Peanut Butter and Jelly Crumble Bars
There’s something magical about the combination of peanut butter and jelly that takes me straight back to my childhood. The very first bite of Peanut Butter and Jelly Crumble Bars sends me on a nostalgic journey, reminding me of after-school snacks and summertime picnics. I remember sitting on the front porch, savoring those perfect sandwiches, while the sun warmed my skin and laughter filled the air. This recipe captures that essence beautifully, transforming a classic duo into a sweet treat that’s perfect for any occasion. Whether you’re looking to indulge yourself or impress friends and family, these bars are bound to bring smiles to everyone’s faces.
Recipe Snapshot
53 mins
10 mins
43 mins
Medium
230 kcal
4 g
Gluten-Free
11 g
Oven, Baking Sheet, Frying Pan, Wooden Spoon, Whisk, Mixing Bowl
The Charm of This Peanut Butter and Jelly Crumble Bars
A Nostalgic Twist
What I love most about Peanut Butter and Jelly Crumble Bars is their ability to bring comfort and happiness. They evoke memories of carefree days spent playing outside, and who doesn’t appreciate a little nostalgia? The combination of rich, creamy peanut butter and sweet, fruity jelly in these bars is nothing short of heavenly.
Perfect for All Occasions
These bars are incredibly versatile. You can serve them at birthday parties, holiday gatherings, or even as a simple dessert after a family dinner. They’re a great way to bring a bit of joy to any table while being surprisingly easy to make. Just imagine your family digging into these delicious layers of flavor – pure bliss!
Easy to Prepare
One of the best parts of this recipe is its simplicity. With just a few basic ingredients, you can whip up a treat that tastes like it took hours to prepare. Trust me, your friends will think you’re a kitchen wizard when they taste the sweet, buttery crumble topping that perfectly complements the jelly and peanut butter.
A Sweet Indulgence
These bars are not just for kids; adults will find themselves sneaking a piece (or two) when no one is looking. The delightful combination of flavors and textures makes them an irresistible treat. The rich butter and brown sugar crumble adds a decadent touch that elevates this simple dessert to something truly special.
Making Memories
Sharing food is a wonderful way to create lasting memories. I often find that when I bring a batch of these Peanut Butter and Jelly Crumble Bars to gatherings, they disappear quickly. Whether it’s a picnic, a coffee date, or a family reunion, these bars are sure to spark joy and conversation.
Key Ingredients for Peanut Butter and Jelly Crumble Bars
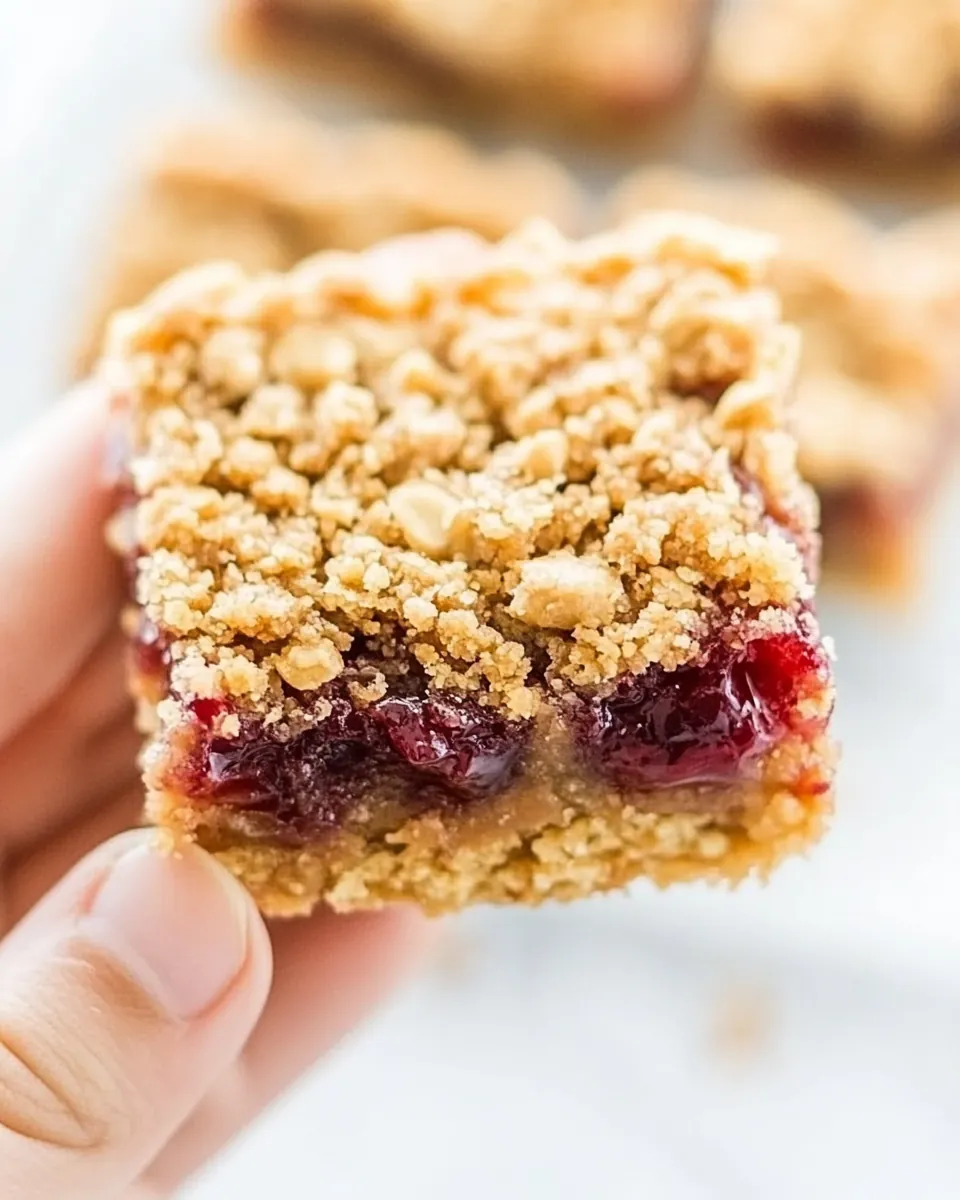
The beauty of Peanut Butter and Jelly Crumble Bars lies in their simplicity. The ingredients come together harmoniously, creating a delightful blend of flavors and textures. The key players here are the unsalted butter, creamy peanut butter, and light brown sugar. Each element contributes to the overall taste, ensuring that every bite is as delicious as the last.
- ½ cup unsalted butter, melted – This rich and creamy base adds depth to the bars.
- ⅓ cup creamy peanut butter, melted – The star of the show, providing that classic peanut flavor we all love.
- 1 large egg – Acts as a binder, holding everything together perfectly.
- 1 cup light brown sugar, packed – Adds sweetness and a hint of caramel flavor.
- 1 tablespoon vanilla – Enhances the overall flavor profile with a warm aroma.
- 1 cup all-purpose flour – Gives the bars structure and a delightful texture.
- ½ teaspoon salt – Balances out the sweetness and enhances flavors.
- ¼ cup unsalted butter, melted – Used for the crumble topping, adding richness.
- ½ cup all-purpose flour – Also for the crumble, providing the necessary texture.
- ⅓ cup old-fashioned rolled oats – Adds a chewy texture to the topping; don’t use quick-cook oats!
- ¼ cup granulated sugar – Sweetens the crumble topping.
- 2 tablespoons light brown sugar, packed – Deepens the sweetness in the topping.
- ¼ teaspoon salt – Ensures the crumble topping is well-seasoned.
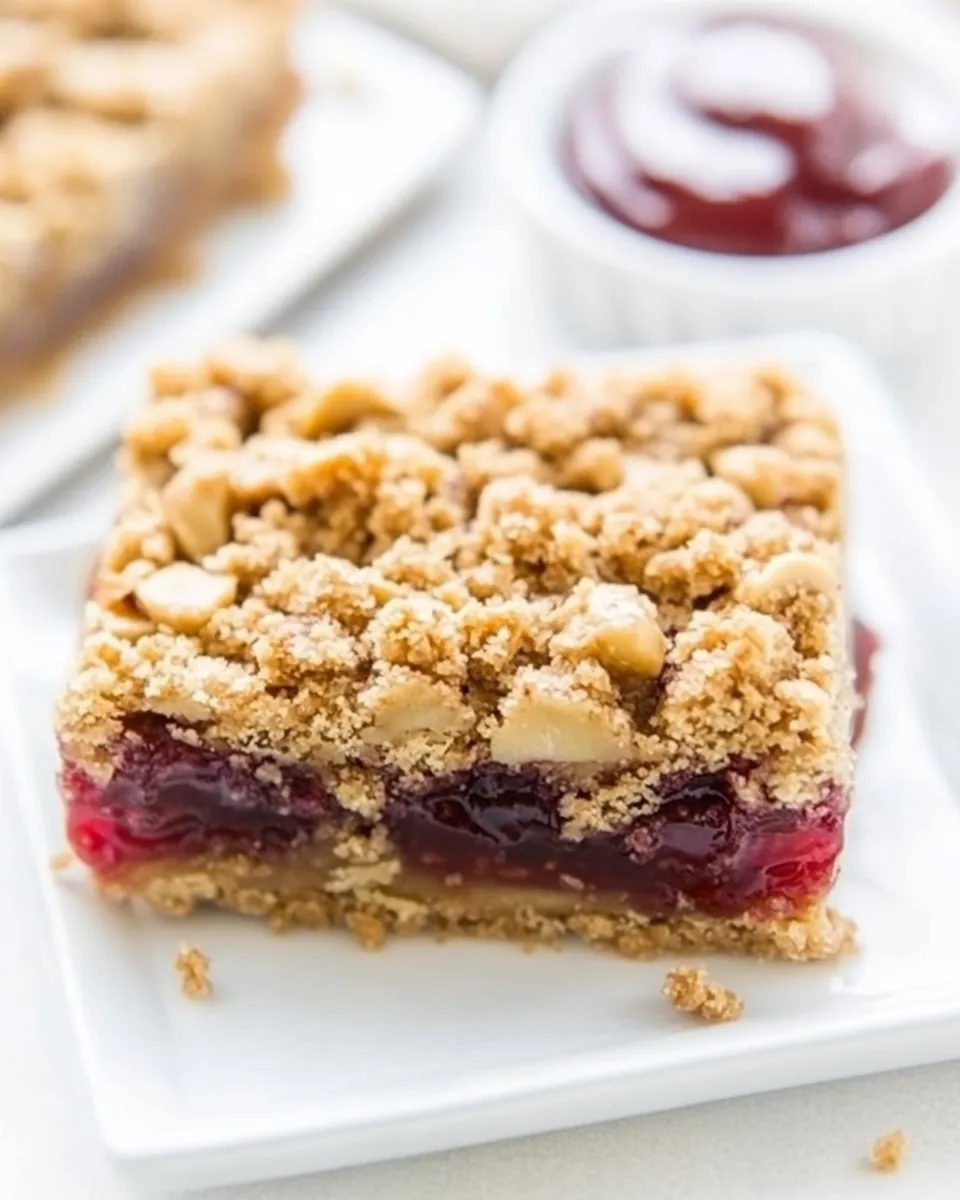
- one 9-ounce jar Smuckers Fruit and Honey Strawberry Fruit Spread – Brings the unmistakable flavor of strawberry jelly to these bars.
Preparation Steps for Peanut Butter and Jelly Crumble Bars
Now that you have your ingredients ready, let’s dive into the preparation of these delightful bars. Each step brings you closer to a sweet treat that you’ll love sharing. Follow along as we create something truly scrumptious.
Begin by preheating your oven to 350 degrees Fahrenheit. This step is crucial as it ensures your bars will bake evenly and thoroughly. While the oven is heating, line an 8-by-8-inch baking pan with aluminum foil. Make sure to spray it with cooking spray after lining it to prevent sticking. Setting the pan aside allows you to focus on the batter without interruption.
In a large, microwave-safe bowl, add the unsalted butter and heat it on high power for about 1 minute until fully melted. Watch closely to avoid any splattering. Once melted, it’s time to add the creamy peanut butter. Heat it for an additional 30 seconds to soften. This makes mixing easier and ensures the two ingredients blend perfectly.
Using a whisk, combine the melted butter and peanut butter until you achieve a smooth and creamy mixture. The goal is to create a luscious base. Allow the mixture to cool slightly before proceeding to the next step to avoid scrambling the egg when you add it.
Now, you can add the large egg, light brown sugar, and vanilla to the bowl. Whisk everything together until the mixture is smooth again. This step is essential for incorporating air, which will give your bars a nice texture.
Next, it’s time to add in the dry ingredients: all-purpose flour and salt. Gently stir them into the mixture until just combined. Be careful not to overmix, as this can lead to tough bars. You want a nice, thick batter that holds its shape.
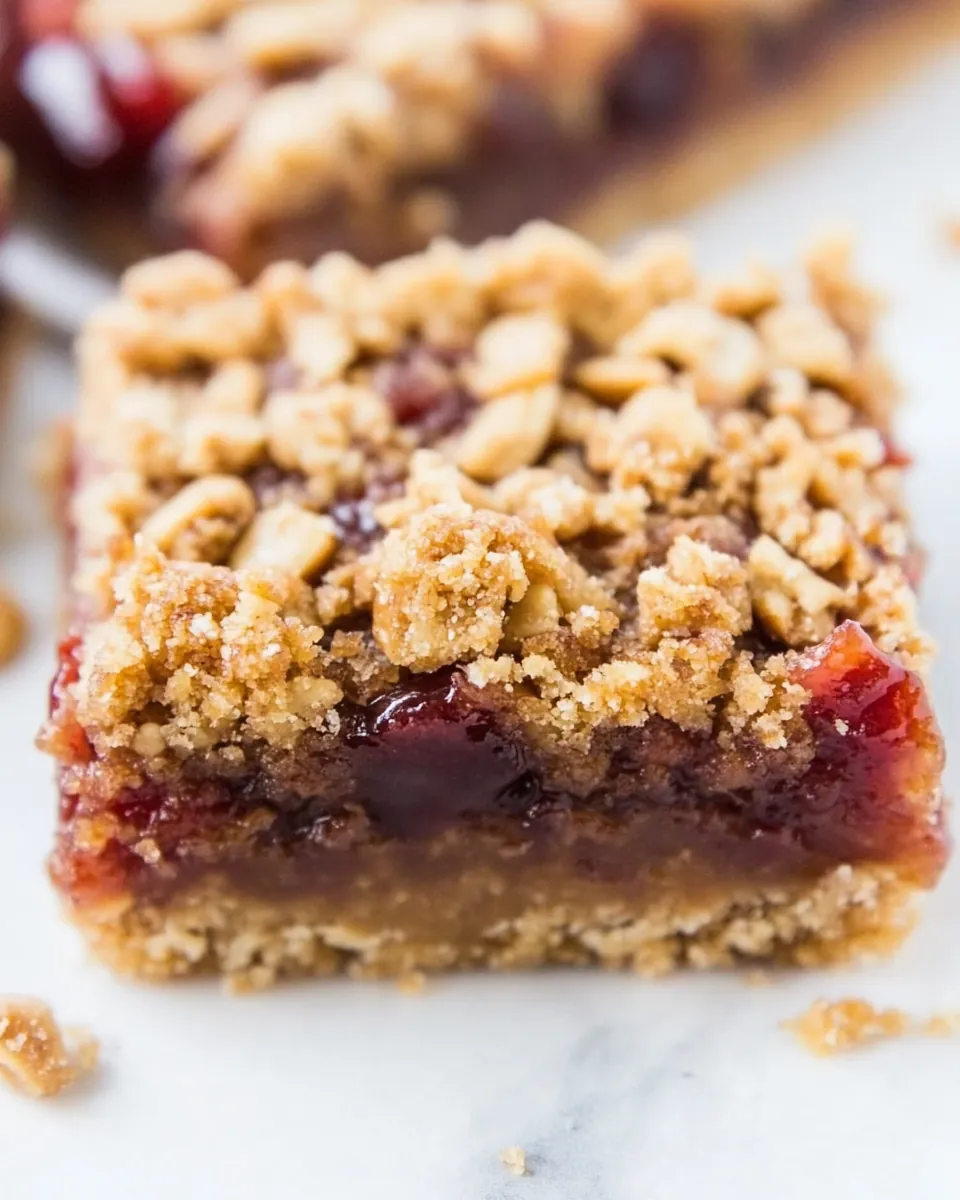
Turn the batter out into the prepared pan, spreading it evenly across the bottom. Bake in the preheated oven for 15 minutes. This initial bake helps set the base layer for your bars, making them sturdy enough to support the topping.
While the bars are baking, let’s prepare the crumble topping. In another large, microwave-safe bowl, add the remaining unsalted butter and heat it until melted, similar to the first step. Once melted, add the all-purpose flour, old-fashioned rolled oats, granulated sugar, light brown sugar, and salt. Mix everything together until the mixture resembles a dry, sandy consistency with some larger crumble pieces, which will create that delightful texture.
After the bars have baked for 15 minutes, remove the pan from the oven. Spread the Smuckers Fruit and Honey Strawberry Fruit Spread evenly over the surface of the warm bars. Be sure to leave about a half-inch margin at the edges.
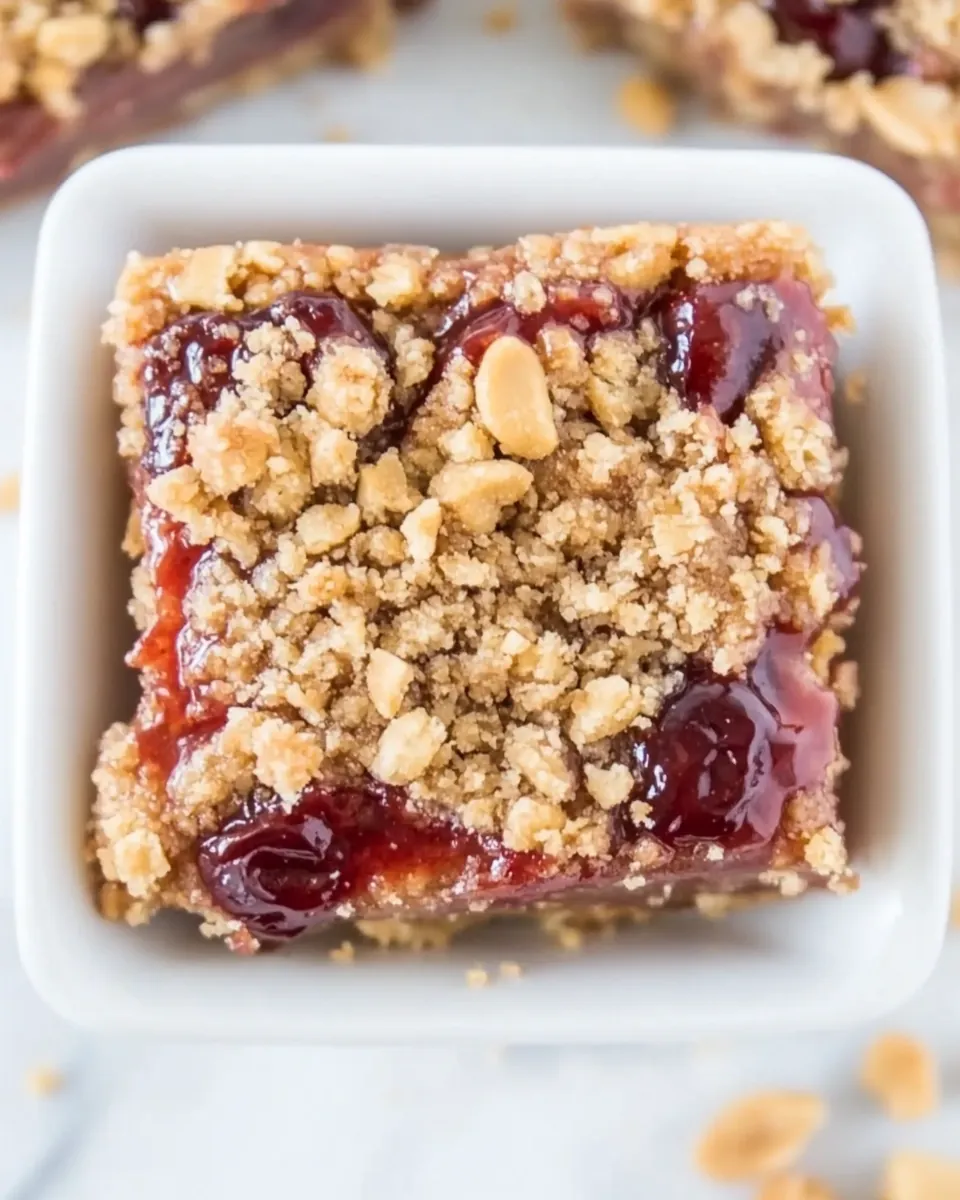
Sprinkle the crumble topping evenly over the fruit spread layer. This creates a beautiful contrast of textures and flavors. It’s okay if some of the fruit spread peeks through; it’ll add to the charm of your finished bars.
Return the pan to the oven and bake for about 25 to 28 minutes. You’ll know they’re done when the crumble topping is lightly golden brown and has set. Keep an eye on them during the last few minutes to prevent over-baking.
Once baked, remove the pan from the oven and place it on a wire rack to cool for at least 90 minutes. This cooling time is essential for the bars to hold their shape when sliced. Patience will pay off!
Finally, once cooled, lift the bars out of the pan using the foil edges and slice them into squares. Enjoy your homemade Peanut Butter and Jelly Crumble Bars!
Things Worth Knowing
- Cooling Time: It’s important to let the bars cool completely to avoid them crumbling when sliced. Patience is key!
- Layering: To ensure the best flavor, spread the fruit spread evenly to create a consistent taste in every bite.
- Oven Temperature: Always preheat your oven to guarantee even baking. This small step can make a big difference in the final product.
- Ingredient Quality: Use high-quality peanut butter and fruit spread for the best flavor. Natural options without added sugars are fantastic.
Ways to Adapt This Recipe
If you’re looking to put your own spin on the Peanut Butter and Jelly Crumble Bars, there are plenty of exciting adaptations you can make. Here are some tips to inspire your creativity!
- Storage: For optimal freshness, store the bars in an airtight container at room temperature for up to a week.
- Freezing: You can freeze these bars for up to six months. Cut them into squares, layer them with parchment paper, and store in a freezer-safe container.
- Variations: Try using different types of fruit spreads like raspberry or blueberry for a unique flavor twist.
- Nut Butters: Experiment with other nut butters like almond or cashew for a change in taste.
- Add-Ins: Consider adding chocolate chips or nuts to the crumble topping for extra texture.
- Serving Options: Serve these bars warm with a scoop of vanilla ice cream for a decadent treat.
- Whole Grain Option: Substitute half of the all-purpose flour with whole wheat flour for a healthier version.
What to Pair With Peanut Butter and Jelly Crumble Bars
These delectable Peanut Butter and Jelly Crumble Bars can be enjoyed in various ways, making them a fantastic addition to any meal or occasion. Here are some pairing suggestions:
- Coffee: Enjoy these bars with your morning coffee or afternoon tea. The sweetness of the bars complements the bitterness of the drink perfectly.
- Fruit Salad: Serve alongside a fresh fruit salad for a refreshing contrast. The fruity flavors will enhance the overall experience.
- Ice Cream: For a rich dessert, top warm bars with a scoop of vanilla or chocolate ice cream. It’s a delightful combination!
- Milk: Pair these bars with a cold glass of milk. The classic combination of peanut butter and milk is always a winner.
- Picnics: These bars are perfect for picnics or outdoor gatherings. They’re easy to transport and always a crowd-pleaser.
- Lunch Boxes: Pack them in lunch boxes for a sweet treat at school or work. They make for a delicious pick-me-up during the day.
- Celebrations: Bring them along to birthday parties or family gatherings. They’re sure to be a hit with both kids and adults alike.
FAQ
Conclusion
Peanut Butter and Jelly Crumble Bars are a delightful twist on a classic favorite, combining the rich flavors of peanut butter and sweet jelly into a luscious dessert. They’re easy to make and perfect for sharing, making them a must-try for any occasion. I encourage you to bake a batch tonight and experience the nostalgia and joy these bars bring to the table!
Peanut Butter and Jelly Crumble Bars
Ingredients
Equipment
Method
- Preheat oven to 350F. Line an 8-by-8-inch baking pan with aluminum foil, spray with cooking spray; set aside.
- To a large, microwave-safe bowl add the unsalted butter and heat on high power to melt, about 1 minute.
- Add the creamy peanut butter and heat for 30 seconds to soften. Whisk the butter and peanut butter mixture until smooth and combined.
- Wait momentarily before adding the egg so you don’t scramble it. Add the egg, light brown sugar, vanilla, and whisk until smooth.
- Add the all-purpose flour, salt, and stir until just combined, don’t overmix.
- Turn batter out into prepared pan and bake for 15 minutes.
- While bars bake, make the crumble topping. To a large, microwave-safe bowl add the unsalted butter and heat on high power to melt, about 1 minute.
- Add the all-purpose flour, old-fashioned whole-rolled oats, granulated sugar, light brown sugar, and salt, and stir to combine. Mixture will be dry and sandy with some larger, well-formed crumble pieces; set aside.
- After bars have baked for 15 minutes, remove pan from the oven, and spread the Smuckers Fruit and Honey Strawberry Fruit Spread in an even flat layer over the surface, leaving a 1/2-inch bare margin at the edges.
- Evenly sprinkle with the crumble topping mixture. Return pan to oven and bake for about 25 to 28 minutes, or until crumble topping is lightly golden browned and set.
- Place pan on a wire rack to cool for at least 90 minutes before slicing and serving.
Notes
- Tip 1: Bars will keep airtight at room temperature for up to 1 week.
- Tip 2: You can freeze these bars for up to 6 months.