Easter Rice Krispie Treats
Every year as spring blossoms and the air fills with the scent of blooming flowers, I find myself craving those delightful Easter Rice Krispie Treats that always remind me of childhood festivities. There’s something magical about gathering with family, sharing stories, and indulging in sweet treats that brings back the joy of those carefree days. The process of making these treats is not just about the delicious end result; it’s the laughter shared while mixing, the anticipation as they set, and the satisfied smiles when the first bite is taken. These treats are a staple at my Easter celebrations, effortlessly bringing together friends and family around the table.
Recipe Snapshot
15 mins
10 mins
5 mins
Medium
120 kcal
1 g
Keto, Gluten-Free, Low FODMAP
5 g
Mixing Bowl, Frying Pan, Wooden Spoon
Why Try This Easter Rice Krispie Treats
Simple and Quick to Make
One of the best things about the Easter Rice Krispie Treats is how quickly they come together. With minimal effort, you can whip up a batch in no time. This makes them perfect for last-minute celebrations or surprise gatherings.
Endless Customization
While the classic recipe is a hit, there’s plenty of room for creativity! You can add colorful candies or nuts to the mix, allowing everyone to personalize their own portion. This is especially fun for kids who love to get involved in the decorating process.
Perfect for Spring Celebrations
The vibrant colors of the mini eggs and the sweetness of the treats make them an ideal desert for spring events such as Easter. They not only taste great but also add a festive touch to the table.
Easy to Transport
These treats are incredibly portable. Whether you’re heading to a picnic, a family gathering, or a potluck, they’re easy to pack and serve. You can make them ahead of time and keep them fresh in an airtight container.
Fun for All Ages
From young children to adults, the Easter Rice Krispie Treats are adored by all. They ignite a sense of nostalgia for many and often spark fond memories of childhood. Making them together can also create new memories worth cherishing.
A Versatile Treat
These treats can be enjoyed in various ways. Serve them as a dessert, a sweet snack, or even as part of a festive brunch spread. Their adaptability means they can fit seamlessly into any occasion.
What to Gather for Easter Rice Krispie Treats
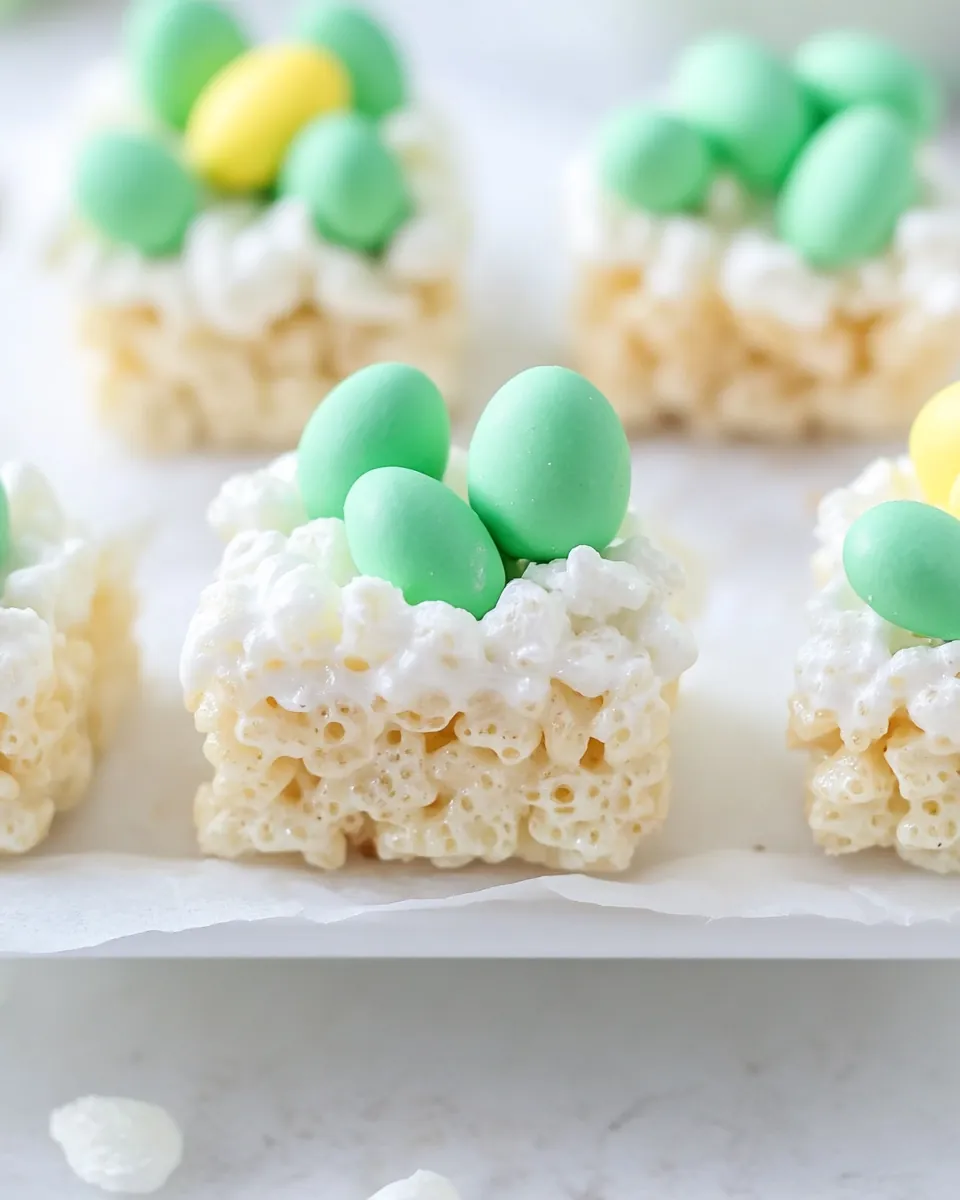
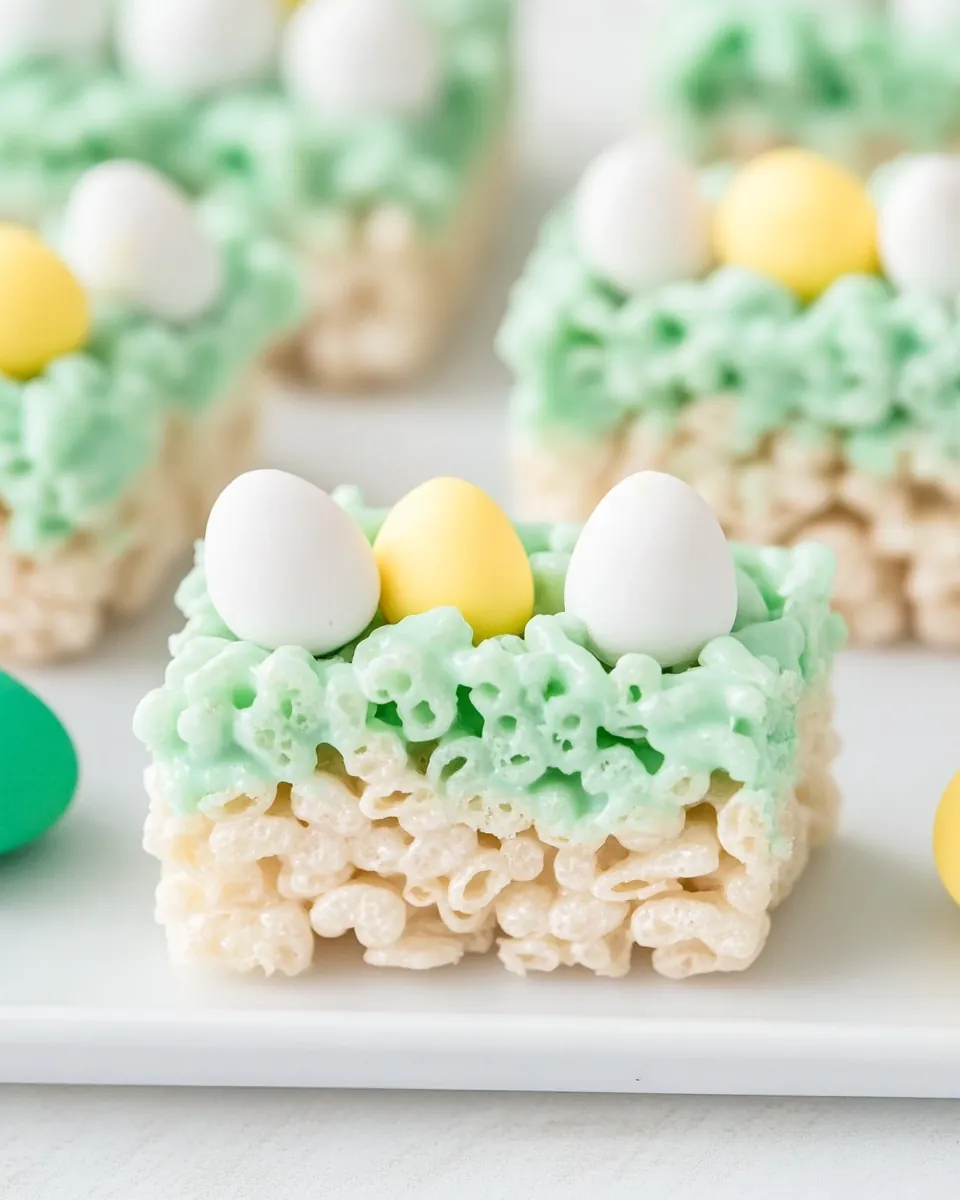
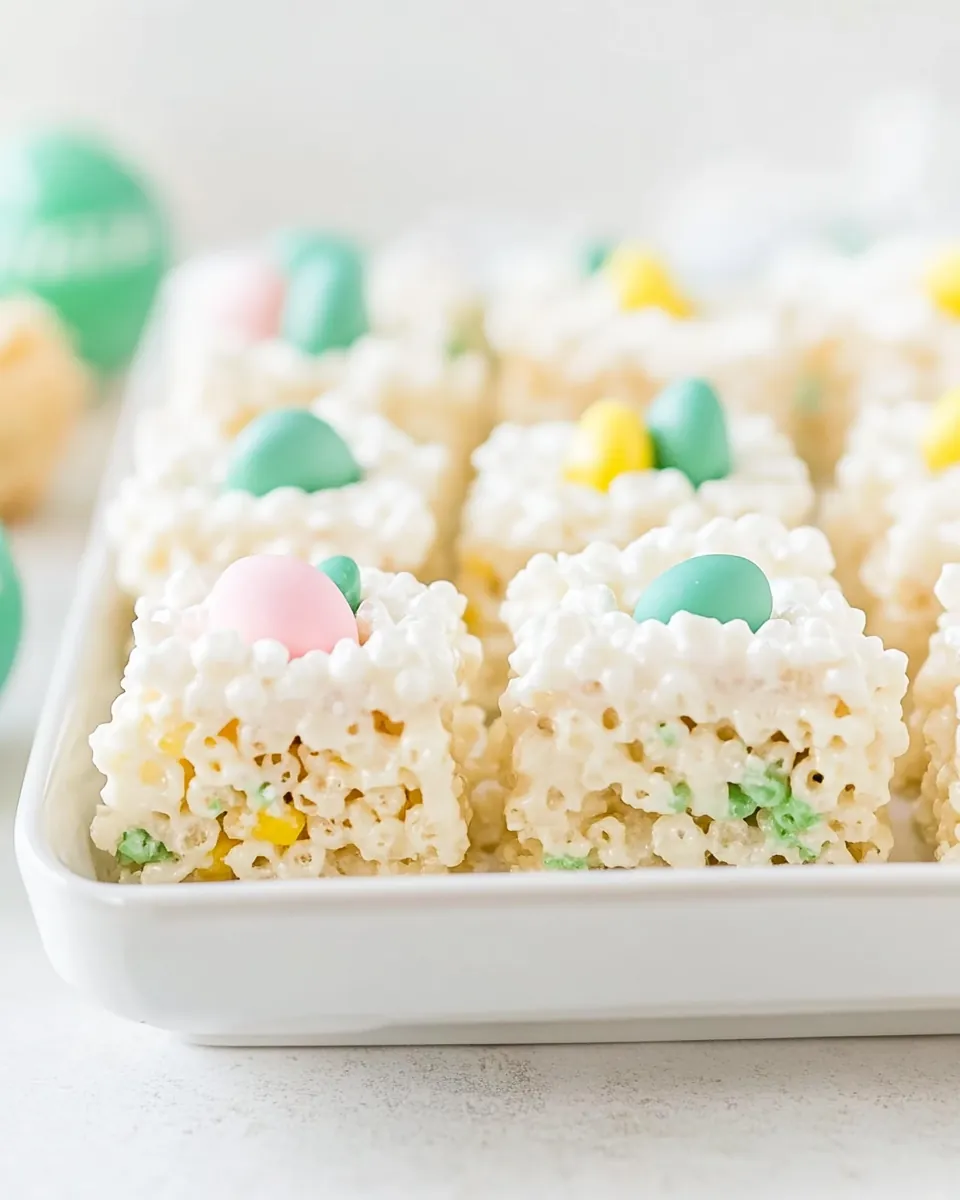
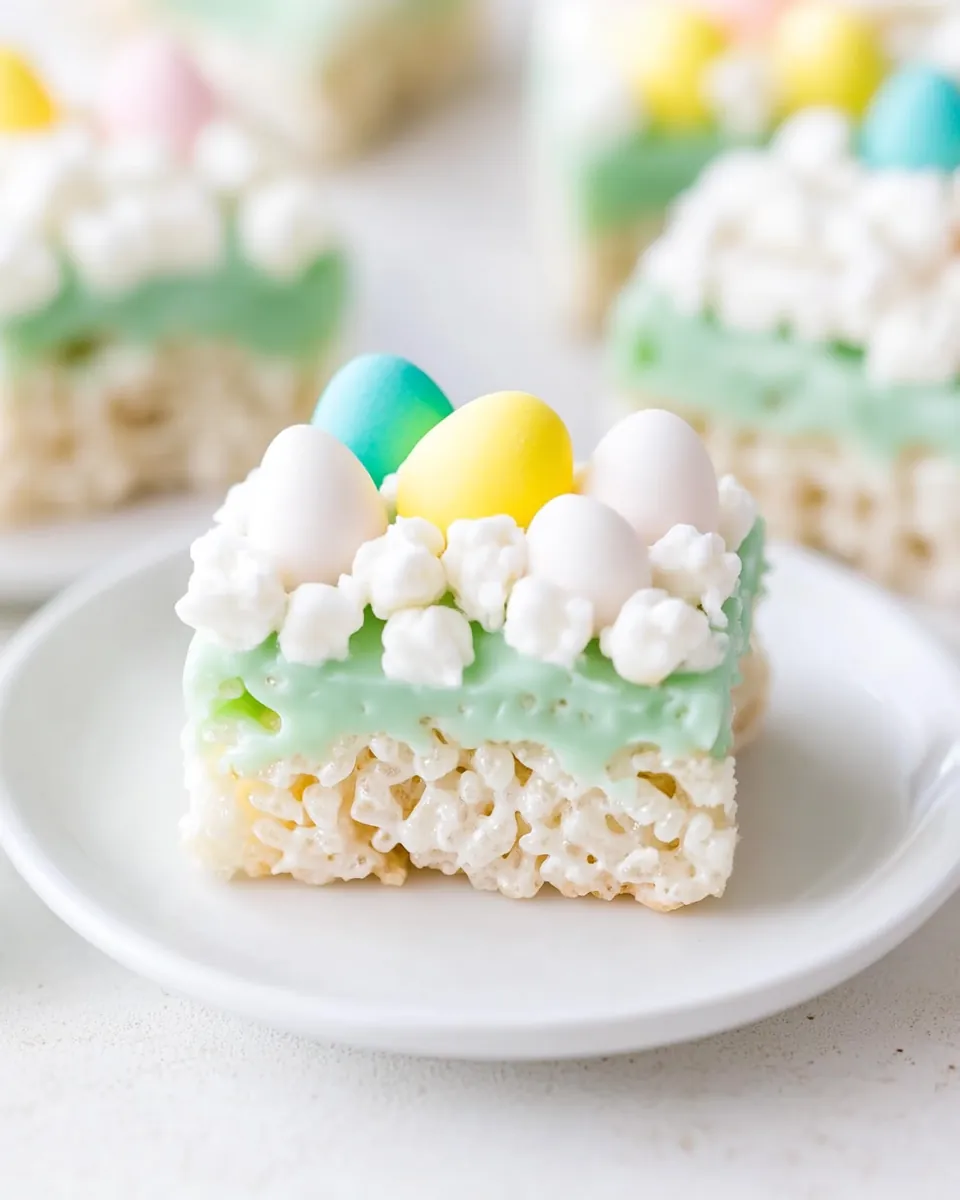
To create those delightful Easter Rice Krispie Treats, you only need a few key ingredients. Each plays a significant role in achieving that perfect blend of flavors and textures. The rich butter ties everything together, while the mini white marshmallows ensure every bite is sweet and gooey. And, of course, the Rice Krispies provide that satisfying crunch, while the mini eggs add a magical touch for the Easter celebration.
- ½ cup unsalted butter: This rich and creamy ingredient adds the necessary fat and flavor to our treats, ensuring they are moist and delicious.
- 15 ounces mini white marshmallows: These little pillows of sweetness melt down to create that signature gooey texture that holds everything together.
- 1 teaspoon vanilla extract: While not always included, a splash of vanilla enhances the sweetness and adds a warm, comforting flavor profile.
- 9 cups Rice Krispies: The star of the show, these crispy rice cereal pieces provide the crunch that contrasts beautifully with the creamy marshmallow mixture.
- 2 cups mini eggs: These add a fun, festive element to the recipe, making your treats perfect for Easter celebrations.
Cooking Instructions for Easter Rice Krispie Treats
Making Easter Rice Krispie Treats is an easy process that requires just a few steps. Gather your ingredients and let’s get started on creating this delightful springtime treat! Trust me, the results are going to be a crowd-pleaser.
- Prepare a 9×13 baking pan by lining it with parchment paper. This will prevent the treats from sticking and ensure easy removal later on. It’s a small step that makes a big difference!
- In a large saucepan or pot over medium heat, combine the mini white marshmallows and unsalted butter. Continuously stir the mixture as it heats up. Keep an eye on it to avoid burning. The goal here is to melt everything down until you have a smooth, velvety mixture.
- Once completely melted, remove the pan from the heat and stir in the vanilla extract. This step infuses the mixture with a lovely aroma and flavor that will make your treats even more scrumptious.
- Now, grab a wooden spoon and start folding in the Rice Krispies and mini eggs. Take your time to coat every piece of cereal and candy with the marshmallow mixture. This is where the magic happens, so be sure to mix it well!
- Pour the mixture into the lined baking pan. Use a greased spatula to spread it evenly across the pan. Gently press the mixture down to compact it without squishing it too hard; you want the treats to be chewy, not tough.
- Leave the treats to set at room temperature for about one hour. This allows them to firm up and makes cutting them into squares much easier.
- Once set, carefully remove the treats from the pan using the parchment paper. Place them on a cutting board and cut them into squares with a sharp knife. You can also use cookie cutters for fun shapes!
- Best if served fresh, but these treats can be stored in an airtight container at room temperature for up to three days. Enjoy them while they’re at their best!
Things Worth Knowing
- Use fresh marshmallows: For the best texture and flavor, always opt for fresh marshmallows. Old marshmallows can become hard and won’t melt as nicely.
- Don’t over-press: When spreading the mixture in the pan, be gentle. Over-pressing can make the treats dense and hard, instead of light and chewy.
- Customizable treats: Feel free to swap out the mini eggs for other candies or nuts. This adds variety and can cater to different tastes.
- Gluten-free option: You can easily make a gluten-free version by using certified gluten-free cereal and marshmallows.
Tips for Success
Making perfect Easter Rice Krispie Treats is all about following a few simple tips. Let’s ensure your treats come out delicious every time with these helpful pointers.
- Storage: Store leftover treats in an airtight container at room temperature. They’ll stay fresh for up to three days, but they’re best enjoyed within the first day or two for peak flavor.
- Freezing: You can freeze these treats for longer storage. Wrap them tightly in plastic wrap, then place them in a freezer-safe container. They can last for up to a month in the freezer.
- Pairing: Serve these treats with a glass of milk or hot chocolate for a delightful snack. They’re also great on their own as a sweet pick-me-up during the day.
- Creative shapes: Use cookie cutters to shape your treats into fun designs for special occasions. This adds a creative touch, especially for kids’ parties.
- Experiment: Don’t hesitate to try different flavor combinations or add-ins like chocolate chips or dried fruit. Personalizing your treats makes them even more special!
Pairing Suggestions for Easter Rice Krispie Treats
When it comes to enjoying your Easter Rice Krispie Treats, there are plenty of delightful ways to serve them. Here are some ideas to consider:
- Perfect for Easter brunch: Serve these treats alongside classic brunch items like pancakes or fruit. Their sweetness complements a variety of breakfast flavors.
- Picnic companion: These treats make for an excellent addition to any picnic basket. Their portability and sweetness are sure to please everyone.
- Seasonal gatherings: Whether it’s an Easter celebration or a springtime get-together, these treats fit perfectly with the festive vibe of the season.
- Sweet snack: Enjoy them on their own as an afternoon snack or dessert. They’re sure to satisfy your sweet tooth!
- Storage tips: If you have leftovers, store them in an airtight container at room temperature for up to three days.
FAQ
Conclusion
These Easter Rice Krispie Treats bring the joy of spring right to your home. Their quick preparation and customizable nature make them a favorite for gatherings and celebrations. I encourage you to try making them for your next event—they’re sure to be a hit!
Easter Rice Krispie Treats
Ingredients
Equipment
Method
- Prepare a 9×13 baking pan by lining it with parchment paper.
- In a large saucepan or pot over medium heat, combine the mini white marshmallows and unsalted butter. Continuously stir the mixture as it heats up.
- Once melted, remove from heat and stir in the vanilla extract.
- Fold in the Rice Krispies and mini eggs until well coated.
- Pour the mixture into the lined baking pan and spread it evenly, pressing gently.
- Leave to set for an hour, then remove and cut into squares.
- Best if served fresh but can be stored in an airtight container for up to three days.
Notes
- Use fresh marshmallows: For the best results.
- Don’t press hard: This will make them hard to eat.
- Customization: Can be made without mini eggs or replace them with other candies.
- Gluten-free option: Use gluten-free cereal and marshmallows.