Rustic Apple Galette
There’s something undeniably comforting about a warm slice of Rustic Apple Galette. Every autumn, as the leaves turn golden and the air grows crisp, I find myself drawn to the kitchen. The scent of freshly baked pastries fills the room, and I can’t help but smile at the thought of sharing this delightful dessert with family and friends. The Rustic Apple Galette is my go-to recipe, embodying the essence of fall with its buttery crust and sweet, spiced apples. It’s not just a dessert; it’s a moment of warmth and nostalgia. Imagine gathering around the table, laughter echoing, while each bite of the galette transports you back to simpler times, where the love of homemade food brings everyone closer together.
Recipe Snapshot
60 mins
0 mins
0 mins
Medium
280 kcal
3 g
Gluten-Free, Low FODMAP
15 g
Food Processor, Oven, Baking Sheet, Chef’s Knife, Mixing Bowl
Why This Rustic Apple Galette Hits Different
Simple Yet Elegant
First and foremost, the beauty of the Rustic Apple Galette lies in its simplicity. Unlike intricate pies, this galette embraces an imperfect charm. The rustic folds of the crust give it a homemade feel that screams comfort.
Versatile Ingredients
The ingredients are everyday items—flour, sugar, butter, and of course, apples. They work harmoniously to create a dish that’s rich in flavor yet simple in concept, making it accessible for everyone.
Perfect for Sharing
This galette is perfect for gatherings. Whether it’s a family dinner or a potluck, the Rustic Apple Galette offers generous slices that are easy to serve. It’s a dessert that invites everyone to the table, creating a communal experience.
Seasonal Delight
As the crispness of fall sets in, this dessert captures the essence of the season. The combination of sweet and tart apples enhanced by a sprinkle of cinnamon evokes the warmth of autumn, making it a seasonal favorite.
Easy to Make
For those who may shy away from baking, the Rustic Apple Galette is straightforward and forgiving, allowing even novice bakers to shine. With just a few simple steps, you can create a stunning dessert that delights and impresses.
Endless Variations
Another reason to love this recipe is its versatility. You can swap apples for pears or add nuts for a delightful crunch. Each rendition tells a different story while maintaining the original spirit of the galette.
Ingredients Overview for Rustic Apple Galette
Creating a Rustic Apple Galette is all about the ingredients. Each element plays an essential role in building layers of flavor. The beauty of this recipe lies in its simplicity and the harmonious way these ingredients come together. Here are the key players:
- 1 ¼ cups flour: This forms the base of your crust, providing structure.
- 2 tablespoons sugar: Sweetens the crust and balances the tartness of the apples.
- ¼ teaspoon salt: Enhances flavor and balances sweetness.
- 8 tablespoons cold butter: This is crucial for a flaky, tender crust.
- 4 ounces cold cream cheese: Adds richness and tenderness to the dough.
- 2 teaspoons lemon juice: Brightens the overall flavor and complements the apples.
- 1-2 tablespoons ice water: Binds the dough together without making it tough.
Rustic Apple Galette Instructions
Making a Rustic Apple Galette is a delightful process that fills your kitchen with mouthwatering aromas. You’ll want to take your time to enjoy each step as you create this beautiful dessert. Here’s how to do it:
- Begin by preparing the dough. In a food processor, pulse flour, sugar, and salt together until combined. This helps distribute the dry ingredients evenly.
- Add butter and cream cheese to the mixture and pulse until it resembles coarse cornmeal. You should see small pieces of butter and cream cheese throughout, which is key for a flaky crust.
- Sprinkle in the lemon juice and 1 tablespoon of ice water. Pulse a few times until the liquid is dispersed throughout the mixture. If it doesn’t hold together when pinched, add more water gradually.
- Turn the dough out onto a lightly floured countertop. Gently press it into a ball, then flatten it into a 6-inch disk. Wrap it in plastic wrap and refrigerate for at least 30 minutes. This chilling time helps the fat solidify, ensuring a flaky crust.
- While the dough chills, preheat your oven to 375ºF. This is essential for a perfectly baked galette.
- Once chilled, remove the dough from the refrigerator. Roll it into a 15-inch circle between two sheets of parchment paper. This technique prevents sticking and makes it easier to transfer.
- Carefully peel off the top sheet of parchment. Lift the bottom sheet, moving the dough onto your baking sheet.
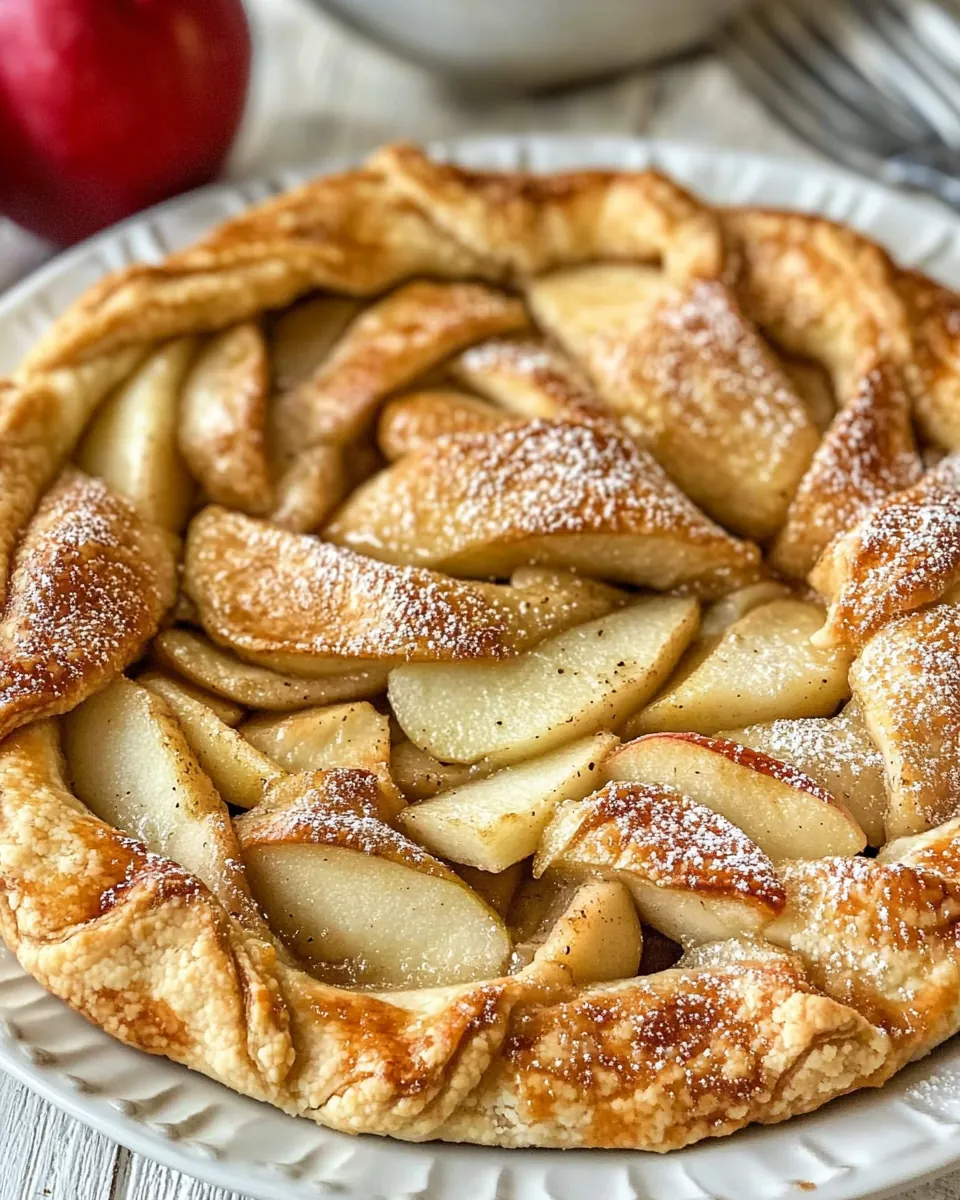
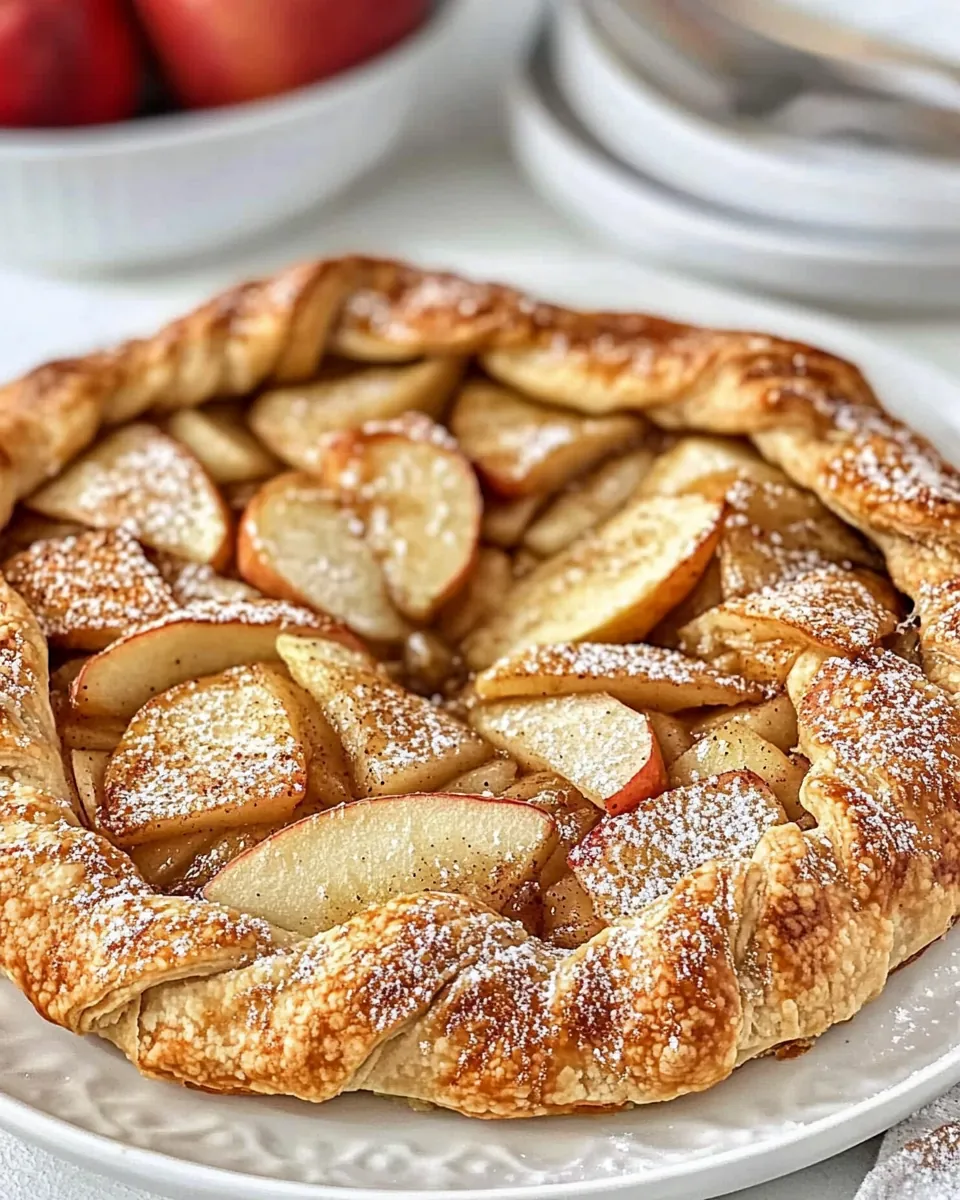
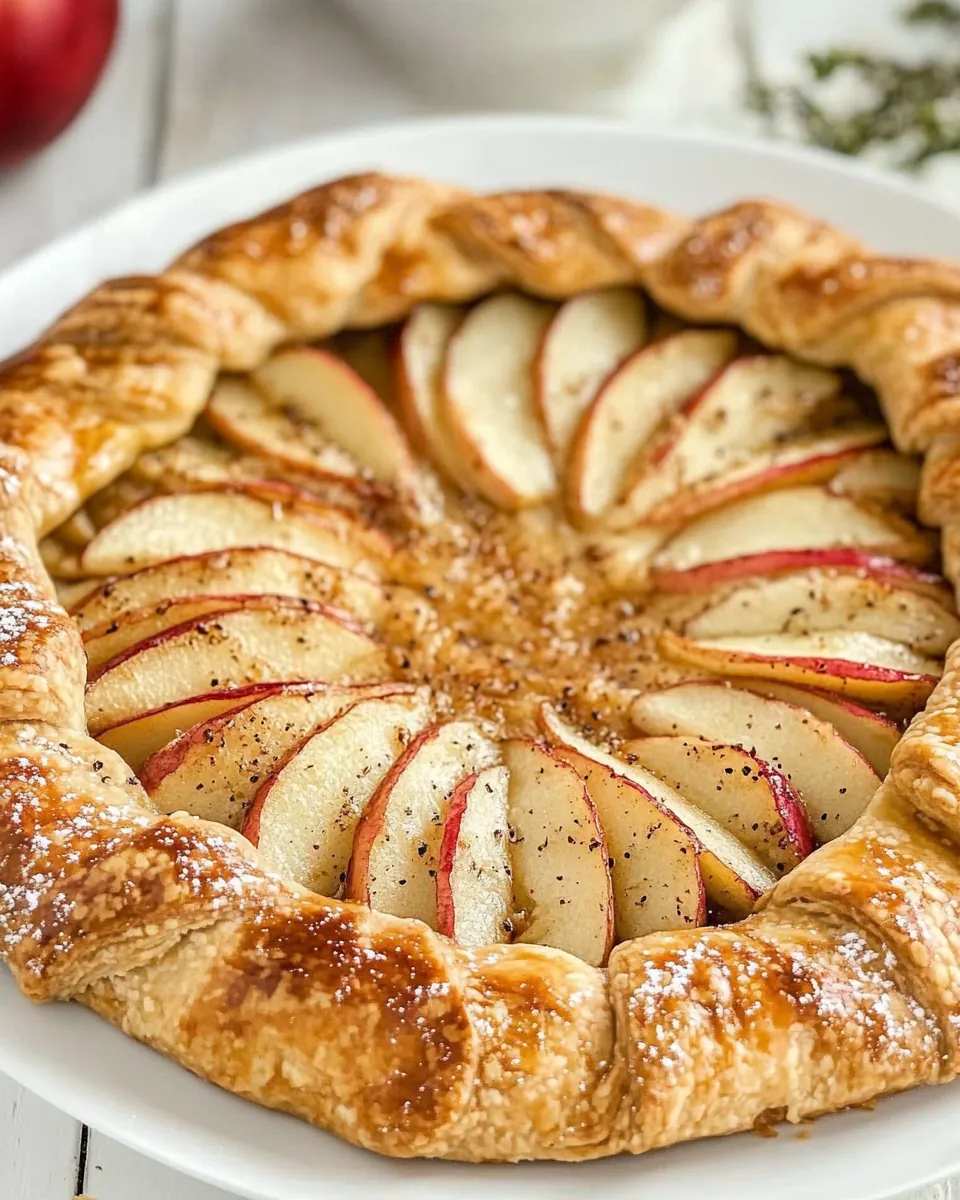
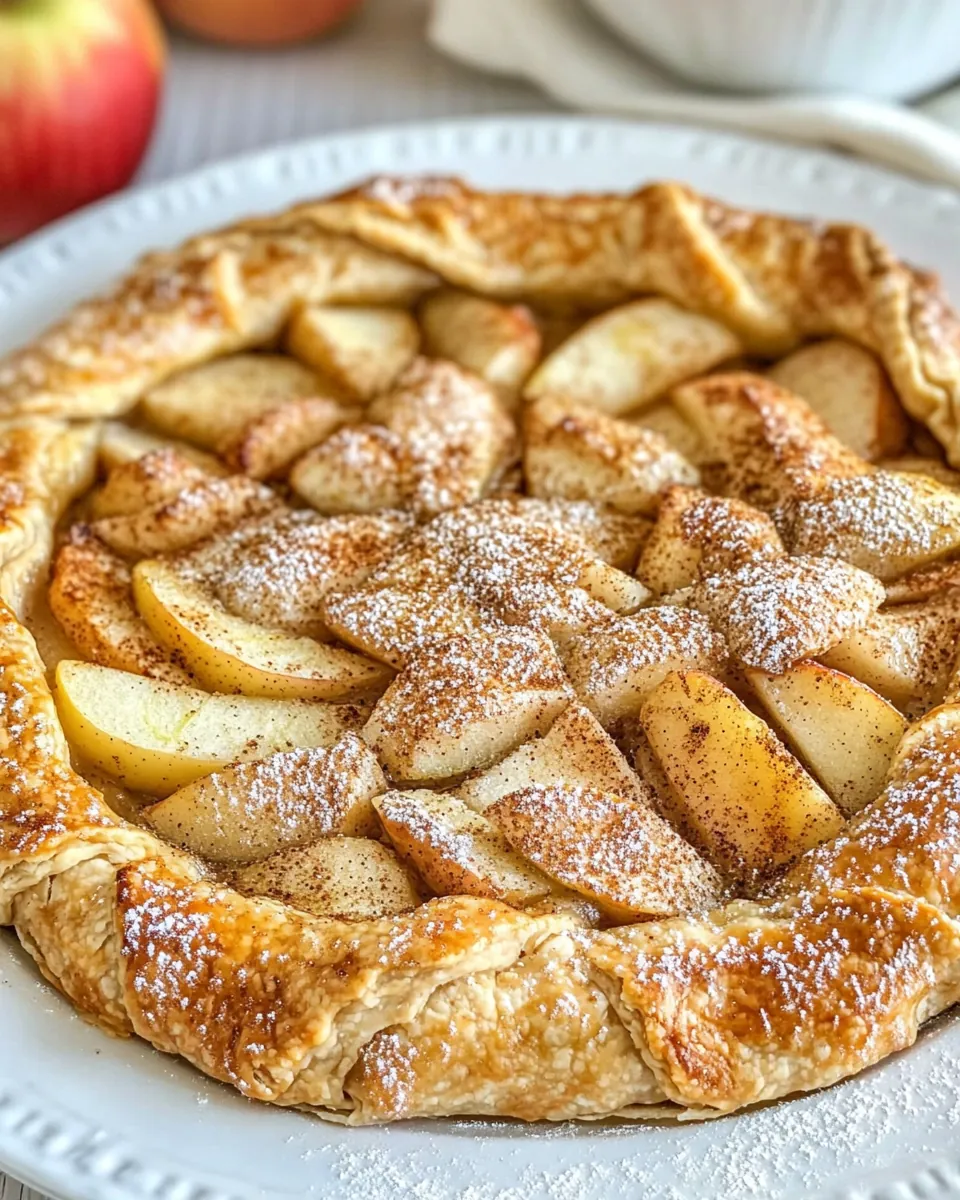
- In a bowl, toss your apples with remaining sugar and cinnamon until well coated. Arrange the apples overlapping in semicircles, starting about 3 inches in from the edge of the dough. This creates a beautiful pattern.
- Fold the outer edge of the dough over the apple filling, pleating as necessary. This rustic look adds to the charm of the galette.
- Using cupped hands, press the sides of the dough to ensure it adheres to the apples. This step is crucial for keeping the filling secure.
- Bake the galette in the preheated oven for 30 minutes. After 30 minutes, brush the exposed crust with egg white and sprinkle any remaining sugar over the tart for a beautiful glaze.
- Continue to bake until the crust is golden and the apples are tender, about 30 more minutes. The smell will be heavenly during this time!
- Once baked, cool for 10 minutes on a cooling rack. This helps the filling set and makes it easier to cut.
- If desired, brush a thin layer of apricot jelly over the apples for a lovely sheen. This will elevate the presentation.
- Finally, use a large spatula to remove the galette from the parchment onto a serving plate. Enjoy slices warm, perhaps with a scoop of vanilla ice cream or a dollop of whipped cream for extra indulgence.
Things Worth Knowing
- Chilling the Dough: It’s crucial to chill the dough. This solidifies the fat, resulting in a flaky crust.
- Choosing Apples: Opt for a mix of tart and sweet apples like Granny Smith and Honeycrisp for depth of flavor.
- Don’t Overwork the Dough: Be gentle when mixing the dough. Overworking it can make the crust tough.
- Use Parchment Paper: Baking on parchment paper makes transferring the galette easy and prevents sticking.
- Watch the Color: Keep an eye on the crust. It should be a deep golden brown when done, indicating a crispy crust.
Expert Tips about Rustic Apple Galette
To master your Rustic Apple Galette, consider these expert tips that can make a big difference in your baking journey:
- Storage: Store any leftovers in an airtight container in the refrigerator for up to three days. Reheat in the oven to restore crispiness.
- Freezing: Can you freeze the galette? Absolutely! Wrap it tightly in plastic wrap and foil before freezing for up to three months. Thaw in the fridge before reheating.
- Pairing: Serve with a scoop of vanilla ice cream or a drizzle of caramel sauce for an extra indulgent dessert experience.
- Flavor Enhancements: Add a pinch of nutmeg or a splash of apple cider to the apples for a unique twist.
- Serving Suggestions: This galette is perfect for any fall gathering, from Thanksgiving to casual family dinners.
What Goes Well With This Rustic Apple Galette
When it comes to serving your Rustic Apple Galette, there are countless ways to elevate the experience. Here are some delightful pairings:
- Vanilla Ice Cream: A scoop of rich vanilla ice cream complements the warm apples beautifully.
- Whipped Cream: Light and airy whipped cream is a classic topping that adds a touch of elegance.
- Caramel Sauce: Drizzling warm caramel sauce over each slice creates a decadent treat.
- Cheese Pairings: Serve with a side of sharp cheddar for a savory contrast against the sweet apples.
- Seasonal Salads: A fresh autumn salad with roasted nuts and cranberries can balance the richness of the galette.
- Gatherings: This galette is perfect for autumn gatherings, cozy dinners, or as an impressive centerpiece for special occasions.
FAQ
Conclusion
The Rustic Apple Galette is a beautiful blend of simplicity and flavor that captures the essence of fall. With its flaky crust and tender apples, it’s a dessert that’s sure to impress at any gathering. I encourage you to try this recipe and share it with your loved ones. You’ll create sweet memories around the dinner table, enjoying every bite together.
Rustic Apple Galette
Ingredients
Equipment
Method
- In a food processor, pulse flour, sugar, and salt. Add butter and cream cheese and pulse till the mixture looks like coarse cornmeal, about 10 pulses.
- Sprinkle with lemon juice and 1 tablespoon of ice water and pulse a few times till liquid is dispersed. Pinch a bit of the dough to see if it holds together; if not, sprinkle with the remaining ice water and pulse to combine.
- Turn the dough out onto the countertop and gently press it into a ball. Flatten into a 6-inch disk, wrap with plastic wrap, and refrigerate for at least 30 minutes.
- Preheat oven to 375ºF. Remove the dough from the refrigerator.
- Roll into a 15-inch circle between two sheets of parchment paper. Remove the top parchment and move the dough round with the parchment paper to a baking sheet.
- Toss apples with the sugar and cinnamon; and arrange apples overlapping in semicircles, starting about 3 inches in from the edge of the dough, placing the thicker sides of the apples facing out.
- Fold the outer dough border up over the apple filling, pleating as needed, then use cupped hands to press the sides of the dough so it adheres to the apples.
- Bake for 30 minutes, then brush the exposed crust with egg white and sprinkle the remaining sugar over the whole tart.
- Bake until the crust is golden and the apples are tender about 30 more minutes.
- Cool for 10 minutes, then slide the tart and parchment onto a cooling rack.
- If you'd like, brush some apricot jelly or jam over the apples to give them a slight sheen.
- Use a large spatula to remove the tart from the parchment onto a serving plate. Serve slices with vanilla ice cream or whipped cream.
Notes
- Storage: Store any leftovers in an airtight container in the refrigerator for up to three days. Reheat in the oven to restore crispiness.
- Freezing: Can you freeze the galette? Absolutely! Wrap it tightly in plastic wrap and foil before freezing for up to three months. Thaw in the fridge before reheating.
- Pairing: Serve with a scoop of vanilla ice cream or a drizzle of caramel sauce for an extra indulgent dessert experience.
- Flavor Enhancements: Add a pinch of nutmeg or a splash of apple cider to the apples for a unique twist.
- Serving Suggestions: This galette is perfect for any fall gathering, from Thanksgiving to casual family dinners.