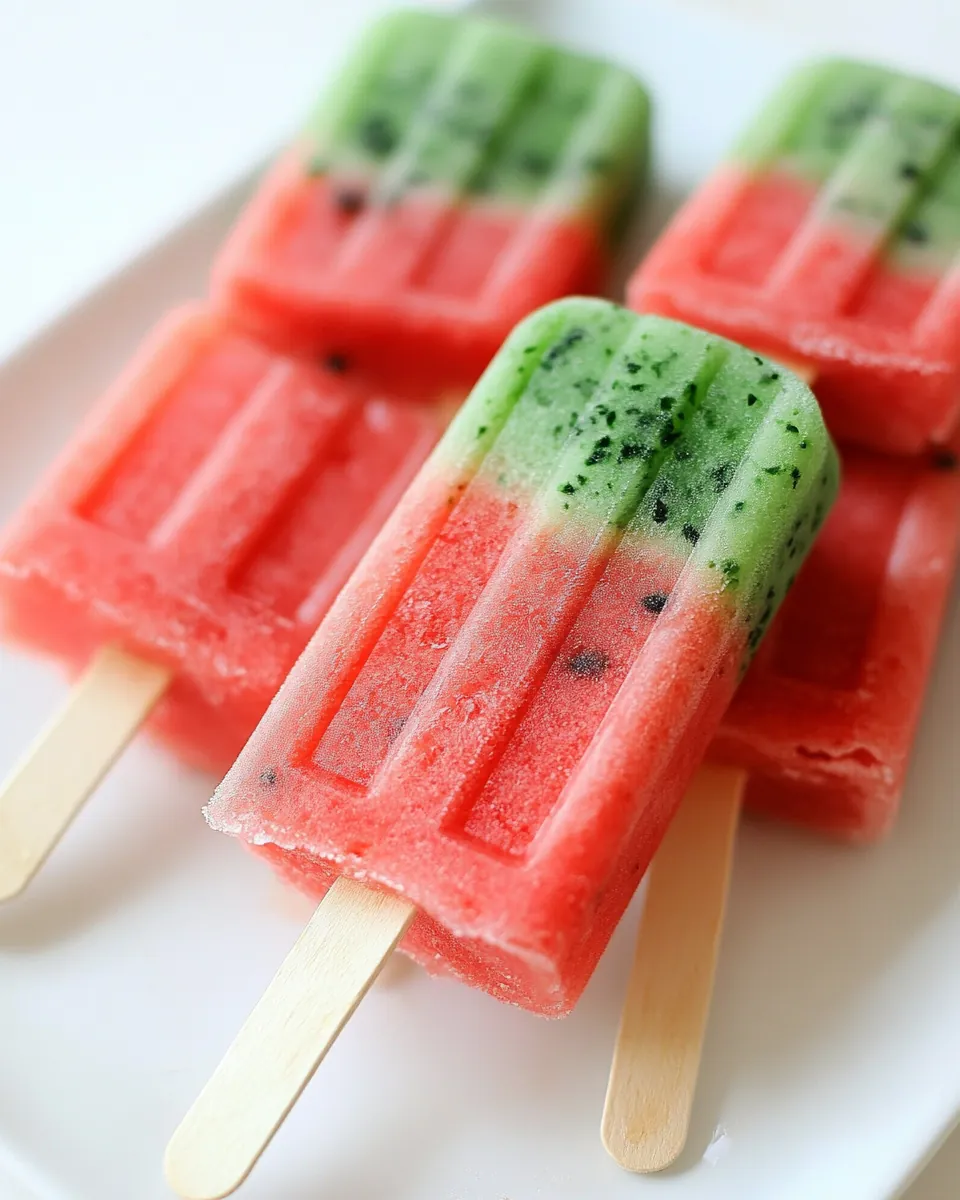
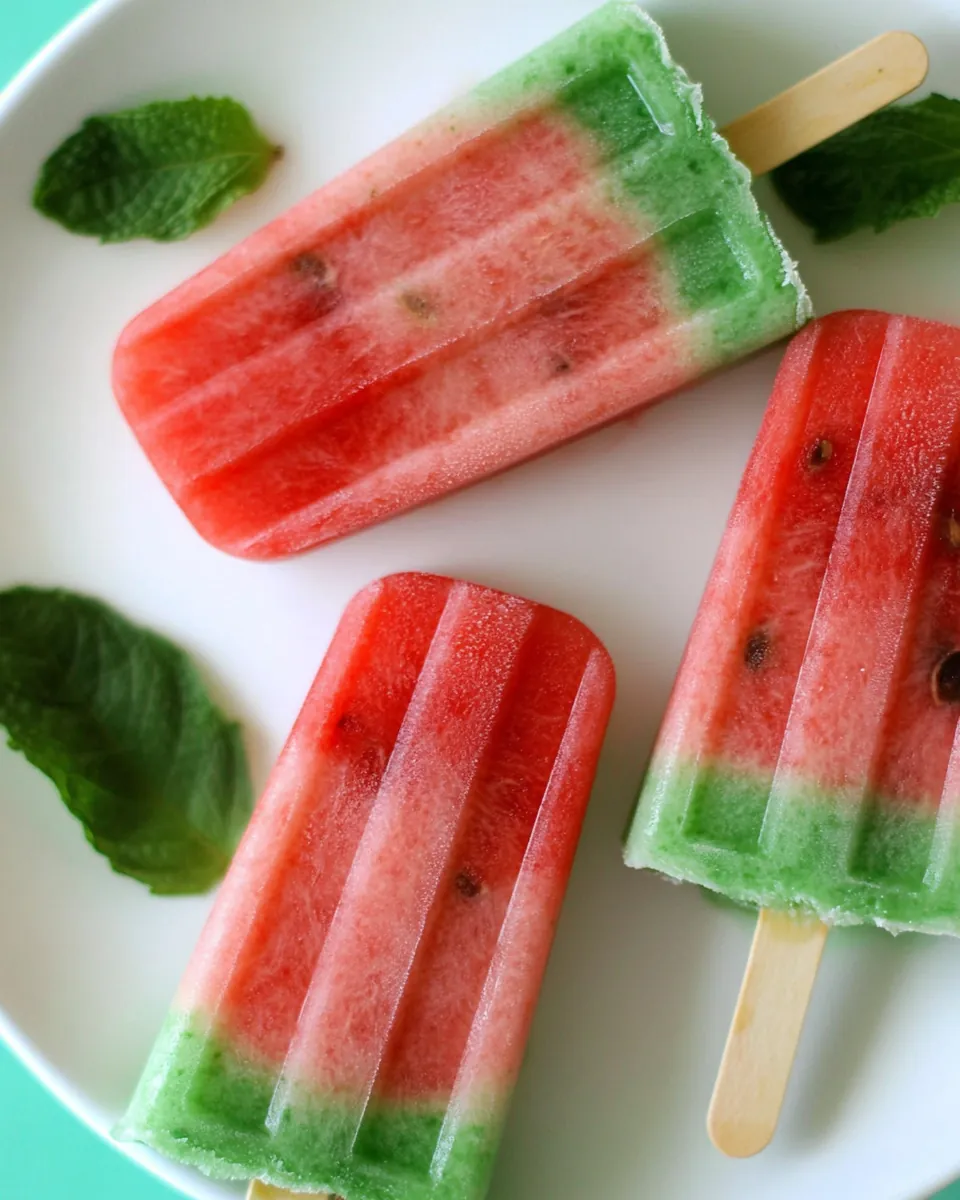
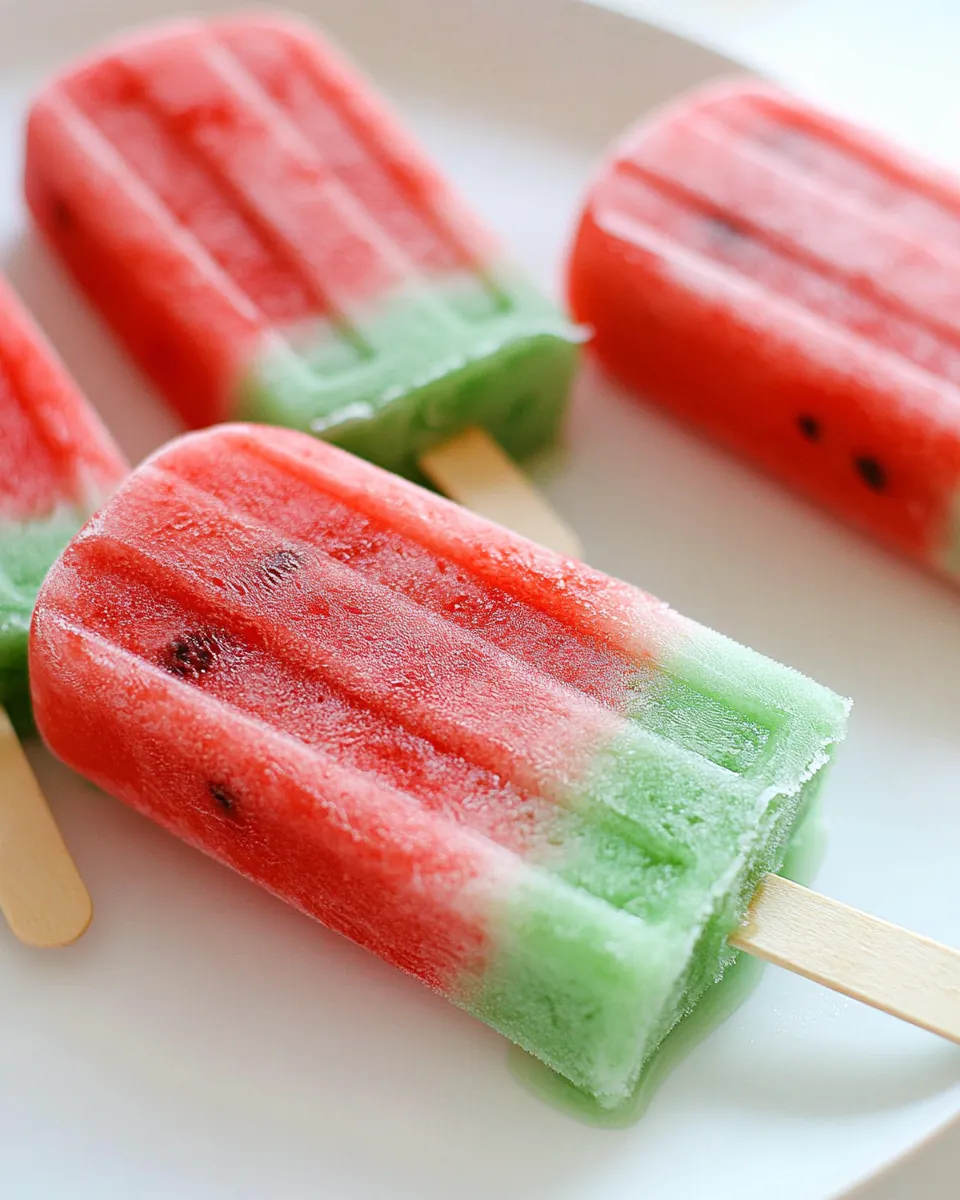
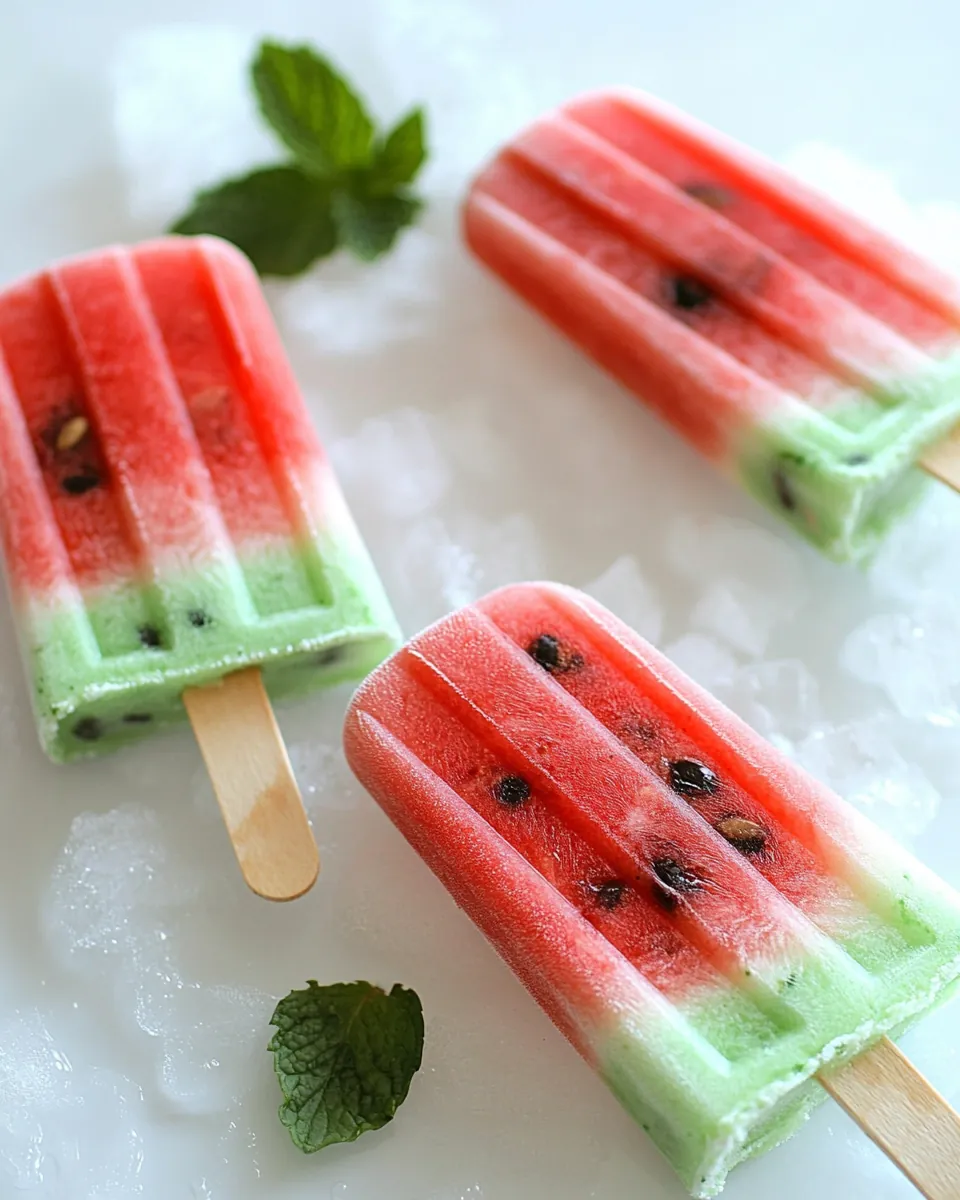
Watermelon Ice Pops
There’s something truly magical about summer days when the sun is blazing, and all you crave is a refreshingly cool treat. That’s when I whip up my favorite summer delight: Watermelon Ice Pops. I remember the first time I made them; it was a hot afternoon, and my kids were running around, sweaty and tired. I wanted to create something fun and cool, and as soon as they took their first bite, their eyes lit up with joy. These pops are not just another frozen treat; they capture the essence of summer in each bite. Sweet, hydrating, and bursting with flavor, they’re the perfect antidote to the heat. Whether it’s a sunny barbecue, a picnic in the park, or simply a quiet afternoon at home, Watermelon Ice Pops are a delightful way to savor the season. Let’s dive into this easy and fun recipe that will keep you and your loved ones refreshed!
Recipe Snapshot
2 hr 10 mins
10 mins
120 mins
Hard
120 kcal
1 g
Paleo, Whole30, Vegan
0 g
Food Processor, Blender, Frying Pan, Wooden Spoon
The Magic of This Watermelon Ice Pops
Refreshing and Hydrating
One of the main reasons I adore Watermelon Ice Pops is their hydrating quality. Watermelon is made up of about 92% water, making it the ultimate thirst quencher on a hot day. It’s like nature’s sports drink, refreshing you while satisfying your sweet tooth.
Easy to Make
You don’t need to be a master chef to make these pops! With just a few simple ingredients, you can create a delicious frozen treat in no time. Pureeing watermelon and mixing in a touch of sugar and chocolate chips is so straightforward, you’ll find yourself making these all summer long.
Fun for Everyone
Kids love helping in the kitchen, and Watermelon Ice Pops are a fun way to involve them. Let them pour the watermelon puree into the cups and stick the popsicle sticks in. It’s a fantastic way to spend time together while creating something delicious.
Healthy Treat
Unlike many store-bought frozen treats, these pops are free from artificial flavors and preservatives. Made with fresh ingredients, they’re a guilt-free indulgence. You can feel good about serving them to your family, knowing they’re packed with vitamins A and C, and are low in calories.
Perfect for Any Occasion
Whether it’s a birthday party, a summer potluck, or a simple family gathering, these pops are a hit with guests of all ages. They look vibrant and appealing, making them a beautiful centerpiece for any dessert table. Plus, they’re easy to make in large batches!
Customizable Flavors
The best part? You can easily customize Watermelon Ice Pops to your taste. Add fresh mint or lime juice for a zesty twist, or mix in other fruits like strawberries or kiwi for a colorful combination. The possibilities are endless!
Essential Ingredients for Watermelon Ice Pops
The ingredients for Watermelon Ice Pops are wonderfully simple and come together beautifully to create a refreshing treat. Each component plays a vital role in achieving the perfect balance of flavor and texture.
- 5 cups seedless watermelon pulp: The star of the show! Its natural sweetness and high water content make these pops incredibly hydrating.
- 1/2 cup sugar: A little sweetness enhances the flavor of the watermelon, making the pops even more delightful.
- 1/4 cup mini chocolate chips: These little morsels add a fun twist and a bit of richness to each bite.
- 1 pint lime sherbet, softened: It adds creaminess and a tart contrast to the sweet watermelon, making the pops even more delicious.
The Process for Making Watermelon Ice Pops
Making Watermelon Ice Pops is an enjoyable process, perfect for a leisurely afternoon. Just follow these simple steps, and you’ll be treating yourself to a deliciously refreshing snack in no time.
Start by preparing your ingredients. First, take the watermelon pulp and sugar and place them in a blender or food processor. Blend until the mixture is completely smooth. The color should be a lovely pink, and the texture silky. This step is crucial, as you want the pops to have a consistent taste throughout.
Once blended, strain the mixture into a medium bowl to remove any small bits of pulp. This will ensure that your pops are smooth and enjoyable. Cover the bowl with plastic wrap and place it in the freezer. Allow it to freeze until the puree is slightly slushy, about 2 to 3 hours.
After the initial freeze, remove the bowl from the freezer. The puree should have a soft, slushy consistency now. Stir well and gently fold in the mini chocolate chips. This adds a delightful surprise to each bite!
Next, prepare twelve 5-ounce disposable cups. Place them in a shallow baking pan for easy handling. Carefully spoon the watermelon puree into each cup, filling them about halfway and leaving about a 1/2 inch from the rim. Make sure they’re evenly filled for uniform pops.
Now, return the pan to the freezer for about 2 hours, or until the puree is solid but not rock hard. At this point, the pops should hold their shape when you gently push on the side of the cup.
While the puree is freezing, take your lime sherbet out of the freezer. Let it soften slightly at room temperature, making it easier to spread. Once the watermelon layer has set, spoon the softened sherbet over the watermelon puree in each cup, filling it to the edge. Smooth the top with the back of a spoon.
Cover each cup with plastic wrap and cut a small slit in the center. Insert a popsicle stick into each cup, ensuring it almost reaches the bottom. This is where the fun begins; the pops will have their handles ready!
Freeze the cups overnight, or until the pops are solid. They can stay frozen for up to two days. This is perfect for preparing ahead of time for a summer gathering or a special treat.
When it’s time to serve, let the pops sit at room temperature for about a minute. This will make it easier to pull them out from the cups without breaking. Gently wiggle each pop free, and enjoy your delightful Watermelon Ice Pops!
Things Worth Knowing
- Always use ripe watermelon for the best flavor. Look for a deep green color and a uniform shape.
- For a smoother texture, make sure to blend the watermelon thoroughly until there’s no pulp left.
- If the pops are too hard to pull out, let them sit at room temperature for a minute longer.
- Experiment with different fruits to create unique flavor combinations!
Tips and Tricks about Watermelon Ice Pops
Creating the perfect Watermelon Ice Pops can be an enjoyable experience with these simple tips. Whether you’re making them for family or friends, these suggestions will help you achieve the best results.
- Storage: Store leftover pops in an airtight container in the freezer to maintain their flavor and texture.
- Freezing: If you want to make these pops ahead of time, they can be frozen for up to two days after making.
- Pairing: These pops pair beautifully with light summer meals, barbecues, or as a cool snack during movie night.
- Variations: Feel free to add a splash of other fruit juices or puree other fruits to create a colorful, mixed-fruit pop.
- Serving size: For smaller servings, 3-ounce cups work as well, creating bite-sized pops.
- Presentation: Garnish with fresh mint or a slice of lime for a vibrant touch when serving.
What Complements This Watermelon Ice Pops
- Barbecues: These pops are a fantastic way to cool down after enjoying a hearty barbecue. They make a sweet ending to your meal!
- Summer parties: Serve Watermelon Ice Pops at birthday parties or gatherings to impress guests with a delightful homemade treat.
- Picnics: Pack these pops in a cooler for a fun picnic treat that everyone will love, especially kids.
- Family movie night: Treat your family to these pops for a special dessert while you all relax and enjoy a film together.
- Seasonal gatherings: These pops can be enjoyed during any summer event, from Fourth of July celebrations to summer camping trips.
- Storage tips: If you make a large batch, keep them in separate containers to prevent them from sticking together in the freezer.
FAQ
Conclusion
The magic of Watermelon Ice Pops lies in their simplicity and refreshing taste. They embody summer in every bite, making them the perfect treat to cool off on hot days. I encourage you to try this delightful recipe; it’s a fantastic way to enjoy the sweetness of watermelon while creating lasting memories with family and friends. So grab some fresh watermelon, and let’s make summer a little sweeter together!
Watermelon Ice Pops
Ingredients
Equipment
Method
- Puree watermelon pulp and sugar in batches in your blender or food processor until smooth and strain into a medium bowl. Cover and freeze until puree is slightly slushy, but not quite solid, about 2 to 3 hours.
- Remove from freezer, stir well and add in mini chocolate chips.
- Place twelve 5-ounce disposable cups in a shallow baking pan and spoon watermelon puree into cups, leaving about a 1/2 inch left from the rim.
- Place pan in freezer for 2 hours, or until puree is solid, but not rock hard.
- Allow lime sherbet to soften a bit, then spread over top of each portion of watermelon puree so that it comes up to the edge of the cup.
- Smooth lime sherbet with the back of a spoon and cover each cup with plastic wrap.
- Cut a small slit in the center of each cup and insert a popsicle stick into each pop so that it almost reaches the bottom of the cups.
- Freeze overnight (or until solid) and can be frozen for up to two days.
- Allow pops to sit at room temperature for about a minute, then gently pull out from the cups.
- Serve and enjoy!
Notes
- Storage: Store leftover pops in an airtight container in the freezer to maintain their flavor and texture.
- Freezing: If you want to make these pops ahead of time, they can be frozen for up to two days after making.
- Pairing: These pops pair beautifully with light summer meals, barbecues, or as a cool snack during movie night.
- Variations: Feel free to add a splash of other fruit juices or puree other fruits to create a colorful, mixed-fruit pop.
- Serving size: For smaller servings, 3-ounce cups work as well, creating bite-sized pops.
- Presentation: Garnish with fresh mint or a slice of lime for a vibrant touch when serving.