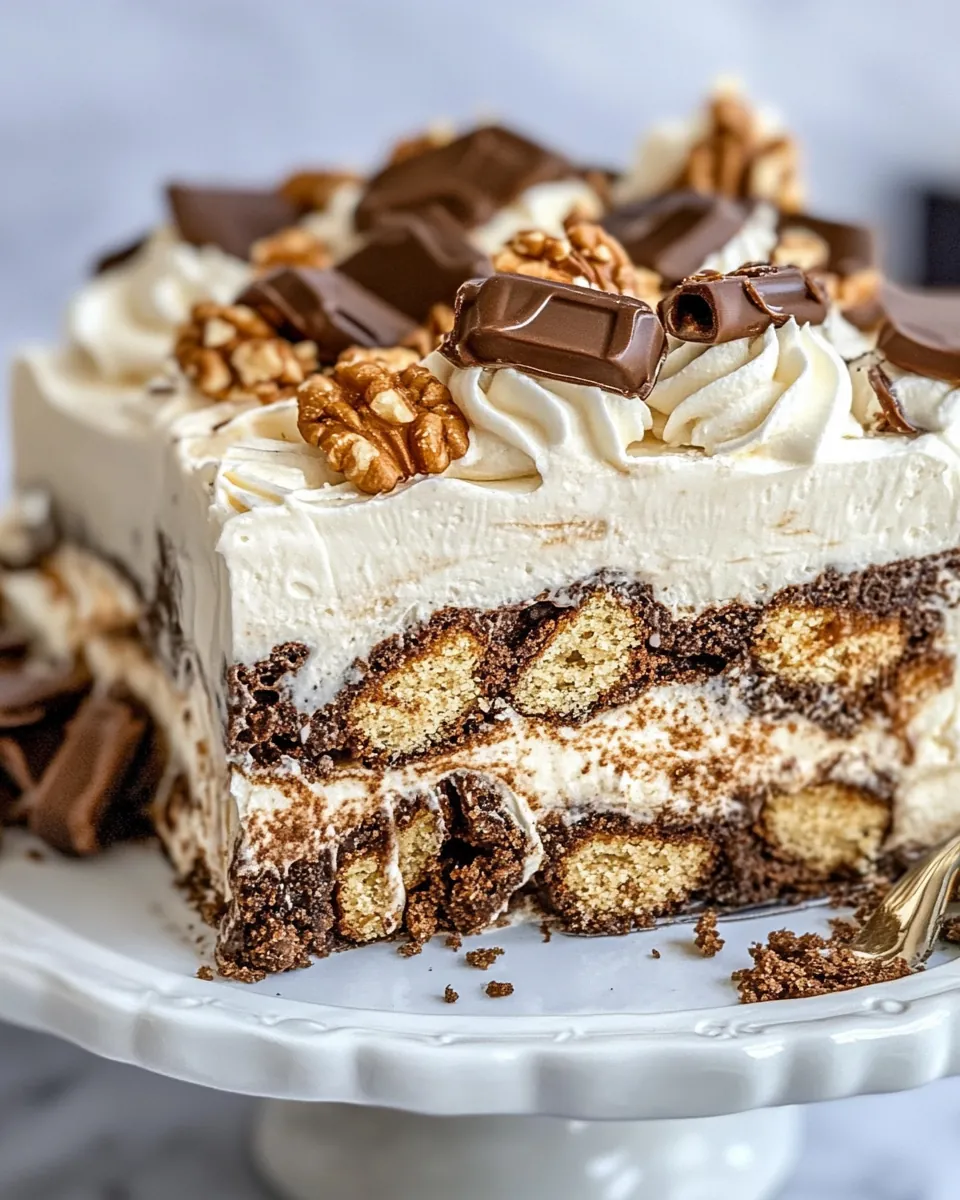
Peanut Butter Icebox Cake
The Peanut Butter Icebox Cake is more than just a dessert; it’s a sweet trip down memory lane. I remember the first time I made it—my family gathered around the kitchen, excitement buzzing in the air. The promise of layers of creamy, rich flavors had everyone guessing what was in store. With each layer formed, anticipation built, and soon enough, we were digging into this no-bake delight. It was a hot summer day, and this cake was the perfect cool treat to beat the heat. The combination of crunchy graham crackers, luscious peanut butter, and rich chocolate created a symphony of flavors that everyone adored. Each slice was met with smiles and compliments, making it a staple at our family gatherings. Whether it’s a birthday party, a summer barbecue, or just a regular weeknight, the Peanut Butter Icebox Cake never fails to impress. So grab your ingredients, and let’s make some delicious memories!
Recipe Snapshot
10 mins
10 mins
0 mins
Medium
350 kcal
5 g
Gluten-Free, Low FODMAP
20 g
Chef’s Knife, Mixing Bowl
What We Adore About This Peanut Butter Icebox Cake
Deliciously No-Bake
One of the best things about the Peanut Butter Icebox Cake is that it’s a no-bake dessert! This means you can whip it up without turning on the oven, saving you from the heat of the kitchen on a warm day. You simply layer the ingredients, let them chill, and it’s ready to serve. It’s perfect for families who want to enjoy a sweet treat without the fuss of baking.
Layered Goodness
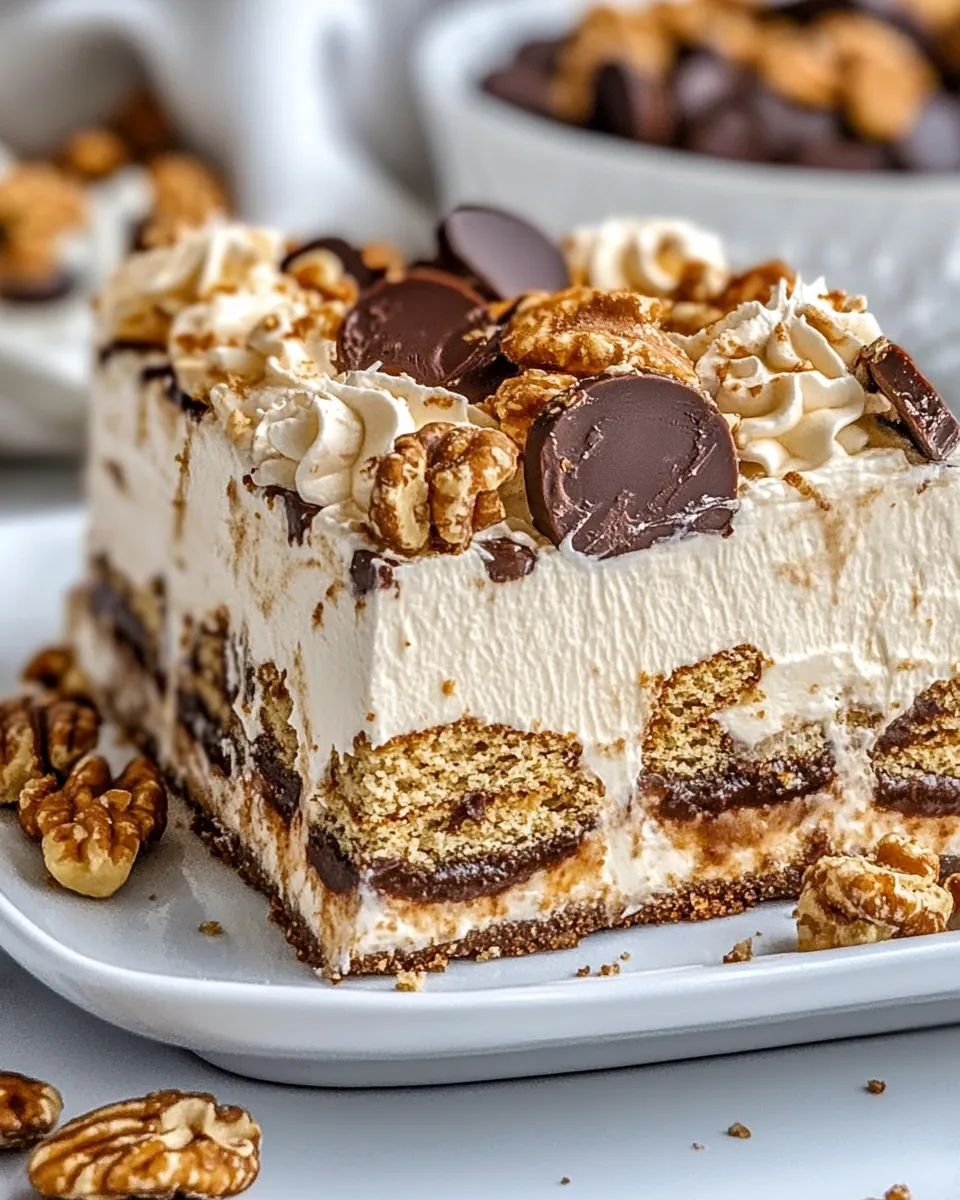
The layers in this cake create both texture and flavor contrasts that make each bite interesting. You have the crunchy graham crackers, the smooth and creamy cream cheese mixture, and the sweet hot fudge sauce. This combination not only looks stunning but also keeps everyone coming back for more!
Customizable
If you’re feeling adventurous, the Peanut Butter Icebox Cake can be easily customized. You can switch up the flavors by using different candies or toppings—you could add crushed cookies, fresh fruit, or even other types of nut butter. This versatility means you can make it your own, fitting it to any occasion or preference.
Great for Gatherings
This cake is a crowd-pleaser, making it an ideal dessert for parties and family gatherings. It’s large enough to serve a big group, and the presentation always impresses. Just imagine serving this beautiful cake at your next barbecue or picnic—everyone will want the recipe!
Easy to Prepare
Even if you’re a beginner in the kitchen, making the Peanut Butter Icebox Cake is straightforward. With just a few simple steps, you’ll have a stunning dessert that looks and tastes like it took hours to prepare. You’ll love how easy it is to impress your family and friends.
Chilling Time Makes a Difference
Letting the cake chill in the fridge develops the flavors and helps the layers set properly. This resting period is crucial because it turns a good dessert into a great one. The longer it chills, the better the taste—so don’t rush it!
Peanut Butter Icebox Cake Shopping List
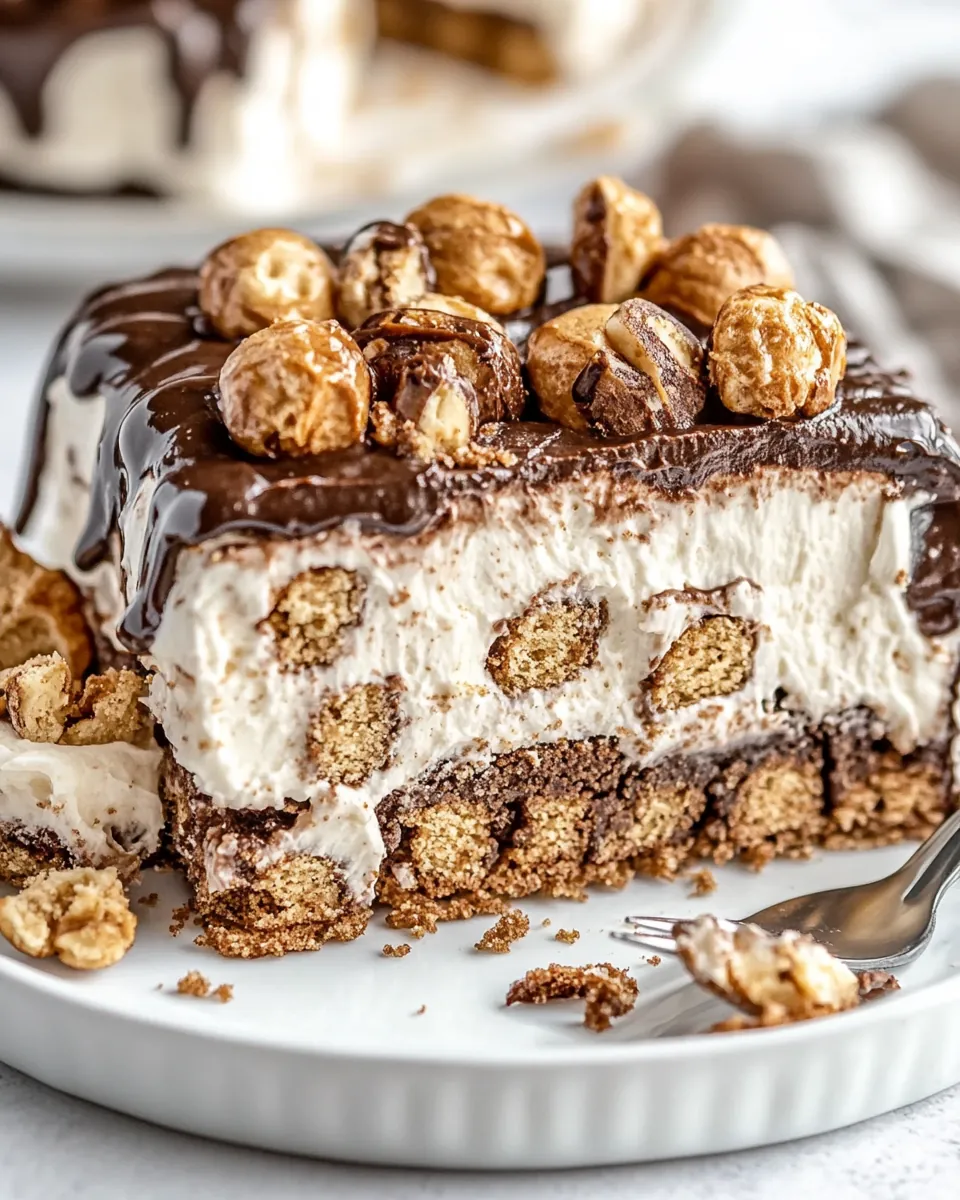
When preparing to make the Peanut Butter Icebox Cake, it’s essential to gather the right ingredients that create a delightful balance of flavors and textures. The key players in this recipe are a mix of creamy and crunchy elements—think smooth peanut butter paired with the crispness of graham crackers. Together with a luscious cream cheese filling and rich hot fudge sauce, they meld perfectly to produce that memorable, multi-layered dessert experience.
- 18 oz graham crackers – You will need enough for three layers, which is about four sleeves, combining a box and an additional sleeve if necessary. These crackers provide crunch and form the base of the cake.
- 1 1/2 cups hot fudge sauce – This sweet sauce is crucial for drizzling between layers, adding a rich chocolate flavor that complements the peanut butter perfectly.
- 1 1/2 cups heavy whipping cream – Used to create a light and airy texture, this whipped cream is folded into the mixture and also used as a topping.
- 20 oz Challenge cream cheese – This provides the creamy base for the filling, creating a rich consistency that binds all the flavors together.
- 1/2 cup peanut butter – The star ingredient that gives this cake its name, offering a rich and nutty flavor that everyone loves.
- 1/2 cup powdered sugar – This sweetens the cream cheese filling and adds to the overall sweetness of the cake.
- 1 tsp vanilla extract – A touch of vanilla enhances the flavor profile of the cake without overpowering it.
- 16 Reese’s – Full-sized and coarsely chopped for mixing into the filling, these candies add a delightful chocolate-peanut butter combo throughout the cake.
- 1 cup heavy whipping cream – Another cup for whipping and topping the cake, ensuring it’s light and fluffy.
- 2 tbsp powdered sugar – Used to sweeten the whipped cream topping, it creates a lovely finish.
- 1/2 tsp vanilla extract – A smaller amount to flavor the whipped cream, ensuring consistency in taste.
- 1 cup graham cracker crumbs – These crumbs are combined with melted butter and sugar to form a crunchy topping.
- 2 tbsp Challenge unsalted butter – Melted and mixed with the crumbs to create a rich topping texture.
- 2 tbsp sugar – Just a bit to sweeten the crumb topping.
Recipe Steps for Peanut Butter Icebox Cake
Making the Peanut Butter Icebox Cake is a fun and simple process that brings together the joy of flavor and creativity. You’ll find that each step is rewarding as the layers come together beautifully. Let’s dive into the steps to create this delicious masterpiece!
- Start by laying graham crackers in a single layer across the bottom of a 9 x 13 baking dish. Don’t worry if some need to be broken apart to fit; just ensure they cover the bottom evenly. This base layer will form the foundation of your cake.
- Next, spread half of the hot fudge sauce on top of the layer of graham crackers. Use the back of a spoon to evenly distribute it, allowing the sweet chocolate flavor to seep into the crackers.
- Set the dish aside and grab a large mixing bowl. Using either a stand mixer or a hand mixer, whip the heavy cream until stiff peaks form. This will take a few minutes, so be patient! Once ready, set it aside for later.
- In a separate bowl, beat the cream cheese on medium-high speed for about 2 to 3 minutes until it becomes light and fluffy. Ensure there are no lumps remaining.
- Then, add in the peanut butter and continue to beat until fully combined. The mixture should become smooth and creamy.
- Now, gradually add in the powdered sugar while mixing at low speed until it’s fully incorporated. Beat in the vanilla extract for an extra boost of flavor.
- Gently fold in the whipped heavy cream from earlier until fully combined. This step adds a lightness to your filling.
- Add the coarsely chopped Reese’s candies into the mixture, folding them in just enough to distribute them without losing volume.
- Spread half of the cheesecake mixture over the layer of hot fudge sauce. This creamy layer will balance out the crunch of the graham crackers.
- Add another layer of graham crackers on top, followed by the remaining half of the hot fudge sauce and then the rest of the cheesecake mixture. Ensure it’s evenly spread out.
- Top the final layer with another layer of graham crackers.
- Once assembled, whip together another cup of heavy whipping cream with powdered sugar and vanilla extract until stiff peaks form. This will be your topping.
- Spread the whipped cream on top of the final layer of graham crackers. Make sure to cover it evenly for a lovely finish.
- In a small bowl, mix together the graham cracker crumbs, melted butter, and sugar. Combine well, then sprinkle this mixture over the top of the cake for added crunch.
- Cover the dish with plastic wrap and chill in the fridge for at least 8 hours, or overnight if you can wait! This allows all the flavors to meld beautifully.
- Before serving, feel free to top with additional Reese’s candies for an extra touch!
Things Worth Knowing
- Don’t rush the chilling time: Allowing the cake to chill for at least 8 hours ensures that the flavors meld beautifully and the layers set properly.
- Use room temperature ingredients: Ensure your cream cheese and butter are at room temperature for easier mixing and a smoother filling.
- Variations are endless: Feel free to incorporate different flavors of candy or use different nut butters to customize your cake.
- Sharp knife for slicing: When it’s time to cut the cake, use a sharp knife to get clean slices without tearing the layers apart.
Change It Up
Feeling adventurous? Here are some tips for mixing things up with the Peanut Butter Icebox Cake. With a few tweaks, you can create new flavor profiles while still keeping the essence of the original dessert.
- Storage: After making the cake, store any leftovers covered in the refrigerator. It will last for up to 5 days, maintaining its delicious flavor and texture.
- Freezing: Yes, you can freeze this cake! Just wrap it tightly and enjoy it within 2 months for the best quality. Thaw in the refrigerator before serving.
- Pairing: Serve this cake with fresh berries for a delightful contrast of flavors. Raspberries or strawberries add a nice tartness that complements the sweetness.
- Flavor Swaps: Try using Nutella instead of peanut butter for a delicious chocolate-hazelnut twist! Or, switch out Reese’s for your favorite chocolate candy.
- Garnishing: Top with whipped cream and a drizzle of chocolate sauce for an extra indulgent presentation. You can also add chopped nuts for a crunchy topping.
- Make it a pie: Instead of layering in a baking dish, consider making individual servings in pie shells for a delightful twist!
Pairing Suggestions for Peanut Butter Icebox Cake
When it comes to serving the Peanut Butter Icebox Cake, the options are as endless as they are delicious. Here are some great pairings to elevate your dessert experience:
- Fresh Fruits: Pairing with fresh fruits like strawberries, raspberries, or bananas adds a refreshing contrast to the rich flavors of the cake.
- Coffee: A warm cup of coffee or iced coffee complements the sweetness of the cake beautifully, making it a great pairing for brunch or afternoon tea.
- Ice Cream: For an indulgent treat, serve slices with a scoop of vanilla or chocolate ice cream on the side!
- Picnic Treat: This cake is perfect for outdoor gatherings—slice it up and take it along to picnics or barbecues!
- Seasonal Celebrations: This dessert can be a hit at any summer gathering, from Fourth of July parties to family reunions.
- Kids’ Parties: With its fun flavors and colorful appearance, the cake is a perfect fit for children’s birthday parties and events.
FAQ
Conclusion
The Peanut Butter Icebox Cake is truly a delightful dessert that combines creamy, crunchy, and sweet elements into one unforgettable experience. I encourage you to give it a try—it’s perfect for any occasion and sure to impress your family and friends. Don’t miss out on the fun of creating this delicious treat; gather your ingredients and start making some delicious memories today!
Peanut Butter Icebox Cake
Ingredients
Equipment
Method
- Lay graham crackers in a single layer across the bottom of a 9 x 13 baking dish, breaking apart as necessary.
- Spread half of the hot fudge sauce on top of the graham crackers. Set aside.
- Using a stand mixer or hand mixer, whip heavy cream until stiff peaks form. Set aside.
- In a separate bowl, beat cream cheese for 2 to 3 minutes on medium-high speed until light and fluffy. Add peanut butter and beat until combined.
- Add powdered sugar and beat until no lumps remain. Beat in vanilla extract.
- Fold in whipped cream. Fold in chopped Reese's.
- Spread half of cheesecake mixture on top of hot fudge sauce.
- Add a layer of graham crackers, remaining half of hot fudge sauce, and remaining cheesecake mixture. Top with another layer of graham crackers.
- Using a stand mixer or hand mixer, whip heavy whipping cream, powdered sugar, and vanilla extract until stiff peaks form.
- Spread whipped cream on top of graham crackers.
- Combine graham cracker crumbs, melted butter, and sugar in a small bowl. Mix to combine. Sprinkle over the top of the cake.
- Cover and chill for at least 8 hours.
- Top with additional Reese's candy before serving, if desired.
Notes
- Tip 1: Store leftovers covered in the refrigerator for up to 5 days.
- Tip 2: Freeze for up to 2 months wrapped tightly.
- Tip 3: Serve with fresh fruits like strawberries or bananas.
- Tip 4: Try different candies for a fun twist!
- Tip 5: Use a sharp knife for clean slices.