Cheeseburger Sliders
There’s something undeniably comforting about Cheeseburger Sliders. Picture this: a casual gathering with friends and family, the sun setting, laughter filling the air, and the aroma of sizzling beef wafting through the backyard. These little sliders are a crowd-pleaser, combining all the classic flavors of a juicy cheeseburger into a bite-sized treat. Imagine watching your guests’ faces light up as they take their first bite of these warm, cheesy delights. The best part? They’re incredibly easy to make and perfect for summer barbecues, game day parties, or even just a cozy movie night at home.
Recipe Snapshot
40 mins
10 mins
30 mins
Medium
320 kcal
18 g
Keto, Gluten-Free
16 g
Oven, Baking Sheet, Skillet, Frying Pan, Wooden Spoon, Cutting Board, Chef’s Knife
The Best Thing About This Cheeseburger Sliders
Perfect for Any Occasion
What I love most about Cheeseburger Sliders is their versatility. You can serve them at birthday parties, football game gatherings, or just a family dinner. They’re great for any occasion!
Customizable to Your Taste
You can easily personalize these sliders. Want to add some heat? Toss in some jalapeños or your favorite hot sauce. Prefer a unique twist? Try adding barbecue sauce or different types of cheese. The possibilities are endless!
Kid-Friendly and Fun
Kids absolutely adore Cheeseburger Sliders. They’re the perfect size for little hands, and with a side of fries or veggies, they make for a well-rounded meal that even picky eaters will enjoy.
Quick and Easy Preparation
These sliders are quick to prepare, allowing you to spend more time enjoying your time with loved ones and less time in the kitchen. With just a few ingredients and simple steps, you’ll have a plateful of sliders ready in no time!
Great for Leftovers
If you happen to have any leftovers (which is rare!), these sliders reheat beautifully. Just pop them in the oven for a few minutes, and they’re as good as new. Perfect for lunch the next day!
Recipe Ingredients for Cheeseburger Sliders
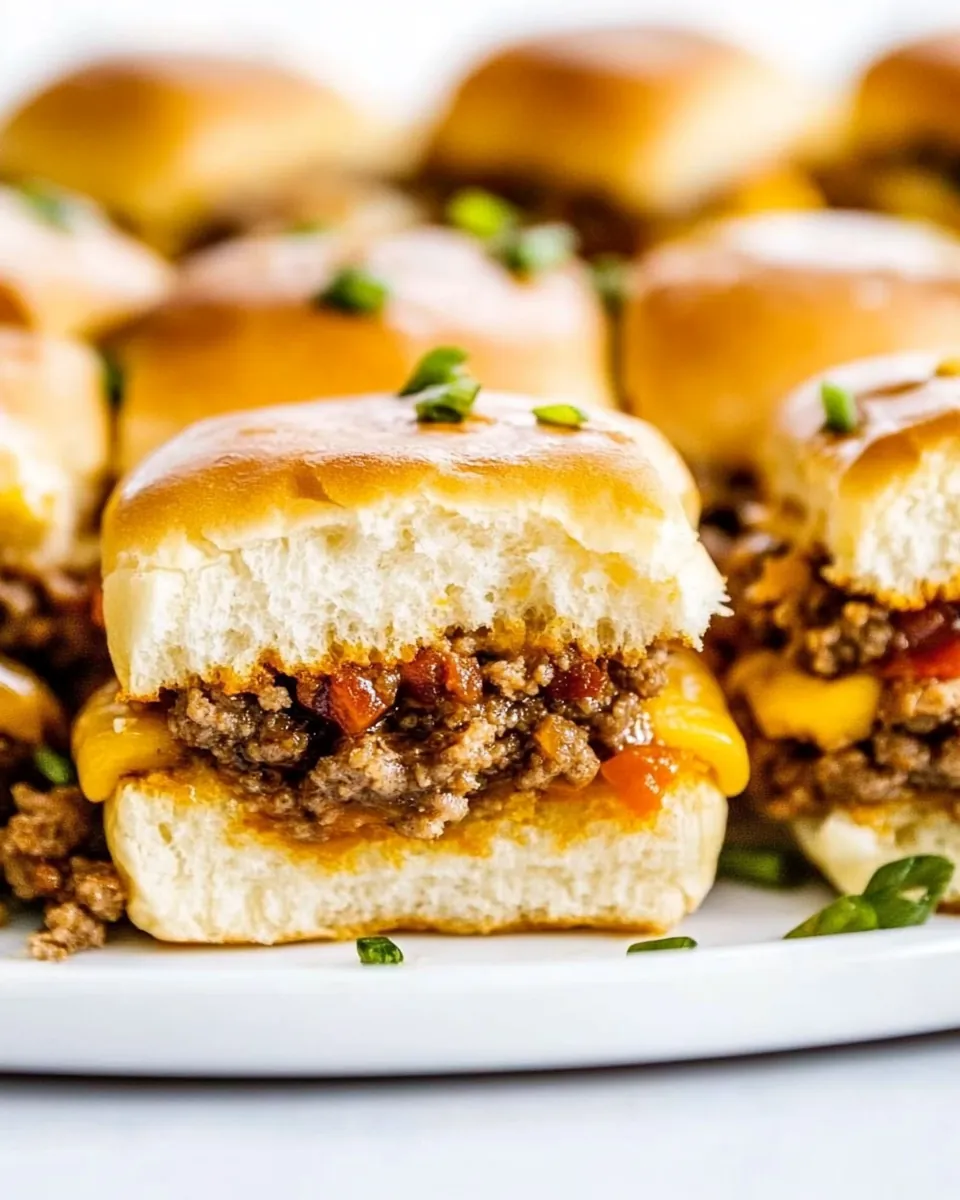
The ingredients for Cheeseburger Sliders come together to create that beloved cheeseburger flavor in a compact form. Each ingredient plays a crucial role in delivering a satisfying taste and texture. The star of the show is the deliciously seasoned ground beef, complemented by the creaminess of cheddar cheese and the crunch of pickles. Together, they form a delightful harmony that will have everyone coming back for more!
- 1 pound lean ground beef: The base of your sliders, delivering rich flavor and juiciness.
- ½ cup finely diced yellow onion: Adds sweetness and depth to the beef.
- 1 teaspoon black pepper: For seasoning, bringing out the flavors.
- ½ teaspoon Morton kosher salt: Essential for enhancing overall taste.
- ½ teaspoon garlic powder: Adds a savory, aromatic touch.
- ¼ cup ketchup: A classic condiment that adds tanginess and moisture.
- 2 tablespoons mayonnaise: Introduces creaminess to the beef mixture.
- 1 teaspoon prepared yellow mustard: For a slight zing that balances the sweetness.
- 1 teaspoon Worcestershire sauce: Adds depth of flavor and umami.
- ¼ teaspoon smoked paprika: Gives a hint of smokiness.
- 1 package (12 ounces total) 12-count dinner rolls (such as King’s Hawaiian Original Sweet Rolls): Soft and slightly sweet, they cradle the filling perfectly.
- 8 slices medium cheddar: Melts beautifully, adding creaminess to each bite.
- 24 dill pickle slices: For that classic burger crunch and tang.
- 1 tablespoon salted butter, melted: To brush over the tops, adding a shiny finish.
- ½ teaspoon sesame seeds: For a touch of flavor and texture on top.
How to Cook Cheeseburger Sliders
Cooking Cheeseburger Sliders is a breeze, making this recipe a must-try! Follow these simple steps to create sliders that will wow your guests. Each step is designed to ensure your sliders are perfectly seasoned and cooked to delicious perfection.
- Start by placing your oven rack in the center and preheating the oven to 350°F. Line a 9" x 13" baking dish with parchment paper and set aside. This step ensures your sliders won’t stick and will come out easily.
- Next, heat a medium-sized skillet over medium heat. Add the ground beef and onion. Use a spatula to break the beef apart as it cooks. Season with black pepper, salt, and garlic powder, stirring to combine. Cook until the beef is browned and no longer pink.
- Once the beef is cooked, remove the skillet from heat and spoon away any excess fat and juices. This is crucial for keeping your sliders from being greasy.
- In the same skillet, add ketchup, mayonnaise, yellow mustard, Worcestershire sauce, and smoked paprika to the beef. Stir until everything is evenly combined, ensuring that each bite will be flavorful.
- Slice the dinner rolls in half horizontally while keeping them attached. Place the bottom layer in the prepared baking dish.
- Now, take 4 slices of cheddar cheese and lay them over the bottom layer of rolls. You can cut the cheese if needed to fit perfectly.
- Spread the seasoned ground beef mixture evenly over the cheese, using the spatula to create a squared-off edge around the perimeter.
- Place the remaining 4 slices of cheddar over the top of the beef, again cutting to fit as necessary. This layer of cheese will melt beautifully over the beef.
- Top each slider with 2 pickle slices, then place the top layer of rolls back on and gently press down. This helps to hold everything together nicely.
- Brush the tops of the rolls with melted butter, then sprinkle with sesame seeds to add a nice golden finish.
- Cover the pan tightly with foil and place it in the center of the oven. Bake for 15 to 20 minutes until the sliders are thoroughly warmed.
- Finally, remove the foil and bake for an additional 1 to 3 minutes, until the cheese is melty and the tops are toasted to your liking. Once done, remove from the oven and allow sliders to rest for a few minutes before serving. This will make them easier to handle.
Things Worth Knowing
- Perfect Baking Time: Keep an eye on your sliders during the last few minutes of baking. You want the cheese perfectly melty, and the tops just golden.
- Resting Period: Letting the sliders rest after baking allows the cheese to set slightly, making it easier to cut and serve.
- Choosing Rolls: Using sweet dinner rolls like King’s Hawaiian can elevate the flavor profile, balancing the savory filling with a hint of sweetness.
- Serving Style: Serve these sliders hot out of the oven with extra ketchup or mustard on the side for dipping.
Recipe Tips about Cheeseburger Sliders
When it comes to perfecting your Cheeseburger Sliders, having a few extra tips can make all the difference. Here are some suggestions to ensure your sliders turn out amazing every time.
- Storage: Store any leftover sliders in an airtight container in the refrigerator for up to 3 days. Reheat them in the oven for the best results.
- Freezing: You can freeze uncooked sliders before baking. Just assemble them, cover well, and freeze. When ready to bake, add a few extra minutes to the cooking time.
- Pairing: These sliders go wonderfully with classic sides like french fries, coleslaw, or a fresh salad.
- Seasoning Variations: Feel free to play with the seasonings and toppings! Adding jalapeños or different types of cheese can give your sliders a unique twist.
- Presentation: For a fun presentation, serve your sliders on a platter with toothpicks, making them easy to pick up and eat.
- Double the Recipe: If you’re expecting a crowd, doubling the recipe is easy! Just use two baking dishes or a larger pan.
Best Served With
- French Fries: Crispy, golden fries are a classic pairing that everyone loves.
- Coleslaw: The crunch and tang of coleslaw complement the richness of the sliders perfectly.
- Potato Salad: A creamy potato salad is a hearty option that balances the meal.
- Pickles: Extra pickles on the side for those who love the crunch and tang.
- Fresh Salad: A light green salad can provide a refreshing contrast to the sliders.
- Game Day: These sliders are perfect for game day, served alongside chips and dip.
- Movie Night: A great option for cozy movie nights, easy to eat without distracting from the film.
FAQ
Conclusion
In conclusion, Cheeseburger Sliders are a delightful blend of flavor and convenience that makes them perfect for any occasion. Their bite-sized nature and customizable toppings make them a hit with everyone. So why not gather your ingredients and make some sliders tonight? You’ll be amazed at how quickly they disappear!
Cheeseburger Sliders
Ingredients
Equipment
Method
- Start by placing your oven rack in the center and preheating the oven to 350°F. Line a 9" x 13" baking dish with parchment paper and set aside. This step ensures your sliders won’t stick and will come out easily.
- Next, heat a medium-sized skillet over medium heat. Add the ground beef and onion. Use a spatula to break the beef apart as it cooks. Season with black pepper, salt, and garlic powder, stirring to combine. Cook until the beef is browned and no longer pink.
- Once the beef is cooked, remove the skillet from heat and spoon away any excess fat and juices. This is crucial for keeping your sliders from being greasy.
- In the same skillet, add ketchup, mayonnaise, yellow mustard, Worcestershire sauce, and smoked paprika to the beef. Stir until everything is evenly combined, ensuring that each bite will be flavorful.
- Slice the dinner rolls in half horizontally while keeping them attached. Place the bottom layer in the prepared baking dish.
- Now, take 4 slices of cheddar cheese and lay them over the bottom layer of rolls. You can cut the cheese if needed to fit perfectly.
- Spread the seasoned ground beef mixture evenly over the cheese, using the spatula to create a squared-off edge around the perimeter.
- Place the remaining 4 slices of cheddar over the top of the beef, again cutting to fit as necessary. This layer of cheese will melt beautifully over the beef.
- Top each slider with 2 pickle slices, then place the top layer of rolls back on and gently press down. This helps to hold everything together nicely.
- Brush the tops of the rolls with melted butter, then sprinkle with sesame seeds to add a nice golden finish.
- Cover the pan tightly with foil and place it in the center of the oven. Bake for 15 to 20 minutes until the sliders are thoroughly warmed.
- Finally, remove the foil and bake for an additional 1 to 3 minutes, until the cheese is melty and the tops are toasted to your liking. Once done, remove from the oven and allow sliders to rest for a few minutes before serving. This will make them easier to handle.
Notes
- Tip 1: Store any leftover sliders in an airtight container in the refrigerator for up to 3 days. Reheat them in the oven for the best results.
- Tip 2: You can freeze uncooked sliders before baking. Just assemble them, cover well, and freeze. When ready to bake, add a few extra minutes to the cooking time.
- Tip 3: These sliders go wonderfully with classic sides like french fries, coleslaw, or a fresh salad.
- Tip 4: Feel free to play with the seasonings and toppings! Adding jalapeños or different types of cheese can give your sliders a unique twist.
- Tip 5: For a fun presentation, serve your sliders on a platter with toothpicks, making them easy to pick up and eat.
- Tip 6: If you're expecting a crowd, doubling the recipe is easy! Just use two baking dishes or a larger pan.