Strawberry Christmas Trees
Every holiday season, I find myself looking for ways to bring a little cheer and creativity to my table, and that’s where Strawberry Christmas Trees come into play. These delightful treats have become a favorite among friends and family, and they never fail to impress with their whimsical appearance and delicious flavor. I remember the first time I made them; I wanted something festive that was also easy enough for the kids to help with. As we crafted our little strawberry trees, laughter filled the kitchen, and the sweet aroma of fresh strawberries combined with candy melts filled the air. Each bite was a perfect blend of sweet and fruity goodness, and they were gone in no time. Whether you’re hosting a holiday party, bringing a dish to a potluck, or just wanting to spread some festive spirit, these adorable Strawberry Christmas Trees are sure to make everyone smile.
Recipe Snapshot
45 mins
45 mins
0 mins
Medium
100 kcal
1 g
Paleo, Whole30, Vegan
2 g
Large Pot, Saucepan, Frying Pan, Wooden Spoon, Chef’s Knife, Mixing Bowl
What Sets This Strawberry Christmas Trees Apart
They’re Fun to Make
One of the best parts of making Strawberry Christmas Trees is that it’s a fun activity for the whole family. From rinsing the strawberries to dipping them in candy melts, everyone can get involved. It’s a wonderful way to create lasting memories with your loved ones while crafting something delightful. The kids will love getting their hands a little messy, and you might even find yourself smiling at their creative designs.
Perfect for Any Occasion
While these treats are perfect for the holidays, they can be enjoyed at any time of the year. The vibrant colors and playful presentation make them a hit at birthday parties, summer picnics, or even a cozy dessert for movie night. The versatility of Strawberry Christmas Trees allows you to modify the decorations to suit any occasion. Just swap out the toppings, and you have a festive treat for any holiday!
Healthy and Delicious
One of the reasons I love this recipe is that it combines the health benefits of fresh strawberries with the fun of candy melts. Strawberries are packed with vitamins, antioxidants, and fiber. When you dip them in candy melts, you get a delicious treat that still gives you a dose of fruit. It’s the perfect balance of indulgence and health, making it a guilt-free dessert option!
Customizable Toppings
You can easily customize the toppings on your Strawberry Christmas Trees. Whether you prefer multi-colored nonpareils or a sprinkle of edible glitter, the sky’s the limit. You can even change the tree toppers to match your theme. This makes it easy to personalize each tree and cater to your guests’ tastes.
Great for Gifting
If you’re looking for a unique gift idea for friends or neighbors, consider making a batch of these charming treats. They can be packaged beautifully in a clear box or a festive tin, making them a delightful surprise. Every time you gift a box of Strawberry Christmas Trees, you’re not just giving a treat; you’re sharing a piece of your creativity and love.
Easy to Make Ahead
One of the best parts? You can prepare the strawberries ahead of time! Just store them in the fridge until you’re ready to dip them. This makes party planning a breeze and allows you to focus more on enjoying the company rather than being stuck in the kitchen.
Strawberry Christmas Trees Shopping List
Gathering the right ingredients is key to creating your Strawberry Christmas Trees. The vibrant colors and sweet flavors come together in this delightful dessert. Each ingredient plays a vital role, from the freshness of the strawberries to the whimsical toppings. Let’s dive into the essentials you’ll need for this festive treat!
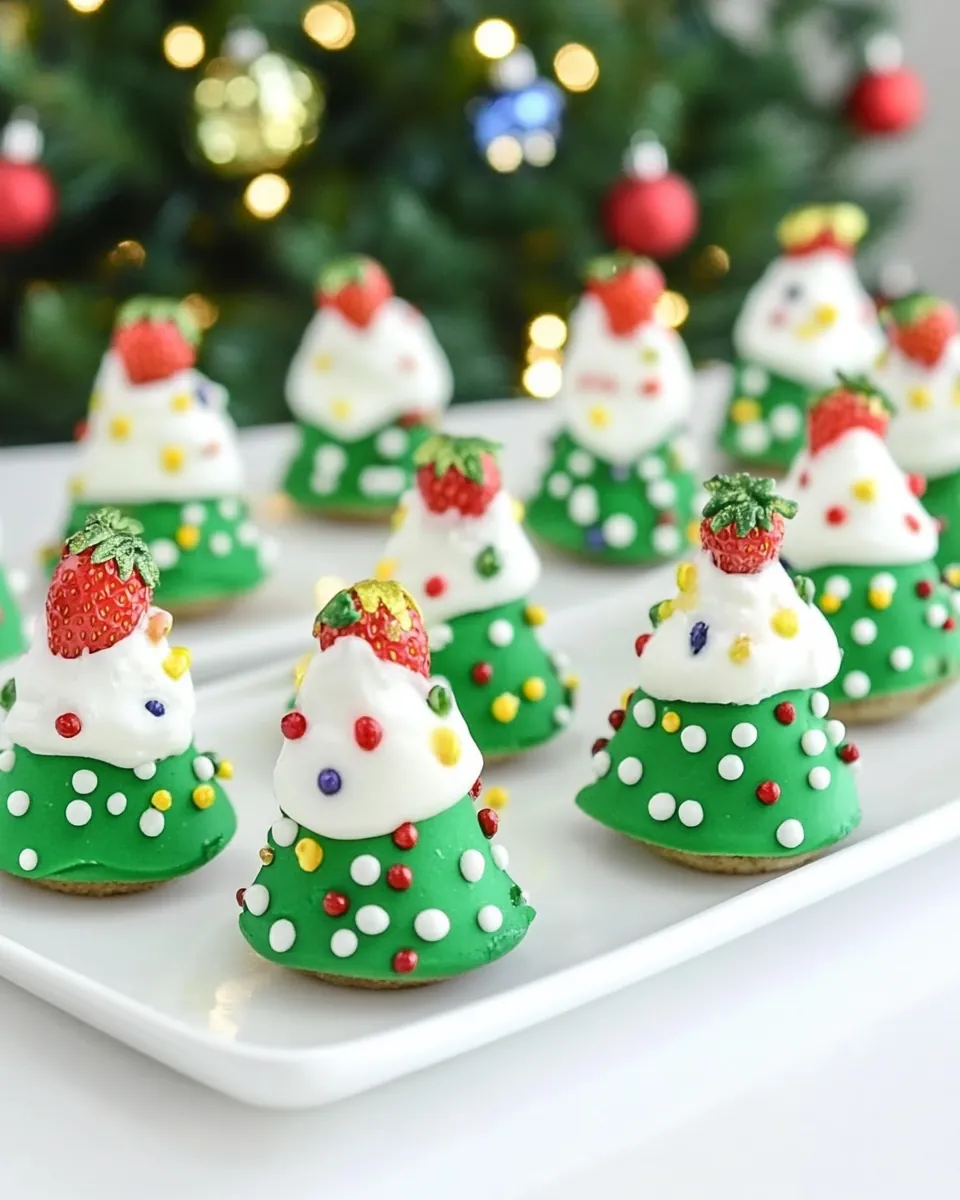
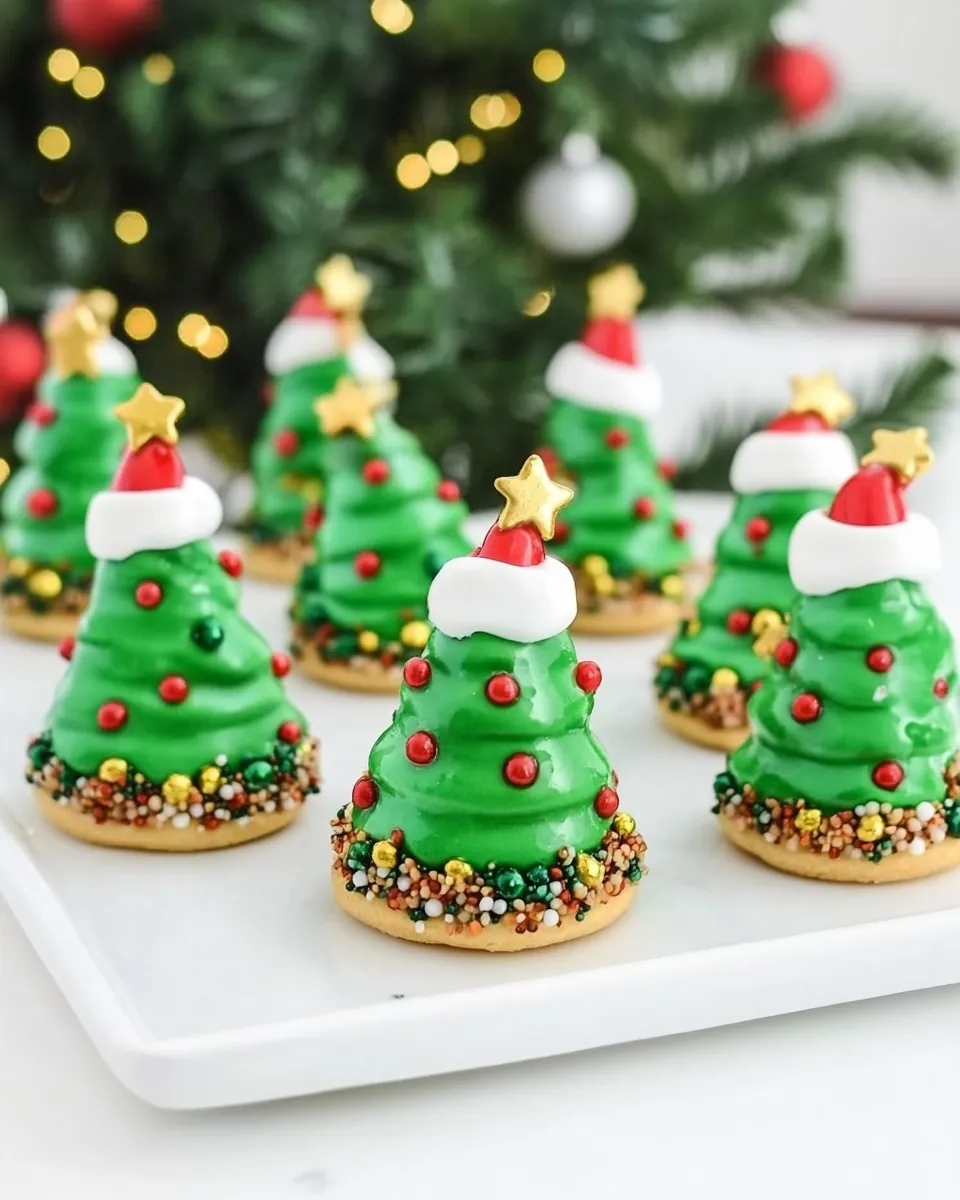
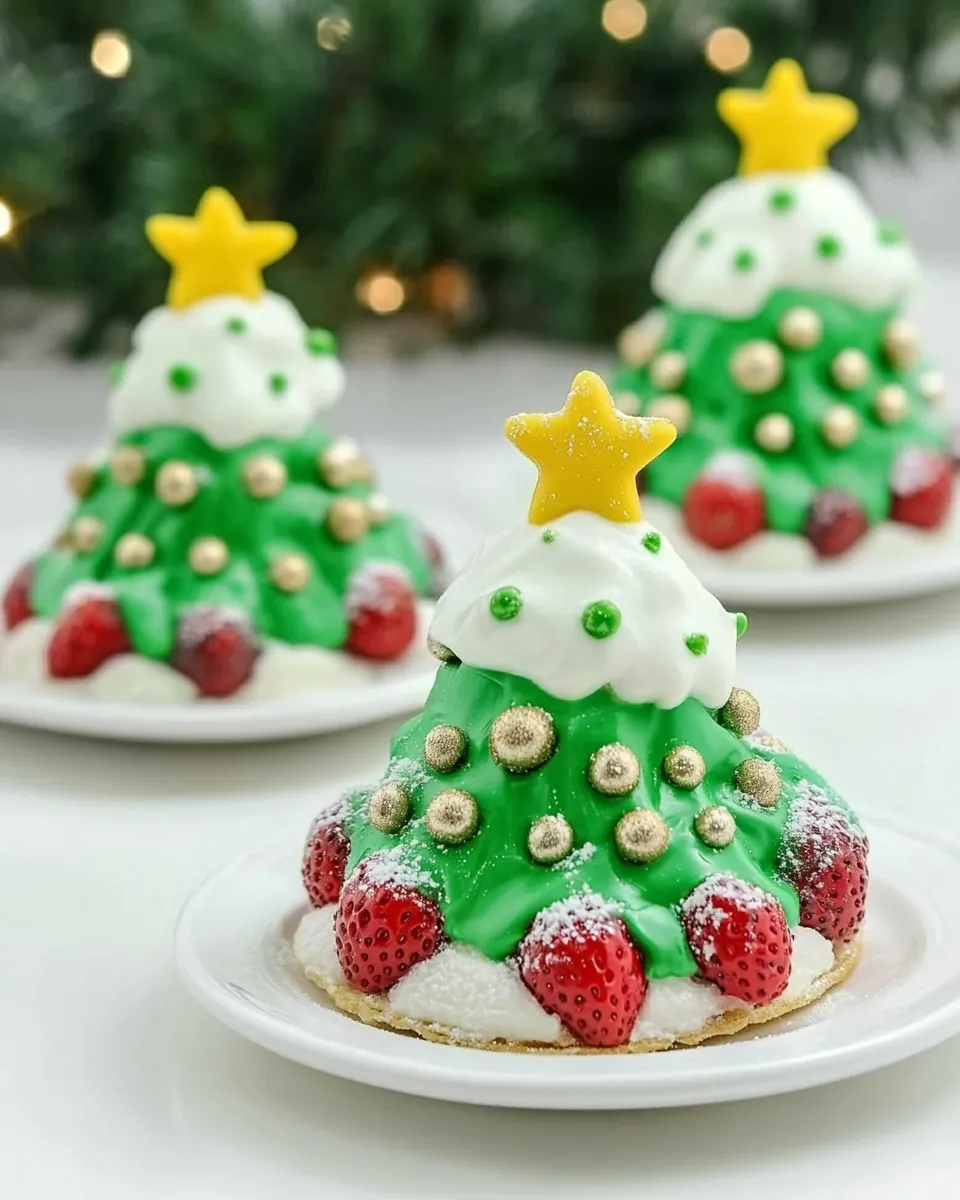
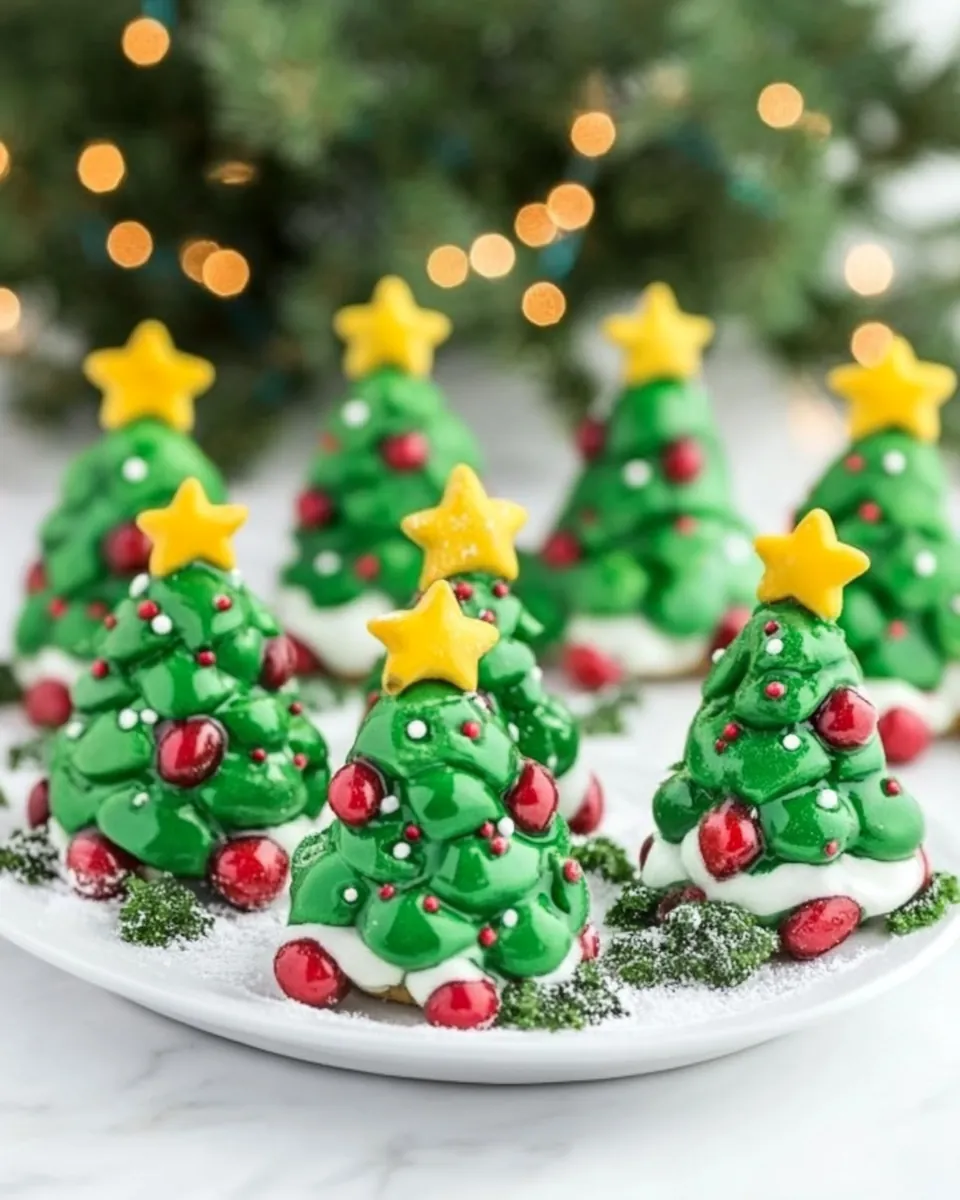
- 2 pounds fresh strawberries (18 large strawberries plus extra just in case): These are the stars of the show! Fresh strawberries provide the fruity base for your trees.
- 24 ounces dark green candy melts (two 12-ounce packages): The candy melts act as the “tree coating,” giving them that rich, sweet flavor and shiny finish.
- 1 frosted oatmeal cookie (need 18 cookies): This serves as the sturdy base for each tree, adding a delightful crunch.
- ¼ cup multi-colored nonpareils: These tiny sprinkles add a festive touch and are perfect for decorating your trees.
- 18 yellow star candies: The perfect finishing touch that makes your trees sparkle like the holiday star!
How to Prepare Strawberry Christmas Trees
Making Strawberry Christmas Trees is not only a rewarding experience but also a delightful way to celebrate the season. Follow these steps to bring your festive masterpiece to life! You’ll be amazed at how simple and enjoyable it is to create these edible trees.
- Start by rinsing the strawberries under cool water. It’s essential to wash them thoroughly to remove any dirt or pesticides. After rinsing, gently pat them dry with a clean towel. This step is crucial, as excess moisture can affect the coating later on.
- Next, with a sharp knife, make a careful slice from the base of each strawberry to remove the stem. This will create a stable base for your strawberry tree. Be cautious while slicing to ensure you don’t cut too deep.
- Set up a double boiler on your stovetop. Place the candy melts in the top pan, and fill the bottom pan with water. Heat over simmering water, stirring frequently. You want the candy melts to melt completely and become smooth without burning.
- Once the candy melts are melted, remove the pan from the heat. Be careful, as the steam can be hot. Use a towel to dry the bottom of the pan to avoid any water mixing with the candy melts.
- Now it’s time to dip! Use a toothpick or a fork to carefully dip a strawberry into the smooth candy melt mixture. Ensure the entire strawberry is covered, but tap off any excess candy so it won’t pool.
- Using a second fork, lift the dipped strawberry from the dipping tool and place it onto the center of a cookie. If you’d like, you can also add a little dollop of melted candy to the cookie before placing the strawberry on top for extra stability.
- While the candy coating is still soft, sprinkle the nonpareils over your dipped strawberry. This adds a wonderful splash of color and texture. Do this quickly so the candy doesn’t harden before you add the sprinkles.
- Finally, top each strawberry with a yellow star candy before the candy coating hardens. This will give your tree that iconic look. Place your creations in a cool spot, or in the fridge, to set.
- If needed, reheat the candy melts to keep them dippable during the process. Just ensure they stay warm and smooth for easy dipping!
Things Worth Knowing
- Keep it Dry: Ensure your strawberries are completely dry before dipping. Any water will cause the candy melts to seize up.
- Temperature Matters: The candy melts should be warm but not too hot. If they start to cool down too much, they can become thick and hard to work with.
- Quick Sprinkling: Add your nonpareils and star candies quickly while the coating is still wet to ensure they stick well.
- Storage Tips: Store finished Strawberry Christmas Trees in a cool place or the refrigerator to keep them fresh. They’re best enjoyed within a few days of making.
Expert Tips about Strawberry Christmas Trees
Creating the perfect Strawberry Christmas Trees is all about the little details. Here are some expert tips to ensure your treats turn out beautifully every time.
- Storage: To keep your Strawberry Christmas Trees fresh, store them in a cool place or in the refrigerator. They’re best enjoyed within two to three days. Use a container that allows air circulation to avoid moisture buildup.
- Freezing: While it’s not recommended to freeze these treats for long periods, you can freeze them for a short time. Just make sure to wrap them tightly to prevent freezer burn.
- Variations: Feel free to switch up the toppings! Try using chocolate sprinkles, crushed nuts, or even edible glitter for a different look. You can also make a variation using different fruits, such as bananas or kiwis.
- Serving Size: Consider how many trees you want to make based on the number of guests. Each cookie can support one strawberry, so plan accordingly.
- Allergy Considerations: Be mindful of allergies when serving your Strawberry Christmas Trees. Inform guests of the ingredients used, especially since candy melts can have varying ingredients.
- Time Management: If you’re making a lot of these treats, it can be helpful to enlist a friend or family member to help with the dipping process. This way, you can work faster and enjoy the fun together!
Perfect Matches for Strawberry Christmas Trees
There are so many wonderful ways to enjoy Strawberry Christmas Trees! These treats can be paired with a variety of festive foods and occasions. Here’s how to serve them:
- Holiday Gatherings: These charming treats are perfect for holiday parties and can be served as a showstopper dessert alongside traditional sweets.
- Picnics: Bring these to an outdoor picnic for a refreshing dessert that will surely impress your friends and family.
- Kids’ Parties: The fun design appeals to children, making them a great addition to birthday parties or school events.
- As a Snack: Enjoy them as a light snack for yourself or serve them as a festive treat for guests.
- Decorative Tables: Use Strawberry Christmas Trees as a centerpiece for dessert tables. They will attract attention and add lively color and a festive vibe.
- Seasonal Pairings: Pair with other seasonal fruits and treats to create a colorful dessert platter. A mix of strawberries, blueberries, and other festive treats can create a beautiful presentation.
FAQ
Conclusion
In conclusion, Strawberry Christmas Trees are a wonderful way to add some festive flair to your holiday celebrations. Their vibrant colors, delicious flavors, and fun presentation make them a hit for both kids and adults alike. I encourage you to give this fun and easy recipe a try this season. You will not only impress your guests but also create delightful memories in the kitchen. Happy baking!
Strawberry Christmas Trees
Ingredients
Equipment
Method
- Rinse the strawberries and gently pat them dry. Make a clean slice from the base of each strawberry to remove the stem and create a base for the bottom of the strawberry “tree.”
- Place candy melts in the top pan of a double boiler. Heat over simmering water, stirring frequently, until the candy melts are smooth. Remove from over the simmering water. Dry the bottom of the pan with a dishtowel.
- Use a toothpick or fork to dip the strawberry into the candy melt mixture. Tap off the excess candy from the strawberry.
- Use a second fork to lift the strawberry from the dipping tool and onto the center of a cookie. You can also place a small dollop of the melted candy onto the center of the cookie before setting the strawberry down.
- Sprinkle nonpareils over the dipped strawberry and place a star on top before the candy hardens.
- Reheat candy melts as needed to keep the mixture dippable.
Notes
- Candy melts can be heated in the microwave: Heat in a microwave-safe bowl in 15 to 30 second intervals, stirring well between. Do not overheat, or they will seize up.
- You can add a few drops of vegetable oil: to the candy melts to help thin them out to the desired consistency. It is critical that no water gets into the candy melts – they will seize up, and you will have to start over with a new package of candy melts.
- We found it easiest to use a fork: for dipping and transferring to the cookie base. The strawberries slipped off the toothpick too easily.
- Candy melts firm up quickly: after coating the strawberries (especially if the strawberries are cold). Add the candy sprinkles and tree topper fast.