Strawberry Rhubarb Pie
There’s something magical about a freshly baked Strawberry Rhubarb Pie wafting through the house. I remember the first time I tasted this delightful dessert at my grandmother’s kitchen. Each bite was a burst of sweet and tart goodness that perfectly balanced the flakiness of the crust. That summer, we spent countless afternoons picking strawberries and rhubarb from her garden, excitedly dreaming about the pie we would bake together. The combination of these two fruits creates a unique flavor profile that is truly irresistible. Every time I make a Strawberry Rhubarb Pie, it brings back those cherished memories and warms my heart. It’s more than just a dessert; it’s a time capsule of love, laughter, and family traditions.
Recipe Snapshot
1 hr 30 mins
30 mins
60 mins
Medium
380 kcal
3 g
Paleo, Gluten-Free, Low FODMAP
15 g
9-inch Pie Plate
The Appeal of This Strawberry Rhubarb Pie
Flavor Combination
One of the reasons I absolutely adore Strawberry Rhubarb Pie is the incredible balance of flavors. The sweetness of the strawberries complements the tartness of the rhubarb beautifully, creating a pie that’s both refreshing and indulgent. The addition of tapioca flour helps to thicken the filling, allowing the flavors to shine without becoming overly soupy.
Versatility
This pie is incredibly versatile! You can serve it warm with a scoop of vanilla ice cream, or at room temperature as a nice afternoon treat. It’s perfect for a summer barbecue or a cozy family dinner. The possibilities are endless, which makes it an excellent go-to dessert!
Seasonal Ingredients
The beauty of this pie lies in its seasonal ingredients. Strawberries and rhubarb are at their peak during spring, making this dessert not only delicious but also a celebration of the season’s bounty. Utilizing fresh, local produce ensures you’re getting the best flavors and nutrients.
Homemade Crust
While it might seem tempting to use a store-bought crust, nothing compares to a homemade pie crust. The flakiness and buttery goodness of a freshly made crust elevate the Strawberry Rhubarb Pie to a whole new level. Plus, it’s a rewarding experience to create the crust from scratch!
Perfect for Sharing
There’s something special about sharing a slice of Strawberry Rhubarb Pie with friends and family. It’s a comforting dessert that invites conversation and connection. Whether it’s a holiday gathering or a simple weeknight dinner, this pie is bound to delight everyone around the table.
Ingredients for Strawberry Rhubarb Pie
Creating a delicious Strawberry Rhubarb Pie starts with selecting the right ingredients. The harmony of flavors comes from the combination of sweet and tart fruits, complemented by the perfect crust. Each ingredient plays a crucial role in achieving the ideal balance, and together, they create a pie that is truly unforgettable.
- 1 pie crust (top + bottom, homemade or store-bought)
- 4 cups rhubarb (stalks cut into small ¼ to ½ inch pieces)
- 4 cups strawberries (cleaned and chopped small)
- 1 cup sugar (granulated)
- ⅓ cup tapioca flour
- 1 tablespoon orange zest
- 1 pinch salt
- 1 egg (for egg wash)
Making Strawberry Rhubarb Pie
Making a Strawberry Rhubarb Pie is a delightful process that combines fresh produce with baked goodness. Let’s walk through the steps to create this mouthwatering dessert together!
In a large bowl, combine the rhubarb, strawberries, sugar, tapioca flour, orange zest, and salt. Toss everything well to ensure that the fruits are evenly coated. Allow it to sit for 15 to 30 minutes to let the tapioca flour start working its magic. This resting period helps the fruits release their juices and ensures a perfect filling consistency.
After the fruit filling has rested, pour off any excess juice that’s collected in the bottom of the bowl. This step is crucial for preventing a soggy pie. You want the filling to be juicy but not runny.
If you’re using homemade pie dough, let it rest at room temperature for 10 minutes, so it’s easier to roll out. This makes the dough more pliable and manageable.
Roll each disc of dough until it’s about ⅛ inch thick. Carefully line a 9-inch pie plate with the bottom crust. Trim any overhang to create a neat edge.
Spoon the drained fruit filling into the prepared crust, spreading it evenly. This ensures that every slice has a good amount of filling.
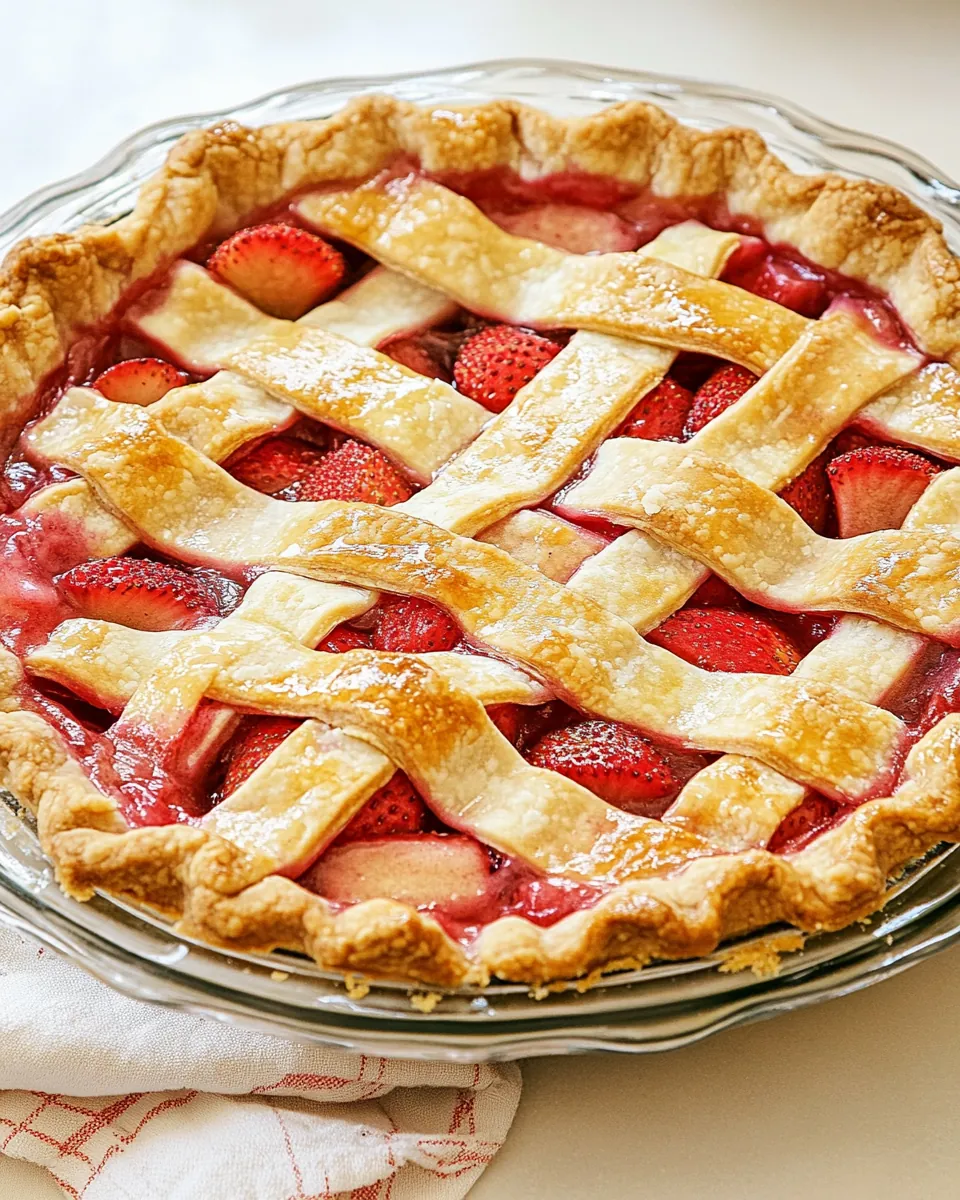
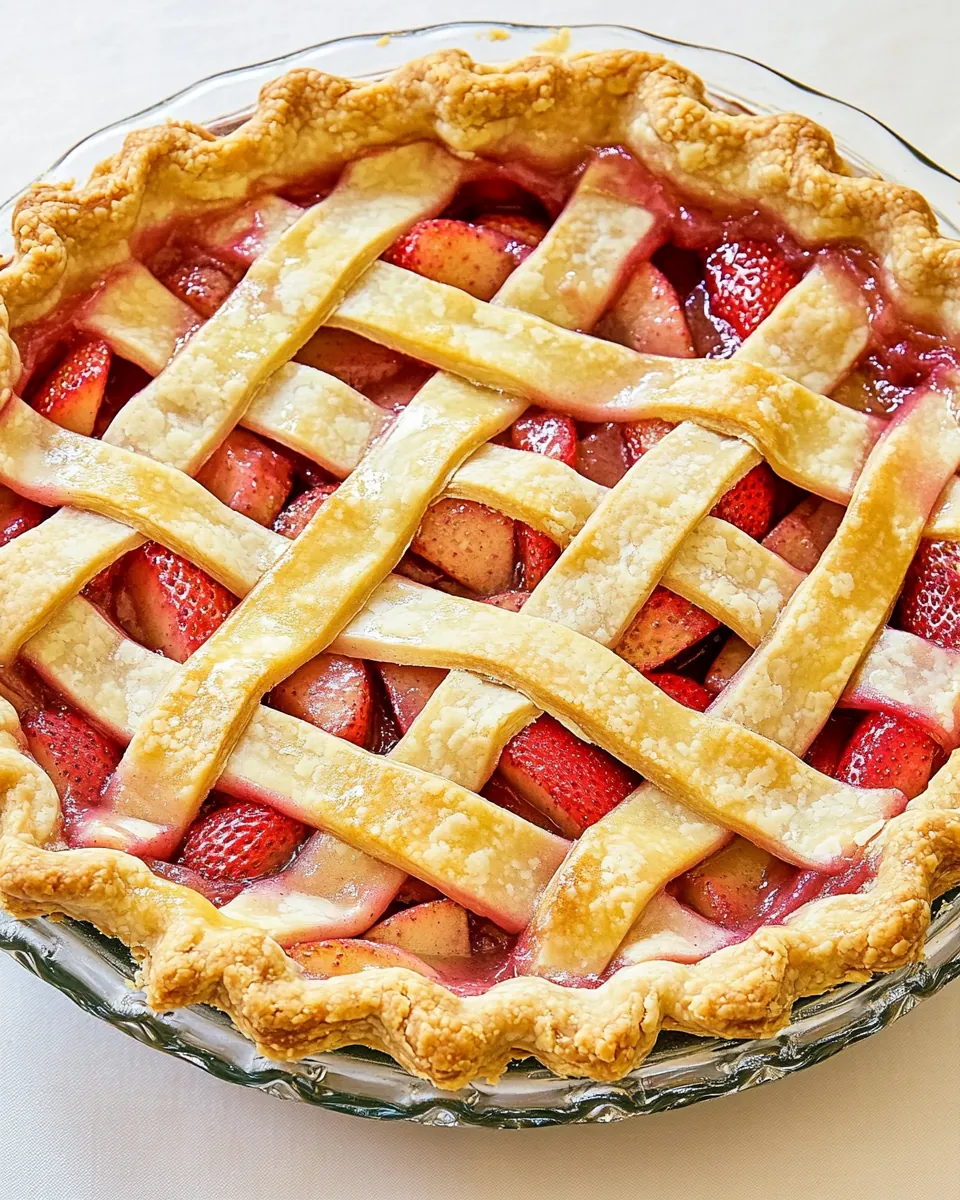
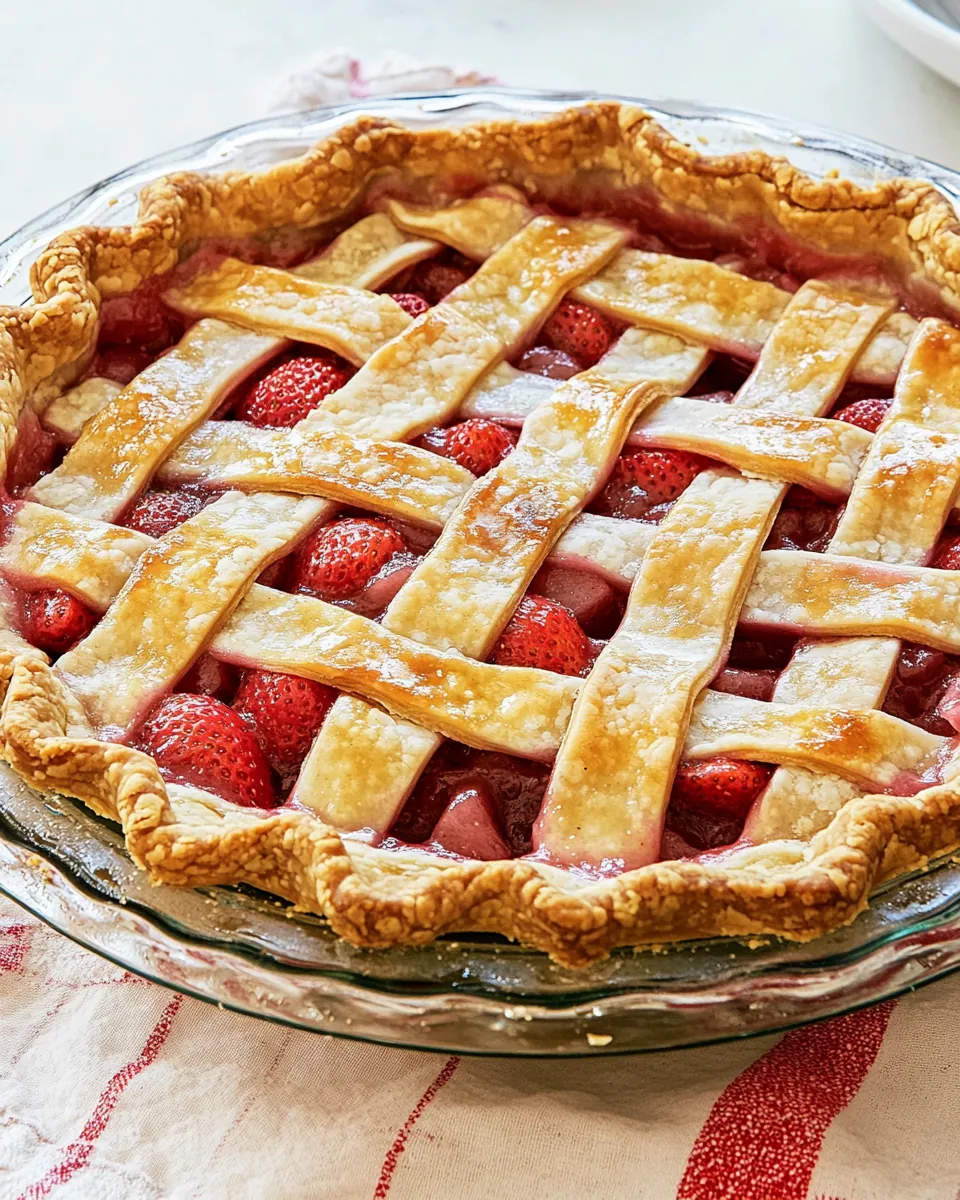
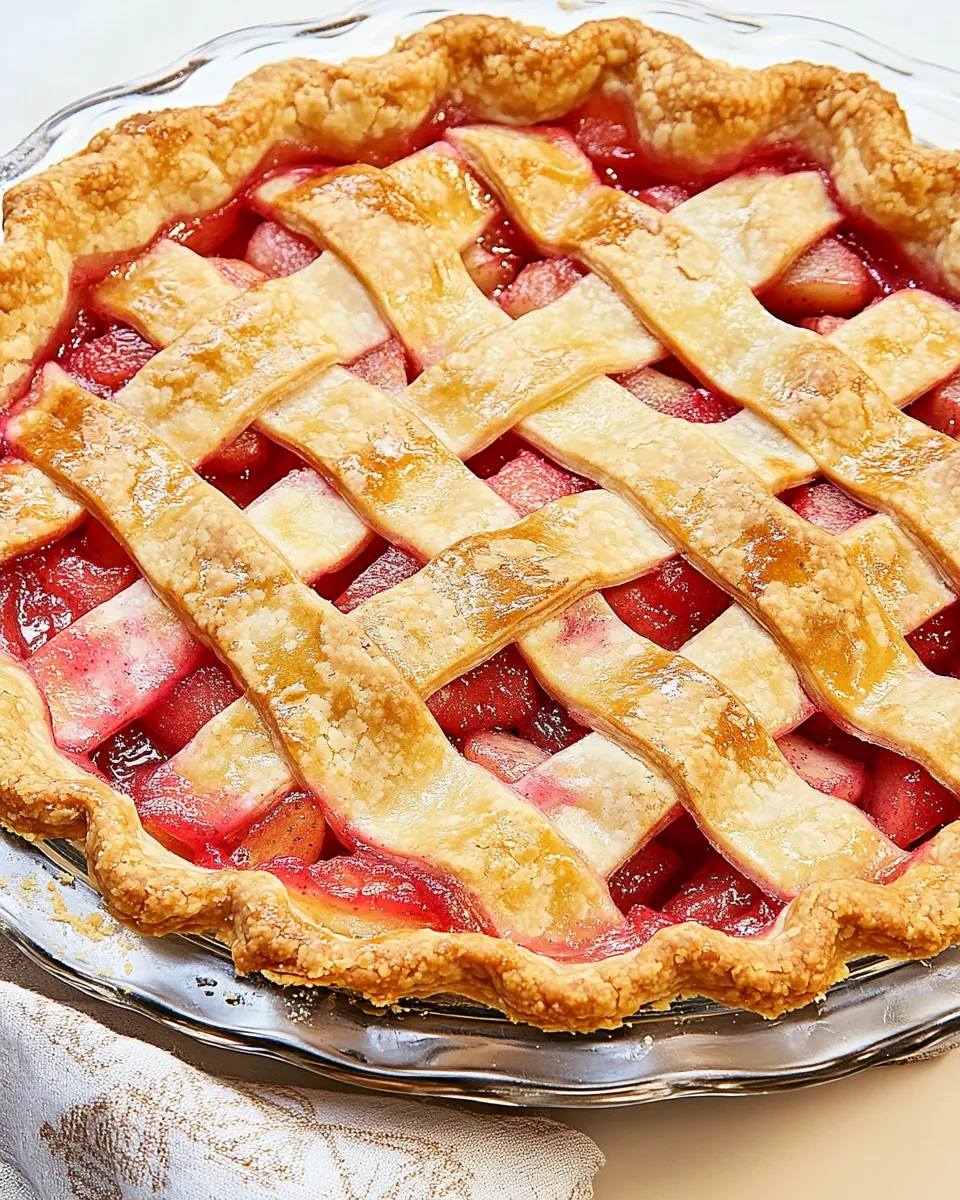
Roll out the top crust and place it over the filling. Trim, crimp the edges to seal, and cut a few slits for steam to escape. Alternatively, you can create a lattice crust for a beautiful presentation!
Brush the top of the pie with the beaten egg. This gives the pie a beautiful golden color as it bakes.
Preheat your oven to 425°F (218°C). Once preheated, place the pie on the bottom rack and bake for 15 minutes. This high temperature helps to set the crust.
After 15 minutes, reduce the temperature to 350°F (177°C) and continue baking for another 45 to 60 minutes. You’ll know it’s done when the crust is deep golden and the filling is bubbling through the vents.
Let the pie cool completely before slicing, which takes at least a couple of hours. This resting time allows the filling to set up properly. You’ll still have a juicy filling, just not a messy fruit landslide!
Things Worth Knowing
- Use Fresh Ingredients: Opt for the freshest strawberries and rhubarb you can find. This greatly enhances the flavor of your pie.
- Check for Doneness: When baking, keep an eye on your pie. If the crust starts to brown too quickly, cover it with aluminum foil.
- Cool Before Slicing: Always allow your pie to cool for a couple of hours. This helps the filling firm up for perfect slices.
- Storing Leftovers: Store any leftovers at room temperature for up to two days or refrigerate for up to five days, wrapped tightly to keep it from drying out.
How to Switch It Up
There are many ways to add your personal touch to the classic Strawberry Rhubarb Pie. Here are some fun ideas to consider!
- Mix of Fruits: Try adding other fruits like blueberries or blackberries for a delicious twist.
- Spices: Add a dash of cinnamon or nutmeg to enhance the flavor profile.
- Whole Wheat Crust: For a healthier option, use whole wheat flour in your pie crust.
- Gluten-Free Option: Substitute with gluten-free flour for a gluten-free crust.
- Serving Style: Serve it warm with vanilla ice cream or whipped cream for a delightful treat.
Best Served With
When it comes to serving the delicious Strawberry Rhubarb Pie, consider these options:
- Vanilla Ice Cream: A scoop of creamy vanilla ice cream pairs perfectly with the warm pie.
- Whipped Cream: A dollop of freshly whipped cream adds a lightness to the dessert.
- Fresh Berries: Serve with a side of fresh berries for added color and flavor.
- Seasonal Salads: This pie complements a light salad, making it an excellent choice for summer gatherings.
- Afternoon Tea: Enjoy a slice with a cup of tea for a delightful afternoon treat.
FAQ
Conclusion
What makes Strawberry Rhubarb Pie special is its unique balance of flavors and the memories it creates around the table. This pie is a delightful way to celebrate the bounty of spring and bring family together. I encourage you to give it a try—you won’t regret it! Enjoy a slice of nostalgia and warmth with each bite.
Strawberry Rhubarb Pie
Ingredients
Equipment
Method
- In a large bowl, combine the rhubarb, strawberries, sugar, tapioca flour, orange zest, and salt. Toss everything well and let it sit for 15–30 minutes so the tapioca can start working. After resting, pour off any excess juice that’s collected in the bottom of the bowl, this helps prevent a soggy pie.
- If using homemade pie dough, let it rest at room temp for 10 minutes so it’s easier to roll out. Roll each disc to about ⅛ inch thick. Line a 9-inch pie plate with the bottom crust and trim any overhang.
- Spoon the drained fruit filling into the prepared crust. Roll out the top crust and place it over the filling. Trim, crimp the edges to seal, and cut a few slits for steam. Or go full Martha and do a lattice. Brush the top with the beaten egg.
- Preheat your oven to 425°F (218°C). Place the pie on the bottom rack and bake for 15 minutes. Reduce the temperature to 350°F (177°C) and continue baking for another 45–60 minutes, or until the crust is deep golden and the filling is bubbling through the vents.
- Let the pie cool completely before slicing, at least a couple of hours. This gives the filling time to set up properly. It’ll still be juicy, just not a fruit landslide.
Notes
- Prevent a soggy bottom: Bake on the bottom rack so the crust cooks through and gets golden.
- Don’t skip the tapioca flour: It gives a clearer, brighter filling and holds up way better to juicy fruits than cornstarch or flour.
- Drain the excess juice: After the fruit filling rests, pour off the liquid before assembling the pie to avoid a soupy mess.
- Protect your oven: Place a baking sheet on the rack below the pie to catch any drips, especially if you’re loading it up with fruit (which you should).
- Storage: Keeps at room temp for 2 days or refrigerate up to 5 days. Wrap tightly to keep it from drying out.