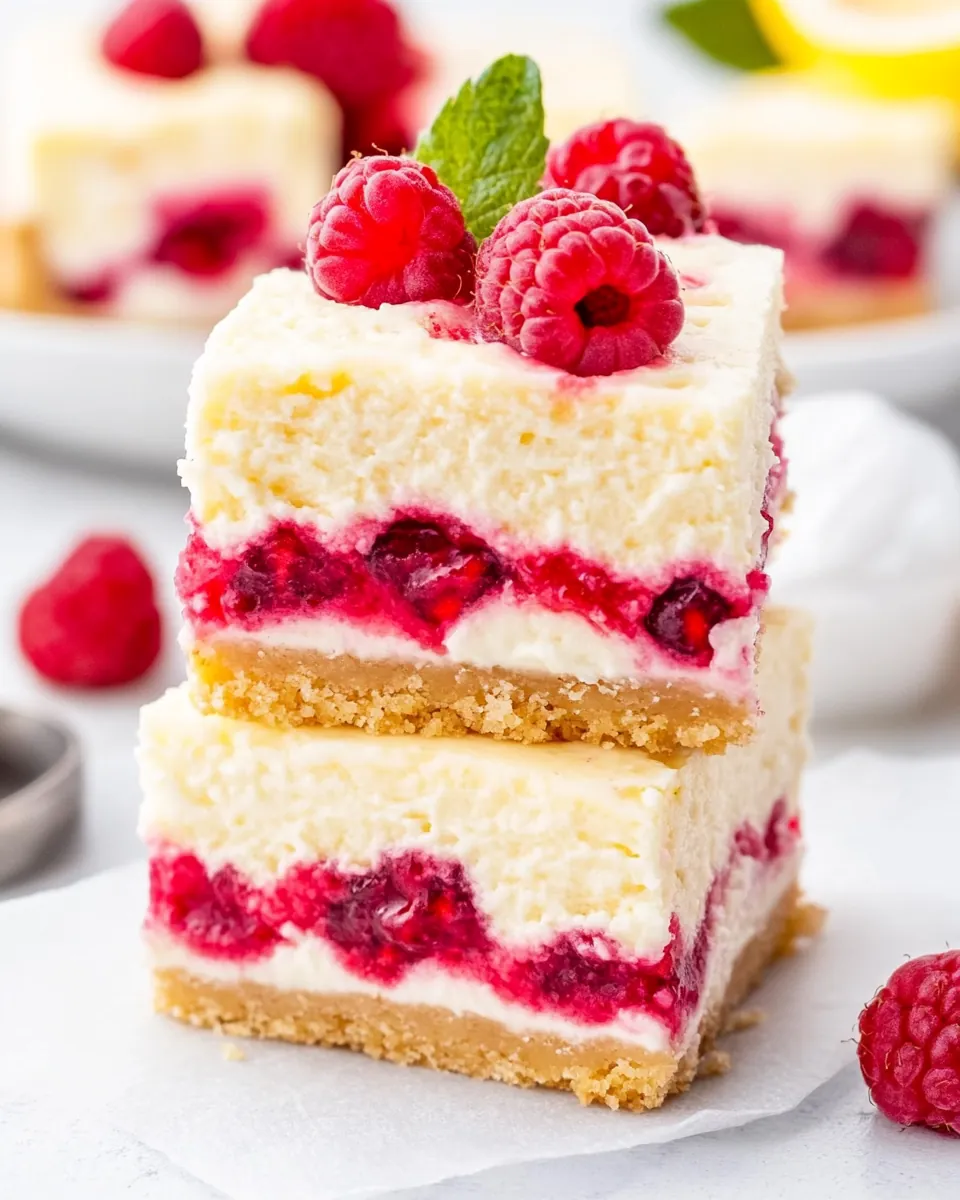
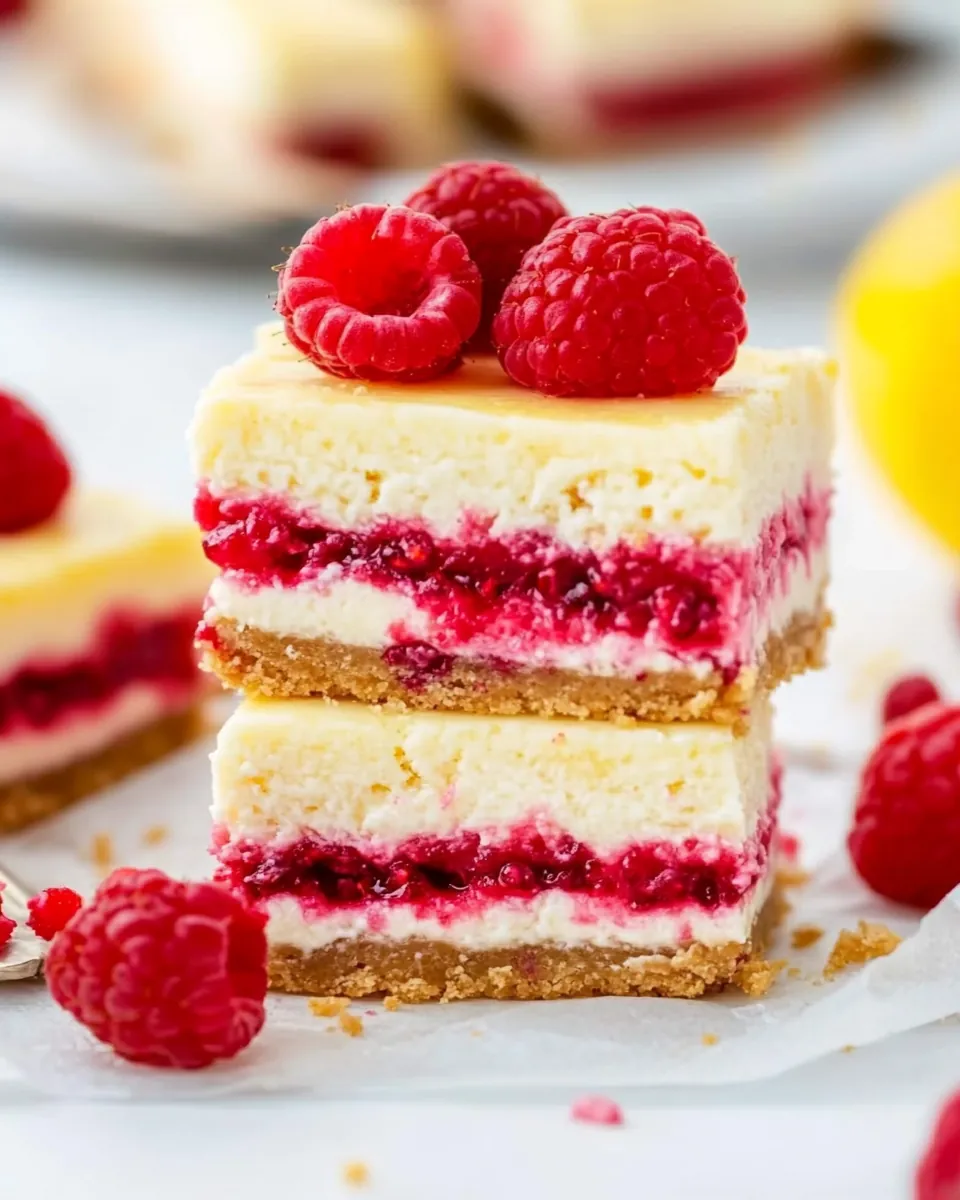
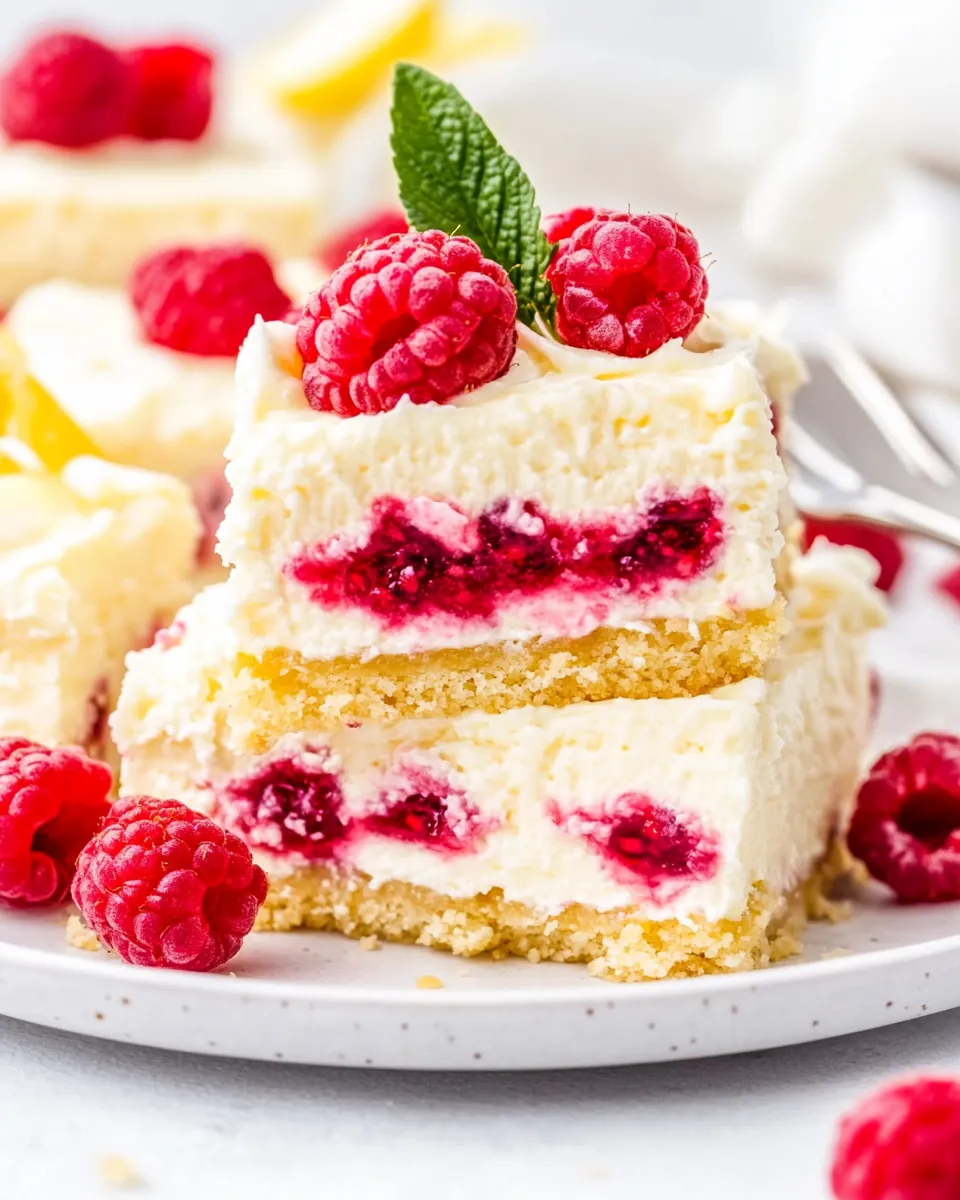
Lemon Cheesecake Bars
There’s nothing quite like the joy of sharing a plate of Lemon Cheesecake Bars with friends and family. I still remember the first time I baked these bars. It was a sunny spring afternoon, and I was in the kitchen, experimenting with flavors. The tartness of the lemons combined with the creamy texture of the cheesecake was what I had in mind, but as I added fresh raspberries, I knew I had struck gold! Each bite was a delightful mixture of sweet and tangy, and the vibrant colors made the dessert a showstopper. Whenever I make these Lemon Cheesecake Bars, they disappear quickly, leaving everyone asking for more. It’s become a tradition in my family to whip these up for gatherings, and they never fail to impress.
Recipe Snapshot
1 hr 22 mins
30 mins
52 mins
Medium
240 kcal
4 g
Gluten-Free, Low FODMAP
12 g
Oven, Baking Sheet, Frying Pan, Wooden Spoon, Chef’s Knife, Mixing Bowl
Let me take you through why this recipe is a must-try. First, the balance of flavors in these bars is simply divine. The creamy filling, enriched with fresh lemon juice and zest, provides a refreshing punch, complemented by the sweetness of the raspberries. Second, the graham cracker crust adds a delightful crunch, making the texture irresistible. Lastly, they are surprisingly easy to make, which means you can have them ready for any occasion without spending hours in the kitchen. So, grab your apron, and let’s get started on making these delicious Lemon Cheesecake Bars!
Why This Lemon Cheesecake Bars Is So Good
It’s All About the Flavors
One of the key reasons to love Lemon Cheesecake Bars is the harmonious blend of flavors. The zesty lemon adds a bright note that cuts through the sweetness, creating an unforgettable taste sensation. The addition of fresh raspberries further enhances this, introducing a hint of tartness and a lovely pop of color.
Perfect For Any Occasion
These bars are incredibly versatile. Whether it’s a casual family dinner, a spring picnic, or a fancy gathering, they fit right in. Their stunning presentation makes them perfect for impressing guests, while their refreshing taste is ideal for warm weather.
A Match Made in Heaven
The combination of rich cream cheese and airy eggs creates a velvety smooth texture in the filling, which is a delight to savor. Every bite melts in your mouth, showcasing the creamy consistency while the raspberry and lemon bite adds an exciting twist.
Easy Preparation
Despite their impressive appearance, the preparation of Lemon Cheesecake Bars is a breeze! With simple ingredients and straightforward steps, even novice bakers can achieve success. The crust is as easy as mixing, pressing, and baking, while the filling just needs a little blending to reach perfection.
Chill for the Best Results
The waiting time may seem challenging, but chilling the bars is crucial. This step allows the flavors to meld beautifully and helps the cheesecake set perfectly, resulting in bars that hold their shape when sliced.
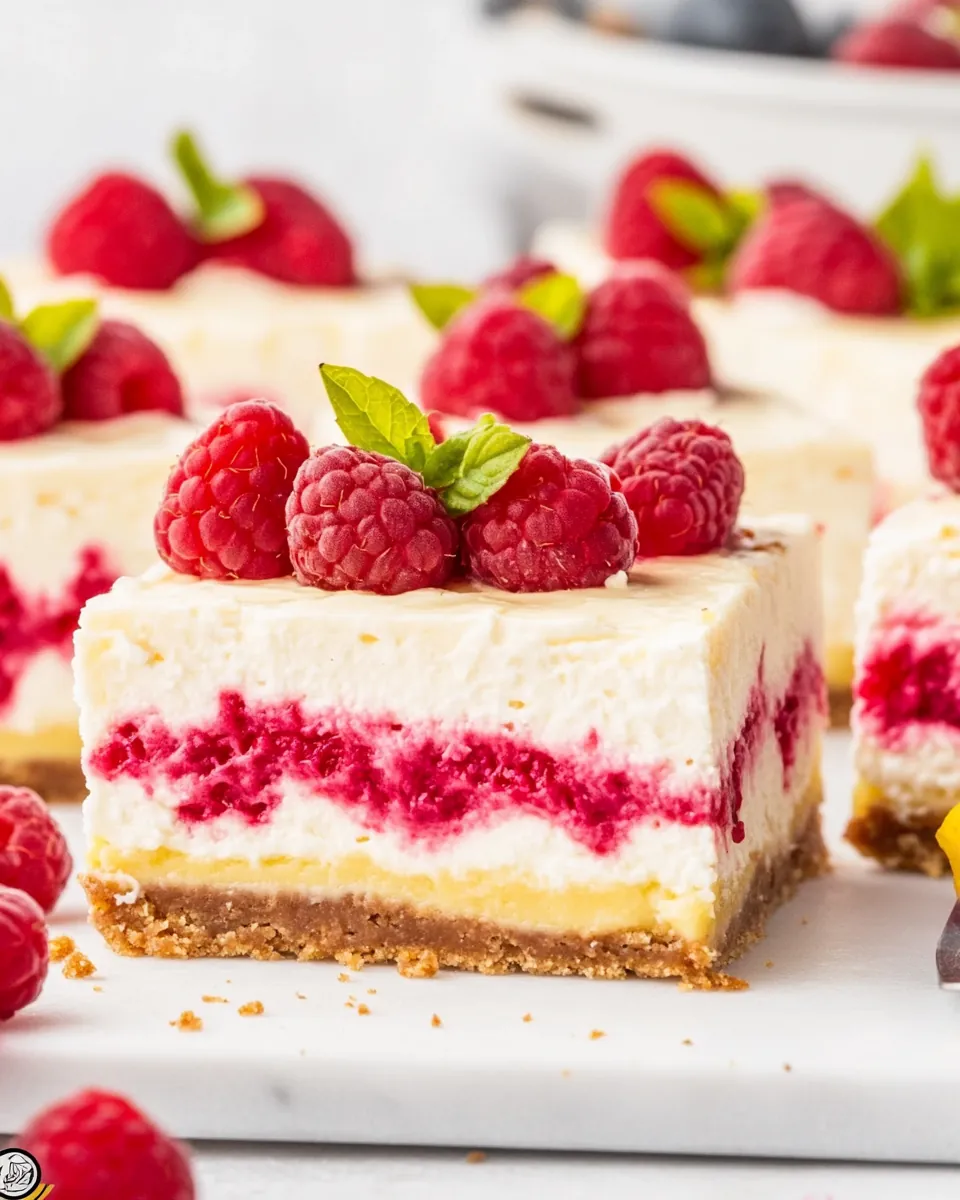
Lemon Cheesecake Bars Ingredients
Using quality ingredients is key to creating the best Lemon Cheesecake Bars. Each component plays a vital role, from the buttery graham cracker crust to the tangy lemon filling. Here’s what you’ll need to make this delightful dessert:
- 1 cup graham cracker crumbs: The base of your bars, offering a sweet and buttery crunch.
- 2 tablespoons granulated sugar: Enhances sweetness in the crust.
- ¼ teaspoon kosher salt: Balances the sweetness.
- ¼ cup unsalted butter, melted: Binds the crust together for a delicious texture.
- 16 ounces full-fat cream cheese, at room temperature: The star ingredient for a rich and creamy filling.
- ½ cup granulated sugar: Sweetens the filling perfectly.
- 2 large eggs, at room temperature: Helps set the filling while adding richness.
- ¼ cup full-fat sour cream: Adds creaminess and a tangy flavor.
- ¼ cup freshly squeezed lemon juice: Provides that refreshing tang.
- lemon zest from 2 large lemons: Infuses the bars with vibrant lemon flavor.
- 1 cup fresh raspberries: Adds a burst of color and flavor.
Lemon Cheesecake Bars Instructions
Making these Lemon Cheesecake Bars is an exciting process that will fill your kitchen with delightful aromas. Follow these steps closely for the best results:
Preheat your oven to 325°F. This temperature is perfect for creating a lovely crust while ensuring the filling bakes to creamy perfection. Lightly spray the bottom of an 8″ x 8″ baking pan with nonstick spray.
In a medium bowl, stir together 1 cup of graham cracker crumbs, 2 tablespoons of sugar, and ¼ teaspoon of kosher salt. This mixture is the foundation of your crust. Once combined, add in ¼ cup of melted unsalted butter. Stir until everything is evenly coated and forms a crumbly mixture.
Press this mixture firmly and evenly into the bottom of the prepared baking pan. This will create a solid layer for your delicious filling. Make sure to pack it tightly so it holds together after baking.
Bake for about 10 to 12 minutes, or until fragrant and golden. You want to see a slight golden color on the crust to ensure it’s fully cooked. Once done, set the crust on a wire rack to cool completely.
While the crust cools, take an electric mixer and cream 16 ounces of full-fat cream cheese and ½ cup of granulated sugar together on medium-high speed until smooth and creamy, which should take about 1 to 2 minutes. Make sure there are no lumps for a velvety texture.
Add in 2 large eggs, ¼ cup of sour cream, ¼ cup of freshly squeezed lemon juice, and the zest of 2 lemons. Beat on medium speed until just combined. Be careful not to overmix, as this can incorporate too much air into the filling, causing cracks.
Spread the mixture evenly over the cooled crust. Gently tap the pan on the counter a couple of times to help settle the filling. This is a crucial step for a smooth surface.
Scatter 1 cup of fresh raspberries on top of the filling, pressing them gently into the cheesecake to ensure they are partially submerged.
Bake the entire assembly for about 40 minutes. Look for the center to be just barely wobbling; the edges should be slightly golden. This indicates that the bars are done baking without overcooking. Remove from the oven and cool completely on a wire rack.
Once cooled, place the pan in the refrigerator for at least 3 hours, or even better, overnight. This chilling time helps the bars set perfectly and enhances the flavor.
To serve, slice the cheesecake into individual bars. If you lined the pan with foil, carefully lift the cheesecake out using the foil, and place it on a cutting board. For clean cuts, dip a thin non-serrated knife in warm water, wipe it dry, and slice. Repeat this process for each cut for perfectly neat edges!
Things Worth Knowing
- Use Room Temperature Ingredients: Make sure your cream cheese and eggs are at room temperature. This helps in achieving a smooth filling without lumps.
- Chill Time is Key: Don’t skip the chilling step! It allows the bars to set properly, making them easier to cut and enhancing the flavors.
- Press Firmly: When making the crust, press the crumbs down firmly. This ensures a sturdy base that holds its shape after baking.
- Bake Until Wobbly: The cheesecake should be slightly wobbly in the center when you take it out of the oven. It will continue to set as it cools.
Change It Up
These Lemon Cheesecake Bars can be customized in various ways to suit your taste. Here are some exciting ideas to experiment with:
- Berry Variations: Try mixing in other berries like blueberries or strawberries for a different flavor profile.
- Nutty Crust: Add finely chopped nuts to the crust for an added crunch and flavor.
- Less Sweet: If you prefer a less sweet cheesecake, reduce the sugar in the filling to taste.
- Chilled Topping: Top the bars with a dollop of whipped cream for a luxurious touch.
- Zesty Lemon Icing: Drizzle lemon icing over the bars for an extra citrus kick.
What to Serve With Lemon Cheesecake Bars
These Lemon Cheesecake Bars are versatile and can be paired with a variety of delightful accompaniments. Consider these options:
- Fresh Berries: Serve with additional fresh raspberries or blueberries for a fruity burst.
- Ice Cream: A scoop of vanilla ice cream goes wonderfully alongside to balance the tartness.
- Coffee: Pair these bars with a cup of coffee for a comforting afternoon treat.
- Light Lunch: They make a refreshing dessert after a light summer lunch.
- Picnic Treat: Slice them up for your next picnic; they’re easy to transport and serve!
- Celebration Dessert: Perfect for gatherings during spring and summer celebrations.
FAQ
Conclusion
These Lemon Cheesecake Bars are a delightful treat that perfectly balances sweetness and tartness. With their creamy filling and crunchy crust, they are sure to be a hit at any gathering. I encourage you to try making these bars for your next event or simply to enjoy at home. They are a refreshing dessert that brings joy to every bite, and once you taste them, you’ll understand why I love them so much!
Lemon Cheesecake Bars
Ingredients
Equipment
Method
- Preheat your oven to 325°F. This temperature is perfect for creating a lovely crust while ensuring the filling bakes to creamy perfection. Lightly spray the bottom of an 8" x 8" baking pan with nonstick spray.
- In a medium bowl, stir together 1 cup of graham cracker crumbs, 2 tablespoons of sugar, and ¼ teaspoon of kosher salt. This mixture is the foundation of your crust. Once combined, add in ¼ cup of melted unsalted butter. Stir until everything is evenly coated and forms a crumbly mixture.
- Press this mixture firmly and evenly into the bottom of the prepared baking pan. This will create a solid layer for your delicious filling. Make sure to pack it tightly so it holds together after baking.
- Bake for about 10 to 12 minutes, or until fragrant and golden. You want to see a slight golden color on the crust to ensure it’s fully cooked. Once done, set the crust on a wire rack to cool completely.
- While the crust cools, take an electric mixer and cream 16 ounces of full-fat cream cheese and ½ cup of granulated sugar together on medium-high speed until smooth and creamy, which should take about 1 to 2 minutes. Make sure there are no lumps for a velvety texture.
- Add in 2 large eggs, ¼ cup of sour cream, ¼ cup of freshly squeezed lemon juice, and the zest of 2 lemons. Beat on medium speed until just combined. Be careful not to overmix, as this can incorporate too much air into the filling, causing cracks.
- Spread the mixture evenly over the cooled crust. Gently tap the pan on the counter a couple of times to help settle the filling. This is a crucial step for a smooth surface.
- Scatter 1 cup of fresh raspberries on top of the filling, pressing them gently into the cheesecake to ensure they are partially submerged.
- Bake the entire assembly for about 40 minutes. Look for the center to be just barely wobbling; the edges should be slightly golden. This indicates that the bars are done baking without overcooking. Remove from the oven and cool completely on a wire rack.
- Once cooled, place the pan in the refrigerator for at least 3 hours, or even better, overnight. This chilling time helps the bars set perfectly and enhances the flavor.
- To serve, slice the cheesecake into individual bars. If you lined the pan with foil, carefully lift the cheesecake out using the foil, and place it on a cutting board. For clean cuts, dip a thin non-serrated knife in warm water, wipe it dry, and slice. Repeat this process for each cut for perfectly neat edges!
Notes
- Tip 1: For very clean cuts, fold a 16” long piece of foil into an 8” x 16” strip and place in an 8” square baking pan.
- Tip 2: Spray the bottom of foil lightly with nonstick spray.
- Tip 3: To slice, dip a thin non-serrated knife in warm water, then slice.
- Tip 4: Cleaning the knife in between slicing is key for neat edges.