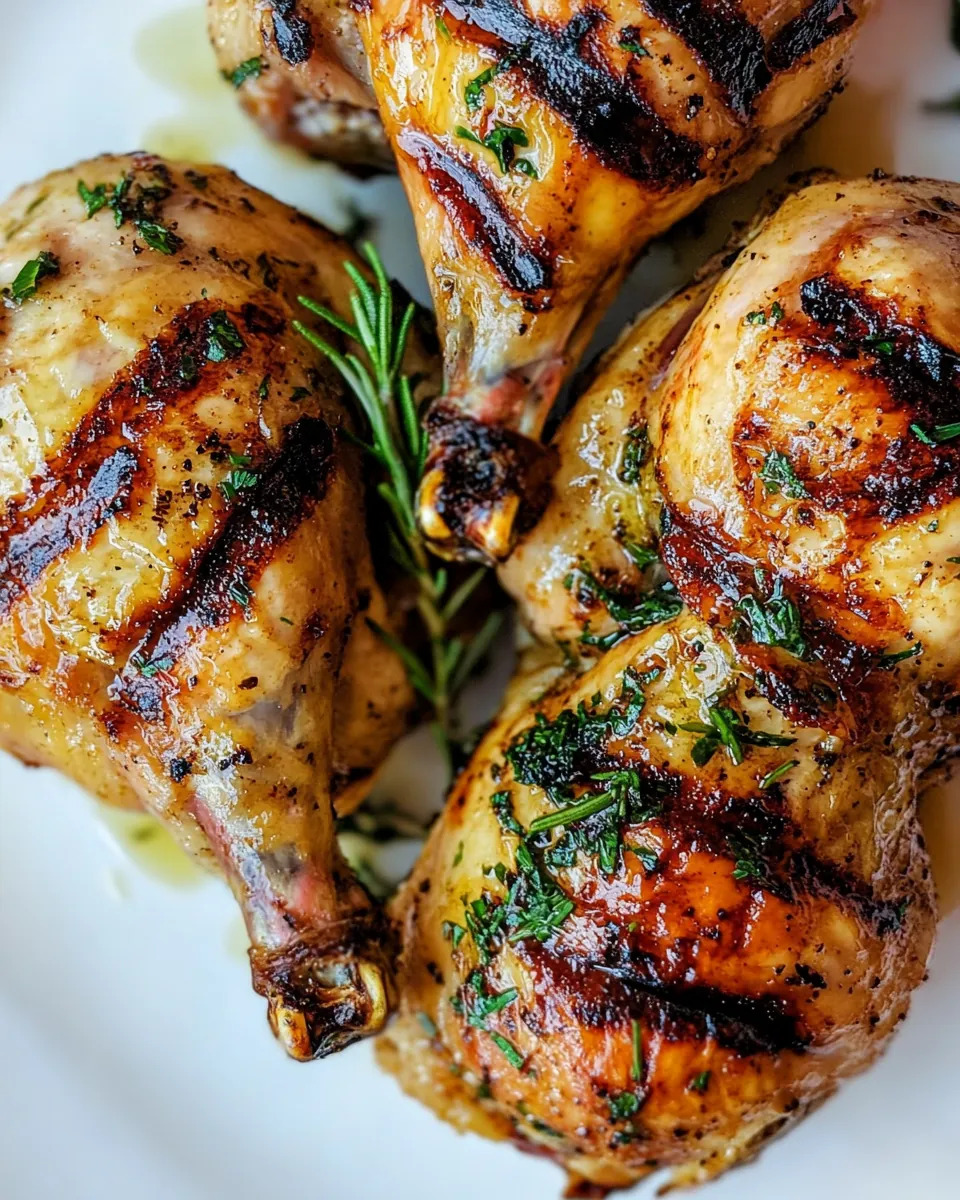
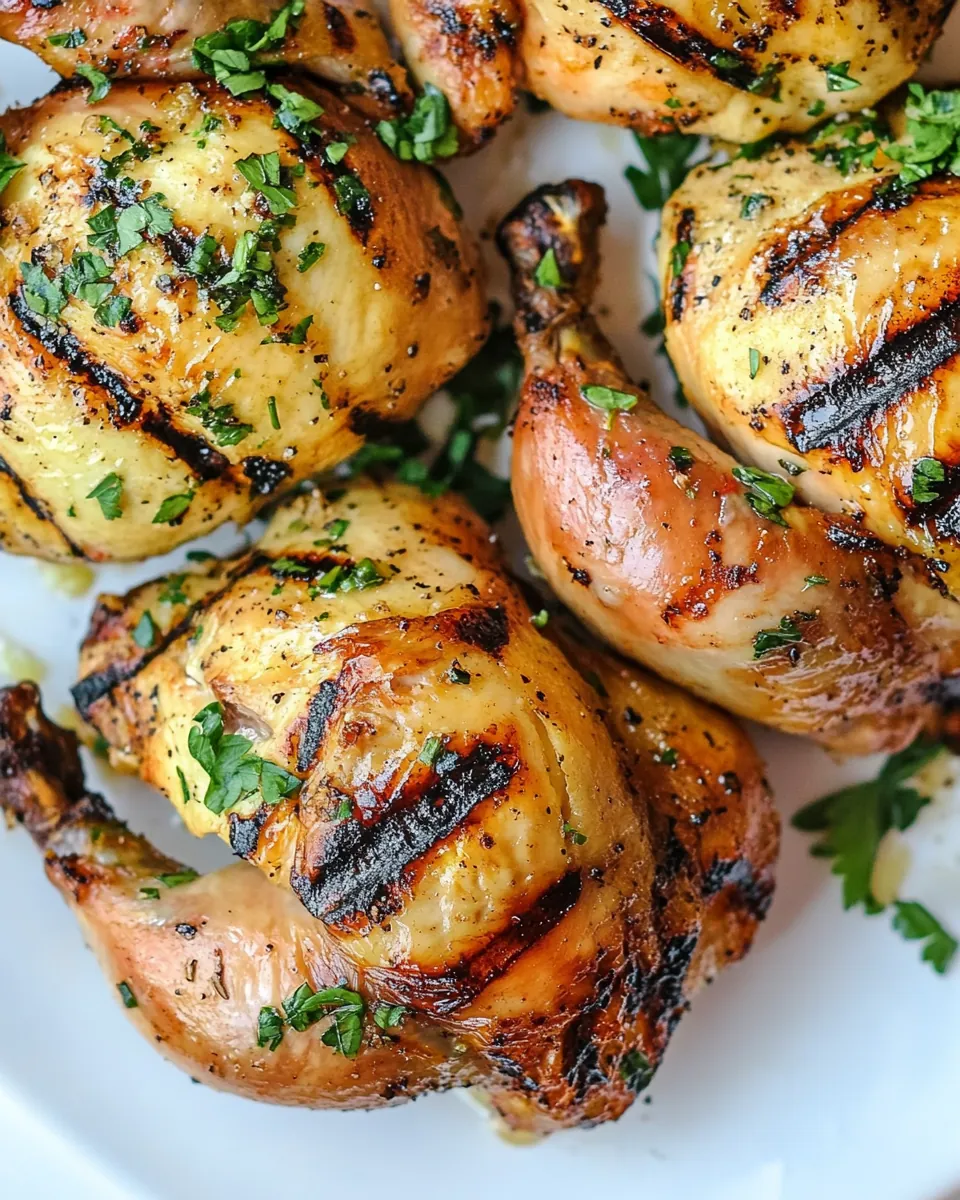
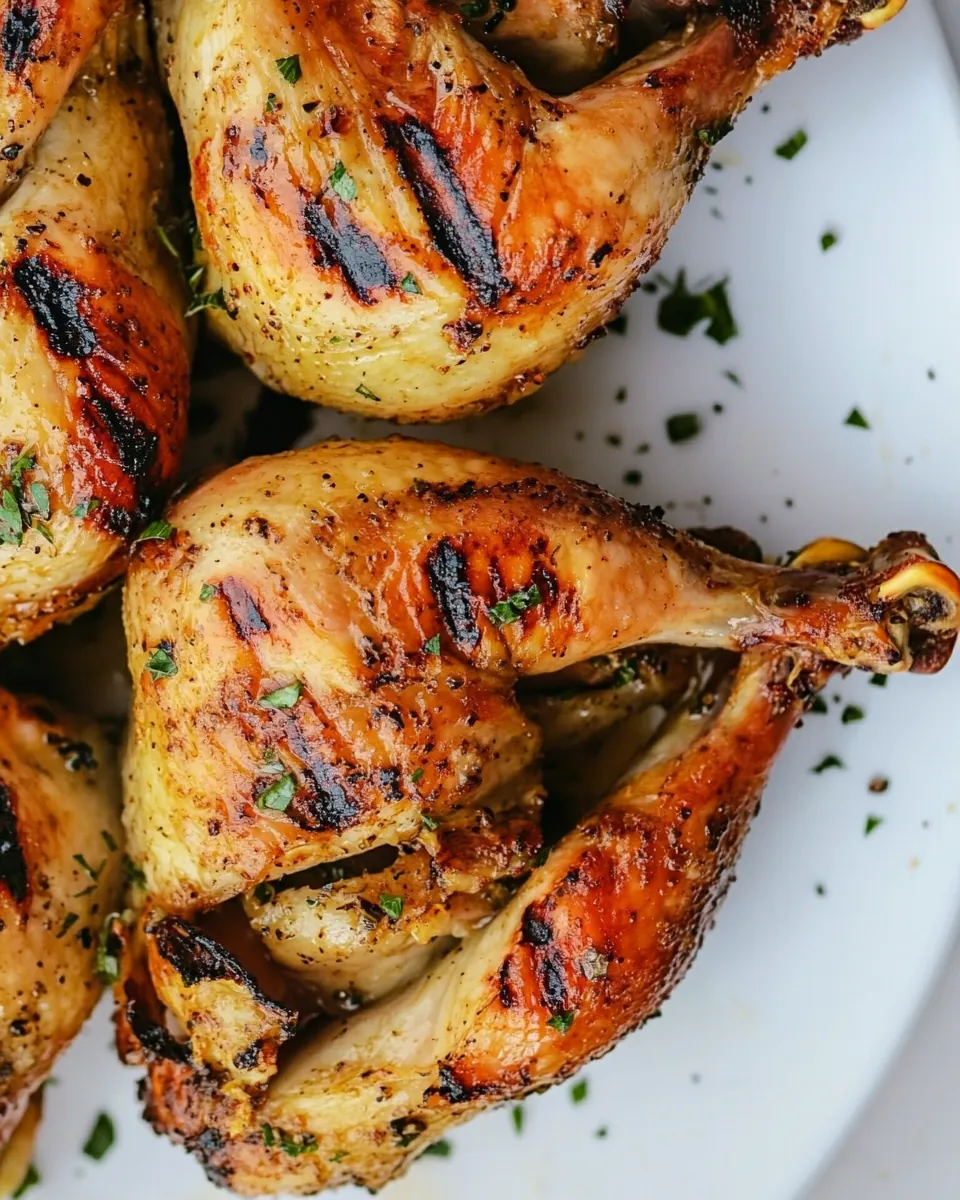
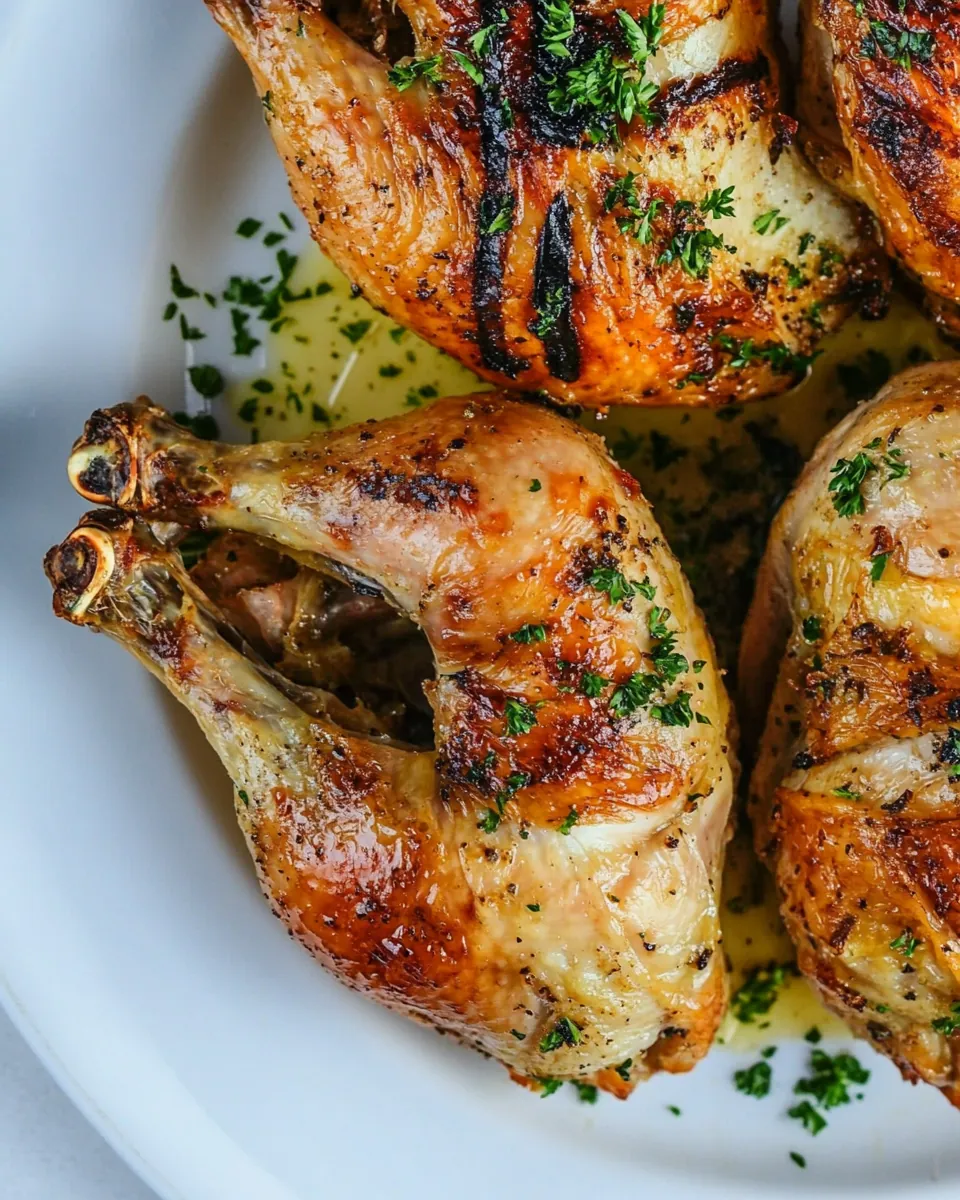
Grilled Cornish Hens
Nothing screams summer quite like a backyard barbecue, and when it comes to firing up the grill, Grilled Cornish Hens are my go-to dish. Picture this: a warm evening, the sound of sizzling meat, and the tantalizing aroma wafting through the air. I remember the first time I made these hens; I was hosting a small gathering, and I wanted something that would impress my friends without being overly complicated. As soon as I set those golden-brown Cornish hens on the table, they disappeared in a flash! The combination of juiciness and crispy skin made them a hit, and now they’re a staple in my summer repertoire.
Recipe Snapshot
30 mins
10 mins
20 mins
Medium
380 kcal
30 g
Keto, Paleo, Whole30
28 g
Large Cutting Board, Kitchen shears, Large mixing bowl, Grill, Barbecue Tongs, Instant-read thermometer
What’s Great About This Grilled Cornish Hens
Perfectly Balanced Flavors
One of the reasons I love making Grilled Cornish Hens is the perfect balance of flavors. The marinade, infused with fresh lemon juice, aromatic garlic, and a hint of ginger, creates a deliciously complex taste profile that’s hard to resist. Each bite is a symphony of savory and zesty flavors!
Easy to Prepare
Despite their gourmet appeal, these hens are surprisingly easy to prepare. They come together quickly, and the marination process can be done ahead of time, allowing you to enjoy more time with your guests and less time in the kitchen. I often marinate them overnight, which deepens the flavors even further!
Impressive Presentation
When hosted at a gathering, these grilled beauties make for an impressive centerpiece. The golden skin, beautifully charred from the grill, adds a rustic charm that complements any summer table setting. You can serve them whole or carve them up for an easy serving option!
Healthier Alternative
Cornish hens are generally lower in fat than their larger chicken counterparts, making them a healthier alternative without sacrificing flavor. Grilling allows for the excess fat to drip away, resulting in a deliciously juicy meal that’s also light and satisfying.
Versatile Pairings
What’s great about Grilled Cornish Hens is their versatility. They can be served alongside a variety of sides, from fresh salads to grilled vegetables, making them suitable for any occasion. This adaptability means you can customize the meal to fit any theme, whether it’s a casual barbecue or an elegant dinner party.
Family Bonding Experience
Cooking these hens can also be a fun family bonding experience. I often invite my kids to help with the marination and preparation process. It’s a great way to get them involved in the kitchen and teach them about cooking while creating lasting memories.
Ingredient List for Grilled Cornish Hens
When it comes to preparing Grilled Cornish Hens, the ingredients play a pivotal role in delivering a flavor-packed dish. The key components work together beautifully, each adding its unique touch. From the tender meat of the hens to the fresh zest of lemon and aromatic garlic, these ingredients create a harmonious blend that elevates your grilling experience.
- 4 x 1.5 lb Cornish hens – These smaller birds are tender and flavorful, making them perfect for grilling.
- 3 tablespoons olive oil – This healthy fat helps keep the meat moist while imparting a rich flavor.
- 2 tablespoons fresh lemon juice – The acidity brightens the overall flavor and balances the richness of the hens.
- 4 cloves garlic, minced – Garlic adds depth and aroma, enhancing the taste of the dish.
- 1 tablespoon grated ginger – Ginger brings a warm spiciness and freshness that pairs well with the other ingredients.
- 1 tablespoon chopped fresh parsley – This herb adds a pop of color and freshness to the dish.
- 1 teaspoon salt – Essential for seasoning and enhancing all the flavors.
- ½ teaspoon ground black pepper – This spice adds a little heat and rounds out the flavor profile.
Preparation Steps for Grilled Cornish Hens
Grilling Grilled Cornish Hens is as much about technique as it is about the ingredients. Let’s dive into the preparation steps that will lead to perfectly cooked, mouthwatering hens. Following these steps closely ensures the best results, so grab your tongs and let’s get grilling!
Start by preparing the hens. Pat them dry with a paper towel, ensuring that any moisture is removed. This helps achieve a crispy skin during grilling. Next, place the Cornish hens skin side down on a large cutting board.
Using kitchen shears, cut along one side of the backbone from the tail towards the neck. This technique is commonly known as butterflying and will help the hens cook evenly. Repeat this on the other side to remove the backbone completely.
Once the backbone is removed, turn the hens over so the breast side is facing up. Bend the legs outward so they spread apart. Using both hands, press down firmly on the breasts until you hear the breastbone crack. This step ensures even cooking and that the meat stays tender.
In a large mixing bowl, combine the olive oil, lemon juice, garlic, ginger, parsley, salt, and black pepper. Mix everything together until well combined.
Add the prepared hens to the bowl or a large Ziploc bag. Use your hands to massage the marinade into the meat, ensuring every inch of the hens is coated. This step is crucial for flavor, so take your time here!
Cover the bowl or seal the bag and marinate the hens in the fridge. If possible, allow them to marinate for at least one hour, but for maximum flavor, marinate overnight.
When you’re ready to grill, preheat half of your grill to 350°F/180°C. Clean and oil the grilling grates to prevent sticking.
Place the hens breast side up over the heat or coals. Brush them with any remaining marinade. Cover the grill and cook for five minutes.
After five minutes, flip the hens over and continue cooking for an additional 15 to 25 minutes, or until the internal temperature of the thigh reaches 180°F/83°C. It’s important to keep the lid closed as much as possible to maintain the grill temperature.
Once cooked, remove the hens from the grill and allow them to rest for a few minutes before serving. This helps redistribute the juices for a moist and flavorful meal!
Things Worth Knowing
- Use a Kitchen Thermometer: To ensure the hens are cooked through, it’s vital to use a kitchen thermometer. This tool takes the guesswork out of cooking and guarantees perfectly juicy meat.
- Marinate for Longer: If time allows, marinating the hens for longer will enhance the flavors significantly. Aim for at least one hour, but overnight is even better.
- Keep the Grilling Grates Clean: Clean and oil your grill grates beforehand. This helps prevent sticking and ensures a beautiful char on your Cornish hens.
- Grill in Batches: If cooking for a larger group, consider grilling in batches. This helps to control cooking times and ensures even cooking.
Ways to Adapt This Recipe
When it comes to Grilled Cornish Hens, there’s plenty of room for creativity! Here are some ideas for making this dish your own:
- Try Different Marinades: Experiment with various marinades, such as teriyaki or a spicy barbecue sauce, to change up the flavor profile.
- Grill with Vegetables: Add vegetables like bell peppers and zucchini to the grill. They pair perfectly with the hens and make for a complete meal.
- Cook in the Oven: If grilling isn’t an option, you can roast the hens in the oven at 375°F for about 45 minutes, ensuring they reach an internal temperature of 180°F.
- Serve with Dipping Sauces: Provide a selection of dipping sauces, like chimichurri or yogurt sauce, for guests to enjoy with the grilled hens.
- Play with Spices: Enhance the flavor with different spices, like smoked paprika or cayenne pepper, to add a kick to your marinade.
How to Enjoy Grilled Cornish Hens
When it comes to enjoying Grilled Cornish Hens, the possibilities are endless. Here are some delightful ways to serve them:
- Pair with Fresh Salads: A light, refreshing salad complements the richness of the hens beautifully. Consider a mixed greens salad with citrus vinaigrette.
- Grilled Vegetables: Serve alongside grilled seasonal vegetables like asparagus or corn on the cob for a complete summer feast.
- Serve for Special Occasions: These hens are perfect for special gatherings, like family reunions, birthday celebrations, or even a romantic dinner.
- Store Leftovers Properly: If you have any leftovers, store them in an airtight container in the fridge for up to three days. They can be enjoyed cold or reheated.
- Freezing: If you have leftovers that you won’t finish, consider freezing them. Place in a freezer-safe bag and store for up to three months.
FAQ
Conclusion
In summary, Grilled Cornish Hens are a fantastic choice for anyone looking to elevate their grilling game. With their succulent meat and flavorful marinade, they are sure to leave a lasting impression. I encourage you to give this recipe a try; you’ll not only impress your guests but also create wonderful memories around the grill.
Grilled Cornish Hens
Ingredients
Equipment
Method
- Start by preparing the hens. Pat them dry with a paper towel, ensuring that any moisture is removed. This helps achieve a crispy skin during grilling. Next, place the Cornish hens skin side down on a large cutting board.
- Using kitchen shears, cut along one side of the backbone from the tail towards the neck. This technique is commonly known as butterflying and will help the hens cook evenly. Repeat this on the other side to remove the backbone completely.
- Once the backbone is removed, turn the hens over so the breast side is facing up. Bend the legs outward so they spread apart. Using both hands, press down firmly on the breasts until you hear the breastbone crack. This step ensures even cooking and that the meat stays tender.
- In a large mixing bowl, combine the olive oil, lemon juice, garlic, ginger, parsley, salt, and black pepper. Mix everything together until well combined.
- Add the prepared hens to the bowl or a large Ziploc bag. Use your hands to massage the marinade into the meat, ensuring every inch of the hens is coated. This step is crucial for flavor, so take your time here!
- Cover the bowl or seal the bag and marinate the hens in the fridge. If possible, allow them to marinate for at least one hour, but for maximum flavor, marinate overnight.
- When you're ready to grill, preheat half of your grill to 350°F/180°C. Clean and oil the grilling grates to prevent sticking.
- Place the hens breast side up over the heat or coals. Brush them with any remaining marinade. Cover the grill and cook for five minutes.
- After five minutes, flip the hens over and continue cooking for an additional 15 to 25 minutes, or until the internal temperature of the thigh reaches 180°F/83°C. It’s important to keep the lid closed as much as possible to maintain the grill temperature.
- Once cooked, remove the hens from the grill and allow them to rest for a few minutes before serving. This helps redistribute the juices for a moist and flavorful meal!
Notes
- Marinate: If the time allows, marinate the chicken in the fridge for 1 hour and up to overnight.
- Don’t discard the bones: Once you’ve butterflied your cornish hens, keep the bones in a freezer-friendly bag and store them until you’re ready to make some broth.
- Doneness: Cornish hens are cooked once the internal temperature of the thigh reaches 180°F/83°C. I highly recommend using a kitchen thermometer to test the temperature. I like to use this instant-read thermometer for checking the meat and it’s perfect for both indoor and outdoor use.