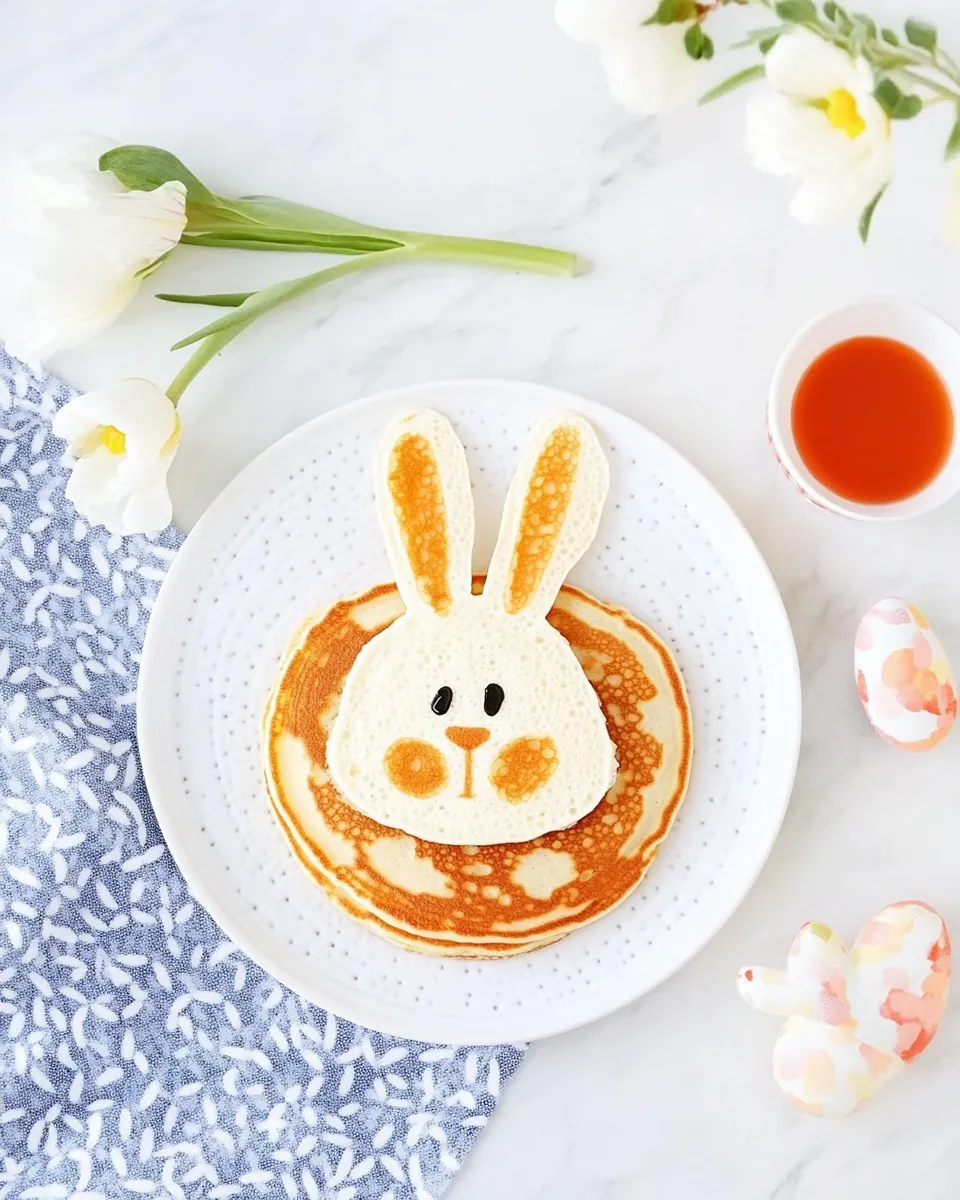
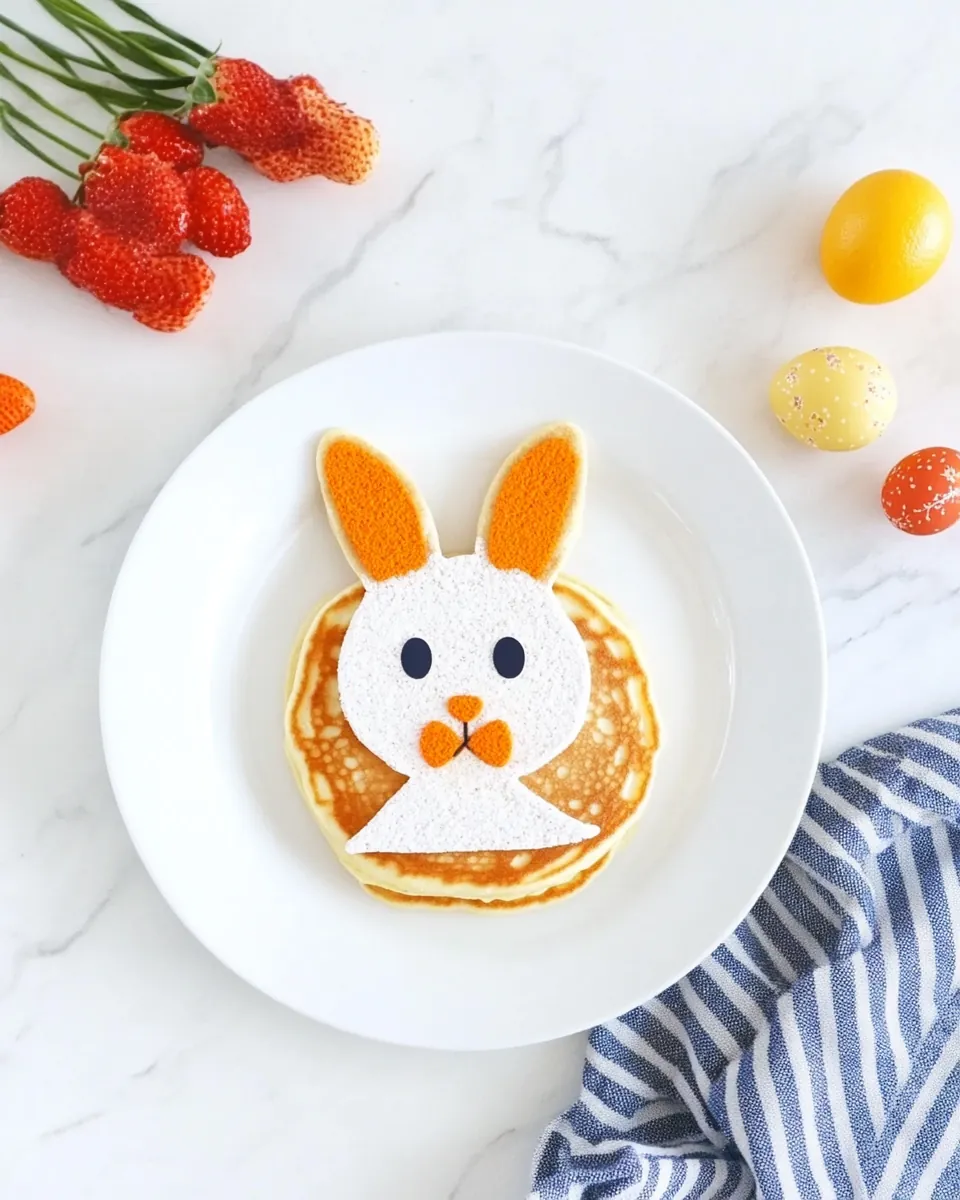
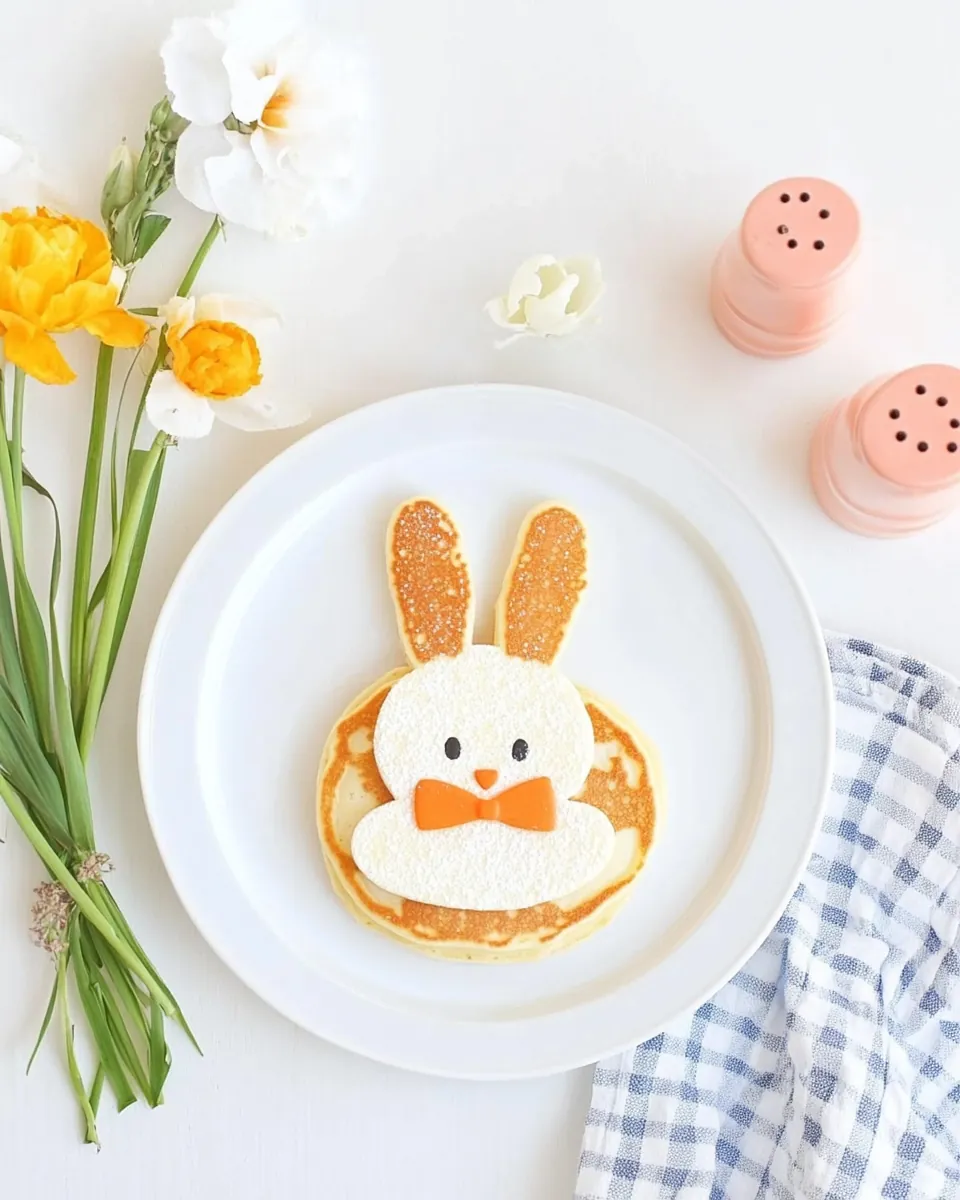
Easter Bunny Pancakes
There’s nothing quite like the joy of making Easter Bunny Pancakes with my family during the spring season. Every year, as Easter approaches, the excitement builds, and the kitchen becomes our canvas for creativity. I love waking up on Easter morning and seeing the smiles on my kids’ faces as they help me whip up these delightful pancakes. It’s not just about the food; it’s about creating memories together. The fun begins with mixing the ingredients, and then, as if by magic, we transform simple pancake batter into adorable bunny shapes. Each flip of the pancake reveals a little work of art, and we can’t help but laugh as we try to make them look just right. Topped with fresh fruits and a dollop of whipped cream, these pancakes become a festive centerpiece that brings our family together.
Recipe Snapshot
20 mins
5 mins
15 mins
Medium
150 kcal
5 g
Standard
4 g
Mixing Bowl, Measuring Cups, Green Pan Nonstick Pan
The Beauty of This Easter Bunny Pancakes
Perfect for Any Occasion
One of the reasons I adore Easter Bunny Pancakes is their versatility. They aren’t just for Easter! You can whip them up for birthdays, spring brunches, or any day when you want to add a splash of fun to breakfast. The whimsical design captures the spirit of celebration, making every meal feel special.
Engaging for Kids
These pancakes are a fantastic activity for children. My kids love getting involved in the kitchen, and making Easter Bunny Pancakes lets them express their creativity. They enjoy pouring the batter and deciding how to decorate each bunny, turning the cooking process into an unforgettable art project.
Deliciously Nutritious
Using ingredients like whole-milk Greek yogurt and fresh fruit, these pancakes are a healthier choice than your average pancake. The yogurt adds protein and creaminess, while the bananas on top not only look cute but also provide natural sweetness. It feels good to know that we’re indulging in something nutritious.
A Memorable Family Tradition
Every year, we make it a tradition to prepare Easter Bunny Pancakes. It’s a way to connect with our heritage and build lasting memories. The kids reminisce about previous years as they help me in the kitchen, and I can see the excitement in their eyes as they anticipate the fun ahead.
Simple and Quick
These pancakes are surprisingly easy to make! With a short list of ingredients and straightforward steps, you can have a delightful breakfast ready in no time. It’s the kind of recipe that makes you a breakfast hero without spending hours in the kitchen.
Customizable
Another aspect that makes Easter Bunny Pancakes stand out is how customizable they are. You can easily switch up the toppings based on what you have on hand. Whether you prefer strawberries, blueberries, or even a drizzle of honey, the options are endless!
Everything You Need for Easter Bunny Pancakes
Every ingredient in this recipe plays a vital role in creating the fluffy and fun Easter Bunny Pancakes. The combination of whole-milk Greek yogurt and all-purpose flour gives these pancakes their delightful texture, while the baking powder ensures they rise beautifully. With a bit of sugar to balance the flavors, each bite is a sweet celebration of spring. Topped with fresh fruits, these pancakes are not only a feast for the eyes but also a treat for the taste buds.
- ¾ cup whole-milk Greek yogurt: This creamy ingredient adds moisture and richness to the batter, making the pancakes fluffy and delicious.
- ¼ cup milk: Enhances the batter’s consistency and helps achieve the perfect pancake texture.
- 2 eggs: Provides structure and binds all the ingredients together, resulting in a tender pancake.
- 2 tablespoons unsalted butter: Melted and cooled, this adds flavor and moisture to the batter.
- 1 cup all-purpose flour: The backbone of the pancakes, giving them their body and structure.
- 1 tablespoon sugar: Adds a hint of sweetness to balance out the flavors in the pancakes.
- 2 teaspoons baking powder: The leavening agent that helps the pancakes rise and become fluffy.
- ¼ teaspoon salt: Enhances the flavors of the other ingredients.
- Sliced bananas and whipped cream (optional): Perfect for decorating the bunnies and adding a fun touch.
- Maple syrup or other dip (optional): A delicious finishing touch to complement the pancakes.
The Process for Making Easter Bunny Pancakes
Making Easter Bunny Pancakes is a delightful journey that begins with simple ingredients and ends with a plate of whimsical, delicious pancakes. Gather your family around and get ready to create some pancake magic!
- Add the ¾ cup whole-milk Greek yogurt, ¼ cup milk, 2 eggs, and 2 tablespoons unsalted butter to a medium bowl. Whisk these ingredients together until you have a smooth mixture. The yogurt not only provides creaminess but also adds a bit of tang that enhances the overall flavor of the pancakes.
- Next, it’s time to incorporate the dry ingredients. Add the 1 cup all-purpose flour, 1 tablespoon sugar, 2 teaspoons baking powder, and ¼ teaspoon salt to the bowl. Gently whisk these together until combined, making sure not to overmix. A few lumps are perfectly fine!
- Heat a large nonstick skillet over medium heat. Once it’s hot, melt a little unsalted butter and swirl it around to coat the pan. This will help prevent the pancakes from sticking and add flavor.
- For the fun part, start making the bunny shapes! To create the head, pour 1 tablespoon of batter into the pan. For the body, add 2 tablespoons of batter next to the head. To make the feet, use about ½ tablespoon of batter for each foot and ½ teaspoon for the long ears. Don’t worry about getting it perfect; the fun is in the creativity!
- Cook the pancakes for about 3 to 4 minutes, or until you see bubbles forming on the surface and the edges look set. This is a sign that they’re ready to flip. Use a spatula to gently turn them over and cook for an additional 3 minutes until golden brown.
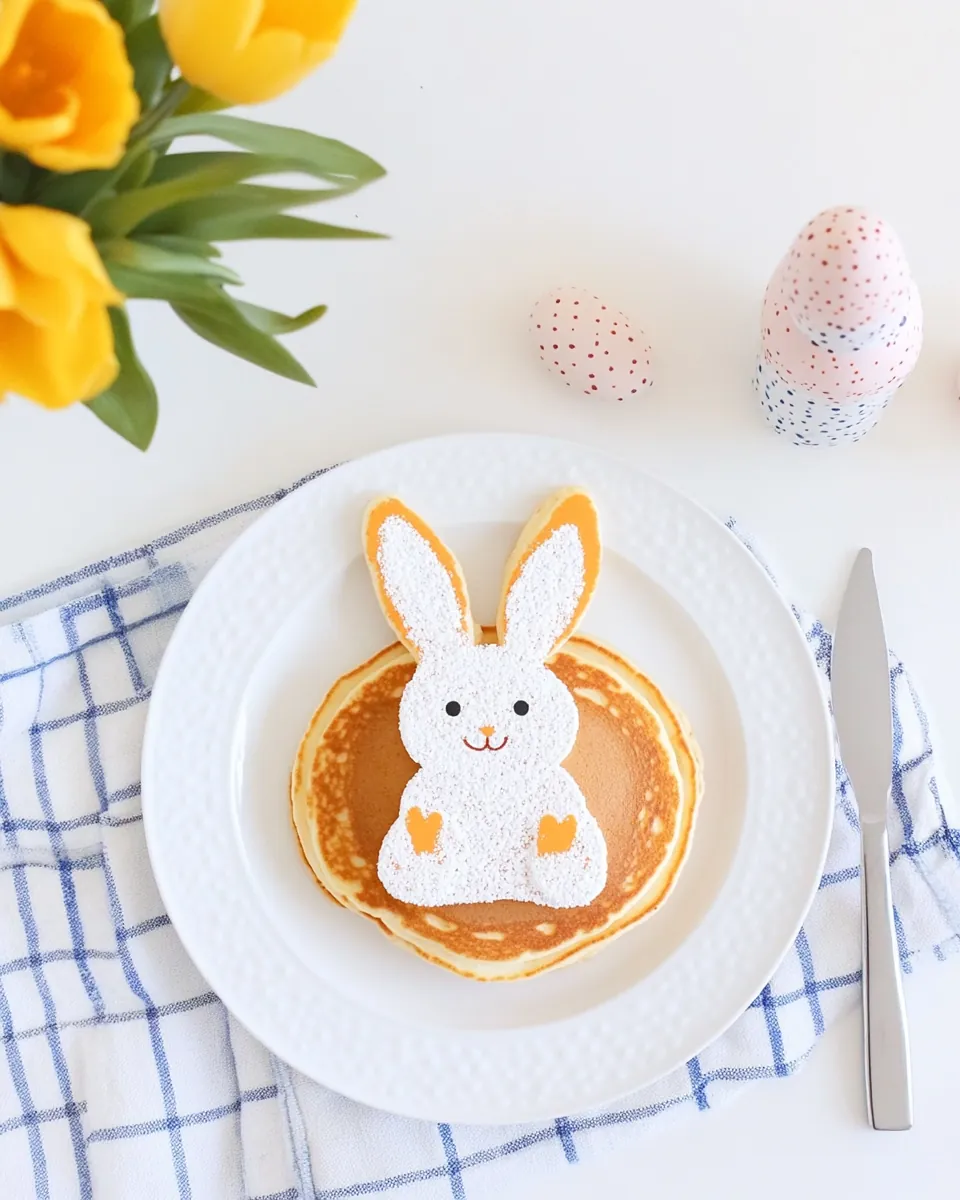
- After cooking, assemble the bunnies on a plate. The body should slightly overlap the head, with the ears pointing up and the feet at the bottom. This gives your bunnies their adorable shape.
- For decoration, place two banana slices on the feet and add a squirt of whipped cream as the tail. This adds a whimsical touch that kids will love!
- Repeat the process with the remaining batter until all the pancakes are made. Enjoy the delicious aroma filling your kitchen!
- Serve the pancakes warm with a variety of toppings, such as applesauce, other fruit purées, maple syrup, or nut or seed butter. Let everyone customize their pancakes to their liking!
Things Worth Knowing
- Consistency is Key: Ensure your batter is not too thick or too runny. This will help create the perfect pancake texture.
- Watch the Heat: Cooking at medium heat is crucial. Too hot, and your pancakes will cook too quickly on the outside while remaining raw inside.
- Don’t Overmix: When mixing your batter, it’s important to leave some lumps. Overmixing will make your pancakes tough.
- Experiment with Shapes: Feel free to get creative with your pancake shapes! Use a squeeze bottle for more precise designs.
- Keep Them Warm: If you’re making a large batch, keep finished pancakes warm in the oven on low heat until ready to serve.
Make It Your Own
One of the best parts about Easter Bunny Pancakes is how easily you can adapt them to suit your taste. Here are some ideas to make this recipe uniquely yours!
- Storage: If you have leftovers, store them in an airtight container in the fridge for 3 to 5 days. They can be reheated in the microwave for a quick breakfast.
- Freezing: You can freeze these pancakes by placing them in a single layer between sheets of parchment paper in a freezer bag. This makes for a quick breakfast option later!
- Pairing: Serve your pancakes with fresh fruits, yogurt, or a fruit compote for a refreshing touch.
- Dairy-Free Option: For a dairy-free version, substitute with non-dairy Greek yogurt and milk alternatives.
- Gluten-Free Alternative: Use a gluten-free all-purpose flour mix to make these pancakes gluten-free without sacrificing flavor.
- Add-Ins: Feel free to mix in chocolate chips, nuts, or even diced fruits into the batter for added texture and flavor.
How to Serve Easter Bunny Pancakes
Serving Easter Bunny Pancakes is where the fun truly begins! Here are some ideas to make your presentation as delightful as the pancakes themselves:
- Breakfast Table Display: Arrange the pancakes on a large platter, allowing everyone to help themselves. Add a variety of toppings like syrup, chopped fruits, and whipped cream for a festive touch.
- Brunch Gatherings: These pancakes are perfect for spring brunches with family and friends. Pair them with fresh fruit salads or smoothies for a well-rounded meal.
- Decorative Touch: Use edible flowers or colorful sprinkles to enhance the festive appearance of your pancakes.
- Personalized Plates: Serve pancakes on individual plates with custom toppings chosen by each guest, making it a fun interactive experience.
- Seasonal Fruit Pairing: For a fresh twist, serve these pancakes with seasonal fruits like strawberries, blueberries, or peaches that enhance their appeal.
- Drinks: Pair with refreshing beverages such as iced tea, lemonade, or even yogurt smoothies to complement the flavors of the pancakes.
FAQ
Conclusion
Easter Bunny Pancakes are more than just a fun breakfast; they’re a celebration of creativity and family togetherness. These delightful pancakes transform an ordinary morning into a festive occasion, filled with laughter and sweet flavors. I encourage you to try making them with your loved ones this Easter or any spring day. It’s a wonderful way to create lasting memories in the kitchen while enjoying a delicious treat.
Easter Bunny Pancakes
Ingredients
Equipment
Method
- Add the whole-milk Greek yogurt, milk, eggs, and unsalted butter to a medium bowl. Whisk to combine into a smooth mixture.
- Add the all-purpose flour, sugar, baking powder, and salt. Whisk gently to combine.
- Heat a large nonstick skillet over medium heat. Melt a little unsalted butter and swirl to coat the pan.
- To make the head, add 1 tablespoon batter to the pan. To make the body, add 2 tablespoons batter. Make 2 oval feet using about ½ tablespoon each and 2 long skinny ears using about ½ teaspoon batter each.
- Cook for 3-4 minutes, until bubbles form on the surface and edges are set. Flip and cook for another 3 minutes.
- Assemble the pancakes on a plate, with the body overlapping the head and the ears at the top and the feet at the bottom. Decorate with sliced bananas and whipped cream.
- Repeat to make the rest of the pancakes and serve warm with maple syrup or other toppings.
Notes
- Store leftovers: for 3-5 days in the fridge in an airtight container. Warm for 15-30 seconds in the microwave.
- Freezing: Freeze between layers of parchment paper in a freezer bag.
- Making with regular yogurt: Use ½ cup yogurt and ½ cup milk.
- Using whole wheat flour: You may need 1-2 additional tablespoons of milk.
- Gluten-free: Use a 1:1 style of gluten-free flour.
- Dairy-free: Use nondairy yogurt and milk.