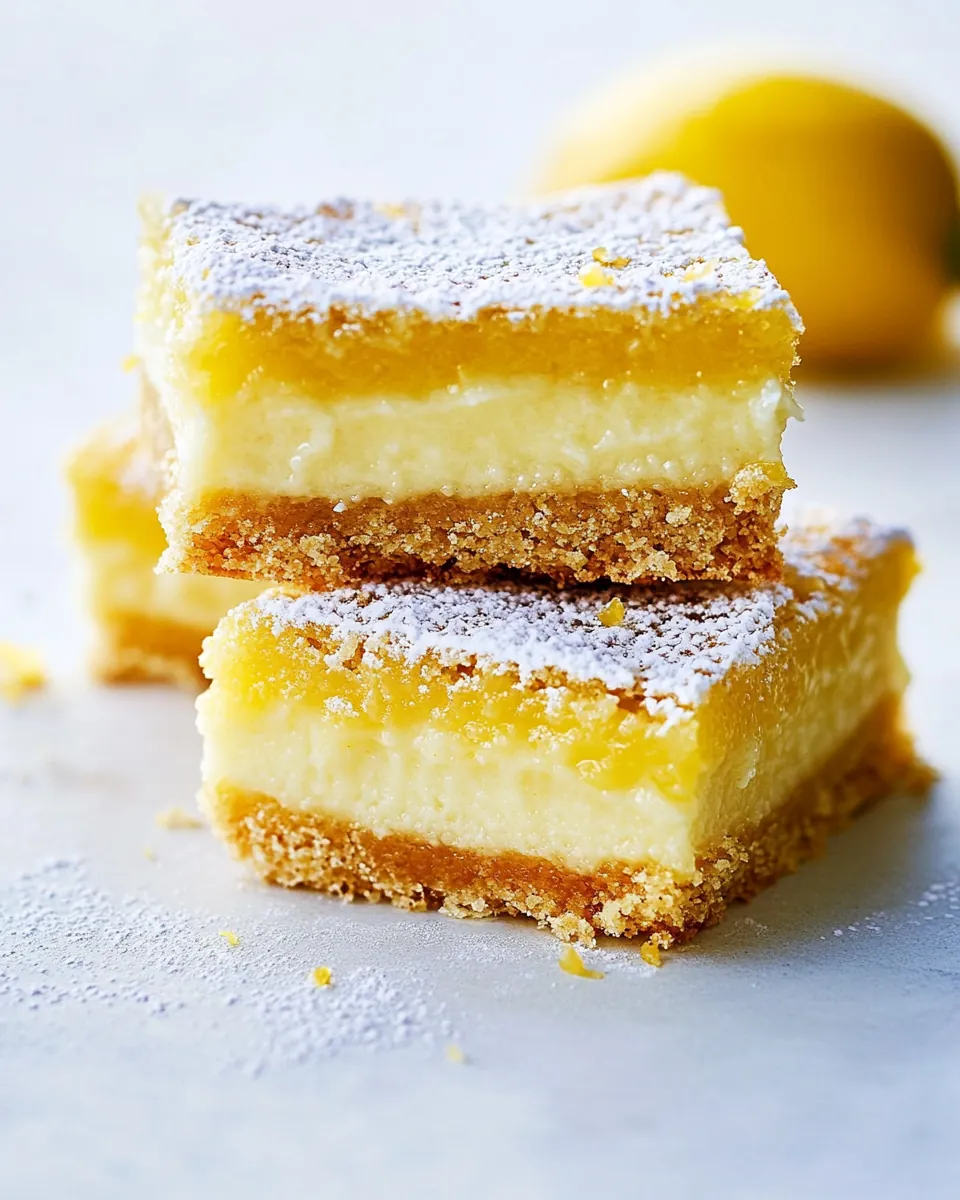
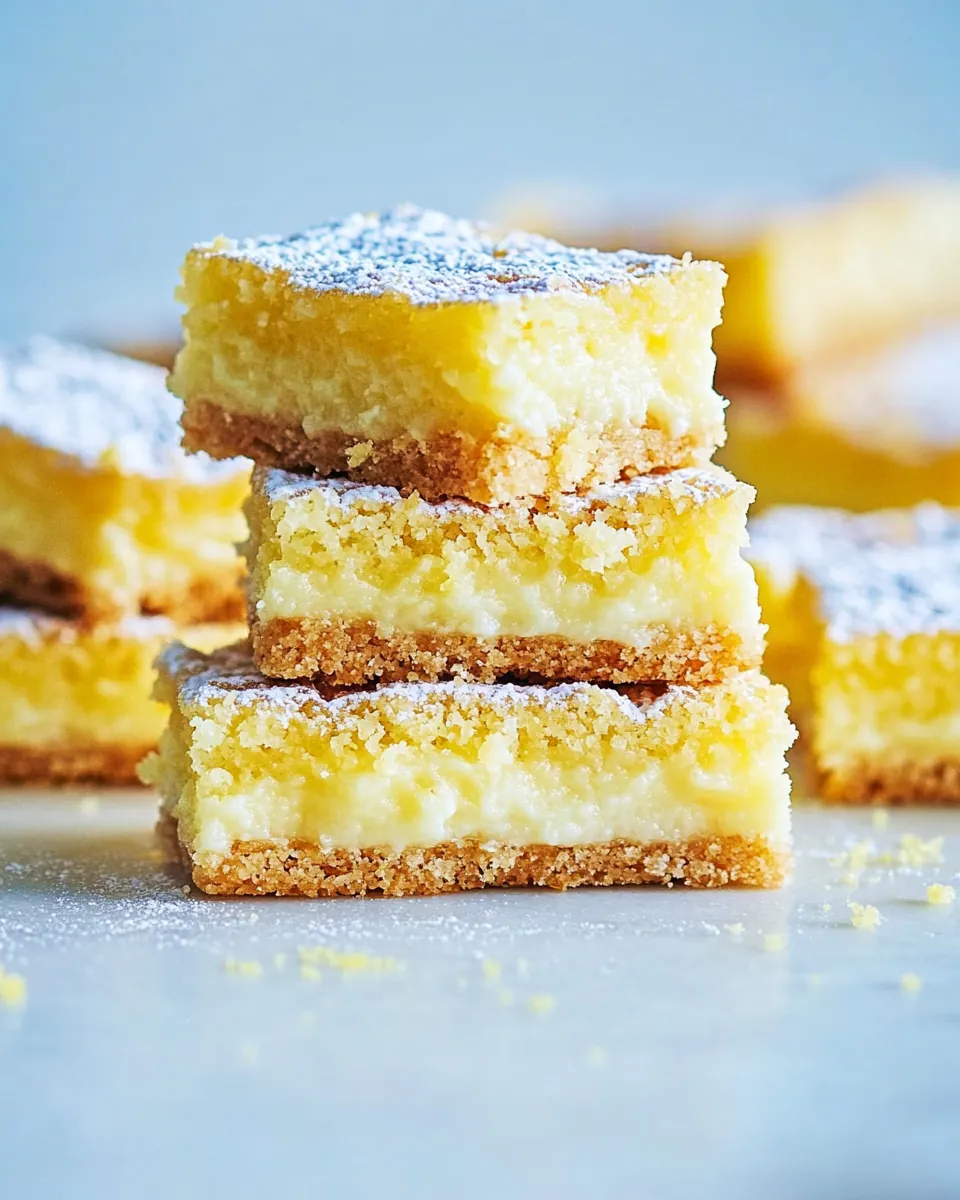
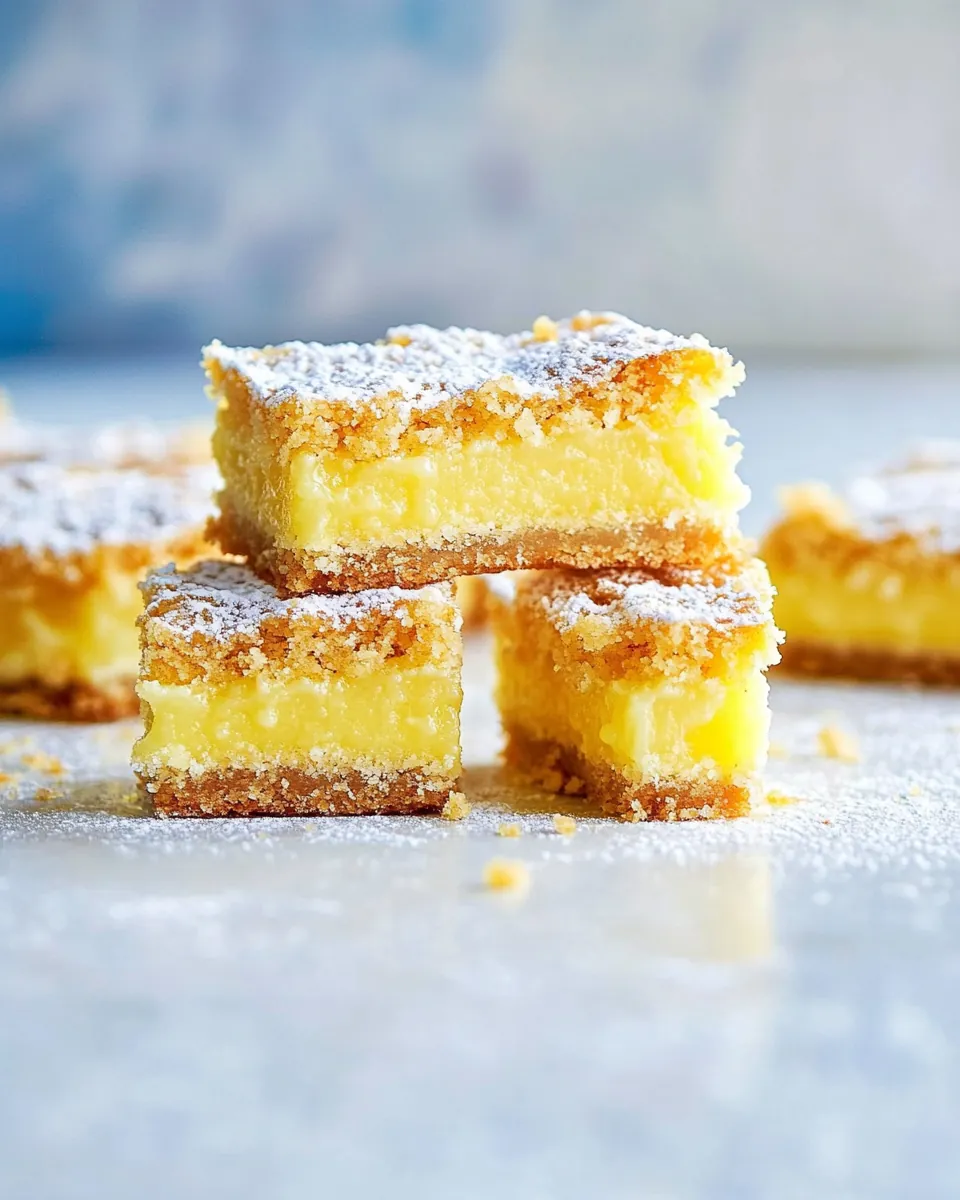
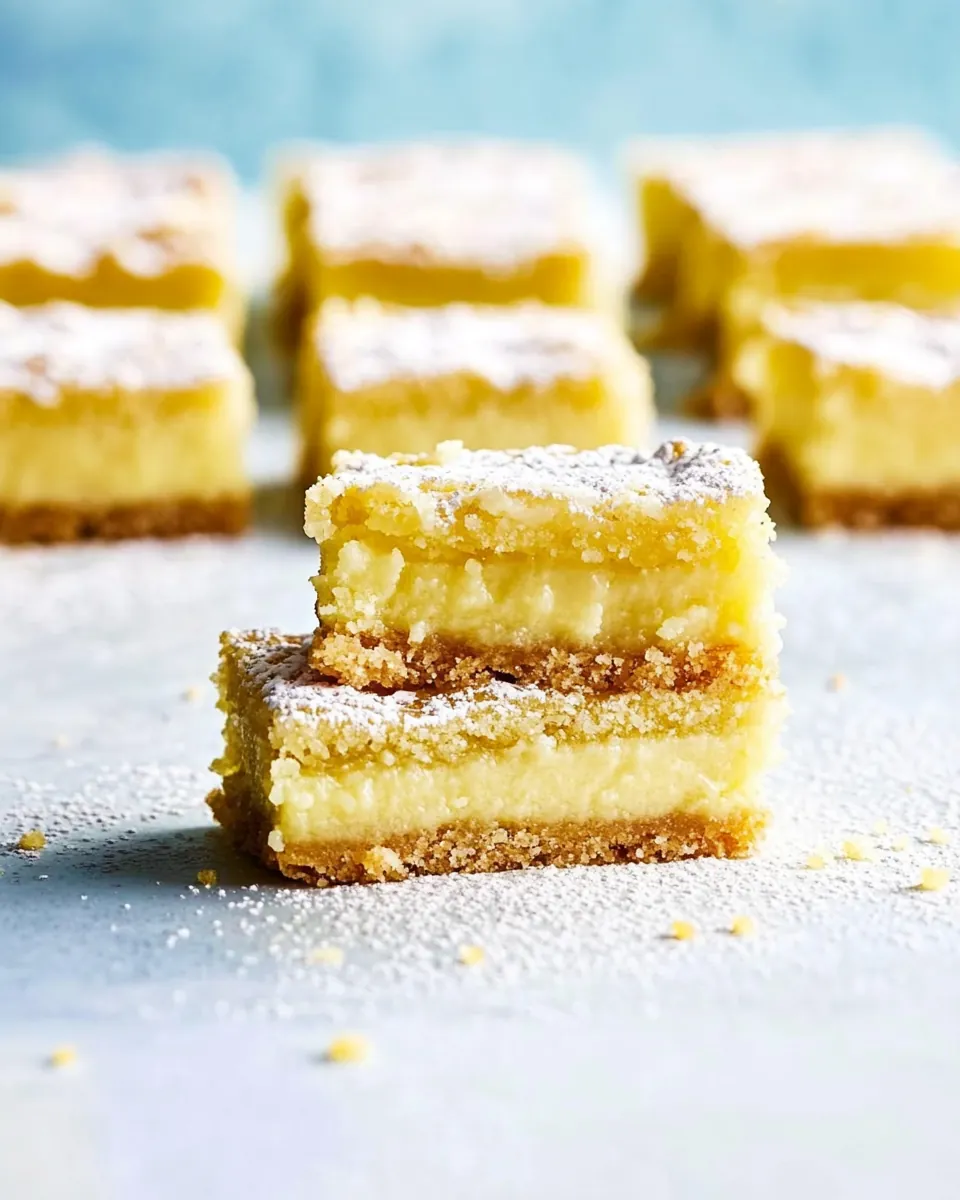
Gluten Free Lemon Bars
There’s something magical about the first bite of Gluten Free Lemon Bars. It takes me back to summer afternoons spent in my grandmother’s garden, where the air was fragrant with the scent of citrus. She would often whip up these tart, sweet treats, and we’d gather around the table, savoring every crumb. Now, each time I make these bars, I’m reminded of those sunny days and the joy of sharing food with loved ones. They’re not just a dessert; they’re a symbol of togetherness and the simple pleasures in life.
Recipe Snapshot
50 mins
10 mins
40 mins
Medium
210 kcal
3 g
Keto, Paleo, Gluten-Free
10 g
Food Processor, Oven, Baking Sheet, Frying Pan, Wooden Spoon, Whisk, Chef’s Knife, Mixing Bowl
The Best Thing About This Gluten Free Lemon Bars
Perfectly Balanced Flavor
The zingy taste of fresh lemons combined with the sweetness of maple syrup or honey creates a delightful balance that makes these bars irresistible. Each bite is a burst of sunshine, invigorating your senses and brightening any day.
Gluten Free Goodness
For anyone with gluten sensitivities, finding a dessert that doesn’t compromise on taste can be a challenge. These Gluten Free Lemon Bars are made with almond flour and tapioca flour, proving that gluten-free options can be just as delicious. You won’t miss the wheat—trust me!
Easy to Make
If you’re looking for a quick and straightforward recipe, this one’s for you. With simple ingredients and clear instructions, you can whip up a batch in no time. Whether you’re a seasoned baker or just starting, these bars are perfect for anyone.
Perfect for Any Occasion
These bars are versatile enough to be served at any gathering, from picnics to birthday parties. You can impress your guests with a homemade dessert that looks as good as it tastes. Plus, they’re a great option for brunch or as a light after-dinner treat.
Make Ahead and Store
Another reason to love these Lemon Bars is that they can be made ahead of time. Just prepare them a day in advance, let them chill in the refrigerator, and they’ll be ready to serve when you are!
What You’ll Need for Gluten Free Lemon Bars
To create these delightful Lemon Bars, you’ll need a handful of simple yet effective ingredients. Each component plays a crucial role in achieving the perfect texture and flavor balance. The combination of almond flour and tapioca flour forms a sturdy base, while the fresh lemon juice and zest bring a vibrant taste. Let’s dive into the ingredients that make this recipe shine!
- 2 cups almond flour: A gluten-free alternative that gives a nutty flavor and a crumbly texture.
- 2 tablespoons tapioca flour: Helps bind the crust, giving it a chewy consistency.
- 4 tablespoons butter OR coconut oil, melted: Adds richness and moisture to the crust.
- 1/4 cup maple syrup or raw honey: Sweetens the bars naturally without refined sugars.
- 1 teaspoon vanilla: Enhances the overall flavor profile.
- 1/4 teaspoon sea salt: Balances the sweetness.
- 3 large eggs: Provides structure and richness to the curd.
- 4 large egg yolks: Helps thicken the lemon filling.
- 1/2 cup beet sugar OR maple sugar: Adds sweetness and helps achieve the right texture.
- Zest from 4 lemons: Adds intense lemon flavor.
- 3/4 cup fresh-squeezed lemon juice: The star of the show, bringing brightness and tartness.
- 8 tablespoons unsalted butter, softened: Ensures a smooth and creamy curd.
- Powdered sugar: For dusting the top before serving.
How to Cook Gluten Free Lemon Bars
Making Gluten Free Lemon Bars is a delightful experience that fills your kitchen with an aromatic citrus scent. Follow these steps to create a delicious dessert that everyone will love. Let’s get started!
- Preheat the oven to 350 degrees °F and line an 8×8 baking pan with parchment paper, leaving some overhang for easy removal later. This step is crucial to ensure that your bars come out perfectly without sticking to the pan.
- In a large mixing bowl, combine almond flour, tapioca flour, melted butter (or coconut oil), maple syrup (or honey), vanilla, and sea salt. Mix well until everything is combined and clumping together. This mixture will form the crust.
- Press the crust mixture evenly into the bottom of the prepared baking pan, making sure it’s compact. Bake for 25 to 30 minutes until the edges are lightly golden brown. This indicates that the crust is ready to hold the lemon filling.
- While the crust is baking, prepare the lemon curd. In a medium pot, whisk together whole eggs, egg yolks, beet sugar (or maple sugar), lemon zest, lemon juice, and sea salt. This will create a luscious filling.
- Place the pot over low heat and continuously whisk the mixture. Cook until it thickens and coats the back of a spoon, which should take about 8 to 10 minutes. Be patient and avoid boiling; this allows the flavors to meld beautifully.
- Once thickened, remove the pot from the heat and strain the lemon curd through a fine mesh strainer into a medium mixing bowl to remove any lumps. This step ensures a silky-smooth curd.
- Add the butter to the strained curd and stir until melted and fully incorporated. This adds richness to the filling.
- Pour the lemon curd over the baked crust, spreading it evenly. Bake for an additional 10 to 15 minutes until the filling is set, but still slightly jiggly in the center. This ensures a creamy texture.
- Once done, remove from the oven and let cool completely at room temperature. After cooling, cover the pan and refrigerate for at least 3 hours to set. Chilling helps the flavors develop.
- Before serving, dust the top with powdered sugar, slice into squares, and enjoy! The contrast of the sweet powdered sugar with the tart lemon filling is simply divine.
Things Worth Knowing
- Baking Tip: Ensure your butter is at room temperature for easier mixing and better texture.
- Storage: Store any leftovers in an airtight container in the refrigerator for up to a week. They taste even better the next day once the flavors meld.
- Customization: Feel free to add fresh berries on top for a fruity twist or incorporate herbs like basil for an aromatic flavor.
- Serving Temperature: These bars can be enjoyed chilled or at room temperature, depending on your preference.
Recipe Tips about Gluten Free Lemon Bars
These tips will help you master the art of creating perfect Gluten Free Lemon Bars. Whether you’re a novice or a seasoned baker, these pointers will ensure your dessert is a hit!
- Adjust Sweetness: Always taste your lemon curd before pouring it into the crust. Depending on the tartness of your lemons, you may want to adjust the sweetness to your liking.
- Use Fresh Ingredients: For the best flavor, always opt for fresh lemons instead of bottled juice. The zest and juice from fresh lemons significantly enhance the taste of your bars.
- Chill Time is Crucial: Be sure to let your bars chill for at least 3 hours after baking. This helps them set properly and makes slicing easier.
- Perfect Presentation: For a beautiful finish, dust powdered sugar over the bars right before serving to maintain its fluffy texture.
- Experiment with Flavors: Consider adding a hint of ginger or coconut for a unique twist on the classic lemon flavor.
Serving Ideas for Gluten Free Lemon Bars
When it comes to serving Gluten Free Lemon Bars, the options are endless. Here are some delightful ways to enjoy these zesty treats:
- Picnic Perfect: Pack these bars for a sunny picnic. They’re easy to transport and will surely impress your friends.
- Sweet Snack: Enjoy them as an afternoon snack with your favorite cup of tea or coffee.
- Brunch Delight: Serve them at brunch gatherings, accompanied by fresh fruit and whipped cream.
- Holiday Treat: These Lemon Bars make a refreshing dessert for festive occasions, bringing a taste of summer to winter celebrations.
- Storage Solution: If you have leftovers, store them in an airtight container in the refrigerator, and they will stay fresh for up to a week.
- Flavor Pairing: They pair beautifully with a side of vanilla ice cream or a dollop of whipped cream for a luscious dessert experience.
FAQ
Conclusion
The Gluten Free Lemon Bars are a perfect blend of sweet and tart, capturing the essence of summer in every bite. They’re not just a dessert; they’re a celebration of flavors and memories. I encourage you to try making these bars yourself. They’re easy to whip up and perfect for sharing with loved ones, so don’t wait—bring a taste of sunshine to your table today!
Gluten Free Lemon Bars
Ingredients
Equipment
Method
- Preheat the oven to 350 degrees °F and line an 8x8 baking pan with parchment paper and set aside.
- In a large mixing bowl, add all ingredients for the crust: almond flour, tapioca flour, butter (or coconut oil), maple syrup (or honey), vanilla, and sea salt. Mix well until combined. Press evenly into the bottom of the prepared baking pan.
- Bake for 25 to 30 minutes, or until crust is lightly brown. Meanwhile, prepare the lemon curd.
- In a medium pot, place whole eggs, egg yolks, beet sugar (or maple sugar), lemon zest, lemon juice, and sea salt and whisk together.
- Over low heat, whisk the lemon curd until it thickens and coats the back of a spoon, about 8 to 10 minutes. Be careful not to let it boil.
- Remove from heat and strain through a fine mesh strainer into a medium mixing bowl. Add in the butter and stir until melted.
- Pour the lemon curd over the crust. Bake for an additional 10 to 15 minutes until set.
- Let cool completely, cover, and refrigerate for at least 3 hours to set.
- Dust with powdered sugar, slice, and serve!
Notes
- Storage: Store leftovers in an airtight container in the refrigerator for up to a week.
- Freezing: These bars can be frozen for up to three months. Just make sure to wrap them tightly.
- Variations: Try adding a touch of ginger for a spicy kick!