Cherry Cream Puff Pastry Tart
There’s something magical about the first bite of a Cherry Cream Puff Pastry Tart. The moment you cut into that golden, flaky crust, you’re greeted with the sweet aroma of cherries, creamy goodness, and a hint of nostalgia. I remember the first time I made this delightful dessert for a summer gathering. Friends and family were mingling, laughter filling the air, and I was eager to unveil my creation. As I set the tart on the table, everyone’s eyes lit up with curiosity and excitement. The combination of rich cream cheese and juicy cherry pie filling nestled within a delicate pastry shell had them coming back for seconds, and even thirds. It’s not just a dessert; it’s a celebration of flavors that brings people together.
Recipe Snapshot
30 mins
15 mins
15 mins
Hard
250 kcal
3 g
Gluten-Free
13 g
Oven, Baking Sheet, Whisk, Chef’s Knife, Mixing Bowl
The Magic of This Cherry Cream Puff Pastry Tart
A Visual Delight
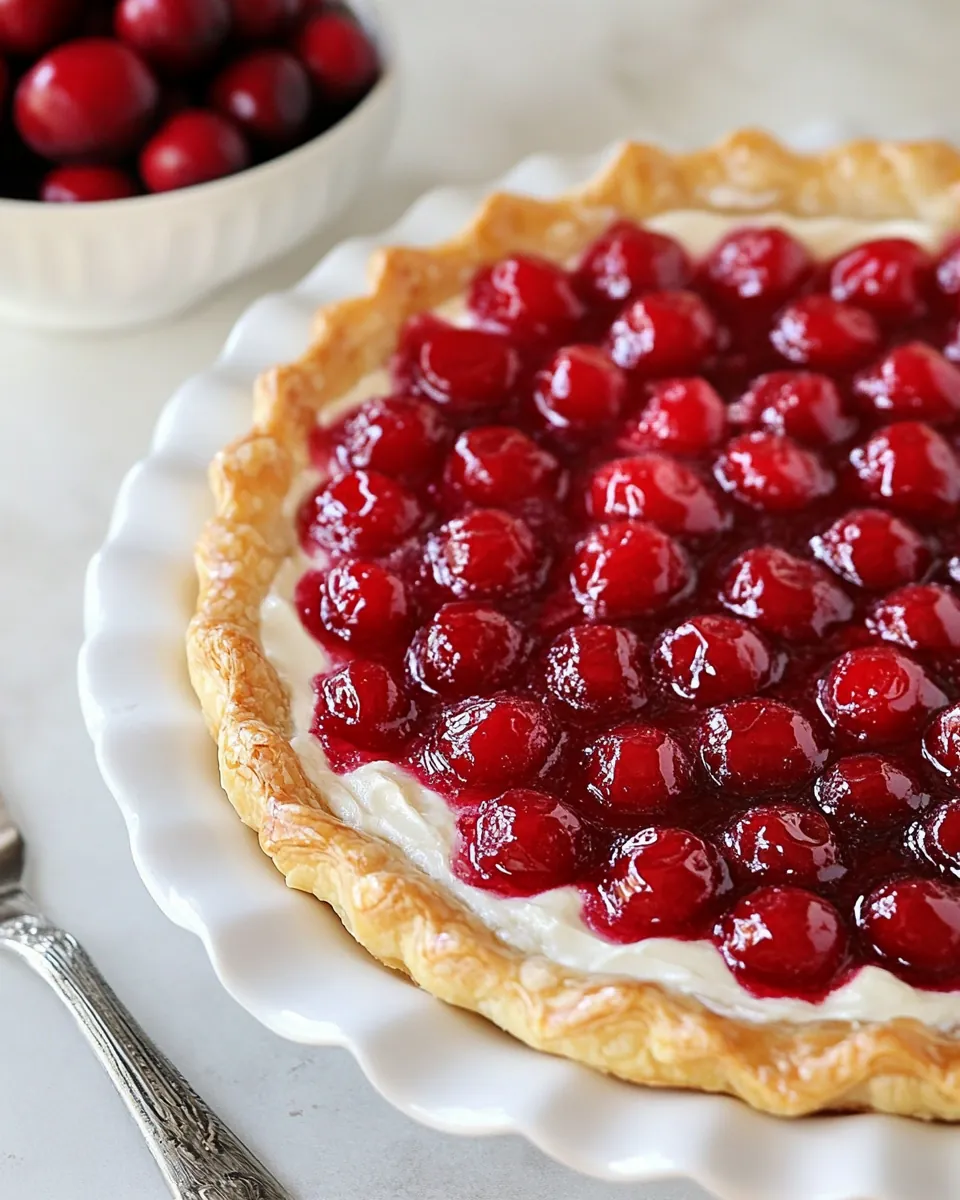
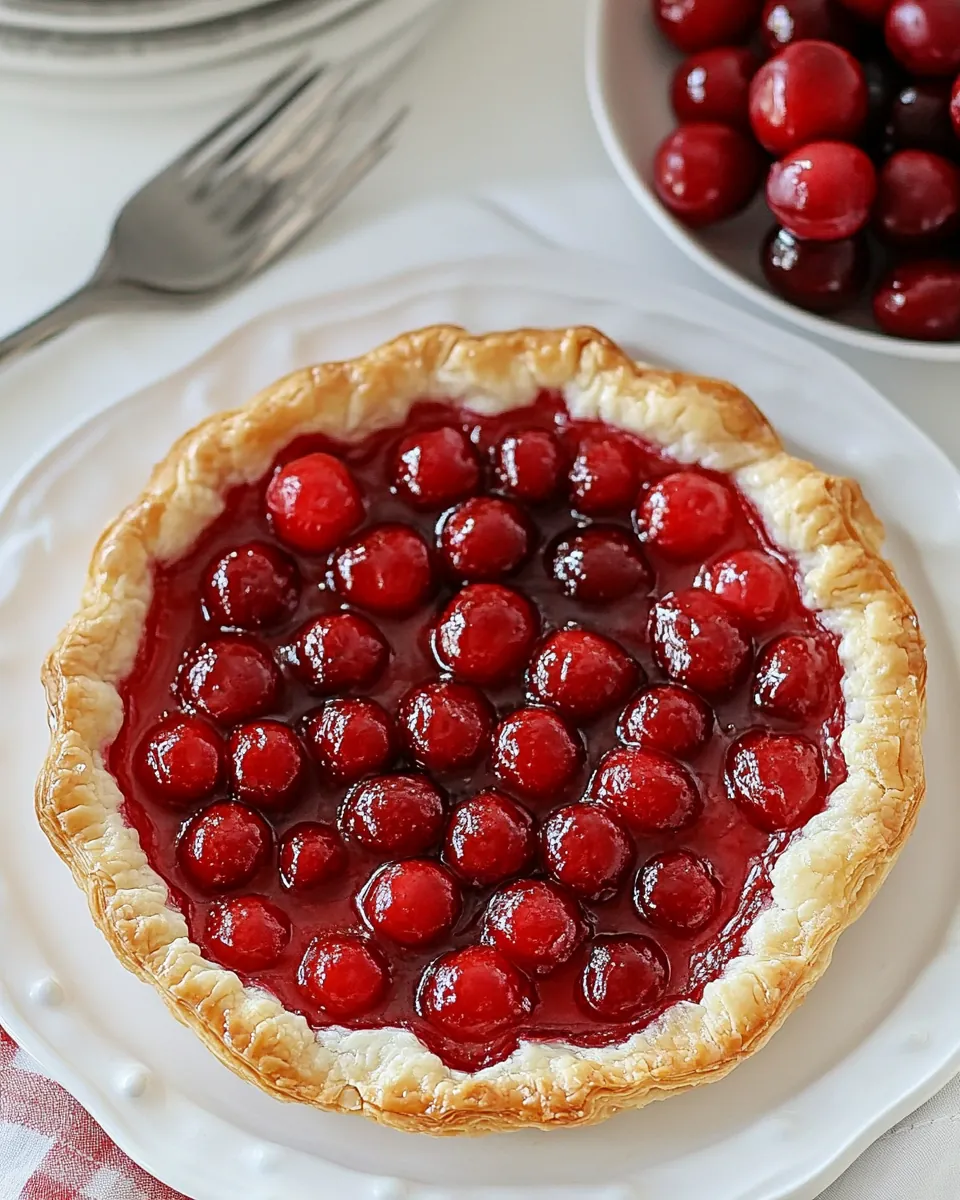
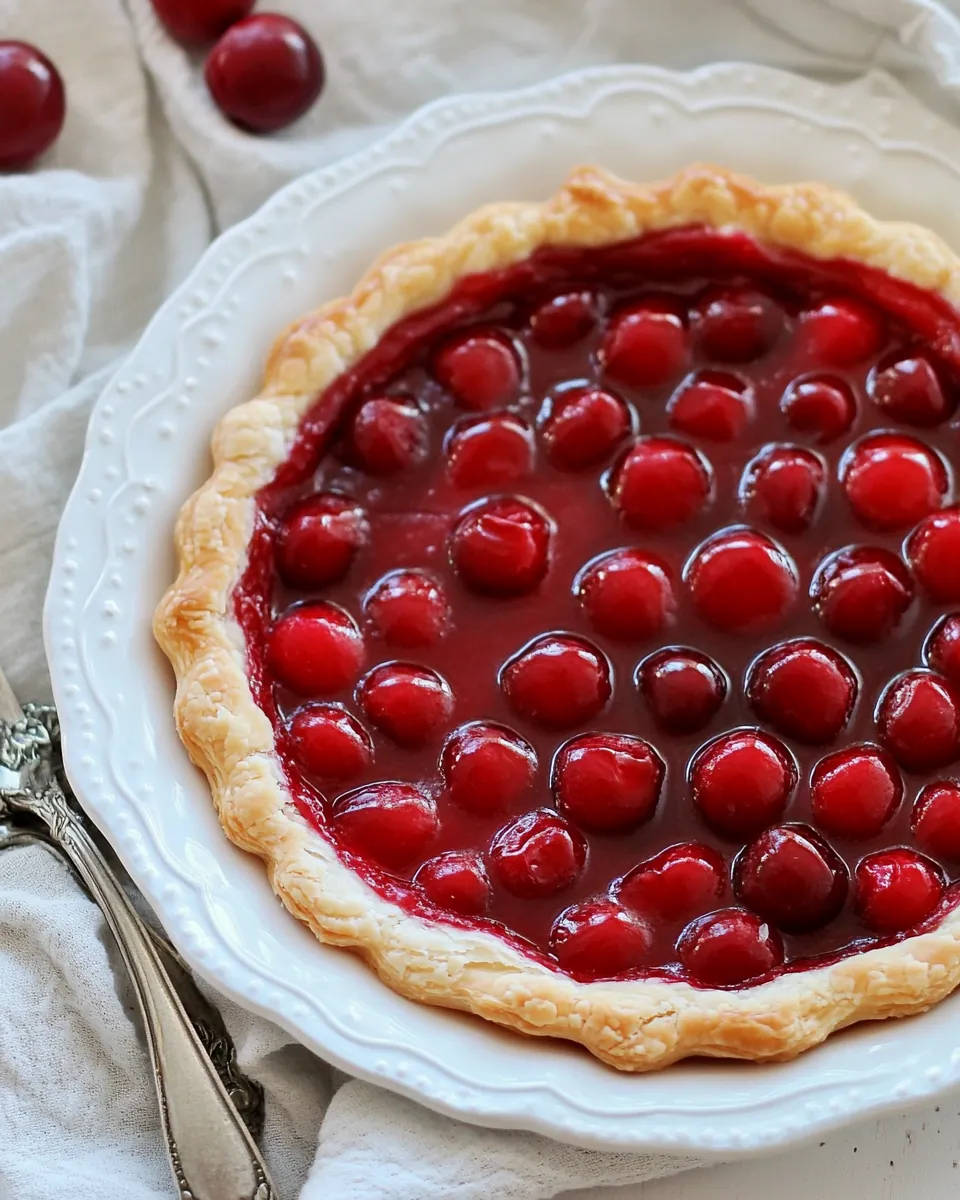
One of the main reasons the Cherry Cream Puff Pastry Tart stands out is its stunning appearance. The golden pastry shell, adorned with vibrant cherry filling, is a feast for the eyes. When you serve this tart, you’re not just offering a dessert; you’re presenting a work of art that invites everyone to indulge.
Perfectly Balanced Flavors
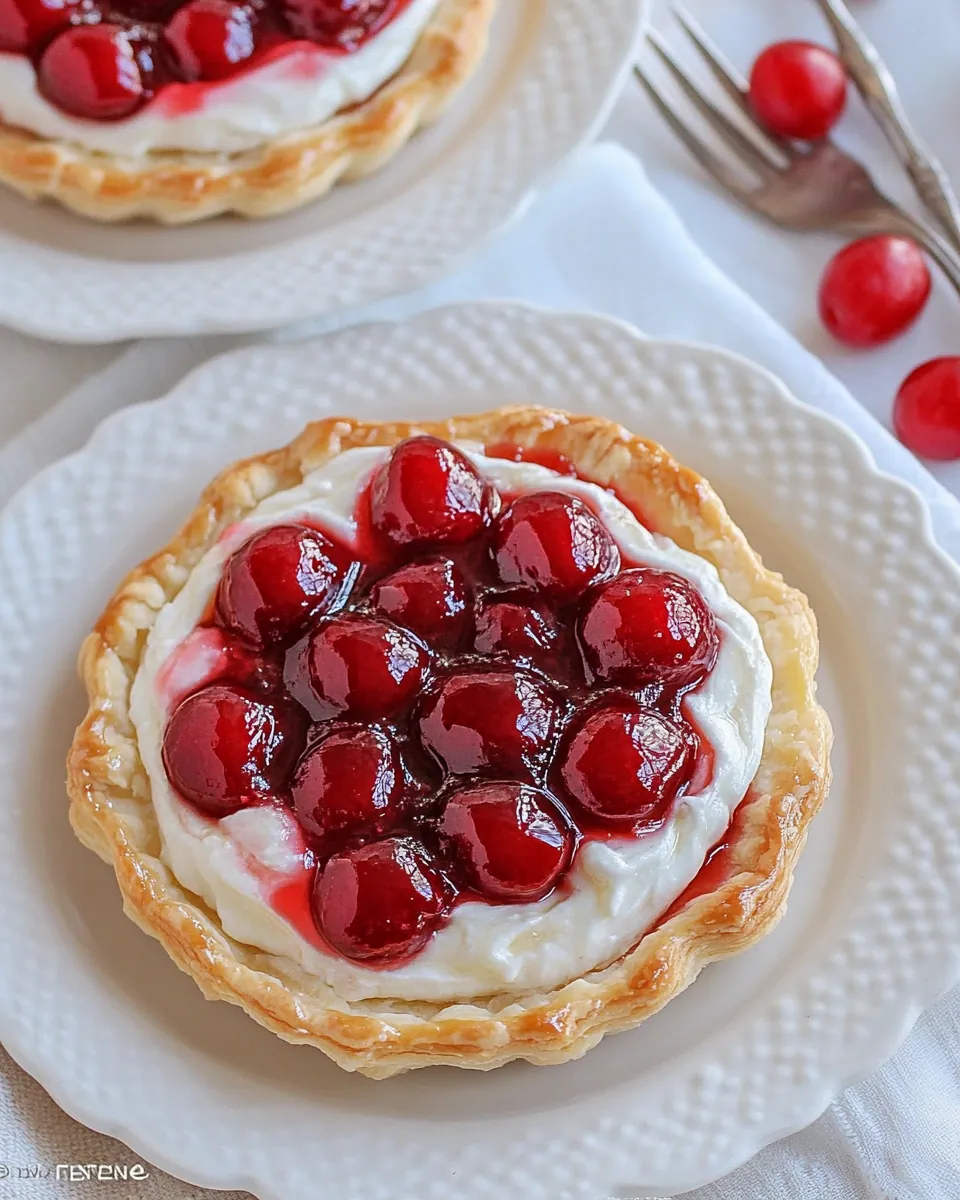
The balance of flavors in this tart is simply divine. The creamy texture of the filling combined with the slight tartness of the cherries creates a harmonious blend. Each bite is a delightful contrast of creamy and fruity, making it an irresistible treat.
Easy to Make
Don’t let the beautiful presentation fool you; this tart is surprisingly simple to make. With just a few ingredients and straightforward steps, anyone can whip up this delicious dessert. It’s perfect for both beginner bakers and seasoned pros looking for a quick yet impressive dish.
Versatile for Any Occasion
Whether you’re hosting a summer barbecue, celebrating a birthday, or just want to treat yourself, this Cherry Cream Puff Pastry Tart fits right in. Its versatility makes it a go-to dessert for many occasions, ensuring there’s always a reason to enjoy it.
Kid-Friendly Fun
This recipe is also a great way to involve kids in the kitchen. They can help with rolling out the dough, spreading the filling, and even decorating the tart. It’s a fun, family-friendly activity that ends with a delicious reward!
Make-Ahead Friendly
If you’re planning a gathering, the tart can be prepared ahead of time. Just keep it refrigerated until you’re ready to serve, and it will taste just as fresh and delightful. This makes it a stress-free option for busy hosts.
Cherry Cream Puff Pastry Tart Ingredients
When making a Cherry Cream Puff Pastry Tart, the ingredients are key to achieving that perfect balance of flavors and textures. Each component plays a vital role in creating a delightful dessert that pleases the palate. From the flaky pastry to the smooth cream cheese filling and the tangy cherry topping, these ingredients work harmoniously together to create a memorable dish.
- 1 sheet frozen puff pastry: The heart of the tart, this puff pastry provides a flaky, buttery crust that perfectly complements the creamy filling and cherry topping.
- 1 egg: Used for the egg wash, it gives the pastry a beautiful golden color when baked.
- 1 teaspoon water: Helps to bind the egg wash for a smooth application on the pastry.
- 2 tablespoons turbinado sugar: This raw sugar adds a delightful crunch and sweetness to the pastry crust, enhancing its texture.
- 8 oz package cream cheese: A key ingredient in the filling, it lends a rich, creamy texture and balances the tartness of the cherries.
- 1 cup powdered sugar: Sweetens the cream cheese filling and contributes to its smooth consistency.
- 1 teaspoon pure vanilla extract: Infuses the filling with a warm, sweet flavor that enhances the overall taste.
- 1 can Lucky Leaf Premium Cherry Pie Filling: The star of the dessert, this cherry pie filling provides a burst of fruity flavor and a lovely visual appeal.
Recipe Steps for Cherry Cream Puff Pastry Tart
Making this Cherry Cream Puff Pastry Tart is a delightful process. Each step brings you closer to that beautiful final product, and it’s easier than you might think. Let’s dive into the steps to create this wonderful dessert!
- Thaw the puff pastry sheet according to the manufacturer’s directions on the packaging. This usually takes about 30 minutes but can vary depending on your kitchen temperature.
- Preheat your oven to 400 degrees F (200 degrees C). This ensures the pastry cooks evenly and gets that lovely golden color.
- Place the thawed puff pastry on a lightly floured surface and roll it out into a 13-inch by 10-inch rectangle. Make sure it’s even so it bakes uniformly.
- Cut off 1 to 1.5-inch strips of pastry dough from each side to create a decorative border. This will help shape the tart and give it an elegant appearance.
- Position the main pastry piece on a sheet of parchment paper to prevent sticking. This will make transferring the tart to the baking sheet easier.
- In a small bowl, whisk together egg and water until well combined. This mixture will serve as your egg wash.
- Brush the edges of the main puff pastry piece with the egg wash to help the border attach properly.
- Place the cut-off strips of dough over the brushed edges, overlapping slightly to create a raised border. Use small squares of pastry to decorate the corners for a lovely touch.
- Brush the strips and corners with egg wash and sprinkle with turbinado sugar for a sweet crunch.
- Transfer the parchment paper with the assembled pastry onto a large baking sheet. This helps with easy handling and clean-up.
- Bake the tart shell for 14 to 16 minutes, or until it’s puffed up and golden brown. Keep an eye on it to avoid over-baking!
- Once baked, cool the tart completely. If the center has puffed up too much, you can gently press it down with a spatula.
- In a medium mixing bowl, mix the cream cheese until smooth, about 30 seconds. You want it to be creamy and spreadable.
- Add the sifted powdered sugar and vanilla extract. Mix well for about 2 minutes on high until everything is well incorporated.
- Spread the cheesecake filling in the center of the cooled tart, smoothing it out evenly.
- Top the filling with the cherry pie filling, spreading it out nicely to cover the cream cheese.
- Slice and serve the tart, or refrigerate it for a few hours until you’re ready to serve. Enjoy every delicious bite!
Things Worth Knowing
- Be Gentle with the Pastry: Puff pastry can be delicate, so handle it gently to keep it from tearing.
- Check for Even Baking: Rotate your baking sheet halfway through the baking time to ensure even browning.
- Cool Completely: Let the tart cool completely before adding the filling; this prevents the filling from melting.
- Use Fresh Ingredients: For the best flavor, use fresh cream cheese and high-quality cherry pie filling.
Ways to Adapt This Recipe
There are countless ways to make the Cherry Cream Puff Pastry Tart your own! Whether you want to change up the flavors or tweak the method, here are some ideas to consider:
- Flavor Variations: Swap out the cherry pie filling for other fruits like blueberries, strawberries, or peaches for a different twist.
- Try a Different Cheese: Instead of cream cheese, consider mascarpone for a different flavor profile.
- Gluten-Free Option: Use gluten-free puff pastry to accommodate dietary needs.
- Add a Zing: Mix some lemon or almond extract into the cream cheese filling for an extra flavor burst.
- Decorate with Fresh Fruit: Top the tart with fresh cherries or berries for an eye-catching presentation.
Best Served With
When serving your Cherry Cream Puff Pastry Tart, consider these delightful pairings to enhance the experience:
- Vanilla Ice Cream: A scoop of creamy vanilla ice cream on the side complements the tart perfectly.
- Whipped Cream: Light, fluffy whipped cream adds a delicious touch and makes the dessert even more indulgent.
- Fresh Berries: Serve with a side of mixed fresh berries for a refreshing contrast to the sweet tart.
- Seasonal Occasions: This tart is perfect for summer gatherings, picnics, or dessert at family holidays.
- Refreshing Beverage: Pair with iced tea or lemonade to balance the sweetness of the tart.
- Elegant Presentation: Serve on a beautiful platter for a stunning display at your next gathering.
FAQ
Conclusion
The Cherry Cream Puff Pastry Tart is not just a dessert; it’s a delightful experience packed with rich flavors and textures. Whether you’re celebrating a special occasion or just treating yourself after a long day, this tart is the perfect choice. I encourage you to try making it for your next gathering or for a cozy night in. You won’t be disappointed with the smiles and satisfied expressions around your table!
Cherry Cream Puff Pastry Tart
Ingredients
Equipment
Method
- Thaw the puff pastry sheet according to the manufacturer’s directions on the packaging.
- Preheat your oven to 400 degrees F (200 degrees C).
- Place the thawed puff pastry on a lightly floured surface and roll it out into a 13-inch by 10-inch rectangle.
- Cut off 1 to 1.5-inch strips of pastry dough from each side.
- Position the main pastry piece on a sheet of parchment paper.
- In a small bowl, whisk together egg and water.
- Brush the edges of the main puff pastry piece with the egg wash.
- Place the cut-off strips of dough over the brushed edges.
- Brush the strips and corners with egg wash and sprinkle with turbinado sugar.
- Transfer the parchment paper with the assembled pastry onto a large baking sheet.
- Bake the tart shell for 14 to 16 minutes, or until it’s puffed up and golden brown.
- Once baked, cool the tart completely.
- In a medium mixing bowl, mix the cream cheese until smooth.
- Add the sifted powdered sugar and vanilla extract.
- Spread the cheesecake filling in the center of the tart.
- Top the filling with the cherry pie filling.
- Slice and serve the tart, or refrigerate it until you're ready to serve.
Notes
- Storage: Keep leftovers in an airtight container in the refrigerator for up to three days.
- Freezing: While the tart is best served fresh, you can freeze the baked pastry shell for up to a month. Just add the filling before serving.
- Variations: Experiment with different fruit fillings to create your own unique tart!
- Presentation: Dust with powdered sugar before serving for a touch of elegance.
- Serving Size: Each slice is satisfying, making this tart a perfect dessert for gatherings.