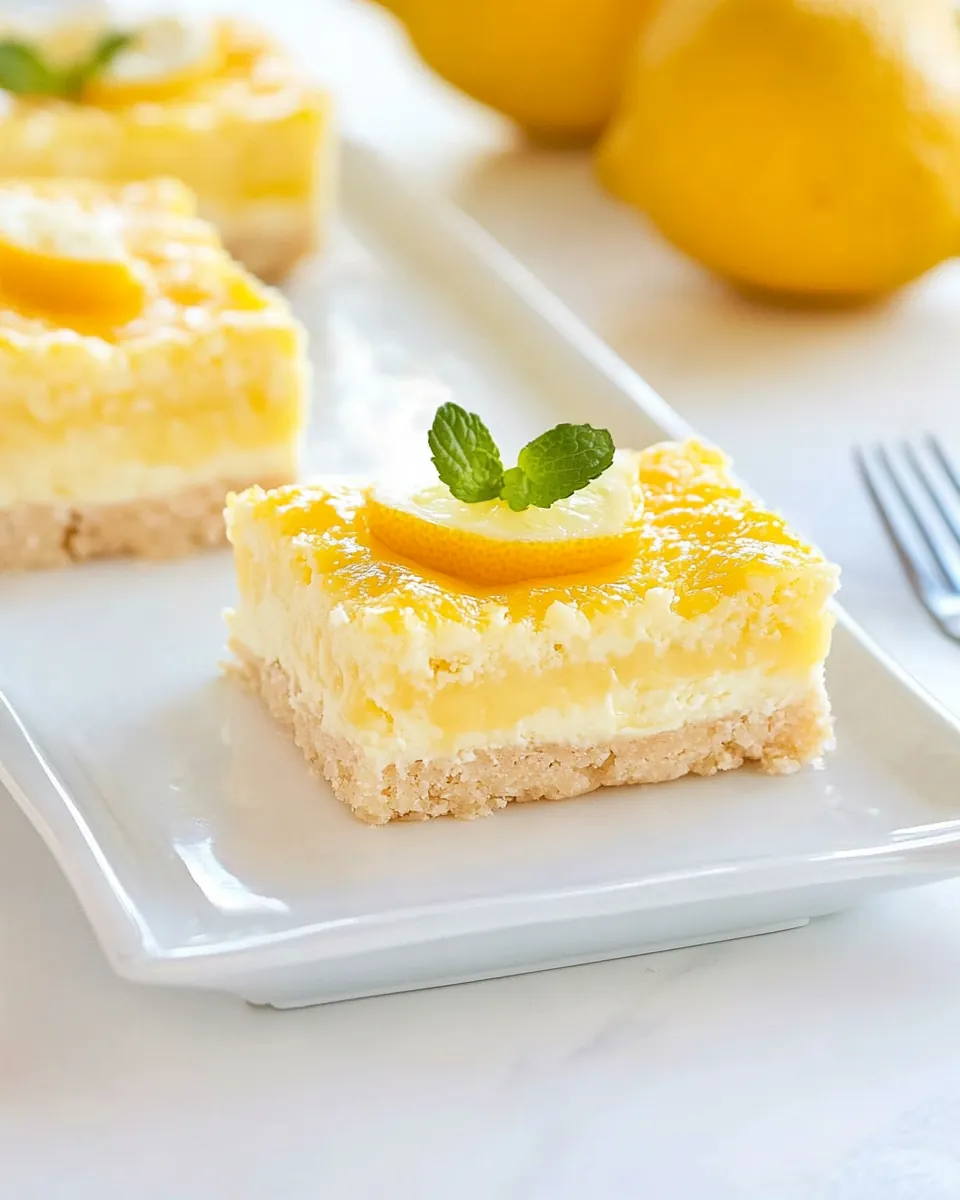
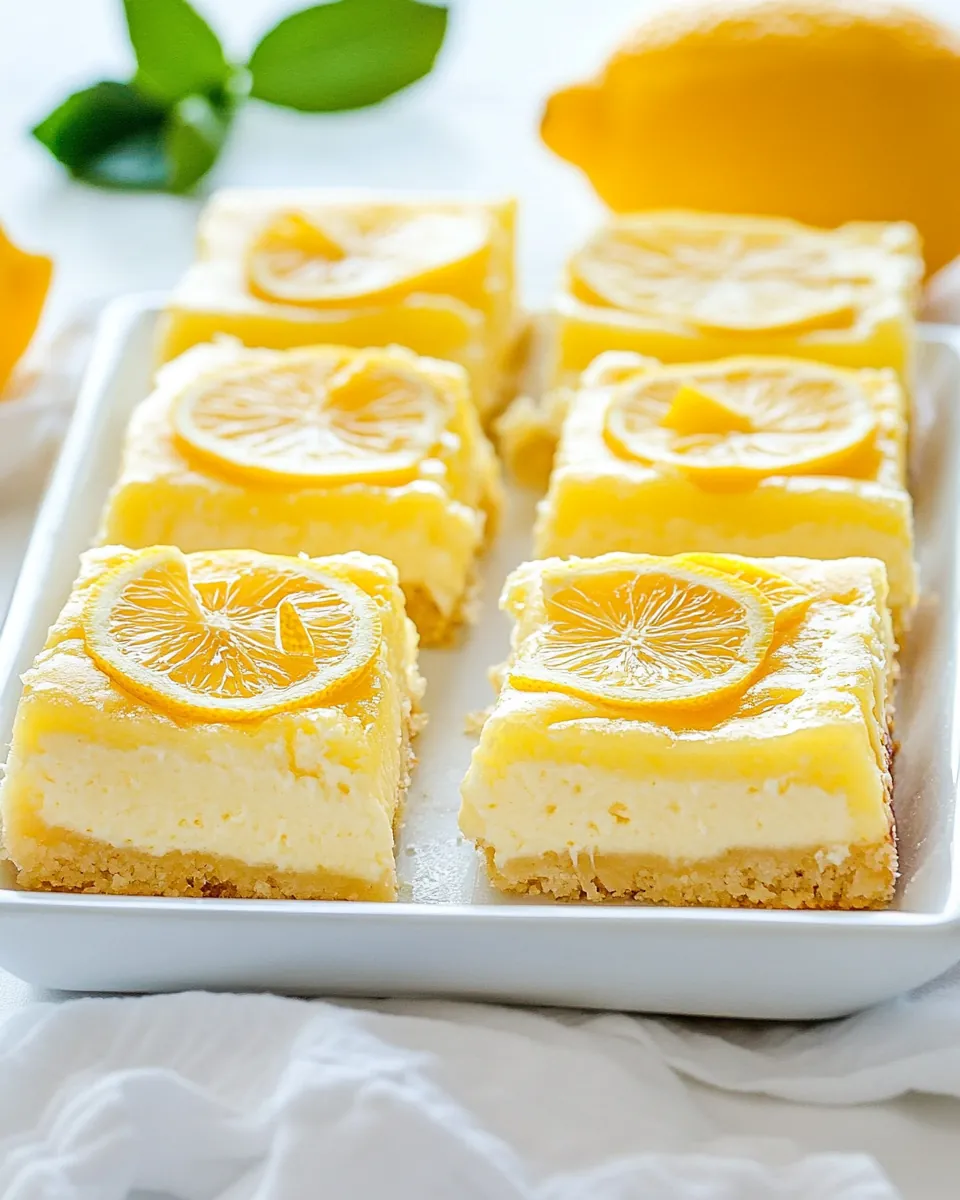
Lemon Cheesecake Bars
The moment I first sunk my fork into a velvety slice of Lemon Cheesecake Bars, I knew I had stumbled upon something truly special. These delectable treats are a perfect balance of tangy and sweet, reminiscent of warm spring days when zest fills the air and laughter is abundant. I remember hosting a small gathering, where the sun cast a golden glow over the garden, and the smell of fresh lemons wafted through the kitchen as I prepared these bars. Each bite was a burst of sunshine, and the smiles around the table were priceless. It’s amazing how a simple dessert can elevate a moment, creating memories that linger long after the last crumb is gone.
Recipe Snapshot
1 hr 35 mins
35 mins
60 mins
Medium
265 kcal
4 g
Gluten-Free, Low FODMAP
15 g
9×13-inch Baking Pan, KitchenAid Artisan 5 Quart Stand Mixer, Parchment Paper, Keep Calm And Bake On Spatula
Why This Lemon Cheesecake Bars Hits Different
Unique Flavor Combination
One of the standout features of these Lemon Cheesecake Bars is the incredible flavor combination. The tartness of fresh lemon zest perfectly complements the creaminess of the cheese, creating a harmonious blend that leaves your taste buds dancing. It’s a flavor experience that’s both refreshing and indulgent.
Perfect for Any Occasion
Whether it’s a sunny picnic, a festive gathering, or a cozy night in, these bars fit any occasion. They are versatile enough for a casual get-together or an elegant dinner party. People are always impressed when you bring out a tray of these beauties.
Easy to Make
Despite their sophisticated appearance, making Lemon Cheesecake Bars is a breeze. With just a few simple steps, you can create a dessert that looks and tastes like it came from a fancy bakery. It’s a wonderful recipe to invite friends or family to help out with, making it a fun, collaborative experience.
Make Ahead of Time
Another reason these bars are fantastic is that they can be made ahead of time. You can prepare them the day before a gathering, allowing the flavors to meld together beautifully in the fridge. This way, you can enjoy the company of your guests without having to worry about dessert at the last minute.
Impressive Presentation
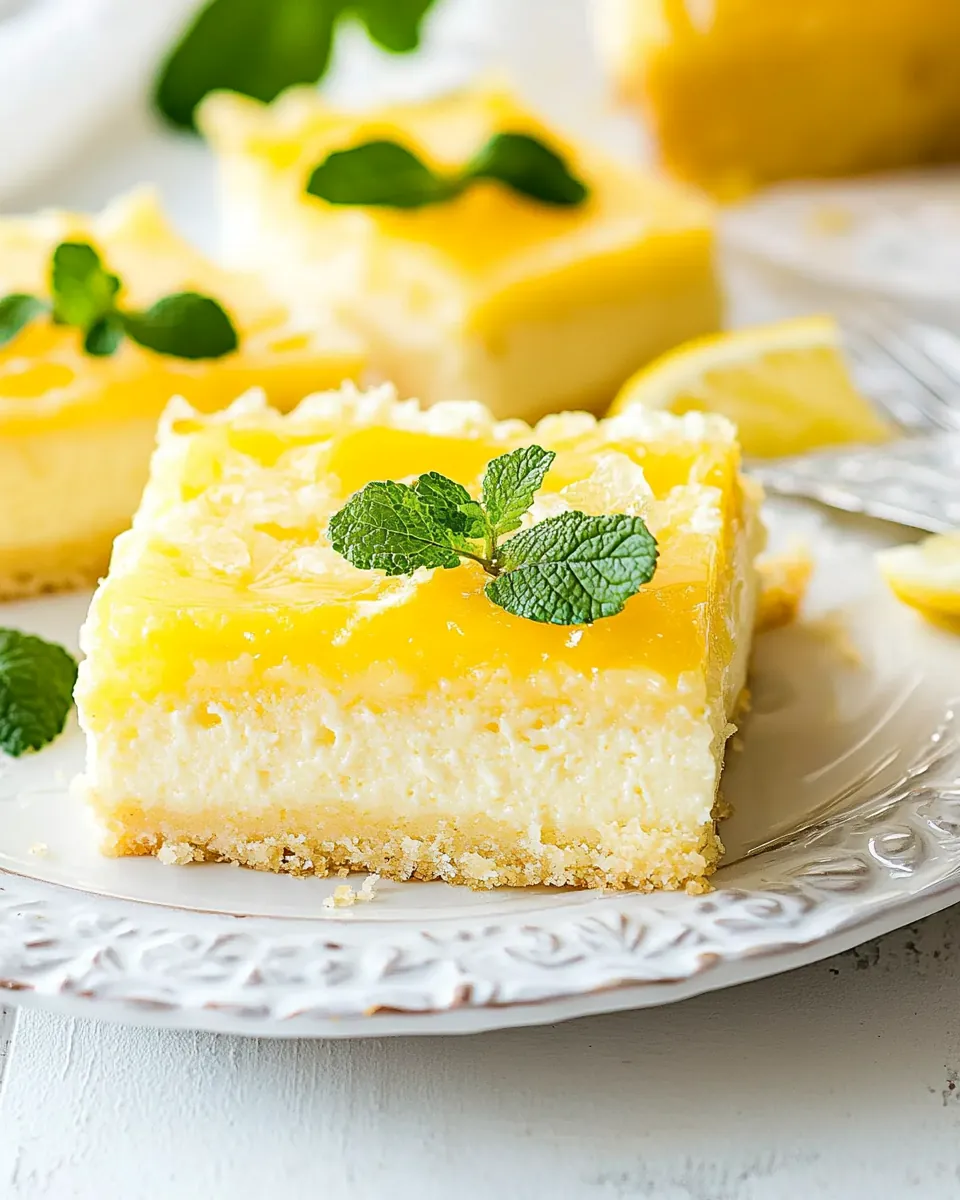
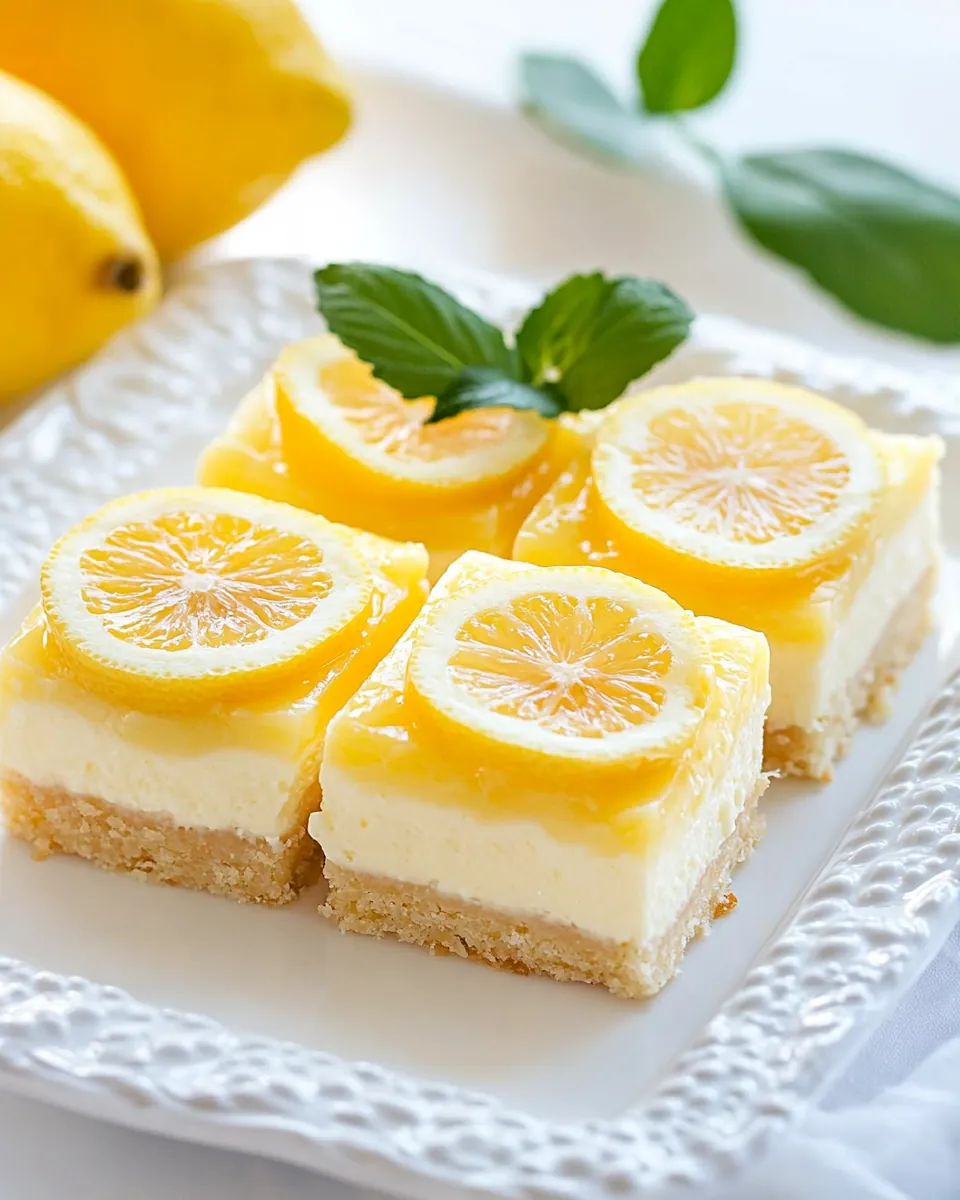
Lastly, the visual appeal of Lemon Cheesecake Bars is undeniable. The creamy cheesecake topped with a glossy layer of lemon curd looks stunning on any dessert table. They are sure to catch the eye and draw compliments from everyone.
What to Gather for Lemon Cheesecake Bars
When crafting Lemon Cheesecake Bars, the ingredients are not just essential; they each play a crucial role in delivering that perfect harmony of flavors. From the crisp base to the creamy filling and zesty topping, every component is integral. Let’s look at the key players that make this dessert a star attraction!
- 1 cup all-purpose flour: This forms the sturdy base of our bars, providing structure and a subtle nutty flavor.
- ¼ cup cornstarch: Helps achieve a light and tender crust that complements the creamy filling.
- ¼ cup granulated sugar: Sweetens the crust just enough without overpowering the other flavors.
- ½ cup butter (unsalted): Adds richness and a buttery flavor to the crust.
- ½ teaspoon salt: Enhances the overall flavor profile of the bars.
- 2 tablespoons lemon zest (freshly grated): Infuses the crust with vibrant citrus notes.
- 24 ounces cream cheese (3 packages, softened): The creamy, luscious filling that is the heart of the cheesecake.
- 3 large eggs: Provides structure and richness to the filling.
- 1 cup granulated sugar: Balances the tartness of the lemon in the cheesecake layer.
- ½ cup sour cream: Adds creaminess and a slight tang to the filling.
- 2 teaspoons vanilla extract: Rounds out the flavors beautifully.
- ¼ teaspoon salt: Complements the sweetness and balances the flavors.
- 1½ cups lemon curd: The crowning glory, adding a bright, zesty finish to the bars.
Making Lemon Cheesecake Bars
Creating Lemon Cheesecake Bars is as delightful as the final product. Don’t worry if it seems a little daunting; I’ll guide you through every step. Let’s embark on this culinary adventure!
Prep: Preheat your oven to 350°F. This ensures the bars bake evenly. While the oven heats, spray a 9×13-inch baking pan with cooking spray. Then, line it with parchment paper, allowing the edges to hang over for easy removal later.
Make Crust: In a food processor, combine all the crust ingredients: flour, cornstarch, sugar, butter, salt, and lemon zest. Pulse a few times until the mixture resembles a dry, coarse meal. This texture is critical for a perfectly crumbly crust.
Bake Crust: Transfer the crumb mixture to the prepared baking dish. Press it down evenly into the bottom, ensuring it’s compact. Place the baking dish in the oven and bake for 15 minutes. You want it to be just golden.
Make Cheesecake Layer: In a bowl, mix the softened cream cheese using a hand mixer until smooth. Add in the eggs, sugar, sour cream, vanilla, and salt. Keep mixing until the mixture is well combined and smooth, with no lumps.
Bake The Cheesecake: Carefully pour the cheesecake batter over the baked crust. Make sure it spreads evenly. Bake for 45 minutes or until the top has slightly browned. Let it cool down fully; this is crucial for the best texture.
Add Lemon Curd: Once the cheesecake is cool, pour the lemon curd over the cheesecake layer. Spread it evenly with a spatula, creating a beautiful top layer. Refrigerate the entire dish for at least 3 hours, allowing it to set properly.
Cut & Serve: When ready, carefully lift the cheesecake out of the pan using the parchment paper. Slice it into your desired size bars; I usually cut them 4 x 6, resulting in 24 bars. Serve them chilled for the best experience.
Things Worth Knowing
- Chilling Time: It’s important to let the bars chill for at least 3 hours. This helps them set and makes cutting them easier.
- Room Temperature Ingredients: Ensure your cream cheese and eggs are at room temperature. This helps achieve a smooth batter without lumps.
- Don’t Overbake: Keep an eye on the cheesecake while baking. Overbaking can lead to cracks. You want the center to be slightly jiggly when you take it out.
- Use Fresh Ingredients: Fresh lemon zest and lemon curd really elevate the flavor of the bars. Avoid bottled options for the best results.
Recipe Notes about Lemon Cheesecake Bars
When making Lemon Cheesecake Bars, a few tips can enhance your baking experience:
- Storage: Store any leftover bars in an airtight container in the fridge. They’ll stay fresh for up to 5 days.
- Freezing: You can freeze these bars! Once completely cool, place them on a pan in the freezer to freeze entirely. Then wrap them up tightly in plastic wrap and aluminum foil for up to 3 months.
- Variation: If you want to switch it up, consider using a graham cracker crust instead of shortbread for a different flavor.
- Slicing Tips: Use a sharp knife for cutting the bars. Dipping it in warm water and then drying it can help achieve clean cuts.
- Presentation: For a touch of elegance, garnish the bars with whipped cream or additional lemon zest before serving.
What Goes Well With This Lemon Cheesecake Bars
When serving Lemon Cheesecake Bars, you want to elevate the experience further. Here are some ideas:
- Fresh Berries: Serve with a side of mixed berries, such as strawberries or blueberries, which complement the tartness beautifully.
- Whipped Cream: A dollop of freshly whipped cream on top adds a nice airy texture and richness.
- Mint Leaves: Garnish with fresh mint leaves for a pop of color and an aromatic twist.
- Tea or Coffee: Pair these bars with a cup of herbal tea or coffee for a delightful afternoon treat.
- Perfect for Spring Gatherings: These bars are perfect for brunch or garden parties, where their bright flavor can shine.
- Storage Tips: Any leftovers should be kept in the refrigerator and can be enjoyed cold or at room temperature.
FAQ
Conclusion
In conclusion, these Lemon Cheesecake Bars are a delightful treat that combines the best of tangy and creamy flavors in a beautiful presentation. They are perfect for any occasion, whether you’re celebrating a special event or just indulging yourself on a quiet evening. I encourage you to give this recipe a try; your friends and family will surely be impressed!
Lemon Cheesecake Bars
Ingredients
Equipment
Method
- Preheat your oven to 350°F. Spray a 9×13-inch baking pan with cooking spray then line it with parchment paper, allowing the paper to hang over the sides for easy removal.
- Combine all the crust ingredients: flour, cornstarch, sugar, butter, salt, and lemon zest in a food processor. Pulse until the mixture resembles a dry coarse meal.
- Transfer the crumb mixture to the baking dish and press it down evenly into the bottom. Bake for 15 minutes.
- Mix the softened cream cheese until smooth. Add the eggs, sugar, sour cream, vanilla, and salt. Continue mixing until well combined and smooth.
- Pour the cheesecake batter over the baked crust and bake for 45 minutes or until the top is slightly browned. Set aside to cool completely.
- Pour the lemon curd over the cooled cheesecake and spread it evenly. Refrigerate for at least 3 hours to set.
- Carefully lift the cheesecake out of the pan using the parchment paper. Slice it into bars, typically cutting 4 x 6 to yield 24 bars.
Notes
- Tip 1: Instead of shortbread, you can make a graham cracker crust.
- Tip 2: Leave enough parchment paper over the sides of your baking dish to allow for easy removal.
- Tip 3: How you cut your bars will determine how many you will get from this recipe. We cut it 4 x 6, making 24 bars.
- Tip 4: These little bars will keep in the fridge for up to 5 days. Just store in an airtight container or wrap them tightly.
- Tip 5: To freeze, place the bars on a pan in the freezer until fully cooled, then wrap tightly.