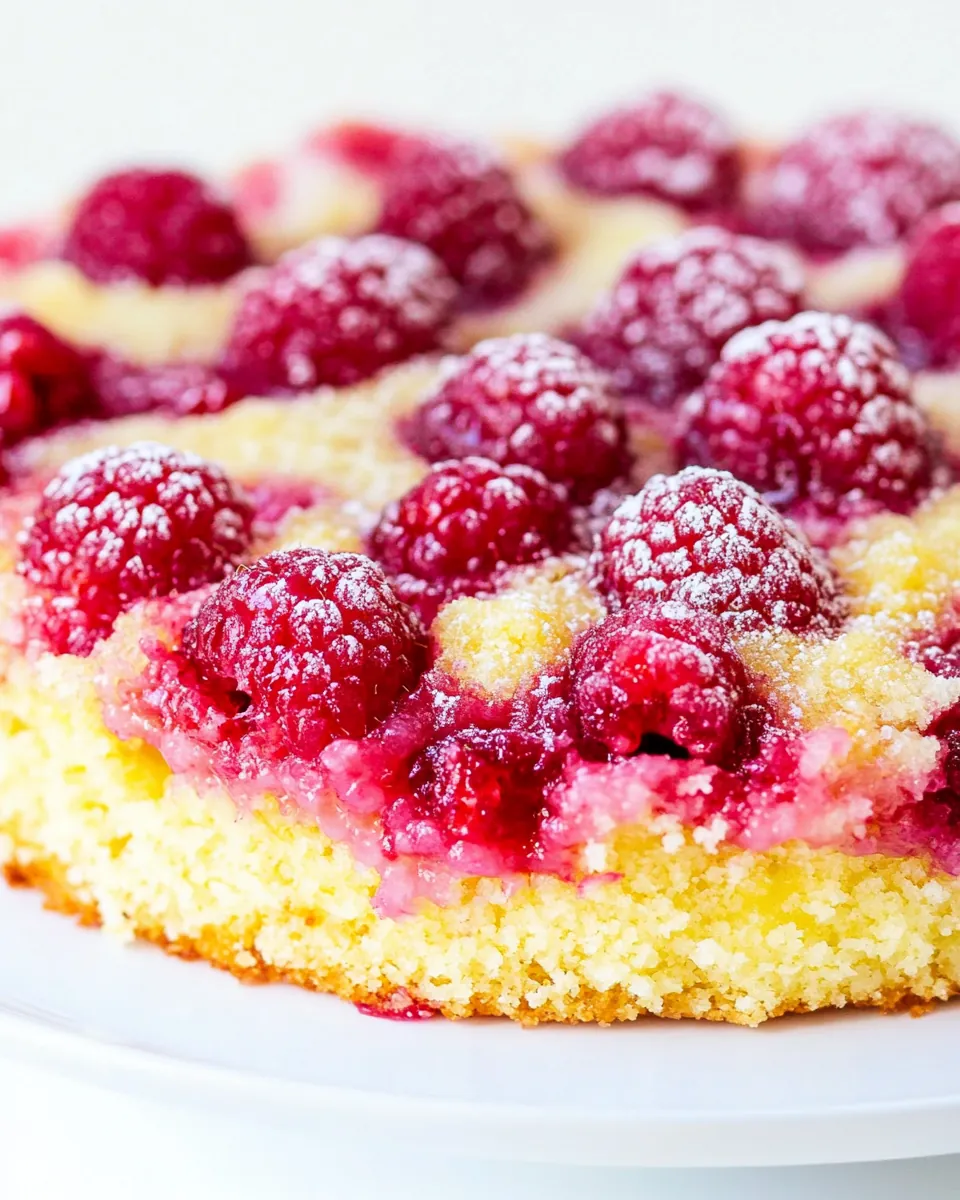
Raspberry Upside Down Cake
There’s something truly magical about a Raspberry Upside Down Cake. I remember the first time I made it; the sweet aroma of raspberries filling the kitchen brought back a rush of nostalgic memories from my childhood. My grandmother would often make a similar cake during the summer months when raspberries were at their peak. We’d gather in her sunny kitchen, the laughter mingling with the scent of baking as we eagerly anticipated our treat. The joy of slicing into the cake to reveal its beautifully arranged raspberries was always a highlight. This cake isn’t just about the taste; it’s about the memories and connections it brings together.
Recipe Snapshot
60 mins
15 mins
45 mins
Medium
250 kcal
4 g
Gluten-Free, Low FODMAP
12 g
Oven, Baking Sheet, Frying Pan, Whisk, Chef’s Knife, Mixing Bowl
Why You Need This Raspberry Upside Down Cake
It’s a Showstopper
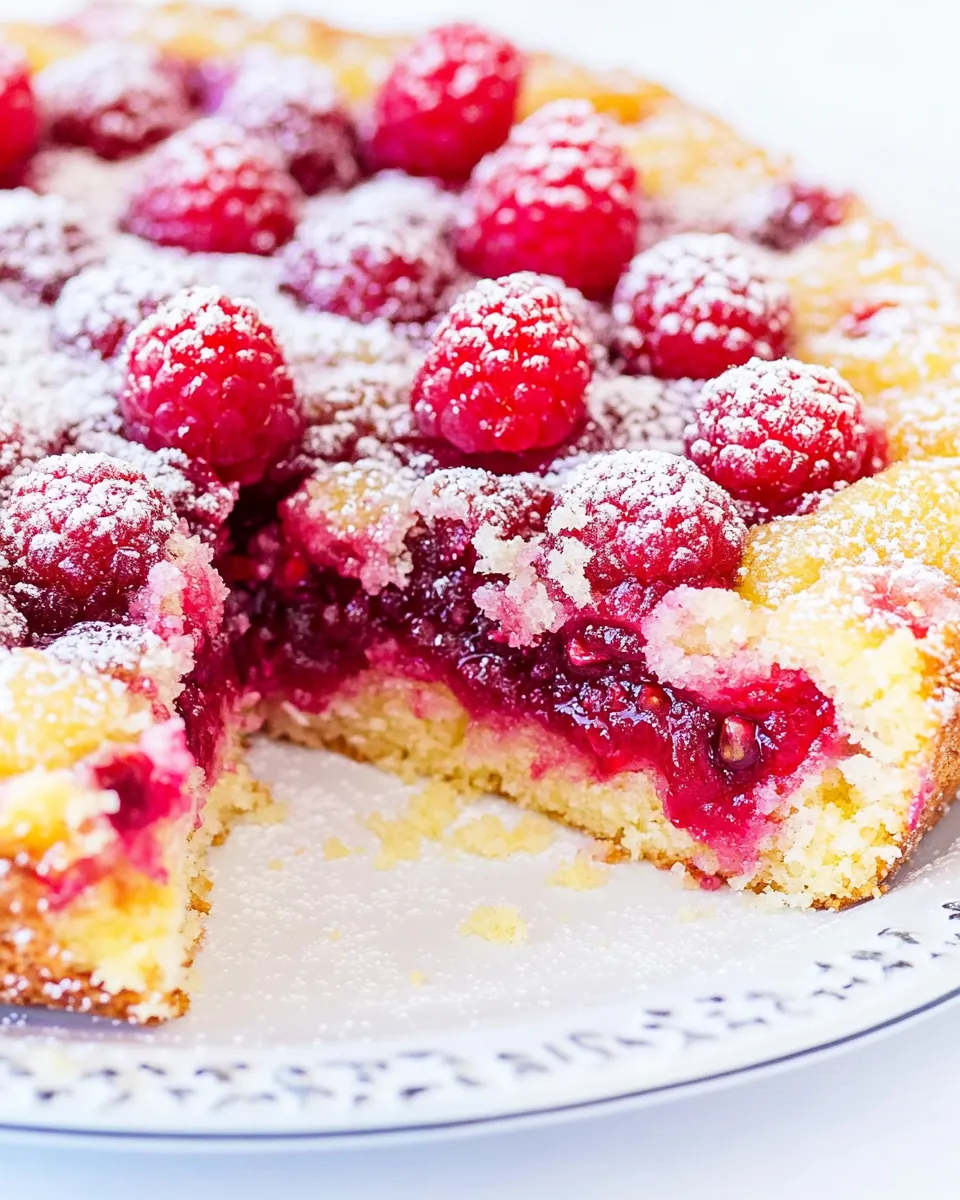
Every time I serve a slice of Raspberry Upside Down Cake, it’s an instant crowd-pleaser. The vibrant colors of the raspberries against the golden cake create a stunning presentation. It’s the kind of dessert that grabs attention and sparks conversation. You can be sure that your guests will be reaching for seconds!
Perfect for Any Occasion
This cake is incredibly versatile. Whether it’s a summer picnic, a birthday celebration, or just a simple weekend treat, the Raspberry Upside Down Cake suits any occasion. It brings a touch of elegance and is perfect for impressing guests or indulging yourself.
Easy to Make
Don’t let the gorgeous appearance fool you; this cake is surprisingly simple to make. With just a handful of ingredients and a few easy steps, you’ll have a stunning dessert ready to serve. It’s a great way to introduce baking to beginners, as the instructions are straightforward but yield impressive results.
Flavorful and Fruity
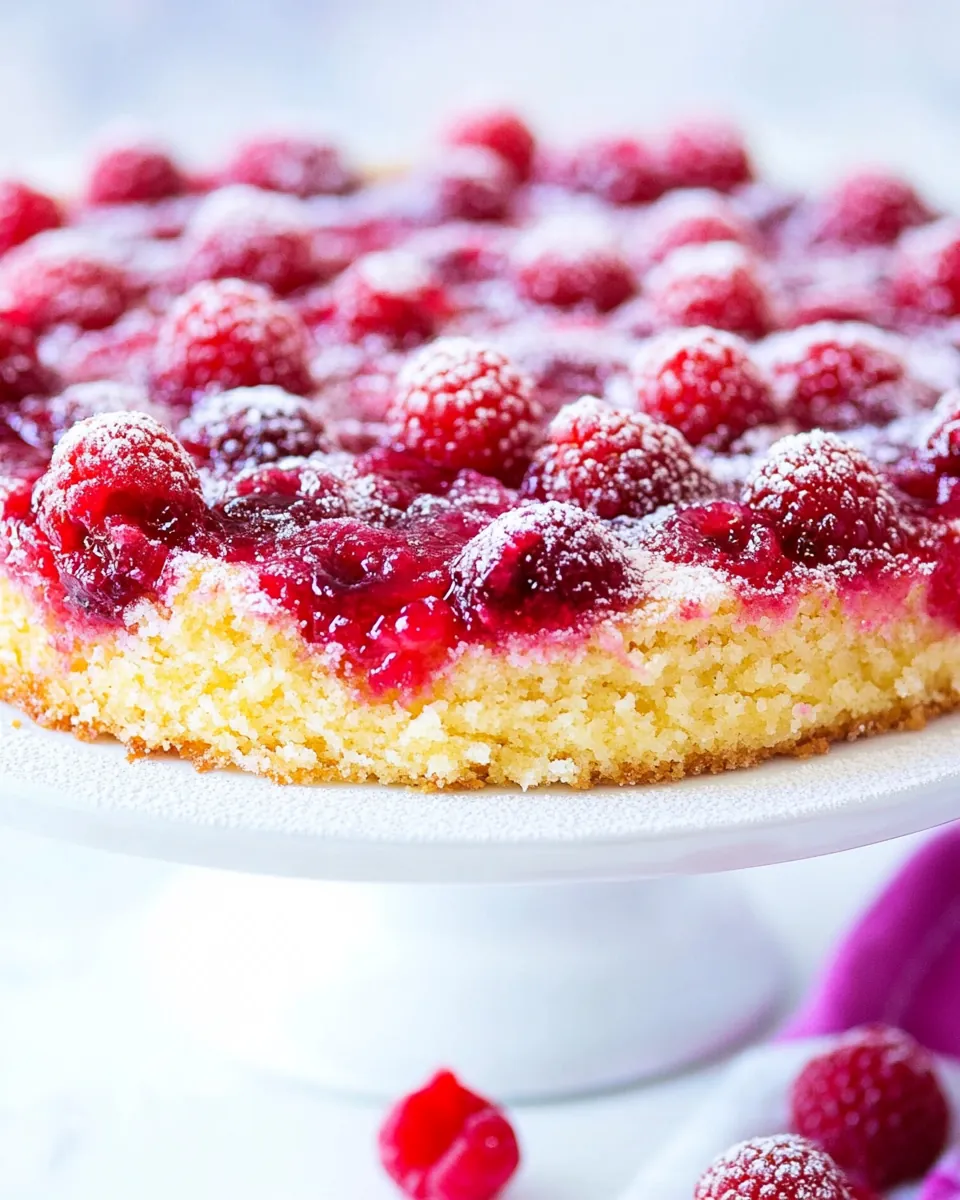
The combination of sweet and tart raspberries brings a delightful flavor profile to the Raspberry Upside Down Cake. The melt-in-your-mouth texture of the cake complements the juicy fruit perfectly. Plus, with hints of lemon zest and juice, it adds a refreshing twist that makes each bite irresistible.
Customizable
You can easily customize this cake to suit your taste. Want to add a bit of zing? A touch of orange zest works beautifully with raspberries. Prefer a richer flavor? Try adding a bit of almond extract. The possibilities are endless, and you can make each version uniquely yours.
A Beautiful Finish
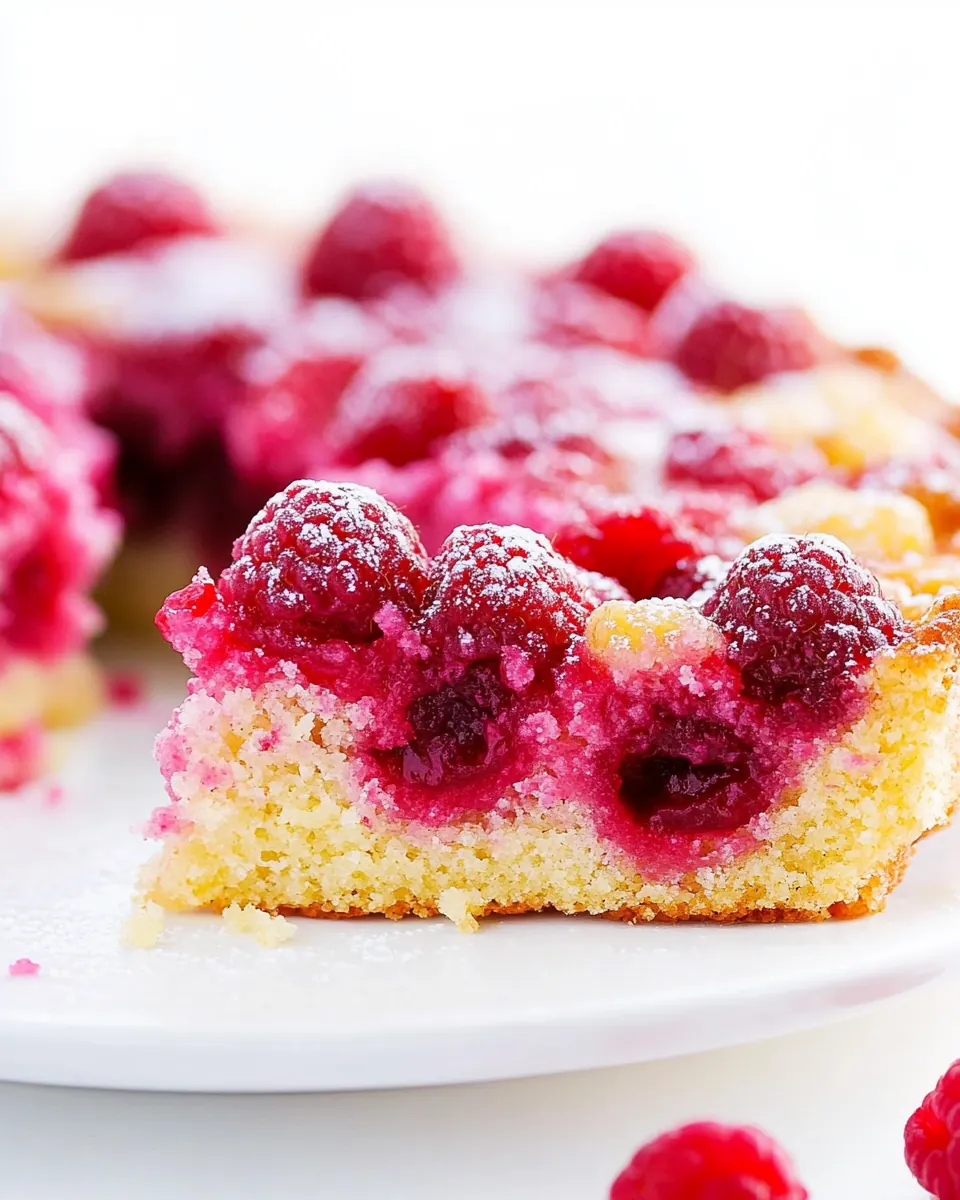
Once out of the oven, dusting the cake with powdered sugar gives it a lovely finish that looks as good as it tastes. It’s the perfect way to elevate the dessert, making it not just delicious but also visually appealing.
What You’ll Need for Raspberry Upside Down Cake
The ingredients for Raspberry Upside Down Cake are not just essential; they work harmoniously to create a delicious dessert. The key players in this cake are the fresh raspberries, of course, which provide that signature fruity flavor. The buttery base and fluffy texture are achieved through a combination of flour, sugar, and eggs, while the lemon zest and juice add a refreshing brightness that balances the sweetness perfectly.
- 1/4 cup unsalted butter, melted
- 1/2 cup brown sugar
- 1 teaspoon lemon juice
- 1 teaspoon lemon zest
- 2 1/3 cups raspberries or enough to cover the bottom of the pan
- 1 1/3 cups all-purpose flour
- 1 teaspoon baking powder
- 1/4 teaspoon salt
- 1/4 cup unsalted butter, softened to room temperature
- 3/4 cup granulated sugar
- 1 large egg
- 1 1/2 teaspoons vanilla extract
- 1 teaspoon lemon juice
- 1 teaspoon lemon zest
- 1/2 cup milk
- 1/3 cup ricotta
- 1/2 cup fresh raspberries
- powdered sugar (optional)
Putting Together Raspberry Upside Down Cake
Making a Raspberry Upside Down Cake is an enjoyable process that fills your kitchen with the most inviting aromas. Follow these steps closely for a cake that’s sure to wow!
- Preheat the oven to 350F degrees. This is essential to ensure your cake cooks evenly.
- Spray a 9-inch springform pan with nonstick cooking spray and wrap the bottom and sides in foil. This helps prevent any butter or sugar from leaking out during baking.
- In a medium bowl, whisk together the topping ingredients—melted butter and brown sugar—except the raspberries. You want a smooth mixture that’s well combined.
- Spread the mixture into the bottom of the prepared pan. Make sure it’s evenly distributed, then top with raspberries in an even layer, covering the bottom entirely. Set this aside for the moment.
- In a large bowl, whisk together flour, baking powder, and salt. This creates the base mix for your cake.
- In another bowl, beat together softened butter with granulated sugar, egg, vanilla extract, lemon juice, and lemon zest until creamy and combined. Don’t forget to scrape down the sides and bottom of the bowl.
- Add the wet ingredients from the previous step to the dry ingredients bowl. Beat until just combined. The batter will appear crumby at this stage, which is normal.
- Next, add milk and ricotta to the batter and beat again until smooth and incorporated.
- Lastly, gently fold in the remaining raspberries using a rubber spatula. This helps to maintain their shape and freshness.
- Spoon the batter over the raspberries in the pan and level the top with an offset spatula. This ensures an even bake.
- Bake in the preheated oven for about 35 to 45 minutes. You’ll know it’s done when it’s golden and a toothpick inserted into the center comes out clean. Keep an eye on it as oven times can vary.
- Once baked, remove the cake from the oven and let it cool in the pan for 10 minutes. This helps set the structure.
- Run a knife around the sides of the pan, open the ring, and slice the cake onto a serving platter. Be gentle to keep the cake intact.
- Allow the cake to finish cooling, then dust the top with powdered sugar just before serving for that final touch of sweetness.
Things Worth Knowing
- Oven Temperature: Make sure your oven is fully preheated before putting the cake in. This ensures even cooking and prevents sogginess.
- Berry Selection: Fresh raspberries are ideal for this recipe. If using frozen, make sure to thaw and drain them first to avoid excess moisture.
- Texture Check: A toothpick should come out clean when the cake is done. If it’s still wet, give it a few more minutes.
- Cooling: Don’t rush the cooling process. Letting it cool in the pan ensures it sets properly and keeps its shape.
Pro Tips and Tweaks
Here are some practical tips to elevate your Raspberry Upside Down Cake experience:
- Storage: Store any leftovers in an airtight container at room temperature for up to three days. For longer storage, refrigerate to keep it fresh.
- Freezing: You can freeze the cake before dusting with powdered sugar. Wrap it tightly in plastic wrap and aluminum foil, and it will last up to two months.
- Pairing: This cake pairs beautifully with a scoop of vanilla ice cream or a dollop of whipped cream for an extra indulgent treat.
- Variations: Feel free to swap out raspberries for other fruits like blueberries or peaches. Each variation offers a new taste experience.
- Serving Ideas: Serve it warm from the oven for a comforting dessert or at room temperature for a refreshing treat on a hot day.
Serving Options for Raspberry Upside Down Cake
Serving your Raspberry Upside Down Cake can be as creative as the cake itself. Here are some great ways to enjoy it:
- As a Dessert: This cake makes for a delightful dessert after a hearty meal. It’s light enough not to feel too heavy while still being satisfying.
- Brunch Delight: Perfect for brunch with a side of fresh fruit and a cup of coffee. It adds a sweet touch to your morning spread.
- Picnic Treat: Slice it up for picnics and enjoy outdoors. It’s easy to transport and tastes wonderful at room temperature.
- Celebration Cake: This cake is ideal for celebrations. Dress it up with extra raspberries on top and serve with sparkling cider for a festive touch.
- Storage Tips: Store leftovers in an airtight container, and if you have the space, consider freezing slices for later enjoyment.
- Seasonal Pairings: During summer, pair it with a refreshing berry salad or serve alongside a light sorbet to enhance the flavors.
FAQ
Conclusion
The Raspberry Upside Down Cake brings together the sweet, tart flavors of fresh raspberries with a moist, delicate cake that’s perfect for any occasion. It’s a delightful way to celebrate summer and impress your guests. I encourage you to try making this cake; I promise it will become a cherished recipe in your collection!
Raspberry Upside Down Cake
Ingredients
Equipment
Method
- Preheat the oven to 350F degrees.
- Spray a 9-inch springform pan with nonstick cooking spray and wrap the bottom and sides in foil to avoid the butter/sugar mixture leak out the bottom.
- In a medium bowl, whisk together the topping ingredients, except the raspberries.
- Next, spread the mixture into the bottom of the prepared pan and top with raspberries in an even layer, to cover the bottom of the pan entirely. Set aside.
- In a large bowl, whisk together flour, baking powder, and salt, and set aside.
- In another bowl, beat together the butter with granulated sugar, egg, vanilla extract, lemon juice, and lemon zest, until combined. Scrape the sides and bottom of the bowl.
- Add the wet ingredients to the dry ingredients bowl and beat until combined. It will look crumby, which is normal.
- After that, add 1/2 cup milk and ricotta and beat until incorporated.
- Lastly, fold in the raspberries, using a rubber spatula.
- Spoon the batter over the raspberries and level the top with an offset spatula.
- Bake in the preheated oven for about 35-45 minutes until golden or until a toothpick inserted into the center comes out clean. Oven times vary so check with a toothpick first to ensure doneness.
- Remove from the oven and let cool in the pan for 10 minutes. After that, run a knife along the pan's sides, open the pan ring, and slice the cake onto a serving platter.
- Let finish cooling and dust the top with powdered sugar before serving.
Notes
- Tip 1: Store any leftovers in an airtight container at room temperature for up to three days.
- Tip 2: You can freeze the cake before dusting with powdered sugar.
- Tip 3: This cake pairs beautifully with a scoop of vanilla ice cream.
- Tip 4: Feel free to swap out raspberries for other fruits.
- Tip 5: Serve warm from the oven for a comforting dessert.