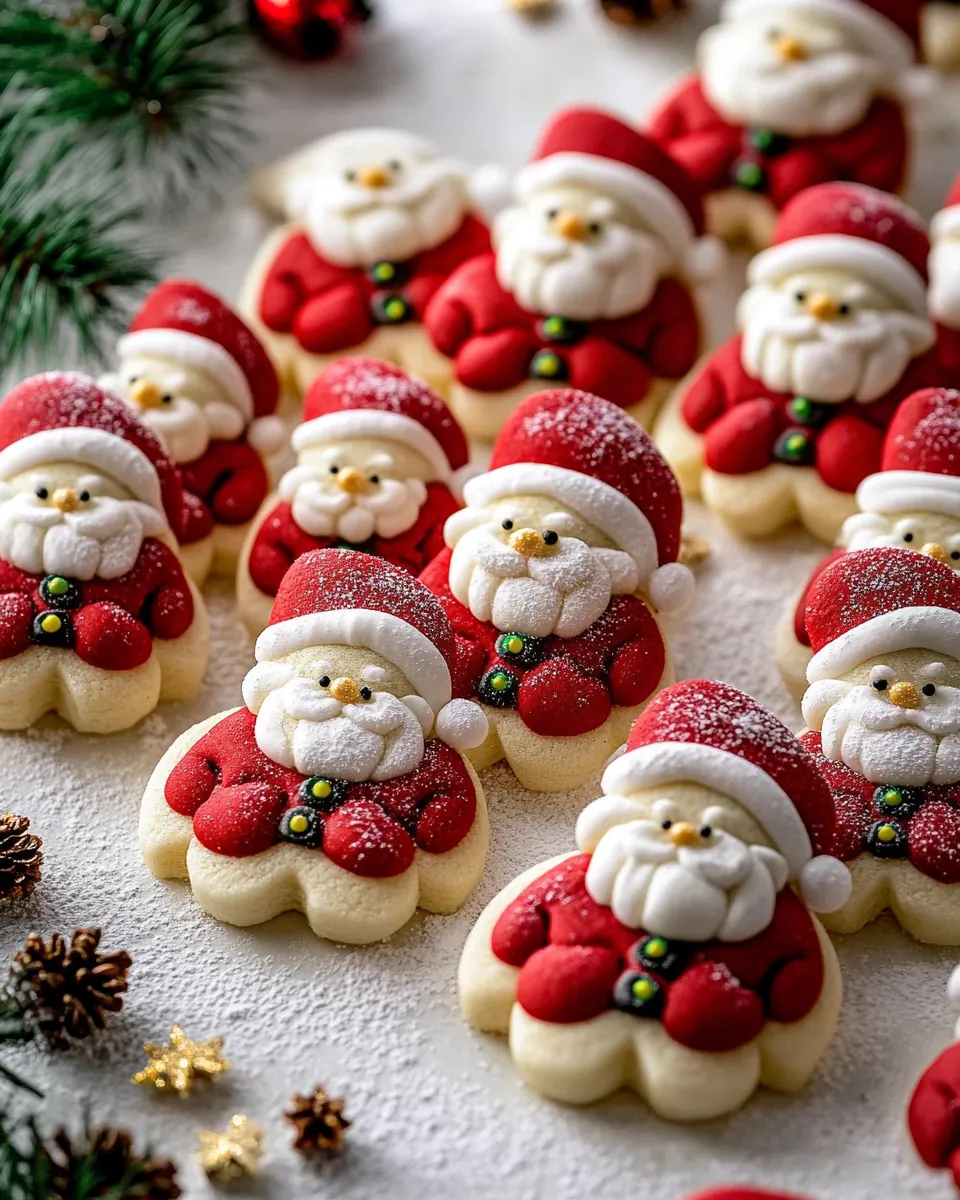
Holly Jolly Santa Cookies
There’s something truly magical about baking during the holiday season, and these Holly Jolly Santa Cookies are no exception. Every year, I gather my kids in the kitchen to create fun and festive treats that bring joy to our home. As we roll the dough and shape it into cheerful little Santas, laughter fills the air. The best part is watching their excitement as they decorate each cookie, transforming them into delicious works of art. The vibrant red and white colors symbolize the season, and the aroma of freshly baked cookies is simply irresistible. It’s more than just baking; it’s a cherished family tradition that we look forward to every year. From the moment we take the first bite, we’re reminded of the joy of sharing treats with friends and family. So, gather your loved ones and let’s dive into the delightful world of Holly Jolly Santa Cookies!
Recipe Snapshot
60 mins
45 mins
15 mins
Medium
120 kcal
2 g
Gluten-Free, Low FODMAP
6 g
Oven, Baking Sheet, Mixing Bowl
The Charm of This Holly Jolly Santa Cookies
1. Festive Vibes
These cookies are a wonderful way to embrace the spirit of the holidays. Their adorable Santa shape brings smiles to faces of all ages, making them perfect for any festive gathering. Whether you’re hosting a holiday party or just want to treat your family, these cookies set the tone for a joyful celebration.
2. Creative Decorating
Baking these cookies is only half the fun! Decorating them becomes a creative outlet for both kids and adults. You can use colorful frosting and candies to personalize each cookie, sparking creativity and imagination as you craft your edible masterpieces. The decorating process allows for wonderful bonding time, especially when everyone gets to put their unique touch on each Santa.
3. Ideal for Gifting
These cookies make fantastic gifts! Pack them in beautiful boxes lined with parchment paper, and you have a lovely homemade present for neighbors, teachers, or friends. Sharing these Holly Jolly Santa Cookies is a heartfelt gesture that spreads cheer and warmth during this special season.
4. Simple Ingredients
The best part about these cookies is that they require simple, everyday ingredients that you probably already have in your pantry. With just a few basic items, you can whip up a batch of these festive treats, making them accessible to everyone, from beginner bakers to seasoned pros.
5. Deliciously Soft Texture
Upon taking a bite, you’ll experience the delightful softness of these cookies. The combination of butter and cream cheese creates a tender, melt-in-your-mouth texture that pairs perfectly with the sweetness of the frosting. Each cookie is a delightful treat that’s hard to resist!
6. A Family Tradition
Making Holly Jolly Santa Cookies has become a beloved family tradition in our home. Each year, we gather to bake, decorate, and share these cookies, creating memories that last a lifetime. It’s a beautiful way to celebrate the season and reinforce the bonds of family through the joy of baking.
Ingredients for Holly Jolly Santa Cookies

When it comes to making Holly Jolly Santa Cookies, the ingredients work together to create a deliciously festive treat. Each component plays a key role in building flavor and texture, ensuring that these cookies are not just eye-catching but also incredibly tasty. Let’s delve into the magic of these ingredients!
- 2 sticks (1 cup) salted butter, at room temperature: The foundation of our cookie dough, butter brings richness and a delightful flavor.
- 1/2 cup granulated sugar: This sweetener is essential for achieving that perfect balance of sweetness in our cookies.
- 1 large egg, at room temperature: Eggs provide moisture and help bind the dough, giving it structure.
- 2 teaspoons vanilla: A dash of vanilla enhances flavor, making the cookies even more inviting.
- 2 1/4 cups all-purpose flour: This is the main dry ingredient that creates the body of the cookie.
- 1/2 teaspoon kosher salt: A pinch of salt elevates all the flavors and balances the sweetness.
- 1-2 teaspoons red food coloring: This adds a fun, festive touch, giving our Santa cookies their iconic look.
- Mini chocolate chips: Perfect for decorating Santa’s eyes and buttons, adding a touch of whimsy.
- Mini holiday M&Ms: These candies serve as Santa’s nose, completing the festive look.
- 2 ounces cream cheese, at room temperature (optional): This ingredient is blended into the frosting, adding creaminess and richness.
- 1 1/2 cups powdered sugar: Used in the frosting to achieve the desired sweetness and texture.
The Method for Holly Jolly Santa Cookies

Now that we have our ingredients ready, let’s get into the fun part—making these adorable Holly Jolly Santa Cookies! Follow these steps, and you’ll have a delightful batch of cookies that not only look great but taste incredible too.
Preheat your oven to 350 degrees Fahrenheit. It’s crucial to have your oven at the right temperature to ensure even baking. Line two baking sheets with parchment paper to prevent sticking and to make cleanup easier later.
In a large mixing bowl, cream together the butter, sugar, and vanilla using an electric mixer until the mixture is light and fluffy, which should take about three to five minutes. This step is important as it incorporates air into the mixture, giving your cookies a lighter texture. Don’t rush this step!
Add the egg to the mixture and beat until combined. Once incorporated, add the flour and kosher salt. Mix just until the dough comes together and forms a ball. Be careful not to overmix; you want a soft dough that holds its shape.
Remove one cup of the dough and set it aside for later. With the remaining dough, add in one teaspoon of red food coloring. Mix until the color is uniform, adding more coloring if necessary for a vibrant hue. Note that the color will deepen when baked, so keep that in mind.
Now it’s time to shape the cookies! From the red dough, roll one (1-inch) ball for Santa’s body and five (1/2-inch) balls for his arms and legs. From the plain dough, create one (3/4-inch) ball for his head and five (1/4-inch) balls for his hands and feet. This method helps you visualize Santa’s shape as you prepare.
On your prepared baking sheet, gently flatten the red 1-inch ball until it’s about 1/2 inch thick. Attach four of the red 1/2-inch balls to create arms and legs. Next, add the plain 3/4-inch ball for Santa’s head, flattening it slightly as well. Then, attach the plain 1/4-inch balls for hands and feet, and shape the remaining red 1/2-inch ball into a triangle for Santa’s hat. Arrange them with at least two inches between each cookie to ensure they have room to spread.
Transfer the baking sheet to the oven and bake the Santa cookies for twelve to fifteen minutes, or until they turn lightly golden. Keep an eye on them; every oven is a bit different.
While the cookies are baking, let’s prepare the frosting. In a stand mixer, whip together the butter and any cream cheese until light and fluffy, about three to four minutes. This adds a rich flavor to the frosting. Gradually add the powdered sugar and an extra teaspoon of vanilla, beating for about two more minutes until it’s airy and spreadable. If it’s too thick, add a splash of milk.
Once the cookies have cooled completely, it’s time to decorate! Transfer half of the frosting into a piping bag fitted with a small round tip. Alternatively, you can use a ziplock bag with a small corner snipped off. Use the piping bag to outline Santa’s face, arms, and legs. For the finishing touch, place a small dot of frosting on the tip of his hat and add a red mini M&M for his nose. Let your creativity shine!
Things Worth Knowing
- Chilling the Dough: If your dough seems too soft, chill it in the refrigerator for about 30 minutes before shaping. This will make it easier to handle.
- Color Darkening: Keep in mind that the red food coloring may darken as the cookies bake, so test the color before baking to avoid overdoing it.
- Even Baking: Rotate your baking sheets halfway through the baking time to ensure even cooking and golden edges.
- Cooling: Allow the cookies to cool completely before frosting to prevent the frosting from melting. This will help keep Santa’s features intact.
Expert Tips about Holly Jolly Santa Cookies
To ensure that your Holly Jolly Santa Cookies turn out perfectly, here are some expert tips that I’ve gathered over the years:
- Storage: Store your cookies in a single layer in an airtight container. If you’re stacking them, place a piece of parchment paper between each cookie to maintain their shape.
- Freezing: You can freeze unfrosted cookies for up to three months. Thaw them before decorating; this keeps them fresh and delicious.
- Cookie Shapes: For a more precise shape, use a cookie cutter instead of rolling by hand. This method ensures uniformity and makes for easier decorating.
- Frosting Choices: Feel free to experiment with different colors for the frosting to match your holiday theme. You can also add sprinkles for extra fun!
- Variations: Try different decorations! Instead of mini M&Ms, consider using small candies or chocolate pieces to create unique designs.
What to Pair With Holly Jolly Santa Cookies
- Holiday Beverages: Serve these cookies alongside a warm cup of hot cocoa or spiced apple cider to enhance the festive experience.
- Festive Parties: These cookies are perfect for holiday gatherings, cookie exchanges, or as delightful treats for Christmas parties.
- Gift Baskets: Include a few of these cookies in gift baskets for your neighbors or friends to spread holiday cheer.
- Cookie Decorating Parties: Organize a cookie decorating event where kids and adults can have fun creating their own Santa cookies.
- Family Gatherings: These cookies are great for family gatherings, providing a fun activity and a delicious treat to enjoy together.
FAQ
Conclusion
The Holly Jolly Santa Cookies are a delightful blend of fun and flavor that brings the holiday spirit to life. Their charming appearance and delicious taste make them a must-have for any festive occasion. I encourage you to try your hand at baking these cookies and experience the joy of creating something special for your loved ones. Not only will you enjoy the process, but you’ll also create sweet memories that will last a lifetime.

Holly Jolly Santa Cookies
Ingredients
Equipment
Method
- 1. Preheat your oven to 350 degrees Fahrenheit. It's crucial to have your oven at the right temperature to ensure even baking. Line two baking sheets with parchment paper to prevent sticking and to make cleanup easier later.
- 2. In a large mixing bowl, cream together the butter, sugar, and vanilla using an electric mixer until the mixture is light and fluffy, which should take about three to five minutes. This step is important as it incorporates air into the mixture, giving your cookies a lighter texture. Don’t rush this step!
- 3. Add the egg to the mixture and beat until combined. Once incorporated, add the flour and kosher salt. Mix just until the dough comes together and forms a ball. Be careful not to overmix; you want a soft dough that holds its shape.
- 4. Remove one cup of the dough and set it aside for later. With the remaining dough, add in one teaspoon of red food coloring. Mix until the color is uniform, adding more coloring if necessary for a vibrant hue. Note that the color will deepen when baked, so keep that in mind.
- 5. Now it's time to shape the cookies! From the red dough, roll one (1-inch) ball for Santa's body and five (1/2-inch) balls for his arms and legs. From the plain dough, create one (3/4-inch) ball for his head and five (1/4-inch) balls for his hands and feet. This method helps you visualize Santa's shape as you prepare.
- 6. On your prepared baking sheet, gently flatten the red 1-inch ball until it's about 1/2 inch thick. Attach four of the red 1/2-inch balls to create arms and legs. Next, add the plain 3/4-inch ball for Santa's head, flattening it slightly as well. Then, attach the plain 1/4-inch balls for hands and feet, and shape the remaining red 1/2-inch ball into a triangle for Santa's hat. Arrange them with at least two inches between each cookie to ensure they have room to spread.
- 7. Transfer the baking sheet to the oven and bake the Santa cookies for twelve to fifteen minutes, or until they turn lightly golden. Keep an eye on them; every oven is a bit different.
- 8. While the cookies are baking, let's prepare the frosting. In a stand mixer, whip together the butter and any cream cheese until light and fluffy, about three to four minutes. This adds a rich flavor to the frosting. Gradually add the powdered sugar and an extra teaspoon of vanilla, beating for about two more minutes until it’s airy and spreadable. If it's too thick, add a splash of milk.
- 9. Once the cookies have cooled completely, it’s time to decorate! Transfer half of the frosting into a piping bag fitted with a small round tip. Alternatively, you can use a ziplock bag with a small corner snipped off. Use the piping bag to outline Santa's face, arms, and legs. For the finishing touch, place a small dot of frosting on the tip of his hat and add a red mini M&M for his nose. Let your creativity shine!
Notes
- Storage: Store your cookies in a single layer in an airtight container. If you're stacking them, place a piece of parchment paper between each cookie to maintain their shape.
- Freezing: You can freeze unfrosted cookies for up to three months. Thaw them before decorating; this keeps them fresh and delicious.