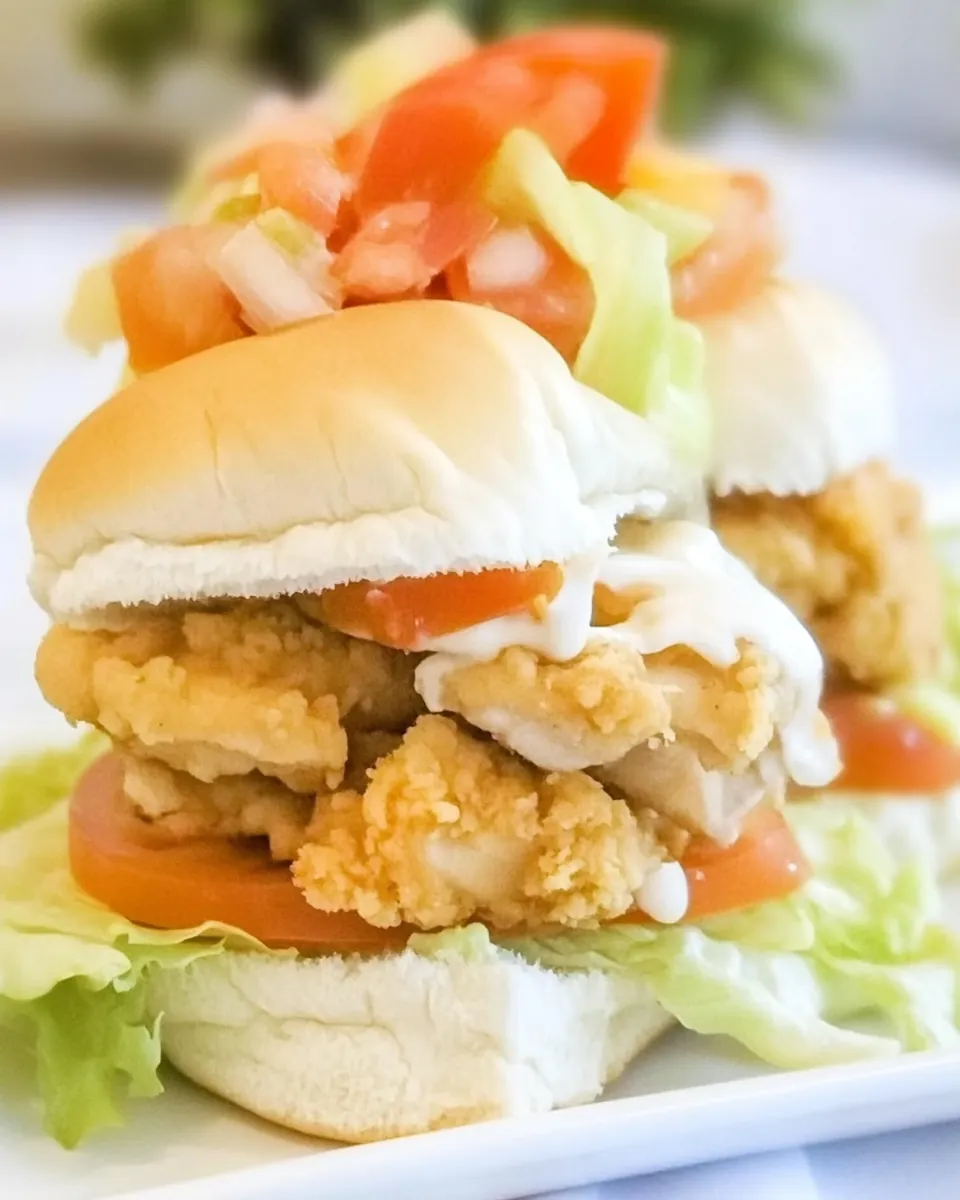
Chicken Tender Sliders
There’s something so comforting about a plate of Chicken Tender Sliders that brings back memories of family gatherings and game nights. Imagine the aroma wafting through the kitchen as you prepare these little delights, each slider packed with flavor and nostalgia. Whether you’re hosting a party or simply looking to indulge in a quick weeknight dinner, these sliders never disappoint. I remember the first time I made them for my friends; we all gathered around the table, laughter echoing as we devoured them in mere minutes. The combination of tender chicken, melty cheese, and soft rolls creates a symphony of flavors that will have everyone asking for seconds!
Recipe Snapshot
30 mins
10 mins
20 mins
Medium
290 kcal
18 g
Keto, Gluten-Free, Low FODMAP
12 g
Oven, Whisk, Chef’s Knife, Baking Sheet
Why You’ll Love This Chicken Tender Sliders
Perfect for Any Occasion
The beauty of Chicken Tender Sliders lies in their versatility. They’re perfect for weeknight dinners, parties, or even as a delicious snack while watching a movie. These sliders are easy to make and incredibly satisfying, satisfying both kids and adults alike.
Flavorful and Comforting
Each bite bursts with deliciousness, thanks to the combination of crispy chicken, creamy cheese, and zesty glaze. The flavors meld beautifully, making you crave just one more slider. It’s like a warm hug on a plate!
Quick and Easy Preparation
Busy week ahead? No worries! These sliders come together in a flash. With minimal prep work and straightforward instructions, you’ll have a mouthwatering meal ready in no time. It’s the perfect solution for those days when you want something hearty without spending hours in the kitchen.
Fun for Everyone
Kids love them, and adults can’t resist them either. Chicken Tender Sliders are fun to eat and easy to hold, making them a great choice for gatherings. Serve them up at your next get-together, and watch your guests light up as they bite into these tasty treats.
A Family Recipe Tradition
Making sliders is not just about the food; it’s about creating memories. Family traditions transform into a culinary adventure as you prepare these sliders together. Sharing the love of cooking with loved ones adds an extra layer of joy to every bite.
Ingredients Required for Chicken Tender Sliders

When preparing Chicken Tender Sliders, the ingredients work in harmony to create a mouthwatering experience. Every element plays a crucial role—from the fluffy Hawaiian rolls to the tender chicken, each ingredient complements the others beautifully.
- 12 Hawaiian rolls: These sweet and soft rolls serve as the perfect base for our sliders, providing a delightful touch to the savory filling.
- 9 chicken tenders, prepared: The star of our sliders, these tender pieces of chicken bring flavor and heartiness to the dish.
- 6 slices colby jack cheese: Melting perfectly, this cheese adds creaminess for an indulgent flavor.
- 2 cups shredded lettuce: This adds a nice crunch and freshness to balance out the richness of the sliders.
- 2 roma tomatoes, sliced: Juicy and flavorful, these tomatoes provide a burst of color and acidity.
- 2 tablespoons salted butter, melted: Used for brushing on the rolls, this butter enhances the flavor and gives the sliders a beautiful golden top.
- 2 teaspoons dijon mustard: This adds a tangy kick to the glaze, elevating the overall taste.
- 2 teaspoons honey: Sweet and sticky, honey balances out the mustard and adds depth to the flavor.
The Process for Making Chicken Tender Sliders
Cooking Chicken Tender Sliders is a breeze, and you’ll appreciate how quickly they come together. Let’s dive into the steps that will lead you to the most scrumptious sliders you’ve ever tasted.
- Preheat your oven to 350˚F. This is an essential step, as a hot oven helps achieve that perfect melt on the cheese while warming the sliders.
- To prepare the glaze, whisk together the melted butter, dijon mustard, and honey until everything is beautifully combined. This glaze is what brings all the flavors together, adding a delightful richness to your sliders.
- Next, place the chicken tenders on a cutting board and chop them into bite-sized pieces. This makes it easier to layer them into the sliders and ensures an even distribution in every bite.
- Take your Hawaiian rolls and cut them in half. Lay the bottom halves in a baking dish. This will be your base for the sliders and helps catch all the melted cheese and chicken juices.
- Now, layer the colby jack cheese on top of the rolls. You want to cover them generously, allowing the cheese to melt deliciously over the chicken.
- Top the cheese with the chopped chicken tenders. Make sure to distribute them evenly so that every slider is packed with flavor.
- Place the top halves of the rolls on and brush them generously with the honey mustard glaze. This step is key to getting that irresistible golden crust.
- Slide the baking dish into the oven and bake for 15 to 20 minutes, or until everything is heated through and the cheese is bubbling. Keep an eye on them to avoid over-baking.
- Once done, use a spatula to lift the tops off the sliders. Now, add the freshly shredded lettuce and roma tomato slices to each slider. This adds freshness and crunch, rounding out the flavors beautifully.
- Finally, place the tops back on and serve immediately. These sliders are best enjoyed hot and fresh, giving you that amazing mix of gooey cheese and savory chicken.
Things Worth Knowing
- Check the temperature: Make sure your chicken tenders are thoroughly cooked before combining them with the other ingredients. You want to ensure that they are safe to eat and delicious.
- Customize the glaze: Feel free to experiment with different flavors in the glaze. Adding a bit of garlic powder or a touch of chili powder can elevate the flavor profile.
- Use a baking dish: A nice, deep baking dish helps the sliders cook evenly and allows the cheese to melt beautifully without spilling over.
- Keep an eye on the cheese: If you prefer a crispier top, leave the sliders uncovered during the last few minutes of baking. Just be cautious not to overdo it!
Substitutions and Tips
If you’re looking to make some adjustments or just want to be prepared, here are some helpful tips and substitutions for Chicken Tender Sliders.
- Storage: To store leftovers, separate them into meal-size portions and keep them in an airtight container in the fridge for 3 to 4 days. This way, you can enjoy them again later!
- Freezing: Yes, you can freeze these sliders! Just wrap them tightly in foil and place them in a freezer-safe bag. They can be frozen for up to 3 months.
- Reheating: When ready to eat, reheat the sliders in the microwave in 30-second increments or cover them with tin foil and place them in the oven until warmed through.
- Customizing: Feel free to swap out the Hawaiian rolls for another type of bread if you prefer. Dinner rolls or slider rolls also work wonderfully.
- Scaling: This recipe can easily be doubled if you’re feeding a crowd, or halved for smaller portions. It’s flexible to your needs!
- Variations: Try swapping the cheese! Cheddar, American, or Provolone are all amazing options that will complement the chicken perfectly.
Best Served With
Chicken Tender Sliders are not just delicious on their own; they pair wonderfully with a variety of sides and beverages that can elevate your dining experience. Here are some ideas to consider:- Fresh Veggies: A side of crunchy veggie sticks with ranch dressing makes for a refreshing complement.
- Salads: A light side salad, perhaps a Caesar or garden salad, adds a nice contrast to the sliders.
- Fries: Crispy fries or sweet potato fries are classic companions that everyone loves.
- Coleslaw: A tangy coleslaw adds a crunchy texture that pairs perfectly with the softness of the sliders.
- Fruit Salad: A refreshing fruit salad can provide a sweet balance to the savory sliders.
- Occasions: These sliders are perfect for game nights, family gatherings, or casual get-togethers.
FAQ
Conclusion
In summary, Chicken Tender Sliders are not just a meal; they are an experience filled with flavor and nostalgia. They are perfect for any occasion, whether it’s a cozy family dinner or a lively game night with friends. I encourage you to try making them yourself and savor the joy they bring to your table. You won’t regret it—these sliders are bound to become a favorite in your home!
Chicken Tender Sliders
Ingredients
Equipment
Method
- Preheat your oven to 350˚F. This is an essential step, as a hot oven helps achieve that perfect melt on the cheese while warming the sliders.
- To prepare the glaze, whisk together the melted butter, dijon mustard, and honey until everything is beautifully combined. This glaze is what brings all the flavors together, adding a delightful richness to your sliders.
- Next, place the chicken tenders on a cutting board and chop them into bite-sized pieces. This makes it easier to layer them into the sliders and ensures an even distribution in every bite.
- Take your Hawaiian rolls and cut them in half. Lay the bottom halves in a baking dish. This will be your base for the sliders and helps catch all the melted cheese and chicken juices.
- Now, layer the colby jack cheese on top of the rolls. You want to cover them generously, allowing the cheese to melt deliciously over the chicken.
- Top the cheese with the chopped chicken tenders. Make sure to distribute them evenly so that every slider is packed with flavor.
- Place the top halves of the rolls on and brush them generously with the honey mustard glaze. This step is key to getting that irresistible golden crust.
- Slide the baking dish into the oven and bake for 15 to 20 minutes, or until everything is heated through and the cheese is bubbling. Keep an eye on them to avoid over-baking.
- Once done, use a spatula to lift the tops off the sliders. Now, add the freshly shredded lettuce and roma tomato slices to each slider. This adds freshness and crunch, rounding out the flavors beautifully.
- Finally, place the tops back on and serve immediately. These sliders are best enjoyed hot and fresh, giving you that amazing mix of gooey cheese and savory chicken.
Notes
- Tip 1: To store leftovers, separate them into meal-size portions and keep them in an airtight container in the fridge for 3 to 4 days.
- Tip 2: Yes, you can freeze these sliders! Just wrap them tightly in foil and place them in a freezer-safe bag.
- Tip 3: When ready to eat, reheat the sliders in the microwave in 30-second increments or cover them with tin foil and place them in the oven.
- Tip 4: Feel free to swap out the Hawaiian rolls for another type of bread if you prefer. Dinner rolls or slider rolls also work wonderfully.
- Tip 5: This recipe can easily be doubled if you’re feeding a crowd, or halved for smaller portions.