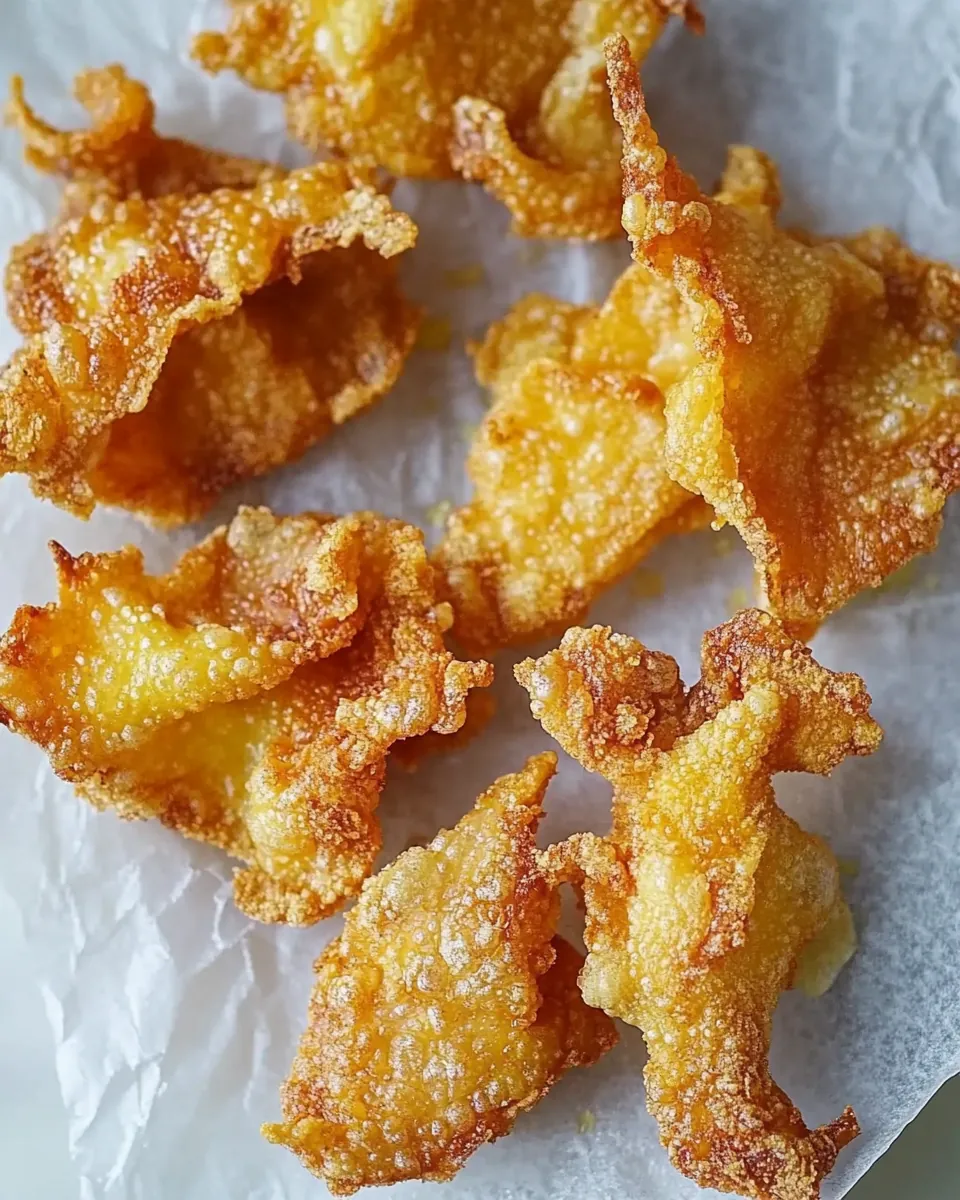
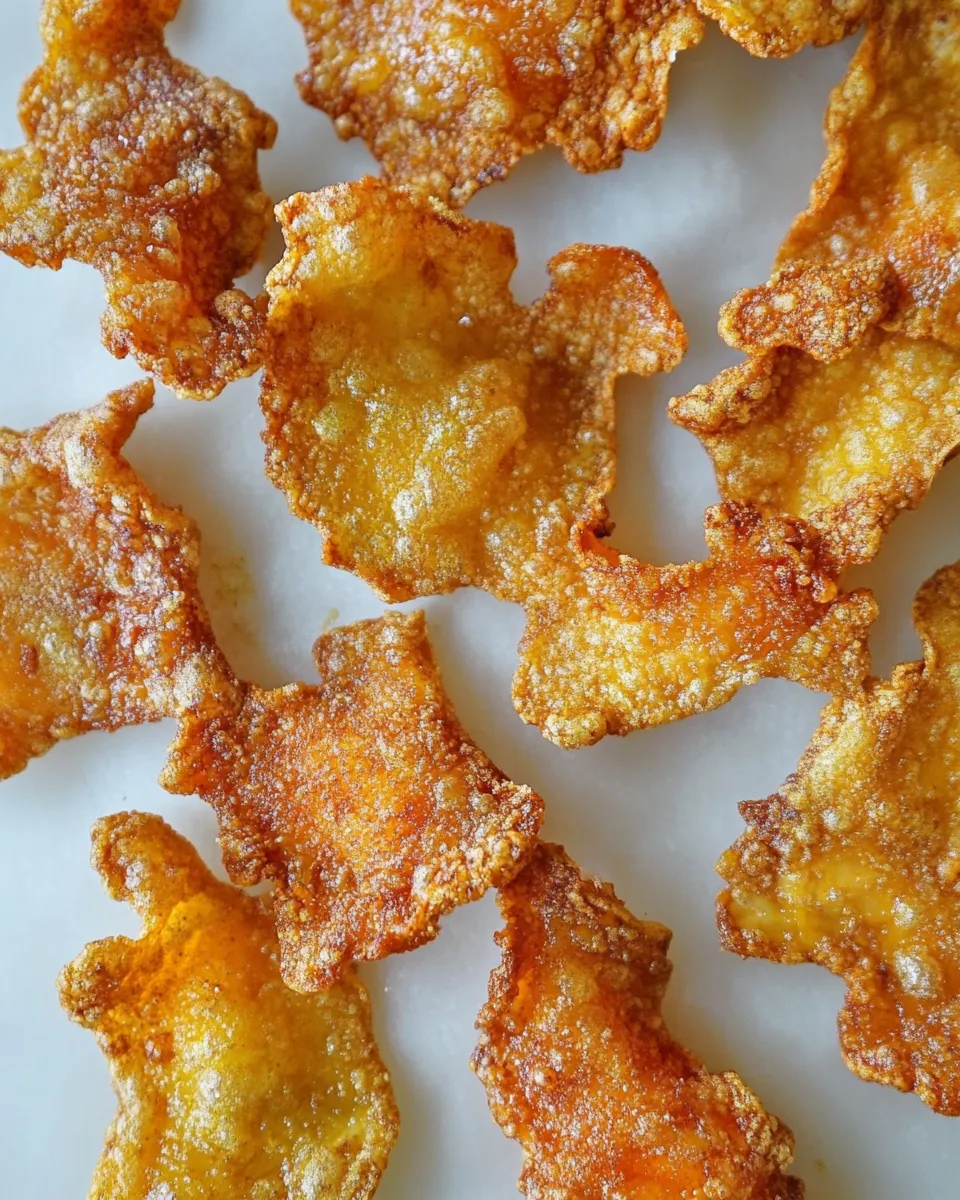
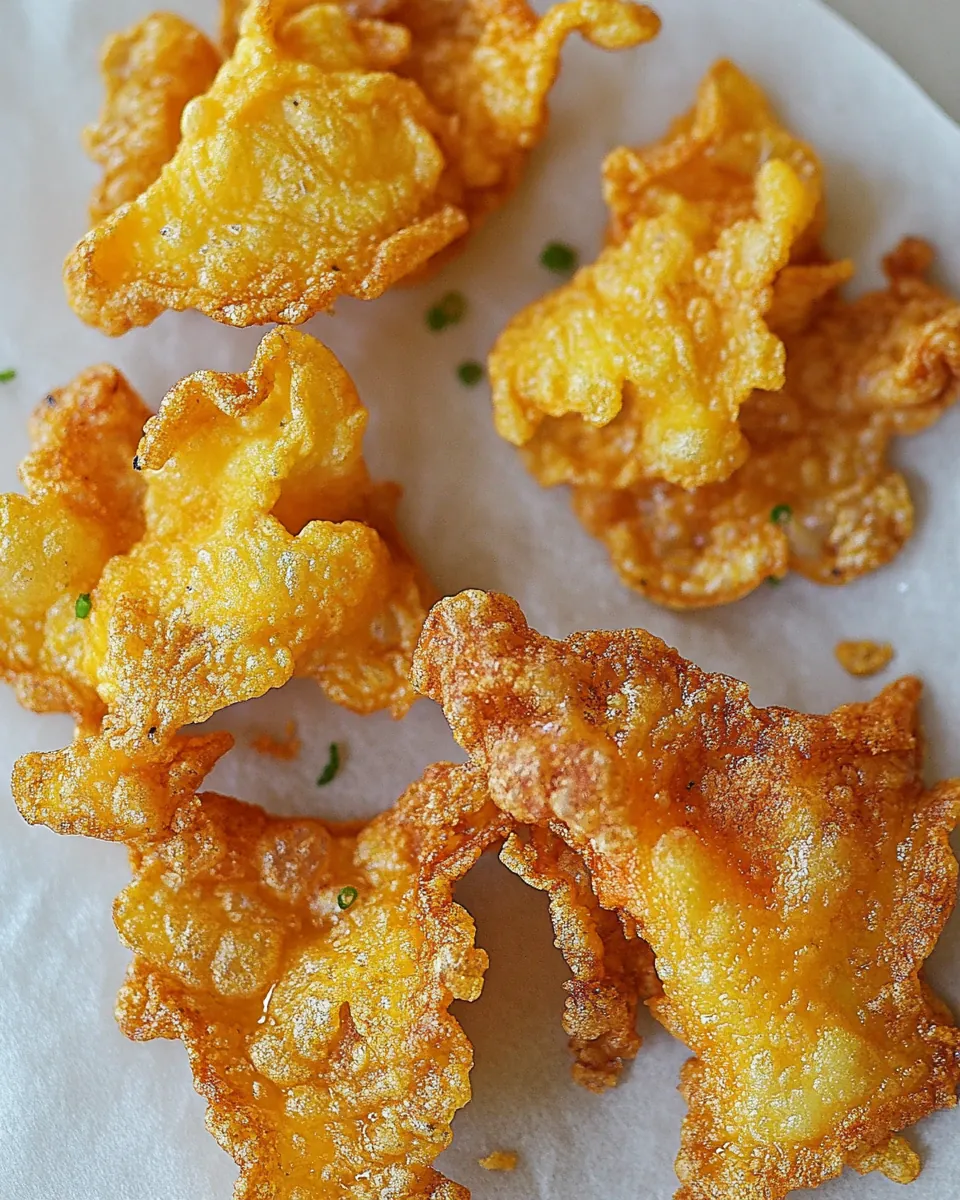
Crispy Chicken Skin Chips
When I first stumbled upon the idea of making Crispy Chicken Skin Chips, I couldn’t believe how simple yet delicious it sounded. It all started one evening when I had a craving for a crunchy snack, something that would satisfy my taste for savory but be a bit different from the usual potato chips. That’s when I remembered the crispy chicken skins I had enjoyed at a local restaurant. Why not recreate that magic in my own kitchen? With just a few ingredients and a little time, I was able to whip up a batch of these incredible chips that not only satisfied my cravings but also left me feeling like a culinary genius.
There’s something undeniably satisfying about taking kitchen leftovers, like chicken skins, and transforming them into a snack that’s both indulgent and guilt-free. Imagine biting into a chip that boasts a crunchy texture and rich flavor, all while knowing you’re using up something that might have been discarded. The Crispy Chicken Skin Chips are perfect for snacking on while watching a movie or topping on a salad for a delicious crunch. Every time I make them, I’m amazed at how versatile they can be. Whether you prefer them straight out of the air fryer or baked to a golden crisp, each bite is a delightful combination of savory goodness.
What makes these chips even better is that they are incredibly easy to prepare. With minimal ingredients and a straightforward cooking method, anyone can dive into making their own batch. Plus, they invite creativity! You can season them in so many ways to match your mood. Whether it’s a sprinkle of your favorite spice blend or a touch of garlic powder for a flavor boost, the world is your oyster. So let’s dive into making these Crispy Chicken Skin Chips and turn those leftover skins into a crunchy delight that you won’t soon forget!
Recipe Snapshot
25 mins
5 mins
20 mins
Medium
250 kcal
17 g
Keto, Paleo, Whole30
20 g
Oven, Skillet, Air Fryer, Baking Sheet
What’s Great About This Crispy Chicken Skin Chips
Why You’ll Love These Crispy Chicken Skin Chips
One of the best things about the Crispy Chicken Skin Chips is how they make you feel like a culinary wizard. You take something that’s typically seen as waste and create a gourmet snack that’s bursting with flavor.
Simplicity at Its Best
Making these chips is straightforward, requiring only a couple of ingredients. You won’t have to spend hours in the kitchen, and you can whip them up in no time. With just chicken skins and salt, you can create a crunchy snack that’s sure to impress.
Perfect for Any Occasion
These Crispy Chicken Skin Chips are incredibly versatile. Whether it’s game day, a movie night, or a casual snack, these chips fit the bill. They can be enjoyed on their own or paired with dips like guacamole or spicy salsa, making them perfect for sharing (or not!).
Healthier Alternative
With the rise of low-carb diets, these chips come as a welcome alternative to traditional potato chips. They are rich in flavor, low in carbohydrates, and can fit into various dietary regimens, making them a guilt-free pleasure.
Customizable Flavor
The flavor possibilities are endless! You can experiment with a range of seasonings according to your preferences. Whether you love a kick of spice or a hint of herbs, you can tailor these chips to suit your palate.
Leftover Transformation
Instead of discarding those chicken skins, you’re repurposing them into something delicious. It’s a beautiful way to minimize waste and make your cooking more sustainable.
Ingredients You’ll Need for Crispy Chicken Skin Chips

Creating the perfect Crispy Chicken Skin Chips revolves around using a couple of simple yet essential ingredients. The main star, of course, is the chicken skins, which are rich in flavor and provide that satisfying crunch when cooked properly. The salt complements the skins perfectly, enhancing their natural flavors and ensuring every bite is savory and delicious.
- 8 chicken skins: I normally use skins from chicken thighs, as they yield the best crunch and flavor. They are the key ingredient that transforms into the delightful chips.
- ½ teaspoon Diamond Crystal kosher salt: This is essential for bringing out the flavor of the skins. The salt not only seasons but also helps in drawing out moisture, contributing to that crispy texture.
Directions for Crispy Chicken Skin Chips
Getting your Crispy Chicken Skin Chips ready is a fun and satisfying process. Follow these simple steps, and you’ll have a delicious snack in no time!
- Start by patting the chicken skins dry with a paper towel. This step is crucial, as removing excess moisture helps achieve that epic crunch that we all crave. Sprinkle salt evenly on both sides of the skins to enhance their flavor.
- Next, lay three or four chicken skins in a single layer, skin-side down, in the air fryer basket. Set the air fryer to cook at 400°F for a total of 12 minutes. This initial cooking phase will kickstart the crisping process.
- At the six-minute mark, carefully open the air fryer and flip the chicken skins over so they are now skin-side up. This ensures that both sides get that perfect golden hue and crunch.
- Continue air frying the skins for the remaining six minutes, checking occasionally. If they seem to be a bit flabby, consider adding a minute or two to the cooking time until they reach that desired crispiness.
- Once they are cooked to perfection, remove the crispy cracklings from the air fryer and place them on a wire rack to cool. This helps them retain their crunch as they cool down.
- Be sure to dump out any rendered chicken fat from the bottom of the air fryer before repeating the steps with the remaining chicken skins.
- If you’re opting for the oven method, heat it to 400°F on convection or 425°F if using a non-convection setting with the rack in the middle.
- Place the chicken skins in a single layer, skin-side down, on a stainless steel wire rack placed on top of a foil-lined rimmed baking sheet. This helps with even cooking and catching drippings.
- Pop the tray into the oven and bake for 10 minutes. The skins will start to sizzle and crisp up beautifully.
- After the first ten minutes, flip the skins so they are skin-side up and bake for another 10 minutes or until they turn golden brown and crispy.
Things Worth Knowing
Things Worth Knowing
- Temperature Check: Ensure your air fryer or oven is preheated before cooking. This step is essential for achieving that crispy texture.
- Cook in Batches: Depending on the size of your air fryer or oven, you may need to cook the chicken skins in batches to avoid overcrowding, which can lead to uneven cooking.
- Cool Properly: Let the Crispy Chicken Skin Chips cool completely on a wire rack to maintain their crunch. Avoid placing them on a plate, as steam can make them soggy.
- Seasoning Variations: Feel free to experiment with different seasonings. Paprika, garlic powder, or even a dash of cayenne can elevate the flavor profile.
Recipe Variations about Crispy Chicken Skin Chips
If you’re looking to spice things up with your Crispy Chicken Skin Chips, here are some tasty variations to consider:
- Spicy Kick: Add a pinch of cayenne pepper or chili powder to the salt for a spicy version of the chips.
- Herbed Delight: Mix in some dried herbs like rosemary or thyme for an aromatic flavor twist.
- Lemon Zest: For a fresh, zesty bite, try adding some lemon zest before baking or air frying. It adds a bright flavor contrast.
- Cheesy Flavor: After cooking, sprinkle some grated parmesan cheese on top of the hot chips for a cheesy finish.
- Sweet & Savory: For a unique twist, toss in a tiny bit of brown sugar with the salt to create a sweet-and-savory chip.
- Storage: Store any leftovers in an airtight container at room temperature to maintain their crunch.
- Freezing: These chips are best enjoyed fresh. However, if you have leftovers, you can freeze them in an airtight container, although they may lose their crunch upon reheating.
Pairing Suggestions for Crispy Chicken Skin Chips
Serving your Crispy Chicken Skin Chips can be just as fun as making them! Here are some ideas to elevate your serving game:
- With Dips: Serve your chips with a variety of dips like guacamole, spicy pineapple salsa, or even a tangy Caesar dressing for a delightful appetizer.
- On Salads: Crumble these crispy chips on top of salads as a crunchy low-carb crouton substitute. They add great texture and flavor.
- Game Day Snacks: These chips are perfect for game day. Pair them with other finger foods and dips for a complete snack spread.
- Casual Gatherings: Whether it’s a family gathering or a casual get-together with friends, these chips are sure to impress and will be a conversation starter!
- Storage Tips: If you have any leftovers, store them in an airtight container to keep them crispy. Avoid refrigerating them, as moisture can make them soggy.
- Seasonal Pairing: Enjoy these chips alongside seasonal dishes. They make a great addition to a summer barbecue or a winter gathering.
FAQ
Conclusion
The Crispy Chicken Skin Chips are a fantastic way to make use of chicken skins that would otherwise go to waste. They offer a flavorful and crunchy snack that everyone can enjoy. I encourage you to give this recipe a try, and I promise you won’t be disappointed with the delicious results. Once you taste these chips, you may find yourself making them again and again!
Crispy Chicken Skin Chips
Ingredients
Equipment
Method
- Pat the chicken skins dry with a paper towel and sprinkle salt on both sides.
- Lay three or four chicken skins in a single layer, skin-side down, on the air fryer basket and program the air fryer to cook at 400°F for a total of 12 minutes.
- At the halfway point (i.e. 6 minutes), flip the chicken skins over so they are skin-side up.
- Air fry the chicken skins the remaining 6 minutes or until crispy. Add a minute or two to the cooking time if the skin is still a little flabby in parts.
- Remove the chicken cracklings from the air fryer and place on a wire rack to cool.
- Dump out any chicken fat on the bottom of the air fryer before repeating the steps with the remaining chicken skins.
- Heat the oven to 400°F convection or 425°F (non-convection) with the rack in the middle.
- Place the chicken skin in a single layer, skin-side down, on top of stainless steel wire rack on a foil-lined rimmed baking sheet.
- Pop the tray in the oven and bake for 10 minutes.
- Then, flip the chicken skins skin-side up and bake for 10 more minutes or until golden and crispy.
Notes
- Tip 1: These crispy cracklings taste delicious on their own, but they’re even more amazing dipped in guacamole, spicy pineapple salsa, or your favorite hot sauce.
- Tip 2: The chicken cracklings also taste great crumbled on top of salads as a low-carb crouton substitute.