Easy Baked Chicken Katsu
When I think about a dish that brings warmth and comfort, Easy Baked Chicken Katsu instantly springs to mind. I remember the first time I made it; the aroma of crispy chicken and tangy pineapple sauce filled my kitchen, drawing my family in from all corners of our home. It wasn’t just a meal; it was an experience. This dish is perfect for busy weeknights when you want something that feels special but doesn’t take hours to prepare. Each bite of the tender, golden-brown chicken paired with the sweet and savory sauce is sheer bliss. The best part? You can whip it up in a flash, making it ideal for those evenings when time is tight but you still want to impress.
Recipe Snapshot
25 mins
10 mins
15 mins
Hard
340 kcal
25 g
Whole30, Gluten-Free, AIP
10 g
Saucepan, Chef’s Knife, Mixing Bowl, Whisk, Large Pot, Baking Sheet, Oven, Frying Pan
What You’ll Enjoy About This Easy Baked Chicken Katsu
It’s Perfectly Balanced
The genius of Easy Baked Chicken Katsu lies in its balance of flavors. The crispy breading contrasts beautifully with the tender, juicy chicken, while the pineapple sauce adds a delightful sweetness. This interplay keeps every bite exciting, making it a favorite among kids and adults alike.
So Easy to Prepare
What I love most about this recipe is how straightforward it is. With just a handful of ingredients and simple steps, you can create a dish that feels gourmet without the fuss. If you’re new to cooking or simply looking for a quick meal, this is your go-to.
Healthy Comfort Food
Even as a comfort food, Easy Baked Chicken Katsu leans towards the healthier side. Baking the chicken instead of frying it significantly reduces the fat content while still delivering that crave-worthy crunch. You can enjoy this dish guilt-free, knowing it’s made with wholesome ingredients.
Customizable for Any Taste
Whether you like it spicy or want to keep it mild, this recipe is highly versatile. You can easily adjust the level of seasoning or add your favorite spices to the breading. Plus, the pineapple sauce can be tweaked to suit your taste, making it a dish that can evolve with your preferences.
Great for Meal Prep
One of my favorite things about this dish is how well it holds up for leftovers. You can prepare a batch ahead of time, and it tastes just as good reheated. This makes Easy Baked Chicken Katsu a fantastic option for meal prepping or making ahead for busy days.
Essential Ingredients for Easy Baked Chicken Katsu
To create a dish as delightful as Easy Baked Chicken Katsu, the right ingredients are paramount. Each component plays a vital role, ensuring that every bite is flavorful and enjoyable. The key players in this recipe include fresh chicken, flavorful seasonings, and a sweet pineapple sauce that ties everything together.
- 1 boneless skinless chicken breast: The star of the dish, this chicken breast is lean, tender, and perfect for baking. It provides a healthy protein base for the recipe.
- Salt: A crucial ingredient that enhances the natural flavors of the chicken and other components.
- 1/4 cup all-purpose flour: This creates a light coating that helps the egg and panko adhere, giving the chicken its crispy exterior.
- 1 large egg beaten: Acts as a binder to hold the panko crust in place, ensuring a nice crunchy texture when baked.
- 3/4 cup panko: Japanese-style breadcrumbs that add an extra crunch to the chicken. They’re lighter and crispier than regular breadcrumbs.
- Cooking spray: Helps achieve that golden-brown appearance without excess oil.
- 1 tablespoon soy sauce: Adds depth and umami flavor to the pineapple sauce.
- 2 teaspoons cornstarch: Used to thicken the sauce, giving it the perfect texture for dipping.
- 1/4 cup granulated sugar: Balances the savory elements and adds sweetness to the sauce.
- 2 teaspoons brown sugar: Provides a richer sweetness and depth of flavor to the sauce.
- 1 tablespoon white vinegar: Adds acidity to the sauce, brightening the flavors.
- 3 tablespoons pineapple juice: Essential for that tropical flavor; you can use juice from canned pineapple chunks.
- 1 teaspoon ketchup: Adds a hint of tanginess to the sauce.
- White steamed rice (optional): Serves as a perfect base for the chicken and sauce.
- Pineapple chunks (optional): A refreshing garnish to accompany the chicken.
Putting Together Easy Baked Chicken Katsu
Now that you have your ingredients ready, let’s dive into making Easy Baked Chicken Katsu. This process is not only simple but also quite enjoyable. You’ll love watching your chicken transform into a crispy delight while your kitchen fills with mouthwatering aromas.
- Preheat your oven to 450 degrees Fahrenheit. It’s essential to get the oven hot enough to achieve that crispy texture. Looking for the right temperature is key to a perfect bake.
- Line a baking sheet with foil and grease it well. This will prevent the chicken from sticking and make cleanup a breeze.
- Prepare your chicken breast by cutting it in half horizontally. This is called butterflying, and it ensures even cooking and tenderness. Make sure both pieces are the same thickness for consistent results.
- Salt both sides of your chicken pieces lightly. This enhances the flavor and draws out moisture, keeping the chicken juicy.
- Set up your breading station with three containers: one for flour, one for the beaten egg, and one for panko. This organization helps streamline the process.
- Coat your first chicken piece in flour, ensuring it’s fully covered. Shake off any excess; you want just enough to help the egg stick.
- Dip the floured chicken into the beaten egg, letting any excess drip off. This step is crucial for achieving a crispy coating.
- Finally, roll the chicken in the panko breadcrumbs, pressing gently to adhere. This breadcrumb layer is what gives the chicken its signature crunch.
- Place the coated chicken onto the prepared baking sheet. Repeat the process for the second piece of chicken.
- Lightly spray the tops of the chicken with cooking oil to encourage browning during baking. It’s a little trick that makes a big difference!
- Bake in the preheated oven for 15 to 20 minutes. Keep an eye on it; you want the internal temperature to reach 160 degrees Fahrenheit. The chicken should be golden brown and crisp.
- Once done, remove the chicken from the oven and let it rest for about 5 minutes. This allows the juices to redistribute, keeping it moist.
- While the chicken is baking, prepare the sauce. In a small bowl, whisk together the soy sauce and cornstarch until smooth. This ensures there are no lumps in your sauce.
- Add the soy sauce mixture along with the remaining sauce ingredients to a small saucepan. Bring it to a simmer over medium-high heat; if it starts boiling too vigorously, reduce the heat slightly.
- Simmer for about 3 to 6 minutes until the sauce thickens. You want it to be just the right consistency for dipping. Remove from heat once thickened.
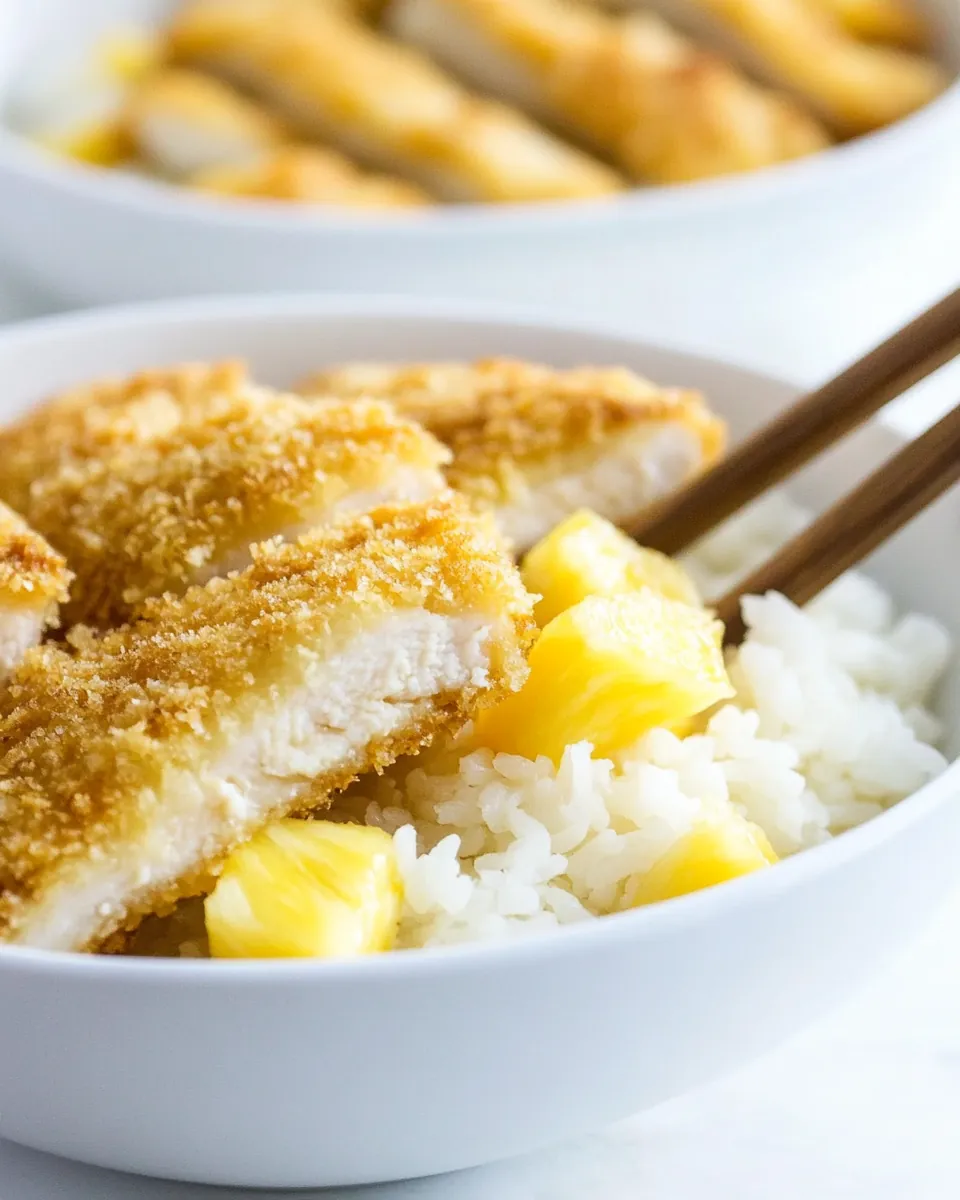
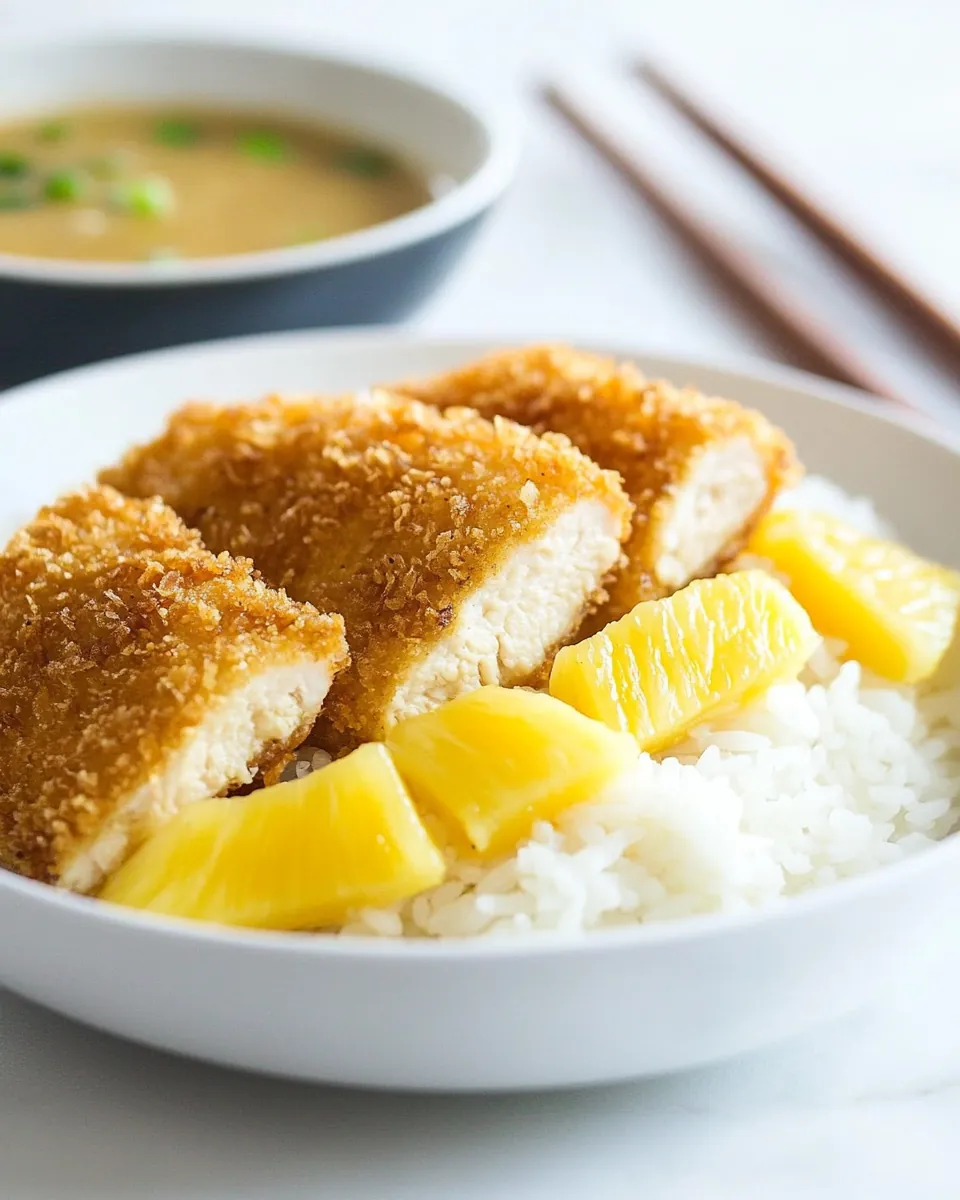
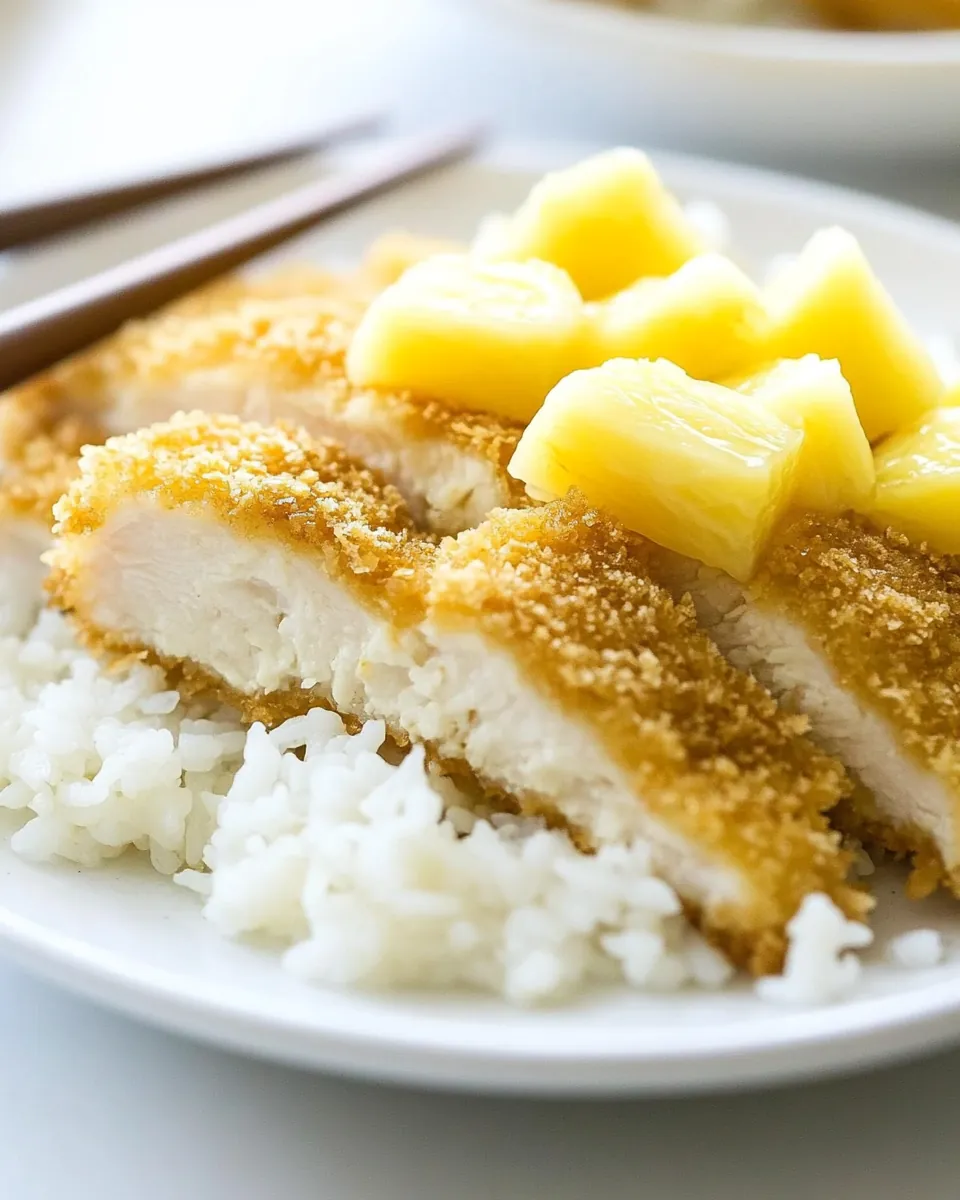
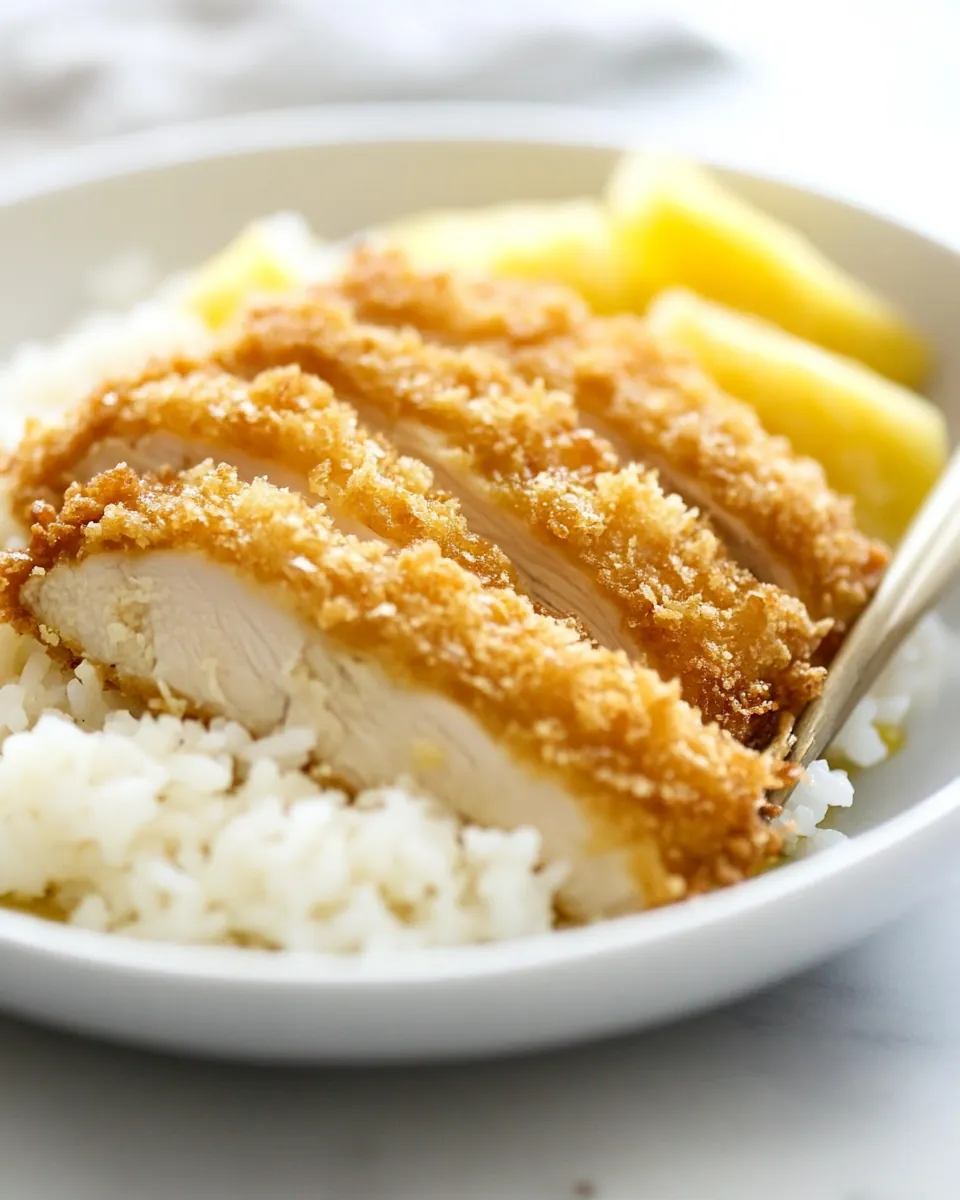
- Slice the baked chicken breast into strips and serve it over a bed of white steamed rice, drizzled with the sauce. Add pineapple chunks on the side for a fresh touch.
- Enjoy every flavorful bite!
Things Worth Knowing
- Check for doneness: Always use a meat thermometer to ensure your chicken is cooked through.
- Get creative with spices: Add paprika or garlic powder to the flour for extra flavor.
- Keep your oil temperature consistent: If you choose to shallow fry, maintaining oil temperature is critical for even cooking.
- Let it rest: Allowing your chicken to rest after baking helps to keep it juicy and tender.
Change It Up
If you’re looking to explore different flavors with Easy Baked Chicken Katsu, here are some tips to customize this dish to suit your taste preferences or dietary needs:
- Storage: Store leftovers in an airtight container in the refrigerator for up to three days. To maintain crispiness, reheat in the oven.
- Freezing: Freeze cooked chicken katsu in a single layer on a baking sheet, then transfer to a freezer bag. It can be kept for up to two months.
- Pairing: Serve with a side of stir-fried vegetables for a complete meal.
- Spice it up: Add chili flakes to the pineapple sauce for a spicy kick.
- Make it a sandwich: Use the chicken katsu in a sandwich with lettuce and tomato for a delicious twist.
How to Enjoy Easy Baked Chicken Katsu
Serving up Easy Baked Chicken Katsu is a delightful experience. This dish can fit into various occasions and settings, making it incredibly versatile:
- Weeknight dinners: It’s quick and easy, perfect for busy weeknights.
- Family gatherings: Serve it as part of a buffet-style spread; everyone loves it!
- Lunch boxes: Slice it up and include it in meal prep for tasty lunches.
- Seasonal parties: Great for summer barbecues or casual get-togethers.
- With sides: Pair it with a simple salad or steamed veggies for a balanced meal.
FAQ
Conclusion
In conclusion, Easy Baked Chicken Katsu is not only a delicious dish but also a fantastic way to bring a taste of Japan to your home. Its crispy exterior and flavorful sauce make it truly special. I encourage you to try making this dish—it will surely become a beloved favorite in your household. Enjoy the process and the delightful flavors that come together in this remarkable recipe!
Easy Baked Chicken Katsu
Ingredients
Equipment
Method
- Preheat your oven to 450 degrees Fahrenheit. It's essential to get the oven hot enough to achieve that crispy texture. Looking for the right temperature is key to a perfect bake.
- Line a baking sheet with foil and grease it well. This will prevent the chicken from sticking and make cleanup a breeze.
- Prepare your chicken breast by cutting it in half horizontally. This is called butterflying, and it ensures even cooking and tenderness. Make sure both pieces are the same thickness for consistent results.
- Salt both sides of your chicken pieces lightly. This enhances the flavor and draws out moisture, keeping the chicken juicy.
- Set up your breading station with three containers: one for flour, one for the beaten egg, and one for panko. This organization helps streamline the process.
- Coat your first chicken piece in flour, ensuring it’s fully covered. Shake off any excess; you want just enough to help the egg stick.
- Dip the floured chicken into the beaten egg, letting any excess drip off. This step is crucial for achieving a crispy coating.
- Finally, roll the chicken in the panko breadcrumbs, pressing gently to adhere. This breadcrumb layer is what gives the chicken its signature crunch.
- Place the coated chicken onto the prepared baking sheet. Repeat the process for the second piece of chicken.
- Lightly spray the tops of the chicken with cooking oil to encourage browning during baking. It’s a little trick that makes a big difference!
- Bake in the preheated oven for 15 to 20 minutes. Keep an eye on it; you want the internal temperature to reach 160 degrees Fahrenheit. The chicken should be golden brown and crisp.
- Once done, remove the chicken from the oven and let it rest for about 5 minutes. This allows the juices to redistribute, keeping it moist.
- While the chicken is baking, prepare the sauce. In a small bowl, whisk together the soy sauce and cornstarch until smooth. This ensures there are no lumps in your sauce.
- Add the soy sauce mixture along with the remaining sauce ingredients to a small saucepan. Bring it to a simmer over medium-high heat; if it starts boiling too vigorously, reduce the heat slightly.
- Simmer for about 3 to 6 minutes until the sauce thickens. You want it to be just the right consistency for dipping. Remove from heat once thickened.
- Slice the baked chicken breast into strips and serve it over a bed of white steamed rice, drizzled with the sauce. Add pineapple chunks on the side for a fresh touch.
- Enjoy every flavorful bite!
Notes
- Tip 1: Approximate nutritional information is for a 10-ounce chicken breast, and calories do not include pineapple chunks or rice.
- Tip 2: To shallow fry, over medium-high heat, heat about 1 cup of oil in a large skillet. The oil should be about 1/4-inch deep.
- Tip 3: You’ll know the oil is ready for frying when you can dip the end of a wooden spoon into the oil and bubbles form around the spoon.
- Tip 4: Cook panko-covered breasts for 3 to 5 minutes per side, longer if they are very large, until an instant-read thermometer inserted into the center of the breasts reads 160°F.