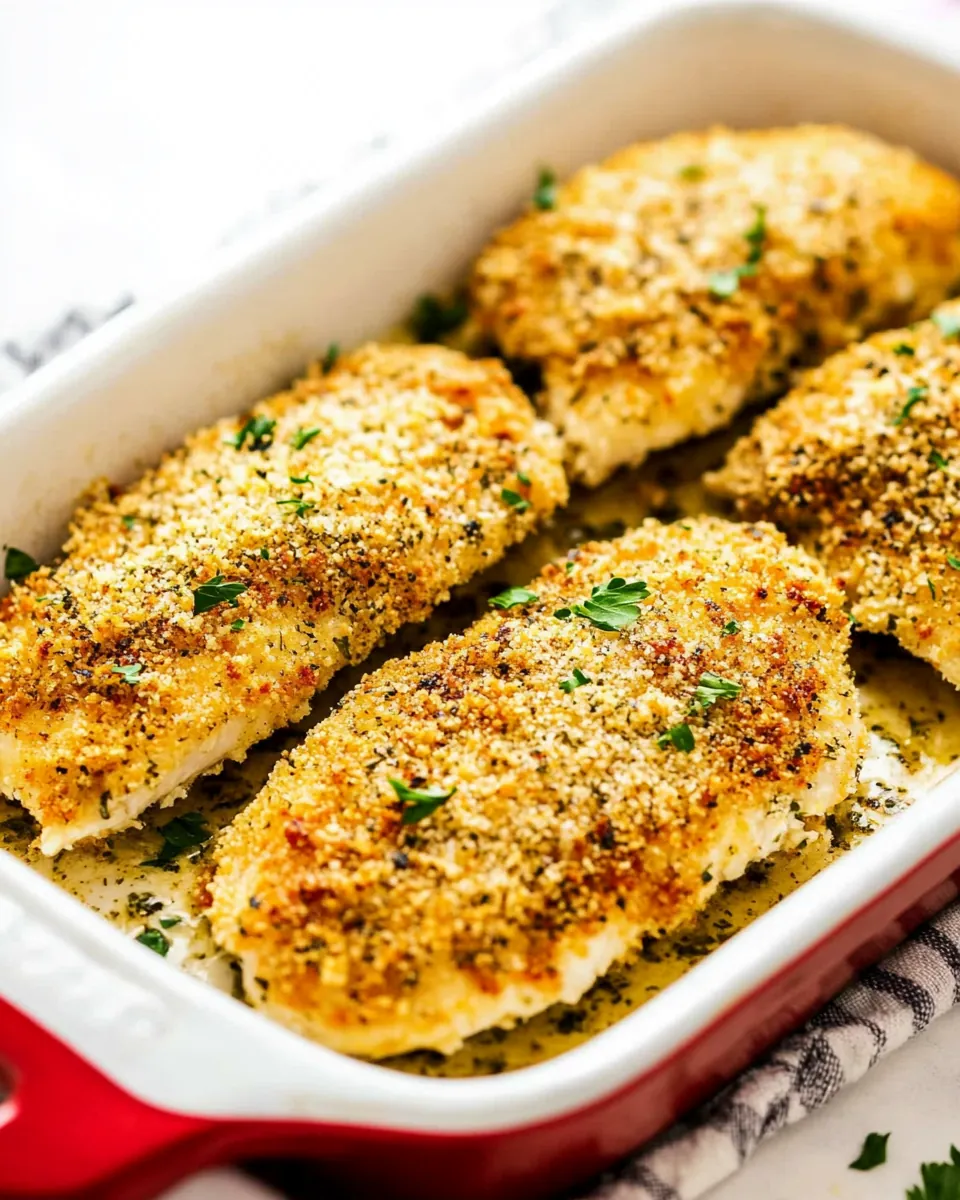
Crispy Ranch Chicken
There’s something truly special about the experience of biting into a perfectly cooked piece of chicken, and that’s exactly what Crispy Ranch Chicken brings to the table. I remember the first time I made this dish for my family; it was a hectic weeknight, and I was looking for something that would please both the kids and the adults. The crispy crust and the flavorful ranch seasoning were a big hit. It turned a simple dinner into a memorable feast while keeping the preparation easy and stress-free. The aroma from the oven as it baked was just heavenly, filling the house with warmth and comfort.
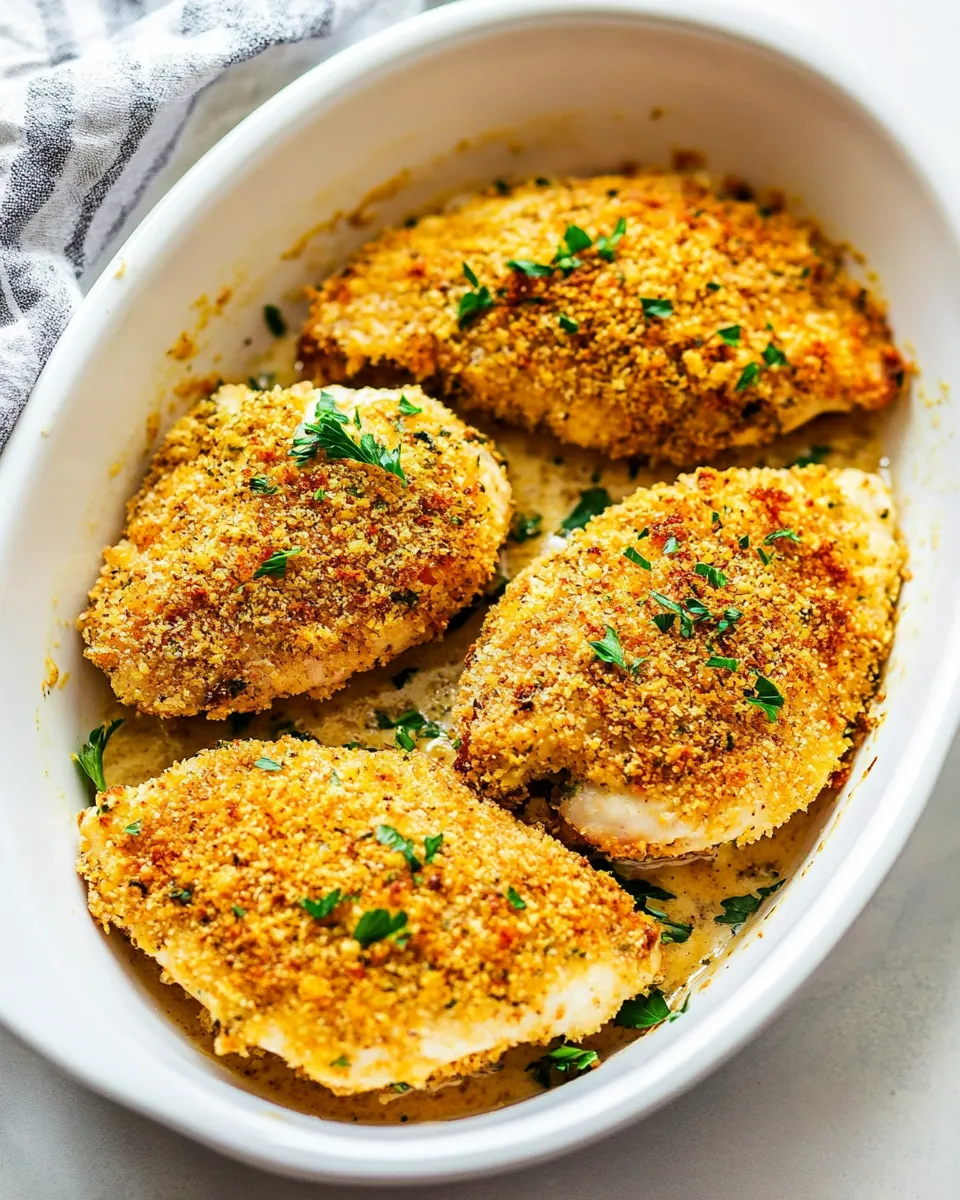
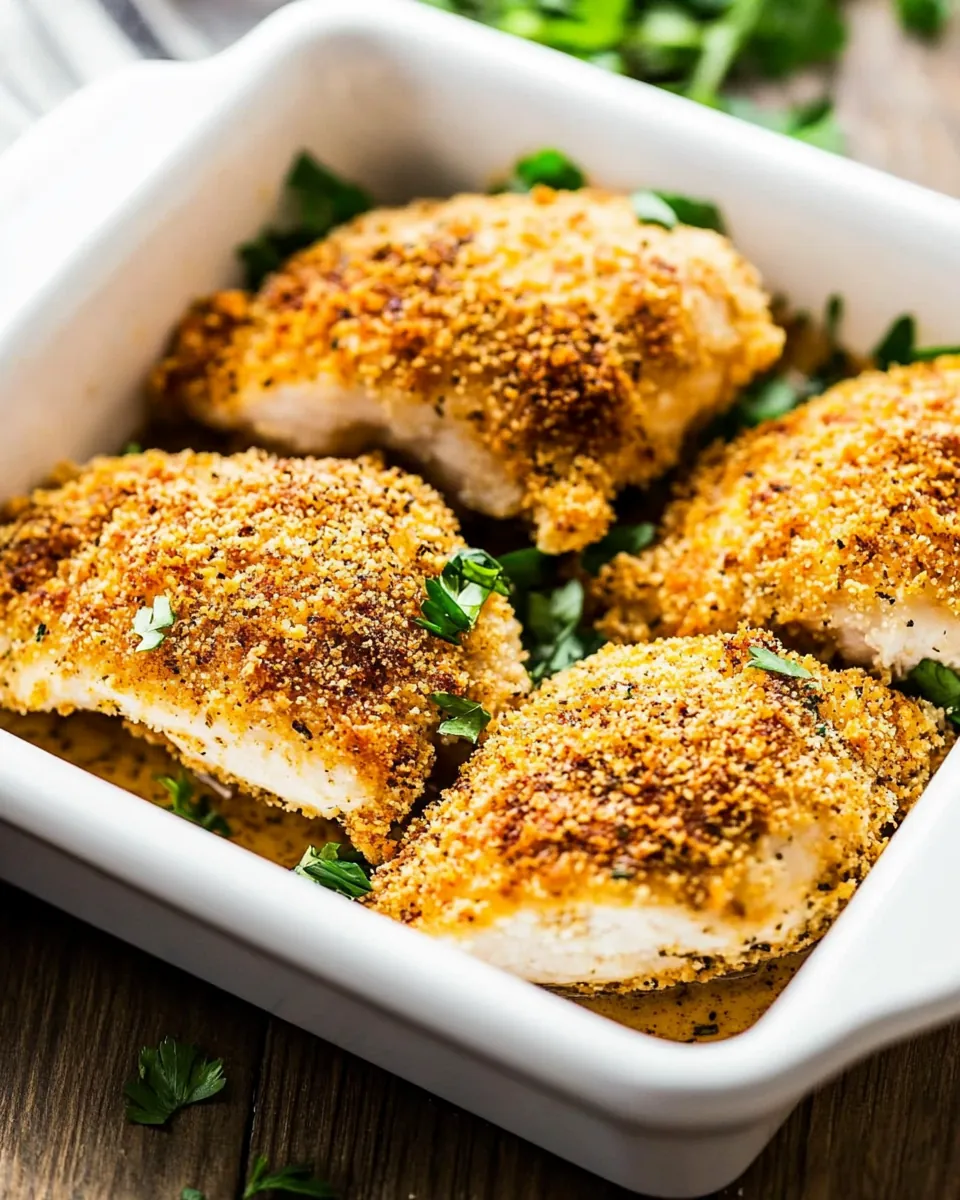
Every bite of this dish is packed with flavor, thanks to the golden crust that forms around the succulent chicken. It’s amazing how just a few ingredients can create such a satisfying meal. I often make this for gatherings, where everyone gathers around, eagerly waiting for the first piece to be served. We all know that the best meals are the ones that bring people together, and Crispy Ranch Chicken does just that. It’s not just a recipe; it’s a memory in the making.
Whether it’s a cozy family dinner or a festive gathering, this dish shines in any setting. The great thing about Crispy Ranch Chicken is its versatility. You can serve it with a variety of sides, making it perfect for any occasion. The moments spent enjoying this meal with loved ones are what I cherish the most. So, if you’re looking for an easy yet delicious chicken recipe, look no further. This one is sure to become a family favorite!
Recipe Snapshot
45 mins
15 mins
30 mins
Medium
300 kcal
28 g
Gluten-Free, Low FODMAP
15 g
9×13 Baking Pan
The Appeal of This Crispy Ranch Chicken
There are countless reasons why I absolutely adore Crispy Ranch Chicken, and I can’t wait to share them with you. From the delightful crunch to the savory flavor, this dish has something for everyone.
1. The Crunch Factor
The crispy exterior of the chicken is what sets this dish apart. Coated in Panko breadcrumbs and ranch seasoning, each bite offers a satisfying crunch that pairs beautifully with the tender chicken inside. It’s a texture contrast that brings joy and excitement to every meal.
2. Flavor Packed
The ranch seasoning infuses the chicken with robust flavor, making it anything but ordinary. It’s the ideal combination of herbs and spices that elevates the dish, creating a savory experience you won’t forget. You won’t believe how such a simple ingredient can make such a big impact!
3. Family-Friendly
This recipe is a hit among both kids and adults. Kids love the crunchy texture and familiar flavors, while adults appreciate the ease of preparation. It’s a win-win situation, making it perfect for family dinners, especially on busy weeknights.
4. Quick and Easy
With just a few ingredients and minimal prep time, Crispy Ranch Chicken is perfect for those evenings when you want to whip up something delicious without spending hours in the kitchen. It allows you to focus more on enjoying your meal and less on the cooking.
5. Versatile Serving Options
This dish is incredibly versatile when it comes to sides and accompaniments. You can pair it with a fresh salad, creamy mashed potatoes, or even some roasted vegetables. The possibilities are endless, making it a fantastic choice for any occasion.
6. Leftover Magic
If by some chance you have leftovers, they can be transformed into delicious sandwiches or salads the next day. The flavor tends to deepen and improve, giving you another delightful meal without any extra effort.
Ingredient List for Crispy Ranch Chicken
In crafting Crispy Ranch Chicken, each ingredient plays a vital role in achieving the perfect balance of flavor and texture. The key players in this dish are the boneless, skinless chicken breasts, which provide a juicy foundation, and the Panko breadcrumbs, offering that coveted crunch. Together, they create a delightful synergy that makes this recipe irresistible.
- 4 boneless, skinless chicken breasts: The star of the dish, providing a moist and tender bite. Look for fresh, high-quality chicken for the best results.
- Kosher salt and freshly ground black pepper to taste: Essential for seasoning the chicken, bringing out its natural flavors.
- ¾ cup all-purpose flour: Helps create a light coating that adheres to the chicken, contributing to the crispiness.
- 2 large eggs, beaten: Acts as a binder to hold the coatings together while adding moisture.
- 1 cup Panko breadcrumbs: These Japanese-style breadcrumbs offer an extra crunch that regular breadcrumbs can’t match.
- ½ cup freshly grated Parmesan cheese: Adds a rich, nutty flavor that complements the ranch seasoning.
- 1 ounce ranch seasoning: The key flavor component that gives this dish its distinctive taste.
How to Make Crispy Ranch Chicken
Making Crispy Ranch Chicken is a straightforward process, perfect for even the most novice cooks. Follow these simple steps to create a dish that will delight your taste buds and impress your guests.
Start by preheating your oven to 375°F. This step is crucial as it ensures the chicken cooks evenly and achieves a golden brown color. Next, grease a 9×13-inch baking pan with olive oil and set it aside. The oil not only prevents sticking but also adds flavor.
Season both sides of the chicken breasts with Kosher salt and freshly ground black pepper. Adjust the seasoning based on your taste preferences. This foundational step enhances the chicken’s flavor and sets the stage for the coating.
Prepare your breading station by setting out three shallow bowls. In the first bowl, mix the flour with a pinch of salt and pepper. This mixture will help the coating stick to the chicken.
In the second bowl, add the beaten eggs. This adds moisture and helps the breadcrumbs adhere to the chicken. In the third bowl, combine the Panko breadcrumbs, Parmesan cheese, and ranch seasoning. This flavorful mixture will be the final coating.
To coat the chicken, start by dipping each seasoned chicken breast into the flour mixture, coating both sides. Make sure to shake off any excess flour to prevent clumping.
Next, dip the chicken into the beaten eggs, ensuring it’s fully coated. The egg acts as a glue, holding the breadcrumbs in place. Again, let any excess drip off.
Finally, roll the chicken in the Panko breadcrumb mixture, pressing it lightly to ensure an even coating. This step is what gives the chicken its crispy exterior.
Place each coated chicken breast in the prepared baking dish. Give the tops a light spray with cooking spray to encourage browning.
Bake the chicken for 30 minutes, or until it reaches an internal temperature of 165°F and is golden brown. Use a meat thermometer to check the temperature, ensuring it’s cooked through without drying out.
Once baked, remove the chicken from the oven and let it rest for a few minutes. This allows the juices to redistribute, making for a juicier bite. Serve hot and watch everyone enjoy!
Things Worth Knowing
- Let it Rest: Allowing the chicken to rest after baking helps retain its moisture, leading to a juicier final product.
- Quality Ingredients Matter: Using fresh and high-quality ingredients will make a noticeable difference in flavor.
- Experiment with Seasoning: Feel free to adjust the ranch seasoning or add your favorite herbs for a personal touch.
- Oven Thermometer: If you’re unsure about your oven’s temperature accuracy, using an oven thermometer can help ensure perfect results.
Tips for Success

To ensure your Crispy Ranch Chicken turns out perfectly every time, here are some helpful tips:
- Storage: Store any leftovers in an airtight container in the refrigerator for up to 3 days.
- Freezing: You can freeze the cooked chicken for up to 2 months. Reheat in the oven for the best texture.
- Pairing: This chicken goes wonderfully with mashed potatoes, green beans, or a fresh garden salad.
- Make Ahead: You can prepare the chicken up to the coating stage and refrigerate it until you’re ready to bake.
- Don’t Overcrowd: Give the chicken space in the baking dish for even cooking and maximum crispiness.
What to Serve With Crispy Ranch Chicken
When it comes to serving Crispy Ranch Chicken, the options are plentiful and satisfying. Here are some ideas to enhance your meal:
- Mashed Potatoes: Creamy mashed potatoes pair perfectly with the crispy chicken, offering a comforting contrast.
- Green Beans: Steamed or sautéed green beans add a fresh, vibrant touch to the plate.
- Caesar Salad: The crispness of a Caesar salad complements the crunchy chicken beautifully.
- Coleslaw: A tangy coleslaw provides a refreshing crunch that balances the richness of the chicken.
- Garlic Bread: Serve with garlic bread to soak up any delicious juices left on the plate.
- Seasonal Vegetables: Roasted or sautéed vegetables can enhance the meal’s nutritional value and color.
- Dip: Consider serving with a side of dipping sauce, like ranch or honey mustard, for added flavor.
- Picnic or Meal Prep: This dish is perfect for meal prep or picnic lunches, as it’s easy to pack and enjoy cold or reheated.
FAQ
Conclusion
Crispy Ranch Chicken is not just another chicken recipe; it’s a perfect blend of flavor and texture that makes every bite memorable. With its easy preparation and delightful taste, it’s an ideal option for busy weeknights or family gatherings. I encourage you to try this recipe; it’s bound to become a favorite in your home, just as it has in mine. Enjoy!
Crispy Ranch Chicken
Ingredients
Equipment
Method
- Start by preheating your oven to 375°F. This step is crucial as it ensures the chicken cooks evenly and achieves a golden brown color. Next, grease a 9×13-inch baking pan with olive oil and set it aside. The oil not only prevents sticking but also adds flavor.
- Season both sides of the chicken breasts with Kosher salt and freshly ground black pepper. Adjust the seasoning based on your taste preferences. This foundational step enhances the chicken's flavor and sets the stage for the coating.
- Prepare your breading station by setting out three shallow bowls. In the first bowl, mix the flour with a pinch of salt and pepper. This mixture will help the coating stick to the chicken.
- In the second bowl, add the beaten eggs. This adds moisture and helps the breadcrumbs adhere to the chicken. In the third bowl, combine the Panko breadcrumbs, Parmesan cheese, and ranch seasoning. This flavorful mixture will be the final coating.
- To coat the chicken, start by dipping each seasoned chicken breast into the flour mixture, coating both sides. Make sure to shake off any excess flour to prevent clumping.
- Next, dip the chicken into the beaten eggs, ensuring it's fully coated. The egg acts as a glue, holding the breadcrumbs in place. Again, let any excess drip off.
- Finally, roll the chicken in the Panko breadcrumb mixture, pressing it lightly to ensure an even coating. This step is what gives the chicken its crispy exterior.
- Place each coated chicken breast in the prepared baking dish. Give the tops a light spray with cooking spray to encourage browning.
- Bake the chicken for 30 minutes, or until it reaches an internal temperature of 165°F and is golden brown. Use a meat thermometer to check the temperature, ensuring it's cooked through without drying out.
- Once baked, remove the chicken from the oven and let it rest for a few minutes. This allows the juices to redistribute, making for a juicier bite. Serve hot and watch everyone enjoy!
Notes
- Tip 1: Store any leftovers in an airtight container in the refrigerator for up to 3 days.
- Tip 2: You can freeze the cooked chicken for up to 2 months. Reheat in the oven for the best texture.
- Tip 3: This chicken goes wonderfully with mashed potatoes, green beans, or a fresh garden salad.
- Tip 4: You can prepare the chicken up to the coating stage and refrigerate it until you're ready to bake.
- Tip 5: Give the chicken space in the baking dish for even cooking and maximum crispiness.