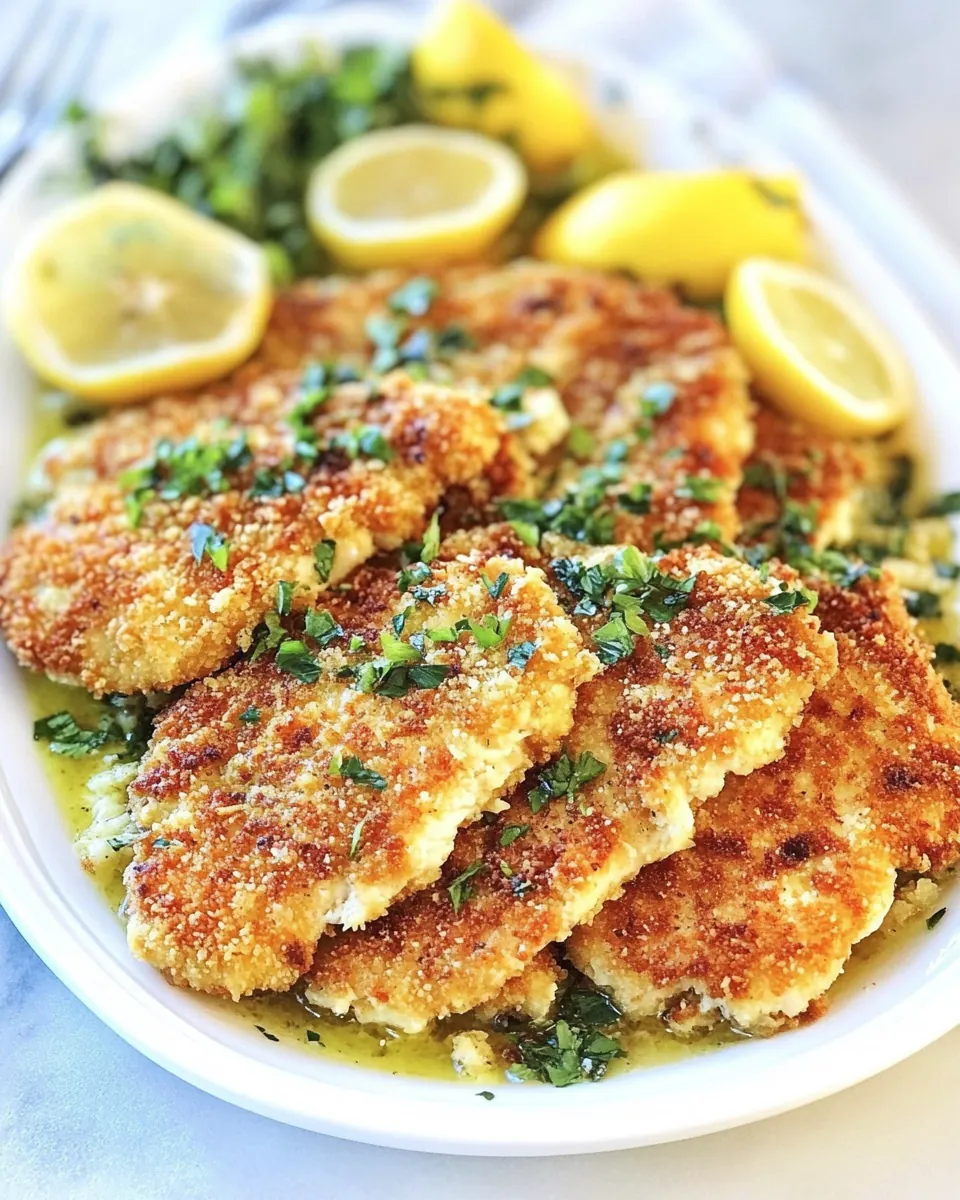
Crispy Chicken Schnitzel
There’s something about a plate of Crispy Chicken Schnitzel that instantly transports me back to my childhood kitchen. I remember the sizzling sound of chicken being fried to golden perfection, the heavenly aroma wafting through the air, making my mouth water in anticipation. As a family, we gathered around the table, the laughter and chatter blending with the crunch of the schnitzel as we took our first bites. Each piece was juicy, tender, and coated in a perfectly crisp layer that had us reaching for seconds. This dish isn’t just about food; it’s about connection, joy, and the memories we create over a shared meal.
Recipe Snapshot
1 hr 2 mins
25 mins
37 mins
Medium
450 kcal
30 g
Paleo, Whole30
20 g
Wooden Spoon, Chef’s Knife, Baking Sheet, Oven, Frying Pan
Why This Crispy Chicken Schnitzel Is So Good
A Comforting Classic
One of the reasons I adore Crispy Chicken Schnitzel is its ability to comfort and satisfy. After a long day, there’s nothing more rewarding than plating this dish, knowing it will bring smiles all around. The crispy coating contrasts beautifully with the tender chicken, creating a delightful texture that’s hard to resist.
Simple Ingredients, Big Flavor
With just a handful of ingredients, you can create an extraordinary meal. The combination of chicken, flour, and Panko breadcrumbs results in a crunchy exterior, while seasoned olive oil and lemon elevate the flavors. It’s proof that you don’t need fancy ingredients to whip up something memorable.
A Family Favorite
This recipe has been passed down through generations, and it’s easy to see why. It’s perfect for family gatherings, casual dinners, or any occasion where you want to impress guests. Everyone loves a good schnitzel!
Versatile and Adaptable
Another reason Crispy Chicken Schnitzel stands out is its versatility. While the classic version is delicious, you can easily adapt it to suit your tastes. Whether you want to add spices, serve it with different sauces, or pair it with unique sides, the options are endless!
Quick and Easy
This dish is not only delicious but also quick to prepare. With just a few simple steps and minimal prep work, you can have a satisfying meal on the table in no time, making it ideal for busy weeknights. You’ll be surprised at how easy it is to achieve that restaurant-quality experience at home.
Perfect for Any Season
Finally, Crispy Chicken Schnitzel is a dish that transcends seasons. Whether it’s summer picnics or winter family dinners, it fits right in. Pair it with fresh salads in warmer months or hearty sides during colder days—this dish is always a hit!
Ingredients to Make Crispy Chicken Schnitzel
Preparing the ingredients for Crispy Chicken Schnitzel is as enjoyable as cooking it. The harmony of flavors from the fresh green beans, baby red potatoes, and chicken works beautifully together. Each component plays a crucial role, ensuring a satisfying meal that delights the senses. Let’s take a closer look at what you’ll need:
- 16 ounces green beans, trimmed and cut into thirds: These add a fresh crunch and vibrant color.
- 12 ounces baby red potatoes, quartered: These give a hearty side that complements the chicken perfectly.
- 2 tablespoons olive oil: Essential for flavor and helping the coating crisp up.
- 2 teaspoons minced garlic: Provides depth and aromatic richness.
- ½ teaspoon Kosher salt: Enhances all the flavors.
- Freshly ground black pepper: Adds a touch of heat and complexity.
- 2 whole boneless, skinless chicken breasts, halved horizontally to make a total of 4 cutlets: The centerpiece of this dish, providing protein and satisfying texture.
- ¼ teaspoon Kosher salt: For seasoning the chicken.
- Freshly ground black pepper: To taste for the chicken.
- 2 tablespoons all-purpose flour: Used for the initial dredging to help the coating stick.
- 1 large egg, beaten: Binds the breadcrumbs to the chicken.
- ¾ cup seasoned Panko breadcrumbs: Provides that irresistible crispy coating.
- Olive oil spray: Ensures the schnitzel gets golden brown without excess oil.
- ½ medium lemon, plus 4 lemon wedges for serving: Brightens the dish and adds a refreshing zing.
- 1 tablespoon capers, drained: Offers a briny contrast that enhances flavor.
- ½ tablespoon chopped fresh Italian parsley: For garnish and a touch of freshness.
The Process for Making Crispy Chicken Schnitzel

Making Crispy Chicken Schnitzel is a joy. The aroma of fried chicken fills the kitchen, making it a delightful experience. Let’s dive into the step-by-step process to achieve the perfect schnitzel.
- Preheat your oven to 425°F. This high temperature is essential for perfectly roasting your vegetables and creating that golden crust on the chicken.
- Lightly spray an 18×13-inch large rimmed sheet pan with nonstick spray. This will prevent any sticking and ensure easy cleanup!
- On the prepared pan, toss together the green beans, potatoes, olive oil, garlic, salt, and pepper to taste. Spread the vegetables out in a single layer, making sure they have space to roast evenly.
- Bake until partially cooked, about 20 minutes. Look for the vegetables to soften slightly but not fully cooked—this ensures they will finish cooking alongside the chicken.
- While the vegetables are cooking, season the chicken with the salt and pepper to taste. This step is crucial, as it infuses the meat with flavor.
- Put the flour in a shallow plate, the egg in a medium bowl, and the Panko breadcrumbs in another shallow plate. This setup makes the dredging process easy and efficient.
- Dredge each chicken cutlet lightly in the flour, then dip it in the egg, shaking off any excess. This creates a base that helps the breadcrumbs adhere.
- Dredge the chicken in the Panko breadcrumbs, lightly pressing to evenly coat. Make sure each cutlet is generously coated for maximum crunch.
- Set the breaded chicken aside on a plate while you prepare the vegetables. The waiting time allows the coating to adhere better during cooking.
- Once the vegetables are partially cooked, remove the pan from the oven. Stir them together, pushing them to one side. This creates space for the chicken.
- Place the chicken on the other side of the pan and spray the tops with olive oil spray. This will give the schnitzel a beautiful golden color.
- Return the pan to the oven and bake until the chicken is golden and the potatoes are cooked through, about 15 minutes. Keep an eye on the chicken’s color as it should be a beautiful golden-brown.
- Switch the oven to broil and broil until the top of the chicken is browned slightly, about 1 to 2 minutes. This step adds that final crispy finish.
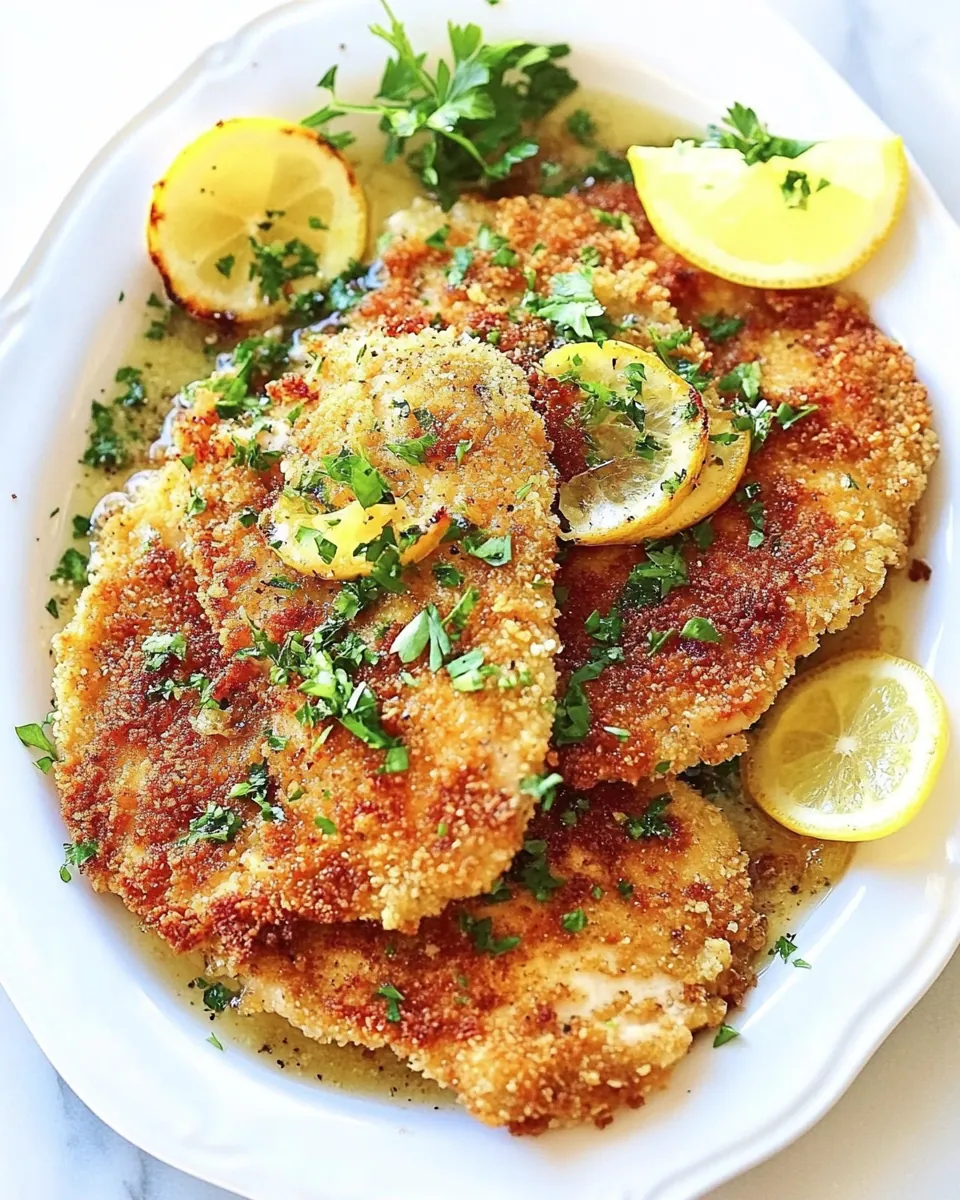
- Remove the pan from the oven and squeeze the lemon half over the vegetables. This brightens the flavors and adds a delicious zing.
- Top the chicken with the capers and parsley, and serve with the lemon wedges on the side. Enjoy your beautifully plated Crispy Chicken Schnitzel!
Things Worth Knowing
- Achieving the Perfect Crunch: For an extra crispy coating, ensure you press the Panko breadcrumbs firmly onto the chicken during dredging.
- Mind the Salt: Be cautious with salt when seasoning the chicken, especially if your breadcrumbs are already seasoned.
- Vegetable Variations: Feel free to swap in your favorite vegetables, like zucchini or carrots, for roasting alongside the chicken.
- Cooking Temperature: Always check the internal temperature of the chicken; it should reach at least 165°F for safety.
Pro Tips and Tweaks
To elevate your experience with Crispy Chicken Schnitzel, here are some helpful tips:
- Storage: Store leftovers in an airtight container in the fridge for up to 3 days. Reheat in the oven to maintain crispiness.
- Freezing: You can freeze cooked schnitzel for up to 2 months. Ensure it’s wrapped well to prevent freezer burn.
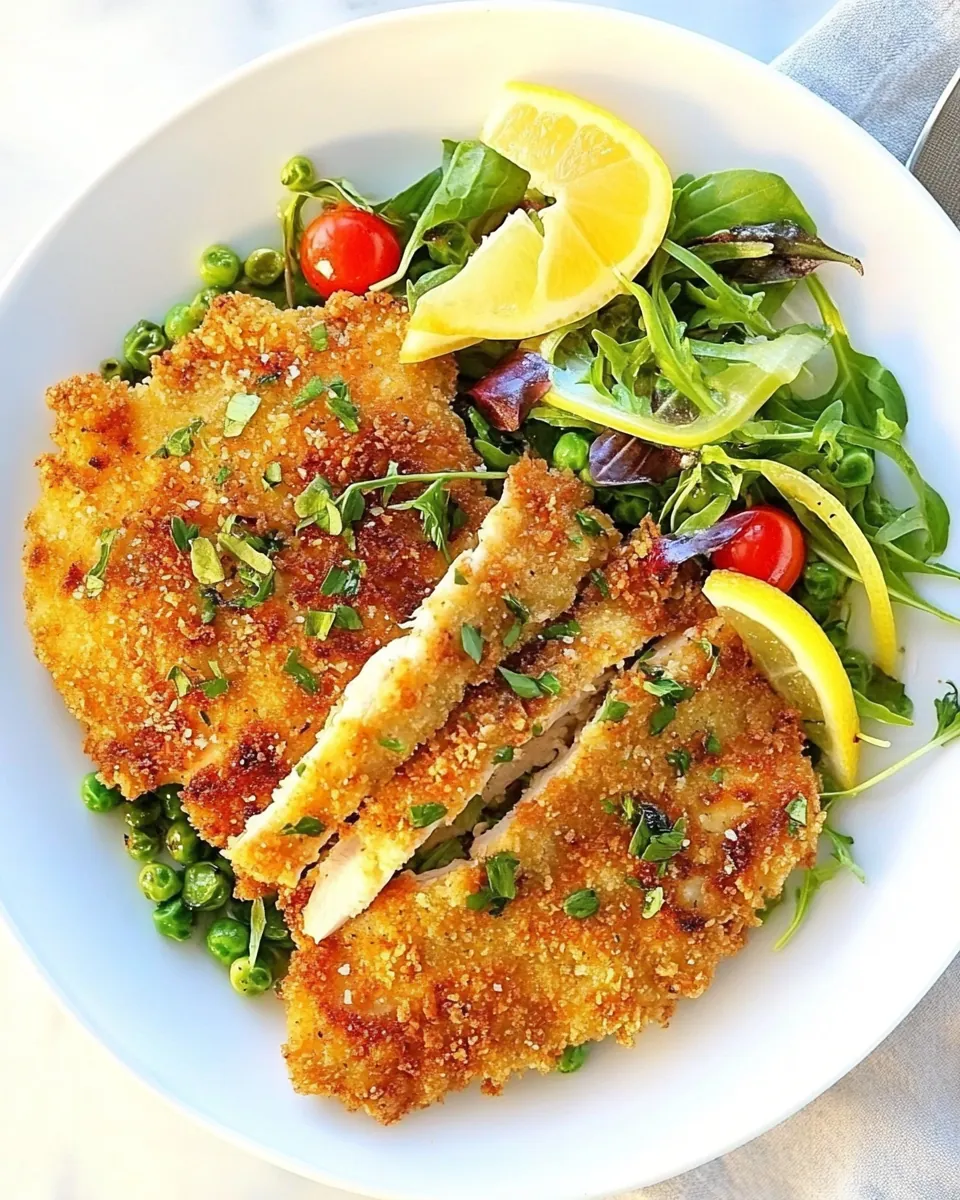
- Pairing: Serve with a light salad or creamy mashed potatoes for a well-rounded meal.
- Customize: Experiment with different spices in your breadcrumb mixture for a unique flavor twist.
- Make it Gluten-Free: Substitute gluten-free flour and breadcrumbs for a gluten-free version without sacrificing flavor.
- Fresh Herbs: Consider garnishing with fresh herbs like basil or dill for an aromatic finish.
Serve This Crispy Chicken Schnitzel With
If you’re looking to make the most of your Crispy Chicken Schnitzel, consider these serving ideas:
- Fresh Salads: Pair with a crisp green salad featuring mixed greens, cherry tomatoes, and a light vinaigrette for a refreshing contrast.
- Mashed Potatoes: Creamy mashed potatoes make a comforting side that compliments the crispy chicken beautifully.
- Roasted Vegetables: Add more roasted vegetables like carrots or asparagus for variety and color on your plate.
- Pasta Salad: A chilled pasta salad can be a delightful summer pairing that balances the richness of the schnitzel.
- Picnic Delight: Perfect for picnics or outdoor gatherings, serve it cold for a delightful bite.
- Storage Tips: Store any leftovers properly to enjoy this dish for a quick meal later.
- Occasions: Ideal for family dinners, casual gatherings, or any day you want to treat yourself to something special.
FAQ
Conclusion
The beauty of Crispy Chicken Schnitzel lies in its delightful crunch and tender chicken, making it a timeless favorite for families everywhere. I encourage you to try making this dish and savor the joy it brings to your table. Once you take that first bite, you’ll understand why it’s such a beloved comfort food!
Crispy Chicken Schnitzel
Ingredients
Equipment
Method
- Preheat your oven to 425°F. This high temperature is essential for perfectly roasting your vegetables and creating that golden crust on the chicken.
- Lightly spray an 18×13-inch large rimmed sheet pan with nonstick spray. This will prevent any sticking and ensure easy cleanup!
- On the prepared pan, toss together the green beans, potatoes, olive oil, garlic, salt, and pepper to taste. Spread the vegetables out in a single layer, making sure they have space to roast evenly.
- Bake until partially cooked, about 20 minutes. Look for the vegetables to soften slightly but not fully cooked—this ensures they will finish cooking alongside the chicken.
- While the vegetables are cooking, season the chicken with the salt and pepper to taste. This step is crucial, as it infuses the meat with flavor.
- Put the flour in a shallow plate, the egg in a medium bowl, and the Panko breadcrumbs in another shallow plate. This setup makes the dredging process easy and efficient.
- Dredge each chicken cutlet lightly in the flour, then dip it in the egg, shaking off any excess. This creates a base that helps the breadcrumbs adhere.
- Dredge the chicken in the Panko breadcrumbs, lightly pressing to evenly coat. Make sure each cutlet is generously coated for maximum crunch.
- Set the breaded chicken aside on a plate while you prepare the vegetables. The waiting time allows the coating to adhere better during cooking.
- Once the vegetables are partially cooked, remove the pan from the oven. Stir them together, pushing them to one side. This creates space for the chicken.
- Place the chicken on the other side of the pan and spray the tops with olive oil spray. This will give the schnitzel a beautiful golden color.
- Return the pan to the oven and bake until the chicken is golden and the potatoes are cooked through, about 15 minutes. Keep an eye on the chicken’s color as it should be a beautiful golden-brown.
- Switch the oven to broil and broil until the top of the chicken is browned slightly, about 1 to 2 minutes. This step adds that final crispy finish.
- Remove the pan from the oven and squeeze the lemon half over the vegetables. This brightens the flavors and adds a delicious zing.
- Top the chicken with the capers and parsley, and serve with the lemon wedges on the side. Enjoy your beautifully plated Crispy Chicken Schnitzel!
Notes
- Tip 1: Store leftovers in an airtight container in the fridge for up to 3 days. Reheat in the oven to maintain crispiness.
- Tip 2: You can freeze cooked schnitzel for up to 2 months. Ensure it's wrapped well to prevent freezer burn.
- Tip 3: Serve with a light salad or creamy mashed potatoes for a well-rounded meal.
- Tip 4: Experiment with different spices in your breadcrumb mixture for a unique flavor twist.
- Tip 5: Substitute gluten-free flour and breadcrumbs for a gluten-free version without sacrificing flavor.
- Tip 6: Consider garnishing with fresh herbs like basil or dill for an aromatic finish.