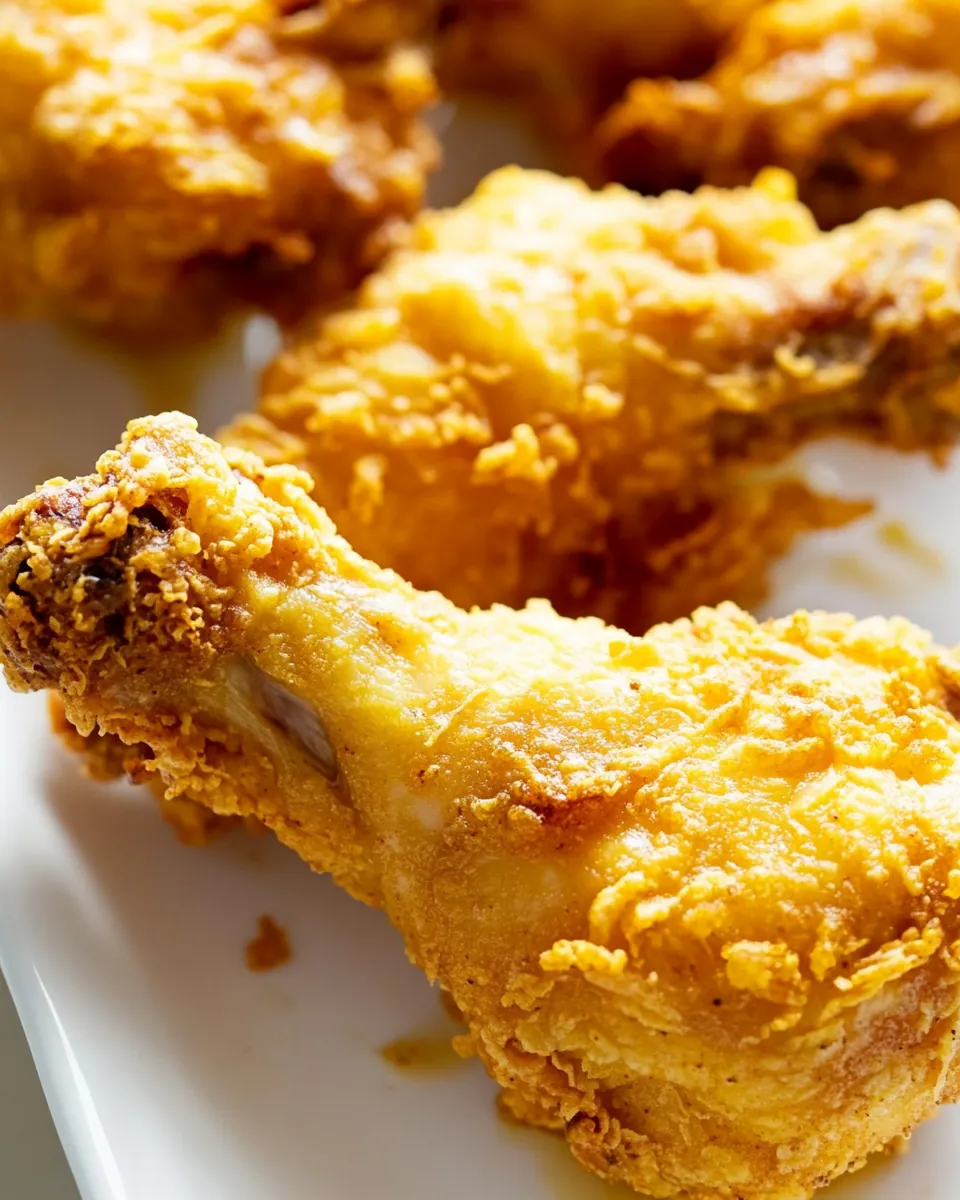
Crispy Broasted Chicken
The first time I made Crispy Broasted Chicken, I was on a quest to find the ultimate comfort food. It was a rainy Sunday, and I wanted something that not only satisfied my cravings but also brought back memories of family gatherings and laughter around the dinner table. As I gathered the ingredients, the anticipation built—there’s something magical about frying chicken that fills the air with a tantalizing aroma. The sound of sizzling oil and the sight of golden-brown chicken pieces are simply irresistible. I knew this dish would be a hit, as it perfectly combines crispy skin, juicy meat, and a rich flavor that warms the heart. Whether it’s for a fun family dinner or a special occasion, Crispy Broasted Chicken is sure to impress!
Recipe Snapshot
4 hr 45 mins
270 mins
15 mins
Hard
400 kcal
25 g
Gluten-Free, Low FODMAP
25 g
Skillet, Wooden Spoon, Mixing Bowl, Baking Sheet, Oven, Instant Pot, Blender
The Magic of This Crispy Broasted Chicken
What makes Crispy Broasted Chicken truly special? Let me share a few reasons why I absolutely love this recipe:
1. The Flavor Explosion
The first reason is the incredible flavor. The combination of spices like turmeric, paprika, and chili powder creates a flavor profile that’s both warm and inviting. When you take a bite of perfectly cooked chicken, the crunch of the outside gives way to juicy, tender meat. It’s a flavor explosion that leaves you wanting more!
2. A Family Favorite
This dish is a family favorite that brings everyone together. I remember my kids gathering around the table, their faces lighting up when they see that golden-brown chicken. It’s perfect for family dinners and gives us a chance to reconnect over a comforting meal.
3. Versatile Serving Options
Crispy Broasted Chicken is incredibly versatile. You can serve it with mashed potatoes, coleslaw, or even a fresh garden salad. No matter what sides you choose, this chicken complements them beautifully. Plus, it’s great for lunch the next day!
4. It’s an Experience
Cooking Crispy Broasted Chicken is not just about the food; it’s an experience. From brining the chicken in buttermilk to frying it to perfection, every step is a part of the journey. It’s a rewarding process that makes the meal taste even better when shared with loved ones.
5. Leftovers are a Treat
Finally, let’s talk about leftovers. While I can hardly keep my family from finishing it in one sitting, when there are leftovers, they make for a delicious lunch the next day. I love reheating it in the air fryer to restore that crispy texture—it’s just as good, if not better!
What to Gather for Crispy Broasted Chicken
Gathering the right ingredients is crucial for achieving that perfect flavor and texture in your Crispy Broasted Chicken. Each element plays a pivotal role in the overall experience, from the rich buttermilk brine that tenderizes the chicken to the blend of spices that create a crispy, flavorful coating. Here’s what you’ll need to make this dish truly shine:
- 3 to 4 pounds of fryer pack of chicken, cut into pieces
- 1 quart of buttermilk
- 3 tablespoons of salt plus 1 teaspoon for breading
- 1 cup of all-purpose flour
- 1 teaspoon of turmeric
- ½ teaspoon of paprika or smoked paprika
- ½ teaspoon of chili powder
- ½ teaspoon of black pepper
- 2 quarts of oil for frying (canola, peanut, or vegetable)
Directions for Crispy Broasted Chicken

Cooking Crispy Broasted Chicken is a delightful process that results in a meal that feels special, no matter the occasion. Follow these steps carefully, and you’ll be on your way to serving up this delicious dish!
- Start by pouring the buttermilk into a large baking dish or a zip bag. Add 3 tablespoons of salt and mix well. This brine is essential as it will tenderize the chicken and infuse it with flavor. Place the chicken pieces into the buttermilk brine, ensuring they are fully submerged. If you’re using a baking dish, cover it tightly with plastic wrap and refrigerate. If you opted for a zip bag, seal it tightly to prevent leaks and place it in the refrigerator. Allow the chicken to brine for at least 4 hours, or ideally, overnight for the best flavor.
- When you are ready to cook, take out another baking dish or tray. In a separate bowl, combine the flour, 1 teaspoon of salt, turmeric, paprika, chili powder, and black pepper. Mix these dry ingredients thoroughly to ensure the spices are well blended into the flour.
- Prepare a tray for the chicken next. One piece at a time, remove the chicken from the buttermilk and place it in the flour mixture. Make sure to roll it around in the flour so it’s evenly coated. Gently shake off the excess flour to keep the coating light and crispy. Place the coated pieces on a baking sheet and set aside.
- Before frying, it’s crucial to let the dredged chicken pieces rest for a bit. This helps the coating adhere better when frying. Meanwhile, pour the frying oil into your broaster and preheat it to 360°F.
- Once the oil reaches the desired temperature, carefully lower the chicken pieces into the hot oil, starting with the larger pieces like the breasts. Close the lid and fry the chicken for about 8 to 10 minutes, or until the skin is golden brown and the internal temperature reaches at least 165°F. Use a meat thermometer to check for doneness and ensure safety.
- For those using a large 6 to 8 quart dutch oven, set it on medium-high heat. Attach a cooking thermometer to monitor the oil temperature. Once the oil reaches 375°F, gently place the dredged chicken pieces into the pot. Stir the chicken pieces carefully to avoid sticking, and adjust the heat as needed to keep the temperature between 350°F to 360°F.
- After the temperature stabilizes, cover the pot with a lid and fry the chicken for about 12 to 15 minutes, again checking that the internal temperature is 165°F. When placing the lid on, keep in mind that it may raise the heat slightly, so it’s fine to peek and adjust the settings if necessary.
- If you’re using an Instant Pot that allows for temperature adjustment, preheat it on the sauté setting to between 360°F and 375°F. After the oil is hot, carefully place the chicken pieces in, starting with the breasts. Cover the pot, and if your model has an automatic shut-off, slightly adjust the lid to prevent that from happening. Fry for around 14 to 16 minutes, again ensuring that the internal temperature is at least 165°F.
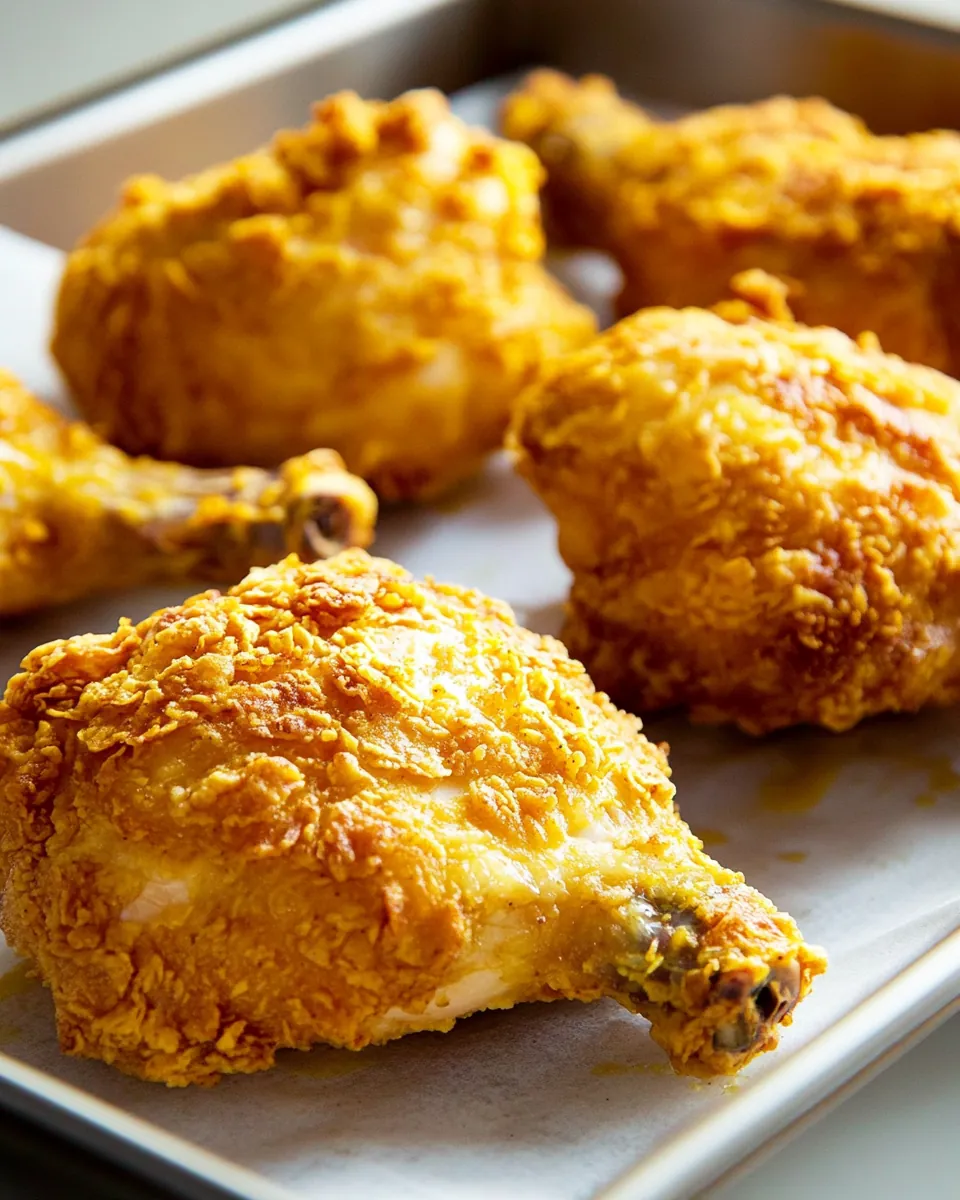
- Once the chicken is fully cooked, delicately remove it from the hot oil using tongs and place it on a cooling rack to drain and dry. This helps keep that lovely crispiness intact.
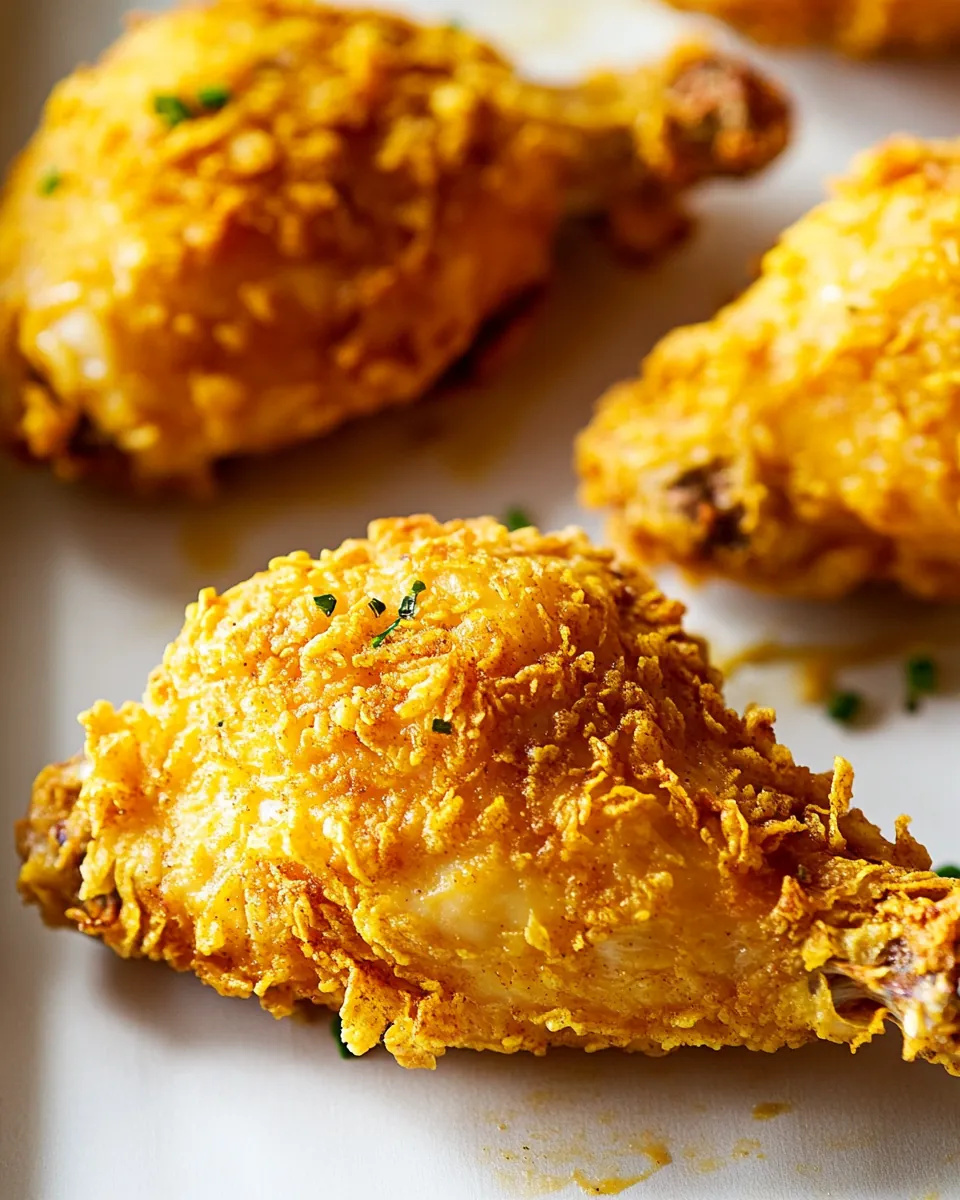
- Finally, serve your Crispy Broasted Chicken warm with your favorite sides. Enjoy the delightful crunch and succulent meat!
Things Worth Knowing
- Temperature Control: Make sure to monitor your oil temperature closely. If it’s too hot, you risk burning the chicken before it cooks through.
- Brining is Key: Don’t skip the brining step! It significantly enhances moisture and flavor.
- Resting Time: Allowing the breaded chicken to rest before frying helps the crust adhere better.
- Fry in Batches: If you have a lot of chicken, fry it in batches to maintain the oil temperature.
Tips and Variations
Every recipe has its nuances, and Crispy Broasted Chicken is no exception. Here are some tips and variations to enhance your cooking experience:
- Storage: Leftover chicken can be stored in an airtight container in the refrigerator for up to 3 to 4 days. Ensure it’s completely cooled before sealing to retain quality.
- Freezing: You can freeze the cooked chicken for later use. Just make sure to wrap it tightly and consume within 2 to 3 months for the best taste.
- Reheating: To reheat, avoid the microwave as it can make the skin soggy. Instead, use an oven or air fryer to restore its crispiness.
- Flavor Variations: Feel free to experiment with different spices in the flour mixture. Adding a bit of cayenne pepper can give it a spicy kick!
- Pairing: Serve your chicken with classic sides like mashed potatoes, coleslaw, or a fresh salad for a complete meal.
How to Serve Crispy Broasted Chicken
Serving Crispy Broasted Chicken is all about enhancing the experience. Here’s how to make it a delightful meal:
- Perfect Pairings: Serve it alongside creamy mashed potatoes and rich gravy for a traditional comfort meal.
- Coleslaw: The crunch of coleslaw adds a refreshing contrast to the crispy chicken, balancing the flavors beautifully.
- Garden Salad: A light garden salad with vinaigrette drizzled over can be a perfect accompaniment for a wholesome feel.
- Sandwiches: Shred leftover chicken to make delicious sandwiches with your favorite toppings.
- Casual Gatherings: This dish is fantastic for casual gatherings or picnics, allowing everyone to indulge in their favorite comfort food.
- Storage Tips: If you have leftovers, ensure they cool completely before transferring to an airtight container. This maintains the texture.
FAQ
Conclusion
The Crispy Broasted Chicken recipe is a fantastic way to bring joy and flavor to your dining table. With its tender meat and crispy skin, it’s sure to satisfy your cravings and impress your guests. I encourage you to give it a try, as it’s easier than you might think and the results are simply delicious. Enjoy this delightful dish with your loved ones, and watch it become a favorite in your home!
Crispy Broasted Chicken
Ingredients
Equipment
Method
- Start by pouring the buttermilk into a large baking dish or a zip bag. Add 3 tablespoons of salt and mix well. This brine is essential as it will tenderize the chicken and infuse it with flavor. Place the chicken pieces into the buttermilk brine, ensuring they are fully submerged. If you're using a baking dish, cover it tightly with plastic wrap and refrigerate. If you opted for a zip bag, seal it tightly to prevent leaks and place it in the refrigerator. Allow the chicken to brine for at least 4 hours, or ideally, overnight for the best flavor.
- When you are ready to cook, take out another baking dish or tray. In a separate bowl, combine the flour, 1 teaspoon of salt, turmeric, paprika, chili powder, and black pepper. Mix these dry ingredients thoroughly to ensure the spices are well blended into the flour.
- Prepare a tray for the chicken next. One piece at a time, remove the chicken from the buttermilk and place it in the flour mixture. Make sure to roll it around in the flour so it’s evenly coated. Gently shake off the excess flour to keep the coating light and crispy. Place the coated pieces on a baking sheet and set aside.
- Before frying, it’s crucial to let the dredged chicken pieces rest for a bit. This helps the coating adhere better when frying. Meanwhile, pour the frying oil into your broaster and preheat it to 360°F.
- Once the oil reaches the desired temperature, carefully lower the chicken pieces into the hot oil, starting with the larger pieces like the breasts. Close the lid and fry the chicken for about 8 to 10 minutes, or until the skin is golden brown and the internal temperature reaches at least 165°F. Use a meat thermometer to check for doneness and ensure safety.
- For those using a large 6 to 8 quart dutch oven, set it on medium-high heat. Attach a cooking thermometer to monitor the oil temperature. Once the oil reaches 375°F, gently place the dredged chicken pieces into the pot. Stir the chicken pieces carefully to avoid sticking, and adjust the heat as needed to keep the temperature between 350°F to 360°F.
- After the temperature stabilizes, cover the pot with a lid and fry the chicken for about 12 to 15 minutes, again checking that the internal temperature is 165°F. When placing the lid on, keep in mind that it may raise the heat slightly, so it's fine to peek and adjust the settings if necessary.
- If you’re using an Instant Pot that allows for temperature adjustment, preheat it on the sauté setting to between 360°F and 375°F. After the oil is hot, carefully place the chicken pieces in, starting with the breasts. Cover the pot, and if your model has an automatic shut-off, slightly adjust the lid to prevent that from happening. Fry for around 14 to 16 minutes, again ensuring that the internal temperature is at least 165°F.
- Once the chicken is fully cooked, delicately remove it from the hot oil using tongs and place it on a cooling rack to drain and dry. This helps keep that lovely crispiness intact.
- Finally, serve your Crispy Broasted Chicken warm with your favorite sides. Enjoy the delightful crunch and succulent meat!
Notes
- Tip 1: Cool the chicken completely and transfer to an airtight container. Store leftover fried chicken in the fridge for up to 3-4 days.
- Tip 2: Reheat leftover fried chicken in the oven or air fryer for crunchy skin; do not microwave.