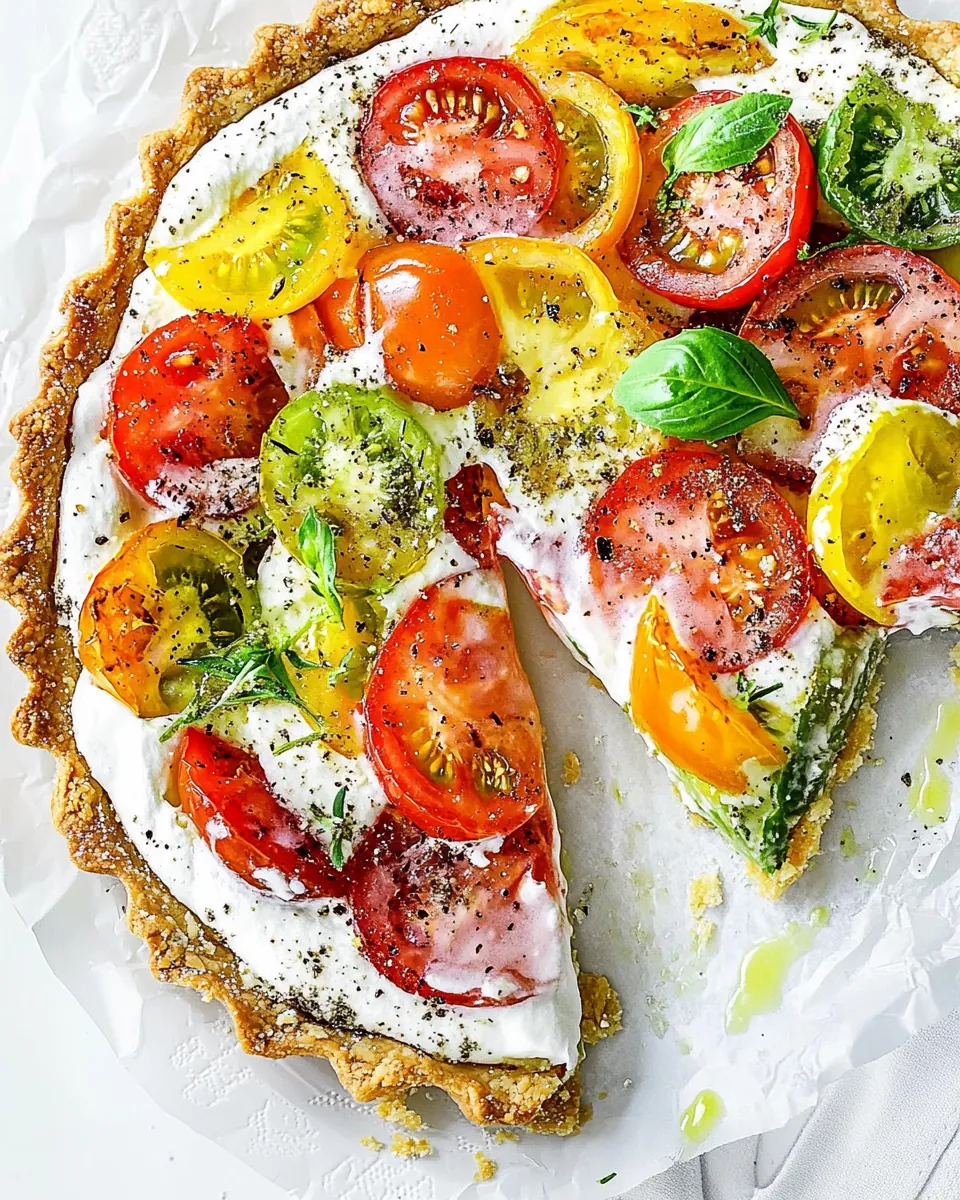
Heirloom Tomato Tart
There’s something truly delightful about a fresh Heirloom Tomato Tart that warms my heart and fills my kitchen with delicious aromas. I remember the first time I made this dish; it was a sunny afternoon, and I had just come back from the farmers’ market, my basket brimming with ripe, vibrant tomatoes. Each one seemed to call out to me, begging to be transformed into something lovely. As I prepared the tart, the tangy scent of the heirloom tomatoes mingled with the creamy ricotta cheese and fragrant fresh basil, creating a symphony of flavors. The golden puff pastry was the perfect vessel for this fresh summer bounty, and I couldn’t help but sneak a few bites along the way. This Heirloom Tomato Tart has become a staple in my home, a dish I eagerly share with friends and family during summer gatherings. It’s more than just a recipe; it’s a celebration of all the beautiful produce the season has to offer.
Recipe Snapshot
25 mins
10 mins
15 mins
Medium
250 kcal
6 g
Keto, Gluten-Free, Low FODMAP
18 g
Baking Sheet Pan, Morton Kosher Salt, Extra Virgin Olive Oil
Why Try This Heirloom Tomato Tart
Fresh Ingredients Matter
One of the reasons I love this Heirloom Tomato Tart is the importance of fresh ingredients. When you use ripe, juicy heirloom tomatoes, they’re bursting with flavor and sweetness, elevating the dish. I always make it a point to source my tomatoes from local farmers’ markets or my garden, if possible. The vibrant colors of the tomatoes bring the tart to life, making it as visually appealing as it is delicious.
Versatile for Any Occasion
This tart is incredibly versatile, making it perfect for various occasions. Whether it’s a backyard barbecue, a picnic in the park, or a cozy family dinner, the Heirloom Tomato Tart fits right in. I love serving it alongside a simple green salad or a glass of chilled lemonade. It’s a dish that can be enjoyed warm or cold, allowing you to make it ahead of time or serve it fresh from the oven.
Simple Yet Elegant
There’s something wonderfully elegant about this tart, yet it’s so simple to make. The combination of ricotta cheese and basil creates a creamy base that complements the tomatoes perfectly. I often find myself marveling at how something so easy can impress my guests. The flaky puff pastry serves as a beautiful canvas, showcasing the stunning heirloom tomatoes, and making every slice a work of art.
Creative Presentation
Presentation is key when it comes to entertaining, and the Heirloom Tomato Tart allows me to get creative. I love arranging the tomatoes in a pattern, perhaps even adding a sprinkle of fresh herbs on top for a pop of color. It’s surprising how a little care in presentation can elevate a dish from simple to stunning. Your guests will be in awe before they even take their first bite!
Seasonal Indulgence
With summer comes an abundance of fresh produce, and this tart is a fantastic way to indulge in seasonal flavors. Each bite is a celebration of the season, capturing the essence of summer gardens. I often make this tart during family gatherings, and it becomes a focal point on the table, inviting everyone to share and enjoy the fruits of the season.
What You’ll Need for Heirloom Tomato Tart

The ingredients for your Heirloom Tomato Tart are simple yet essential. Each component plays a key role in creating that heavenly blend of flavors. The puff pastry serves as a light and flaky base, while the ricotta cheese adds rich creaminess. Fresh basil brings a fragrant touch that perfectly complements the tomatoes, which are the star of the show. Together, they create a harmonious dish that embodies the taste of summer.
- 1 slice puff pastry: The foundation of your tart, this flaky dough will become golden and crispy in the oven, providing an irresistible crunch.
- 1 cup ricotta cheese: Creamy and mild, this cheese adds richness and balances the acidity of the tomatoes.
- ¼ cup minced fresh basil: A fragrant herb that elevates the tart with its fresh flavor and aroma.
- 1 tablespoon lemon zest: Adding a bright and zesty note, this enhances the overall flavor profile.
- ½ teaspoon black pepper: A dash of spice for a subtle kick.
- Heirloom tomatoes, thinly sliced: The star ingredient, these tomatoes bring vibrant colors and sweet, juicy flavors.
- Fresh basil leaves: For garnishing, adding a touch of color and freshness.
- Extra virgin olive oil: A light drizzle to finish off the tart, enhancing the flavors.
- Kosher salt, to taste: Essential for seasoning and bringing out the natural flavors of the ingredients.
Preparation Steps for Heirloom Tomato Tart
Making your own Heirloom Tomato Tart is a rewarding experience that fills your kitchen with delicious scents. Let’s dive into the preparation, which is both straightforward and enjoyable. You’ll see how simple steps lead to a stunning final dish that you can proudly serve.
- Preheat your oven to 400 degrees F (200 degrees C). As it warms up, prepare a baking sheet by lining it with parchment paper. This will prevent the tart from sticking and make cleanup easier.
- Next, unwrap your thawed puff pastry. Lightly roll it out on a floured surface into a rectangle about 9×13 inches. Place it carefully on the prepared baking sheet, ensuring it fits nicely.
- Using a fork, poke holes all around the edges of the puff pastry, leaving a half-inch border untouched. This will help prevent the pastry from puffing up too much in the oven. If you want a smoother application, adding a bit of flour on the surface can help with sticking.
- Slide the baking sheet into the preheated oven and bake the pastry for about 15 minutes, or until it’s golden brown. Keep an eye on it; you want it to be perfectly puffed and brown. If any large air bubbles form while baking, gently break them down.
- Once baked, remove the pastry from the oven and let it cool for a few minutes. This cooling period is important as it helps the pastry firm up, making it easier to spread your toppings.
- In a small bowl, combine the ricotta cheese, minced basil, lemon zest, and black pepper. Mix well until everything is nicely blended. This creamy mixture will form the base of the tart.
- Once the pastry has cooled, spread the ricotta mixture evenly over the top, making sure to cover it generously.
- Now, layer the thinly sliced heirloom tomatoes over the ricotta. You can arrange them in a pattern or simply scatter them; either way, it should look beautiful!
- To finish, garnish with fresh basil leaves and drizzle a bit of extra virgin olive oil over the top. This adds a lovely sheen and enhances the flavor.
- Finally, sprinkle kosher salt and a bit more black pepper as desired. Your Heirloom Tomato Tart is now ready to be served!
Things Worth Knowing
- Watch Your Baking Time: Every oven is different, so keep an eye on the tart as it bakes. You want it golden brown but not overcooked.
- Use Fresh Ingredients: The quality of your tomatoes makes a huge difference. Opt for the ripest heirloom varieties you can find.
- Cool Before Serving: Allowing the tart to cool slightly before serving enhances the flavors and makes it easier to slice.
- Experiment with Herbs: Feel free to mix up the herbs based on your preference. Thyme or oregano can add a different twist!
Helpful Notes about Heirloom Tomato Tart

This Heirloom Tomato Tart offers not only a delightful taste but also several tips for perfecting your dish. Here are some suggestions to ensure your tart is a hit every time:
- Storage: Store any leftovers in an airtight container in the refrigerator. It’s best enjoyed within two days, as the pastry can become soggy.
- Freezing: While I don’t recommend freezing the baked tart, you can prepare the filling in advance and freeze it separately. Assemble and bake when you’re ready.
- Pairing: This tart pairs beautifully with a simple arugula salad dressed with lemon vinaigrette, or enjoy it with a chilled glass of iced tea.
- Variations: Feel free to add other seasonal vegetables like zucchini or bell peppers for added flavor and nutrition.
- Serving Temperature: The tart can be served warm or at room temperature, making it versatile for different occasions.
How to Enjoy Heirloom Tomato Tart
- Perfect for Lunchtime: This Heirloom Tomato Tart is an excellent choice for a light lunch. Pair it with a crisp salad or some fresh fruit for a well-rounded meal.
- Picnic Delight: Take it on a picnic! It travels well and can be eaten cold or at room temperature, making it an ideal picnic dish.
- Elegant Dinner Party: Impress your guests by serving this tart as a starter at your next dinner party. Its vibrant colors will be a showstopper on your table.
- Seasonal Gatherings: Summer gatherings and barbecues are perfect occasions for this dish. It highlights the season’s produce beautifully.
- Storage Tips: For leftovers, carefully cover any remaining tart with plastic wrap and refrigerate. Reheat gently in the oven for the best texture.
- Serving Style: Slice into squares or wedges for easy serving. Garnish with additional fresh basil for a pop of color.
FAQ
Conclusion
The Heirloom Tomato Tart is not just a recipe; it’s a celebration of summer’s bounty and a beautiful way to enjoy seasonal ingredients. Its flaky crust, creamy filling, and vibrant heirloom tomatoes create a stunning dish that’s sure to impress. I encourage you to try making this tart at home and share it with your loved ones.
With each bite, you’ll experience the delightful flavors of summer that this tart embodies. So gather your ingredients and get ready to enjoy a slice of sunshine!

Heirloom Tomato Tart
Ingredients
Equipment
Method
- Preheat your oven to 400 degrees F (200 degrees C). As it warms up, prepare a baking sheet by lining it with parchment paper. This will prevent the tart from sticking and make cleanup easier.
- Next, unwrap your thawed puff pastry. Lightly roll it out on a floured surface into a rectangle about 9×13 inches. Place it carefully on the prepared baking sheet, ensuring it fits nicely.
- Using a fork, poke holes all around the edges of the puff pastry, leaving a half-inch border untouched. This will help prevent the pastry from puffing up too much in the oven. If you want a smoother application, adding a bit of flour on the surface can help with sticking.
- Slide the baking sheet into the preheated oven and bake the pastry for about 15 minutes, or until it’s golden brown. Keep an eye on it; you want it to be perfectly puffed and brown. If any large air bubbles form while baking, gently break them down.
- Once baked, remove the pastry from the oven and let it cool for a few minutes. This cooling period is important as it helps the pastry firm up, making it easier to spread your toppings.
- In a small bowl, combine the ricotta cheese, minced basil, lemon zest, and black pepper. Mix well until everything is nicely blended. This creamy mixture will form the base of the tart.
- Once the pastry has cooled, spread the ricotta mixture evenly over the top, making sure to cover it generously.
- Now, layer the thinly sliced heirloom tomatoes over the ricotta. You can arrange them in a pattern or simply scatter them; either way, it should look beautiful!
- To finish, garnish with fresh basil leaves and drizzle a bit of extra virgin olive oil over the top. This adds a lovely sheen and enhances the flavor.
- Finally, sprinkle kosher salt and a bit more black pepper as desired. Your Heirloom Tomato Tart is now ready to be served!
Notes
- Storage: Store any leftovers in an airtight container in the refrigerator. It’s best enjoyed within two days, as the pastry can become soggy.
- Freezing: While I don’t recommend freezing the baked tart, you can prepare the filling in advance and freeze it separately. Assemble and bake when you’re ready.
- Pairing: This tart pairs beautifully with a simple arugula salad dressed with lemon vinaigrette, or enjoy it with a chilled glass of iced tea.
- Variations: Feel free to add other seasonal vegetables like zucchini or bell peppers for added flavor and nutrition.
- Serving Temperature: The tart can be served warm or at room temperature, making it versatile for different occasions.