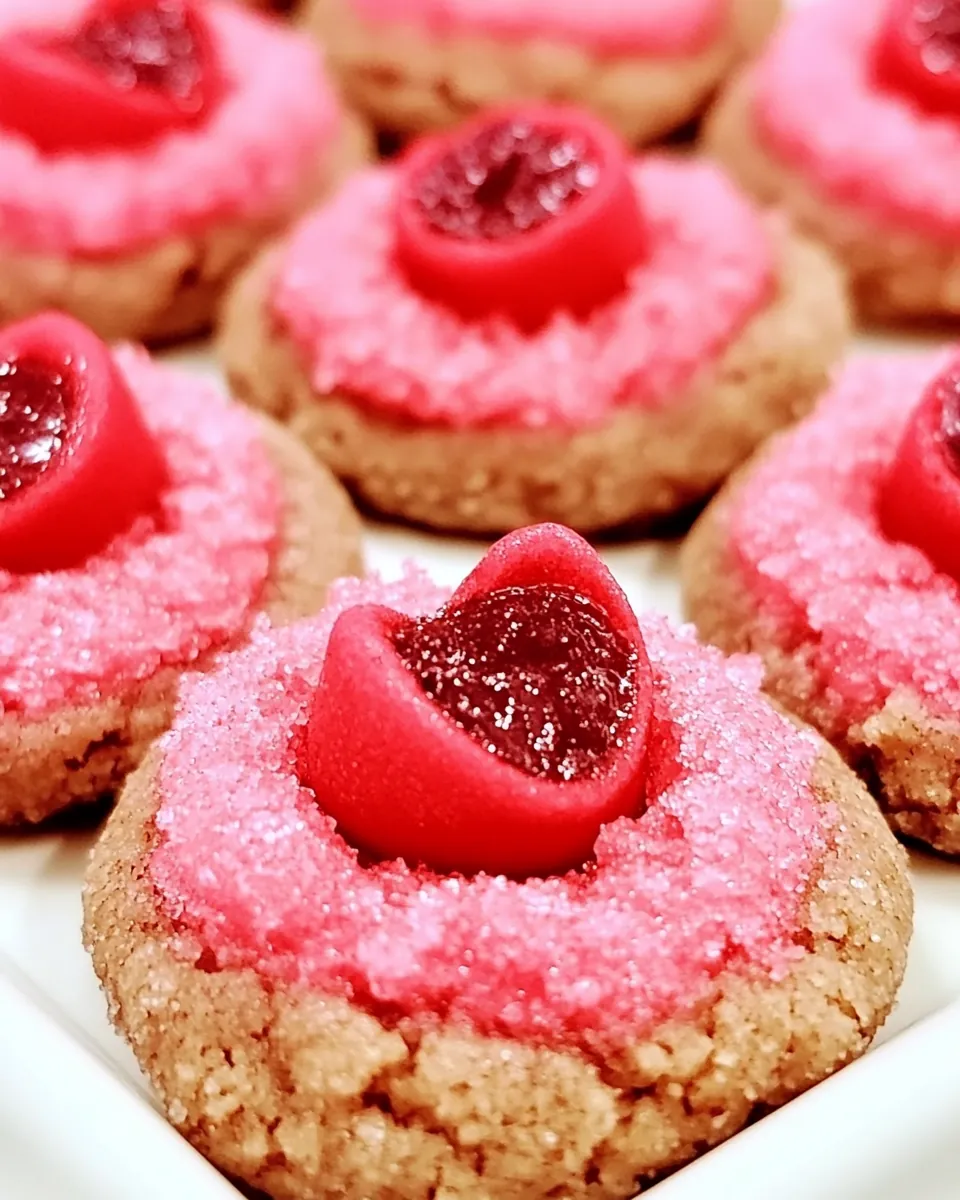
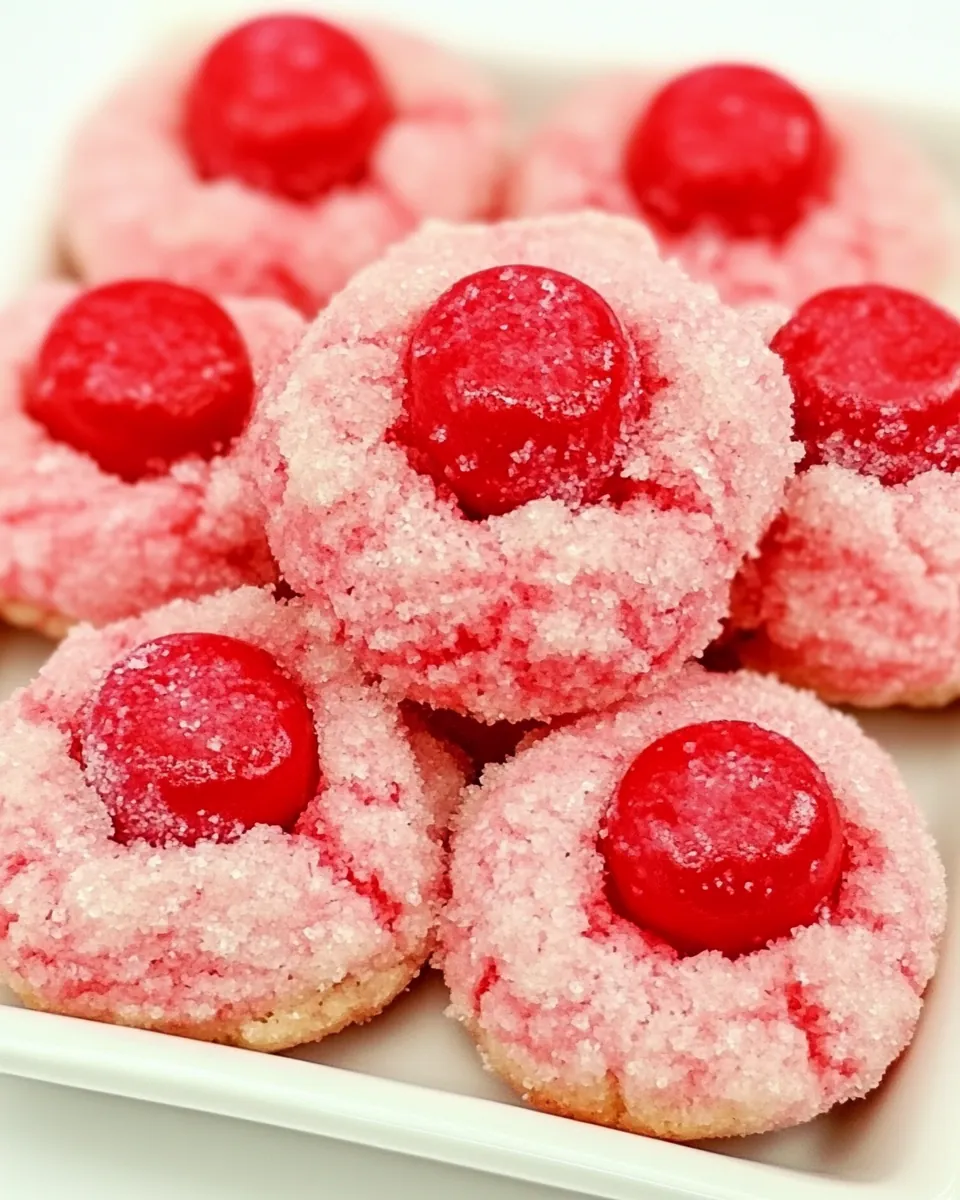
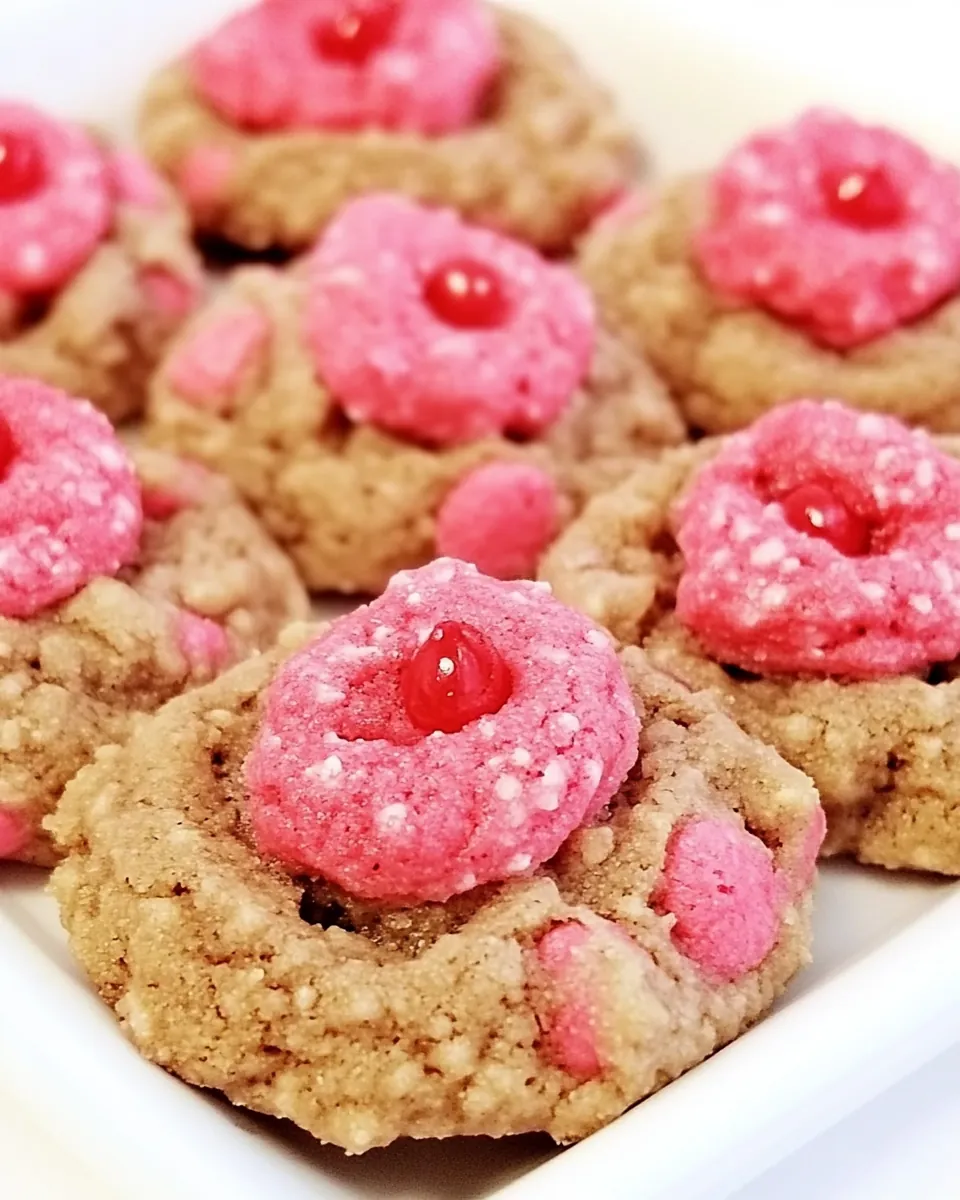
Cherry Kiss Cookies
As I started to bake my favorite treats, the aroma of sweet cherries filled the air, and that’s when I knew I was making Cherry Kiss Cookies. These delightful cookies have been a staple in my kitchen for years, especially during those cozy February nights when love is in the air. Each bite offers a perfect blend of soft cookie and rich chocolate, making them an irresistible treat. I remember the first time I made these for a friend’s Valentine’s Day party, and the joy on their face when they took a bite was priceless. The combination of flavors and textures in Cherry Kiss Cookies is simply magical, and I can’t help but whip them up every chance I get. Whether it’s a holiday gathering or just a special evening at home, these cookies never fail to bring smiles. They’re quick to prepare and offer that nostalgic taste of childhood, reminding us of simpler times. So, grab your mixing bowl, and let’s dive into the world of Cherry Kiss Cookies together!
Recipe Snapshot
25 mins
15 mins
10 mins
Medium
80 kcal
1 g
Gluten-Free
4 g
Oven, Baking Sheet, Whisk, Chef’s Knife, Mixing Bowl
The Charm of This Cherry Kiss Cookies
1. A Touch of Nostalgia
There’s something deeply nostalgic about Cherry Kiss Cookies. They remind me of baking with my grandmother, her gentle hands deftly mixing the ingredients while sharing stories from her youth. It’s more than just a recipe; it’s a connection to cherished memories that I love to recreate.
2. Perfect for Any Occasion
These cookies aren’t just for Valentine’s Day; they’re perfect for any occasion! Whether it’s a birthday party, a family gathering, or simply a treat for yourself, Cherry Kiss Cookies can add a special touch to any moment. Their vibrant colors and adorable chocolate kisses make them a delightful centerpiece on any dessert table.
3. Versatile Flavor Combinations
While the classic version is absolutely divine, you can easily switch things up. Consider adding different extracts or toppings alongside the chocolate kisses; whether it’s a drizzle of white chocolate or a sprinkle of nuts, the possibilities are endless. This flexibility keeps things fresh and exciting.
4. Easy to Prepare
One of the best parts about Cherry Kiss Cookies is how simple they are to prepare. With just a few ingredients and straightforward steps, even novice bakers can impress their friends and family. The joy of baking should be accessible to everyone, and this recipe embodies that spirit.
5. A Crowd Favorite
No matter where I take these cookies, they always disappear quickly. There’s something about the sweet, soft cookie hugging a chocolate kiss that makes them irresistible. When you serve Cherry Kiss Cookies, expect compliments and requests for the recipe!
6. A Fun Baking Activity
Baking is a great way to bond with family and friends. Invite some loved ones over and make it a fun activity! Rolling the dough into balls and dipping them in sanding sugar before baking is a delightful experience that everyone can participate in. It’s a simple way to create memories while creating these delicious cookies.
What You’ll Need for Cherry Kiss Cookies
To create the perfect batch of Cherry Kiss Cookies, it’s essential to choose quality ingredients that work harmoniously. Each ingredient plays a specific role, from the buttery base to the vibrant cherries that bring life to each bite. Here’s a list of the key players you’ll need for this sweet treat.
- 2½ cups all-purpose flour (spooned and leveled) – This flour provides structure to the cookies, ensuring they hold their shape while remaining soft and chewy.
- ½ teaspoon baking soda – This ingredient acts as a leavening agent, helping the cookies rise to the perfect height.
- 1 cup salted sweet cream butter (softened) – The butter adds a rich flavor and contributes to the cookies’ tender texture.
- 1¼ cups powdered sugar – This sugar sweetens the cookies while also giving them a smooth texture.
- 1 tablespoon maraschino cherry juice – A splash of this juice infuses the cookies with a lovely cherry flavor.
- 1½ teaspoons cherry extract – This extract enhances the cherry flavor, making it more pronounced.
- ½ teaspoon almond extract – This ingredient adds depth and a subtle nuttiness to the cookies.
- 3 to 5 drops red food color gel – A little color goes a long way, giving the cookies a festive appearance.
- ⅓ cup maraschino cherries – These sweet cherries are chopped and added for bursts of flavor within the cookies.
- 1 tablespoon maraschino cherries (finely chopped) – More cherry goodness to enhance the texture and flavor.
- Pink sanding sugar (for rolling the dough balls in) – Adds a sparkling finish to the cookies, making them visually appealing.
- 42 unwrapped chocolate kisses – The star of the show, these chocolate kisses are pressed into the center of each cookie for the ultimate combination of flavors.
Cherry Kiss Cookies Instructions
Making Cherry Kiss Cookies is a rewarding experience that fills your kitchen with delightful aromas. Follow these steps closely, and you’ll have a batch of cookies that will impress everyone!
- Preheat the oven to 350°F. Line two baking sheets with parchment paper and set them aside. This ensures the cookies won’t stick and will bake evenly.
- In a small mixing bowl, whisk together the flour and baking soda. This helps to evenly distribute the leavening agent, ensuring consistent results.
- Using a stand mixer or a medium-sized mixing bowl and a handheld mixer on medium-high speed, beat together the softened butter and powdered sugar for about one and a half to two minutes. You want the mixture to be smooth and fluffy, which is crucial for the texture of your cookies.
- Add the maraschino cherry juice, cherry extract, and almond extract. Continue beating for another minute until the flavors are well incorporated into the butter and sugar mix.
- Next, add the red food color gel and continue mixing for another thirty seconds. You’re aiming for a uniform color without any streaks, enhancing the visual appeal of your cookies.
- Lower the mixer speed to medium and add in the flour mixture. Mix until just combined, ensuring not to over-mix as this can affect the cookie’s texture.
- Gently fold in the chopped cherries, mixing just until they are evenly distributed throughout the dough. This adds delightful bursts of cherry flavor in each cookie.
- Take the pink sanding sugar and place it in a small mixing bowl, setting it aside for later use.
- Using a one tablespoon cookie scoop, scoop out the dough and roll it into a ball. Aim for uniform sizes for even baking.
- Roll the dough ball in the sanding sugar, gently shaking off any excess. This gives the cookies a beautiful sparkling finish.
- Place the coated cookie dough balls on the lined baking sheet, spacing them about two inches apart. This allows for spreading while they bake.
- Bake the cookies for eight to ten minutes, keeping a close watch so the edges don’t brown. The edges may crack slightly, which is perfectly fine.
- Once you remove the cookies from the oven, immediately press an unwrapped chocolate kiss gently into the center of each cookie. The heat will help the kiss stick to the cookie.
- Allow the cookies to rest on the baking sheet for two to three minutes before transferring them to a cooling rack to cool completely. This helps them set up nicely without falling apart.
Things Worth Knowing
- Check your oven temperature often, as it can vary. Using an oven thermometer can ensure that your cookies bake evenly.
- For a softer cookie, don’t overbake them. They should look slightly underbaked when you take them out and will continue to set as they cool.
- Make sure the butter is at room temperature for the best creaming results; it should be soft but not melted.
- Chill the cookie dough for thirty minutes before baking for a thicker cookie that spreads less.
Customization Ideas
If you’re feeling adventurous, you can easily customize Cherry Kiss Cookies to suit your tastes or occasion. Here are some fun ideas to try!
- Storage: Once cooled, store your cookies in an airtight container at room temperature for up to five days. This helps keep them fresh and chewy.
- Freezing: You can freeze the cookie dough balls before baking. Just place them on a baking sheet until frozen, then transfer them to a freezer-safe bag. When you’re ready to bake, simply add a minute or two to the baking time.
- Variations: Try using different flavored extracts like lemon or orange for a citrus twist. You can also mix in chopped nuts for additional texture.
- Presentation: For special occasions, drizzle melted white chocolate over the cookies after they’ve cooled for an elegant finish.
- Color Themes: Adapt the color of the sanding sugar to match holidays or events, such as red and green for Christmas or pastel colors for Easter.
Perfect Pairings for Cherry Kiss Cookies
When it comes to serving Cherry Kiss Cookies, the options are endless! Let’s explore some delightful pairings and occasions to make the most out of these tasty treats.
- Tea or Coffee: Enjoy your cookies with a warm cup of tea or coffee. The flavors of cherry and chocolate beautifully complement the bitterness of coffee.
- Picnics: These cookies are fantastic for outdoor gatherings. Their charm and flavor make them a hit among both kids and adults.
- Birthday Celebrations: Serve these cookies at birthday parties, where they can double as both a dessert and a fun treat for party bags.
- Holiday Treats: Perfect for Valentine’s Day, these cookies add a heartwarming touch to any romantic dinner or celebration.
- Winter Delight: Enjoy them during cold months, accompanied by a warm glass of milk or hot cocoa for a cozy experience.
- Gifts: Package these cookies in decorative tins or boxes to give as gifts. They make heartwarming presents for friends and family.
FAQ
Conclusion
Cherry Kiss Cookies are a delightful combination of flavors and textures that make them truly special. Their soft, chewy nature, combined with the sweetness of chocolate kisses, creates a treat that’s hard to resist. I encourage you to try making these cookies for your next gathering or simply as a sweet indulgence for yourself. They’re sure to bring joy and smiles to everyone who takes a bite.

Cherry Kiss Cookies
Ingredients
Equipment
Method
- Preheat the oven to 350°F. Line two baking sheets with parchment paper and set them aside.
- In a small mixing bowl, whisk together the flour and baking soda.
- Using a stand mixer or a medium-sized mixing bowl and a handheld mixer on medium-high speed, beat together the softened butter and powdered sugar for about one and a half to two minutes.
- Add the maraschino cherry juice, cherry extract, and almond extract. Continue beating for another minute.
- Next, add the red food color gel and continue mixing for another thirty seconds.
- Lower the mixer speed to medium and add in the flour mixture. Mix until just combined.
- Gently fold in the chopped cherries.
- Take the pink sanding sugar and place it in a small mixing bowl.
- Using a one tablespoon cookie scoop, scoop out the dough and roll it into a ball.
- Roll the dough ball in the sanding sugar, gently shaking off any excess.
- Place the coated cookie dough balls on the lined baking sheet, spacing them about two inches apart.
- Bake the cookies for eight to ten minutes, keeping a close watch so the edges don’t brown.
- Once you remove the cookies from the oven, immediately press an unwrapped chocolate kiss gently into the center of each cookie.
- Allow the cookies to rest on the baking sheet for two to three minutes before transferring them to a cooling rack to cool completely.
Notes
- Tip 1: The baking soda is crucial for a soft and chewy texture. Omit it for a crunchier cookie.
- Tip 2: Oven temperatures may vary, so check your cookies at the lower end of the baking time.
- Tip 3: Press the chocolate kiss into the cookie while still warm for better adhesion.