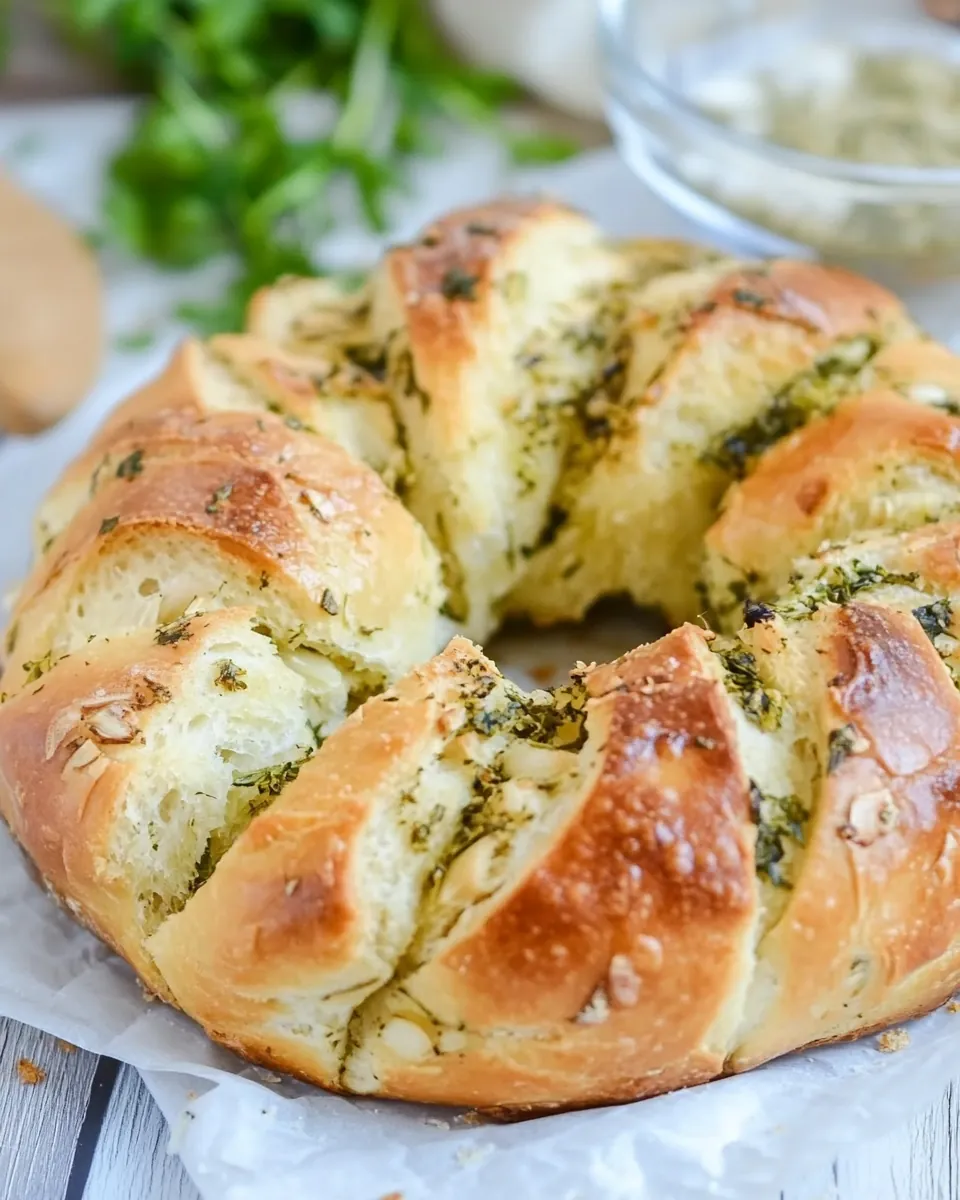
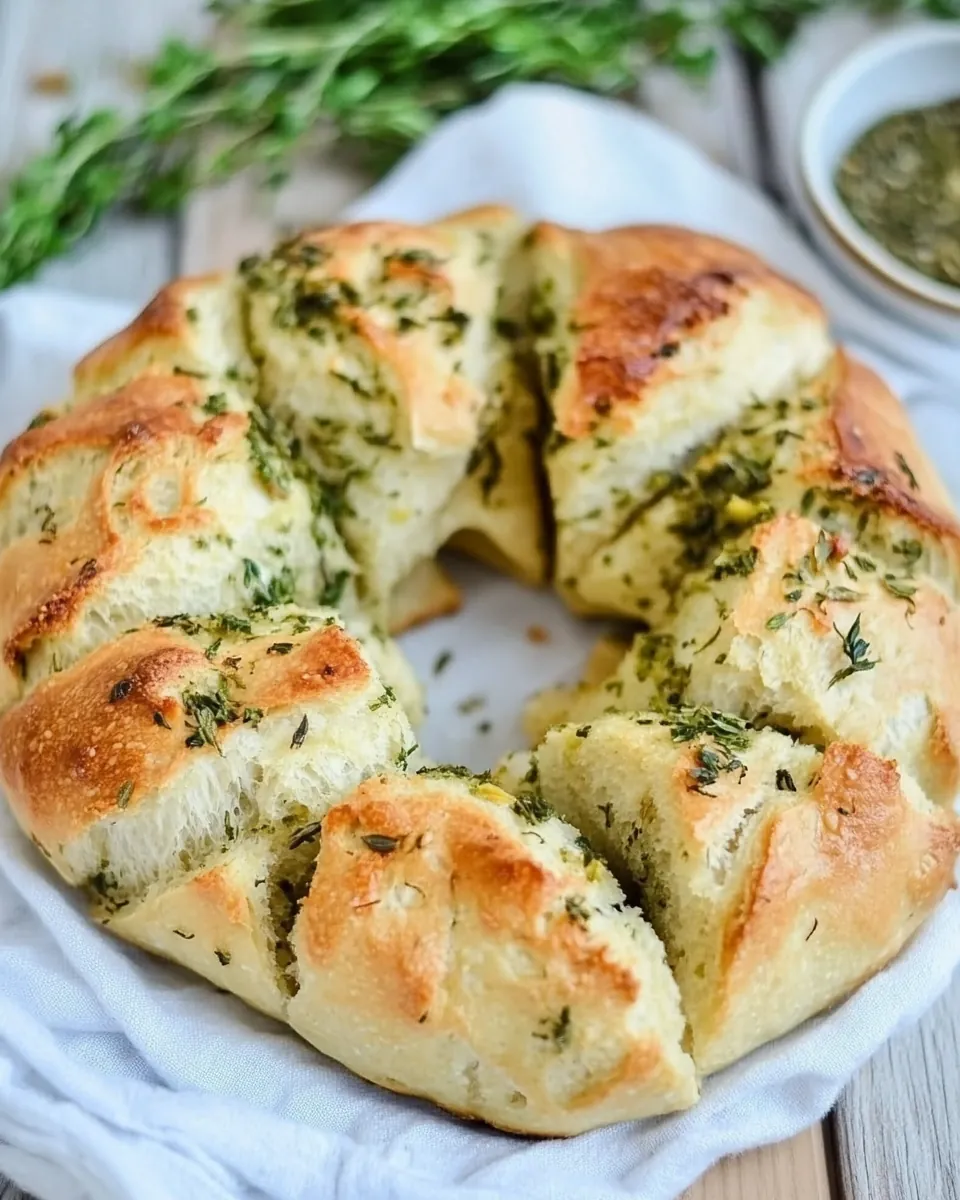
Garlic Herb Bread Wreath
There’s something truly magical about sharing a warm and freshly baked loaf of bread, especially when it’s a Garlic Herb Bread Wreath. I remember the first time I made this delightful creation; the aroma of herbs and garlic wafting through my kitchen felt like a warm hug. It was a crisp autumn evening, and I was preparing for a small gathering with friends. As the bread baked, anticipation bubbled among us, and I could barely wait to serve it straight from the oven. The golden crust and the soft inside were simply irresistible. This bread isn’t just for sharing; it’s a centerpiece, a conversation starter, and a much-loved treat that brings friends and family together.
Recipe Snapshot
50 mins
20 mins
30 mins
Medium
200 kcal
6 g
Paleo, Whole30, Vegan
8 g
Grater, Oven, Baking Sheet, Wooden Spoon, Whisk, Chef’s Knife, Mixing Bowl
Why You’ll Love This Garlic Herb Bread Wreath
It’s a Showstopper
The Garlic Herb Bread Wreath isn’t just a recipe; it’s a visual feast. The twisted wreath shape instantly captures attention, making it an impressive centerpiece for any table. Whether it’s a holiday feast or a casual gathering, your guests will be drawn to its beauty.
Incredible Aroma
As it bakes, the smell of garlic and herbs fills the house, creating an inviting atmosphere that makes everyone feel right at home. It’s comforting and warm, making it hard to resist cutting into it as soon as it comes out of the oven.
Versatile Pairing
This bread pairs beautifully with a variety of dips, soups, or even just a simple olive oil for dipping. Its flavor complements many dishes, from a hearty stew to a fresh salad, making it perfect for any meal.
Fun for Everyone
Making this wreath can be a fun activity for everyone. Whether you’re baking with kids or entertaining friends, the process of rolling, twisting, and weaving the dough allows for creativity. Everyone loves getting involved, and it becomes a shared experience.
Perfect for Celebrations
With its unique shape and delicious flavor, the Garlic Herb Bread Wreath is ideal for special occasions, from holiday dinners to birthday parties. It adds a festive touch to any table, making it a memorable addition to your events.
Comfort Food
At its core, this bread is a comfort food that transcends seasons. Whether it’s a chilly fall day or a summer evening, gathering around a warm loaf of freshly baked bread creates an intimate and joyful atmosphere.
Everything You Need for Garlic Herb Bread Wreath

When it comes to baking, the quality of ingredients matters greatly. Each component in the Garlic Herb Bread Wreath works in harmony to create a loaf that’s soft, flavorful, and aromatic. The star ingredients, such as the fresh herbs and garlic, provide depth, while the butter ensures a rich texture. Together, these ingredients create a delightful experience that’s both satisfying and comforting.
- 3 1/2 to 4 cups all purpose flour: This forms the backbone of the bread, giving it structure and a delightful chewiness.
- 3/4 cup whole milk: Warmed to just the right temperature, it activates the yeast and adds richness to the dough.
- 2 ¼ ounces instant yeast: This is key for achieving a light and airy texture, allowing the bread to rise beautifully.
- 1 teaspoon salt: Essential for enhancing flavors and controlling the fermentation process of the dough.
- 2 tablespoons honey: Adds a subtle sweetness that balances the savory elements perfectly.
- 3 large eggs: These provide moisture and richness, contributing to the bread’s wonderful texture.
- 8 tablespoons butter: Softened and mixed into the dough, it creates a tender crumb and a rich flavor.
- 1/4 cup parmesan cheese: Freshly grated, it adds a savory depth that pairs beautifully with the herbs.
- 2 cloves garlic: Minced to infuse the bread with its aromatic flavor, enhancing the overall taste.
- 1/3 cup fresh parsley: Finely chopped, it adds freshness and a pop of color.
- 2 tablespoons fresh basil: A fragrant herb that complements the garlic and elevates the bread.
- 1 tablespoon fresh sage: Provides an earthy flavor that deepens the taste profile of the wreath.
- 1 tablespoon fresh thyme: Adds a subtle woodsy note that rounds out the herb blend beautifully.
Cooking Instructions for Garlic Herb Bread Wreath
Ready to get started? Making your own Garlic Herb Bread Wreath is a fun and rewarding experience. Follow these simple steps to create a stunning centerpiece for your next meal. The process is easy to follow, and I promise it will be worth the effort!
- In a large bowl, whisk together instant yeast, honey, and warm whole milk until well combined. It’s important that the milk is warm but not too hot; around 110°F is ideal. This temperature helps to activate the yeast, ensuring your bread rises beautifully.
- Add the eggs to the mixture and whisk until fully incorporated. You’ll want a smooth blend before moving on. The eggs will give richness to your dough.
- Next, add one cup of all-purpose flour to the bowl. Stir just until combined; don’t worry about incorporating all the flour yet. This is where the magic begins to happen.
- Whisk in 2 tablespoons of the softened butter and then add another cup of flour along with the salt until the mixture looks smooth and uniform. You’ll notice the dough starting to come together nicely!
- Continue adding flour half a cup at a time, stirring until the dough pulls away from the sides of the bowl. If you have a stand mixer with a hook attachment, feel free to use it at this point to make things even easier.
- Knead the dough for about 6 to 8 minutes until it becomes smooth and elastic. You’ll know it’s ready when it springs back when gently pressed. This step is crucial for developing the gluten structure.
- Lightly grease a large bowl using some of the remaining butter, and place the dough inside. Cover it with a towel or plastic wrap and let it rise in a warm, draft-free area for around 60 minutes, or until it has doubled in size.
- While the dough rises, prepare your baking sheet by lining it with parchment paper or a silicone baking mat. This ensures easy removal of the bread once it’s baked.
- In a small bowl, mix together 4 tablespoons of softened butter, minced garlic, chopped parsley, basil, sage, thyme, and parmesan cheese until well combined. This aromatic herb butter will be spread over the dough.
- After the dough has risen, transfer it to a lightly floured surface. Knead for a few minutes until it becomes smooth again. Then roll it out to a large rectangle, about 18 inches by 10 inches. Spread the herb butter evenly over the top, leaving a 1-inch perimeter around the edges.
- Roll the dough tightly to form a log, similar to making cinnamon rolls. Using a sharp knife, cut through the log lengthwise, leaving an inch intact at one end to hold it together.
- Twist the two pieces of dough around each other gently, lengthening the dough as you twist. This should form a beautiful spiral. Shape the twisted dough into a wreath by bringing the ends together and pinching them to seal.
- Transfer the wreath to the prepared baking sheet. Loosely cover it with plastic wrap or a towel and let it rest for about 30 minutes, allowing it to rise again.
- Preheat your oven to 375°F. Bake the bread for 30 to 35 minutes until it turns golden brown and sounds hollow when tapped on the bottom.
- Once baked, brush the remaining 2 tablespoons of softened butter over the top. Let it rest for at least 10 minutes before slicing and serving. The aroma will be irresistible!
Things Worth Knowing
- Yeast Activation: Ensure your milk is warm but not hot, as too high a temperature can kill the yeast. Around 110°F works perfectly.
- Kneading Technique: Knead the dough until it’s elastic. This step is crucial for a good rise and texture.
- Resting Period: Allow the dough to rise in a warm place, as this helps it develop flavor and texture.
- Baking Tips: Keep an eye on your bread towards the end of the baking time. If it browns too quickly, you can cover it loosely with foil.
- Flavor Enhancements: Feel free to experiment with different herbs like rosemary or oregano in the herb butter for additional flavor.
Tips and Tricks about Garlic Herb Bread Wreath
Creating the perfect Garlic Herb Bread Wreath is all about attention to detail. Here are some tips to ensure your bread turns out fantastic each time!
- Storage: Keep any leftovers in an airtight container at room temperature for up to three days. Reheat in the oven briefly to restore freshness.
- Freezing: You can freeze the bread after baking. Wrap it tightly in aluminum foil and store in a freezer bag for up to three months. Thaw and reheat before serving.
- Pairing: This bread goes wonderfully with soups, salads, and cheese platters. Try serving it alongside a creamy tomato soup or a fresh garden salad.
- Variations: You can add different cheeses such as mozzarella or herbs like chives to customize the flavor to your liking.
- Serving Warm: For the best flavor, serve the bread warm out of the oven. It creates a delightful aroma and taste that everyone loves.
- Make It Ahead: You can prep the dough in advance and refrigerate it. Just allow extra time for the second rise before baking.
Serving Suggestions
The Garlic Herb Bread Wreath is a versatile bread that shines in many settings. Here are some great serving suggestions:
- With Dips: Serve it alongside a warm cheese dip or a homemade hummus for a delightful appetizer.
- At Gatherings: This wreath makes an impressive centerpiece for holiday gatherings, birthdays, or family dinners.
- Complementary Sides: Pair it with a light salad or a rich soup to make a complete meal.
- For Brunch: Serve it warm at brunch with spreads like butter, jam, or even a savory pesto.
- As a Snack: It’s perfect as a snack on its own or alongside a charcuterie board, making it a hit at any party.
- Seasonal Pairings: In the fall, enjoy it with roasted vegetables; in summer, pair it with fresh tomatoes and basil.
FAQ
Conclusion
The Garlic Herb Bread Wreath is more than just a bread; it’s an experience that brings people together. Whether for special occasions or simple family meals, this recipe offers a delicious way to connect with loved ones over a shared love of good food. I encourage you to try making it for yourself; it’s easy, satisfying, and will surely impress anyone who takes a bite!

Garlic Herb Bread Wreath
Ingredients
Equipment
Method
- In a large bowl, whisk together instant yeast, honey, and warm whole milk until well combined. It's important that the milk is warm but not too hot; around 110°F is ideal. This temperature helps to activate the yeast, ensuring your bread rises beautifully.
- Add the eggs to the mixture and whisk until fully incorporated. You’ll want a smooth blend before moving on. The eggs will give richness to your dough.
- Next, add one cup of all-purpose flour to the bowl. Stir just until combined; don’t worry about incorporating all the flour yet. This is where the magic begins to happen.
- Whisk in 2 tablespoons of the softened butter and then add another cup of flour along with the salt until the mixture looks smooth and uniform. You’ll notice the dough starting to come together nicely!
- Continue adding flour half a cup at a time, stirring until the dough pulls away from the sides of the bowl. If you have a stand mixer with a hook attachment, feel free to use it at this point to make things even easier.
- Knead the dough for about 6 to 8 minutes until it becomes smooth and elastic. You'll know it’s ready when it springs back when gently pressed. This step is crucial for developing the gluten structure.
- Lightly grease a large bowl using some of the remaining butter, and place the dough inside. Cover it with a towel or plastic wrap and let it rise in a warm, draft-free area for around 60 minutes, or until it has doubled in size.
- While the dough rises, prepare your baking sheet by lining it with parchment paper or a silicone baking mat. This ensures easy removal of the bread once it's baked.
- In a small bowl, mix together 4 tablespoons of softened butter, minced garlic, chopped parsley, basil, sage, thyme, and parmesan cheese until well combined. This aromatic herb butter will be spread over the dough.
- After the dough has risen, transfer it to a lightly floured surface. Knead for a few minutes until it becomes smooth again. Then roll it out to a large rectangle, about 18 inches by 10 inches. Spread the herb butter evenly over the top, leaving a 1-inch perimeter around the edges.
- Roll the dough tightly to form a log, similar to making cinnamon rolls. Using a sharp knife, cut through the log lengthwise, leaving an inch intact at one end to hold it together.
- Twist the two pieces of dough around each other gently, lengthening the dough as you twist. This should form a beautiful spiral. Shape the twisted dough into a wreath by bringing the ends together and pinching them to seal.
- Transfer the wreath to the prepared baking sheet. Loosely cover it with plastic wrap or a towel and let it rest for about 30 minutes, allowing it to rise again.
- Preheat your oven to 375°F. Bake the bread for 30 to 35 minutes until it turns golden brown and sounds hollow when tapped on the bottom.
- Once baked, brush the remaining 2 tablespoons of softened butter over the top. Let it rest for at least 10 minutes before slicing and serving. The aroma will be irresistible!
Notes
- Tip 1: Keep any leftovers in an airtight container at room temperature for up to three days. Reheat in the oven briefly to restore freshness.
- Tip 2: You can freeze the bread after baking. Wrap it tightly in aluminum foil and store in a freezer bag for up to three months. Thaw and reheat before serving.
- Tip 3: This bread goes wonderfully with soups, salads, and cheese platters. Try serving it alongside a creamy tomato soup or a fresh garden salad.
- Tip 4: You can add different cheeses such as mozzarella or herbs like chives to customize the flavor to your liking.
- Tip 5: For the best flavor, serve the bread warm out of the oven. It creates a delightful aroma and taste that everyone loves.