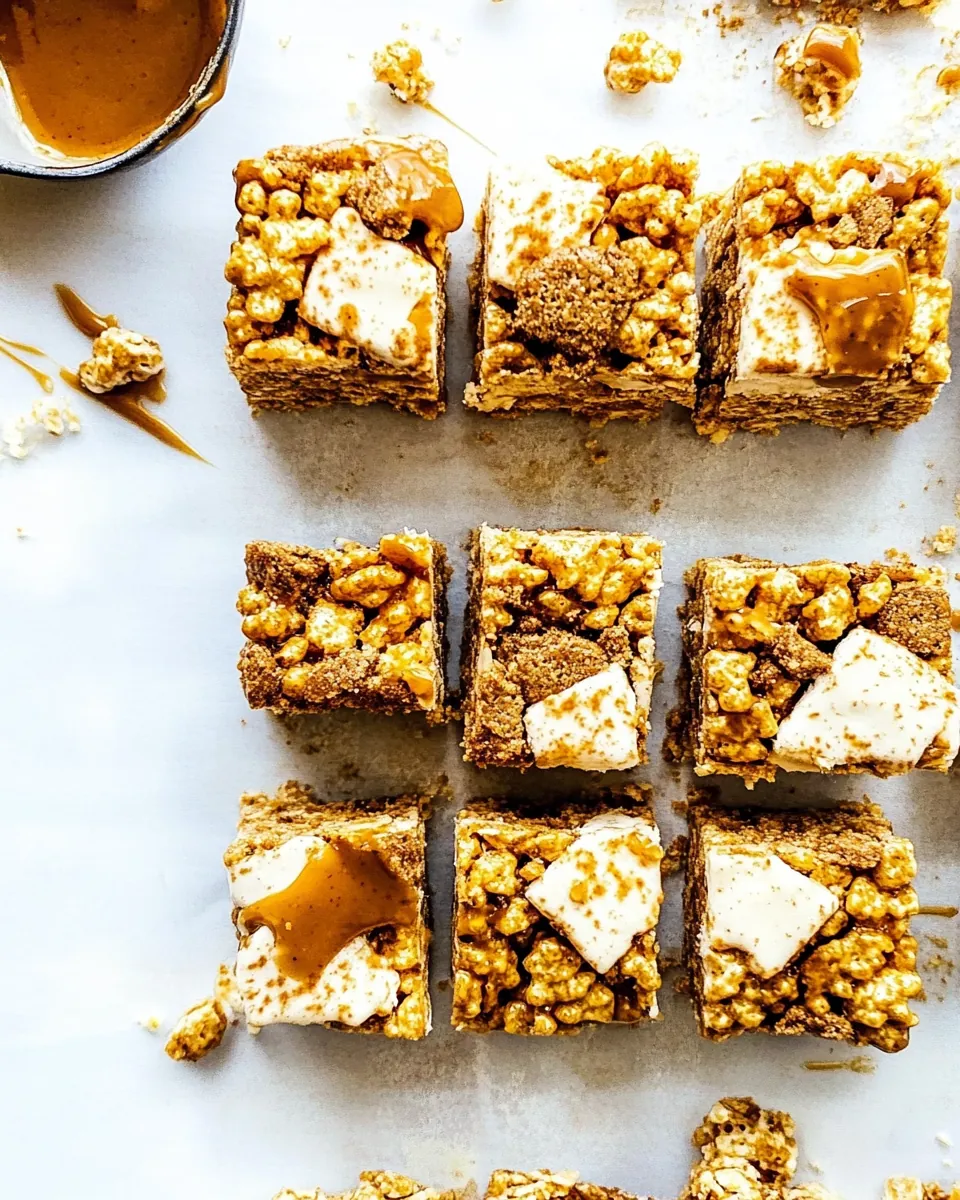
Brown Butter Biscoff Rice Krispie Treats
There’s something about making Brown Butter Biscoff Rice Krispie Treats that takes me back to simpler times. I remember being a kid, eagerly waiting for the sweets to cool in the kitchen while the aroma of melting butter filled the air. It’s one of those recipes that is not only easy to whip up but also brings joy to everyone who tries it. The combination of nutty brown butter and the caramel-like flavors of Biscoff cookie butter is simply irresistible. Every bite is a delightful crunch with that signature sweetness that makes you want to come back for more. Whether you’re hosting friends or just looking for a delicious treat to enjoy at home, these bars will definitely hit the spot.
Recipe Snapshot
15 mins
5 mins
10 mins
Easy
180 kcal
1 g
Gluten-Free, Low FODMAP
9 g
Chef’s Knife, Mixing Bowl, Frying Pan, Wooden Spoon
You see, the magic happens when you transform the ordinary into something extraordinary. Using brown butter gives these treats a rich flavor that elevates them beyond the typical Rice Krispie treat. And adding Biscoff cookies not only enhances the texture but also introduces a unique twist that will leave everyone guessing your secret ingredient. Trust me; this is the kind of treat that will have your friends and family begging for the recipe.
So, gather your ingredients, and let’s make some Brown Butter Biscoff Rice Krispie Treats that will fill your home with warmth and sweetness!
Why This Brown Butter Biscoff Rice Krispie Treats Hits Different
1. A Twist on Classic Treats
While traditional Rice Krispie treats are always a hit, adding brown butter and Biscoff takes them to the next level. The nutty, caramel flavor from the browned butter pairs perfectly with the spiced notes of Biscoff cookie butter, creating a treat that’s hard to resist.
2. Quick and Easy to Make
One of the best things about Brown Butter Biscoff Rice Krispie Treats is how simple they are to prepare. In just a few steps, you can have a batch ready to share with friends and family, making them perfect for last-minute gatherings or sweet cravings.
3. Kids Love Them!
If you have little ones around, they will adore these treats. The combination of crunchy cereal and gooey marshmallows is a classic kids’ favorite. Plus, they can help with mixing and pressing the mixture into the pan, making it a fun family activity.
4. Perfect for Any Occasion
Whether it’s a birthday party, a holiday gathering, or just a cozy night in, these treats are incredibly versatile. You can easily cut them into fun shapes for themed parties or serve them with a scoop of ice cream for a delightful dessert.
5. Customizable for Different Flavors
While I love the Biscoff flavor, you can easily adapt this recipe to include your favorite add-ins. Consider incorporating chocolate chips, nuts, or even peanut butter for a unique twist that reflects your taste.
FAQ
Conclusion
The Brown Butter Biscoff Rice Krispie Treats are a delightful blend of flavors and textures that make them stand out among dessert options. With their crispy texture and buttery richness, they are sure to impress anyone who takes a bite. So, don’t wait—give this recipe a try and enjoy these scrumptious treats today!
Brown Butter Biscoff Rice Krispie Treats
Ingredients
Equipment
Method
- For super thick Rice Krispie Treats, grease a 9×9-inch baking pan with nonstick cooking spray. For regular Rice Krispie Treats, grease a 9×13-inch baking pan with nonstick cooking spray. You can also line the pan with parchment paper to make it easier for them to come out of the pan. Set the pan aside.
- Place the butter in a large pot and melt over medium heat, stirring often, until it foams, smells nutty, and browns. This will take about 5 minutes.
- Add the 16 oz bag of marshmallows and stir until they are completely melted.
- Remove the pan from the heat and stir in the Biscoff cookie butter, vanilla extract, and sea salt. Add the crispy rice cereal and chopped Biscoff cookies; gently stir until well coated with the marshmallows. Stir in the remaining 2 cups of mini marshmallows.
- Transfer the mixture to the prepared pan. Lightly press the mixture into the pan using a greased spatula. You can also lightly grease your hands and press the mixture into the pan. Don’t press too firmly or the treats will end up hard and dry. Sprinkle a little flaky sea salt on top, if desired.
- Let the Rice Krispie Treats sit for about 1 hour. Cut into squares and serve.
Notes
- Tip 1: Cover the pan with plastic wrap or put the treats in an airtight container and store on the counter for up to 3 days.