Pumpkin Rice Krispie Treats
There’s something magical about the colorful, festive nature of Pumpkin Rice Krispie Treats that never fails to bring a smile to my face. Each time autumn rolls around, I am reminded of those cozy evenings spent in the kitchen, crafting sweet treats that not only taste delightful but also spark joy. These treats, with their vibrant orange hue and playful shapes, are perfect for Halloween gatherings, school parties, or just a fun family project. The combination of crispy rice cereal, gooey goodness, and a touch of chocolate creates a flavor profile that’s impossible to resist. I remember making these with my little ones, their excitement as they shaped the pumpkins was contagious! It’s a tradition that I cherish greatly and love sharing with friends and family. When I see the smiles on their faces, I know we’ve created something special together.
Recipe Snapshot
20 mins
10 mins
10 mins
Medium
150 kcal
1 g
Gluten-Free, Low FODMAP
5 g
Oven, Mixing Bowl, Frying Pan, Wooden Spoon
Why This Pumpkin Rice Krispie Treats Is So Good
Perfect for Fall Celebrations
As the leaves change and the air turns crisp, there’s no better way to celebrate fall than with a batch of Pumpkin Rice Krispie Treats. Their vibrant orange color adds a festive touch to any gathering, making them a delightful addition to Halloween parties or Thanksgiving feasts.
Fun and Interactive
Making these treats is not just about the end result; it’s the fun experience that brings everyone together. Kids love to help shape the pumpkin treats, and it becomes a cherished bonding activity. It’s amazing to see their creativity shine as they add candy decorations!
Easy to Make
This recipe is incredibly straightforward, making it perfect for novice cooks or busy parents. With just a few easy steps, you can create a batch of scrumptious treats that will impress your guests without spending hours in the kitchen.
Customizable and Creative
While this recipe focuses on pumpkins, the base can be easily adapted to suit any occasion. Change the colors, use different candies, or shape them into other fun designs. The possibilities are endless, and they allow for creativity in the kitchen.
Great for Gifting
These treats also make for wonderful homemade gifts. Whether you’re sharing with neighbors or bringing a sweet surprise to a potluck, who wouldn’t love receiving a batch of adorable pumpkin treats? They’re sure to brighten anyone’s day!
Kid-Approved Treats
Most importantly, Pumpkin Rice Krispie Treats are universally loved by kids and adults alike. Their playful appearance and sweet, crispy texture make them a hit at any age. They’re perfect for satisfying the sweet tooth without being overly complicated.
Pumpkin Rice Krispie Treats Ingredients
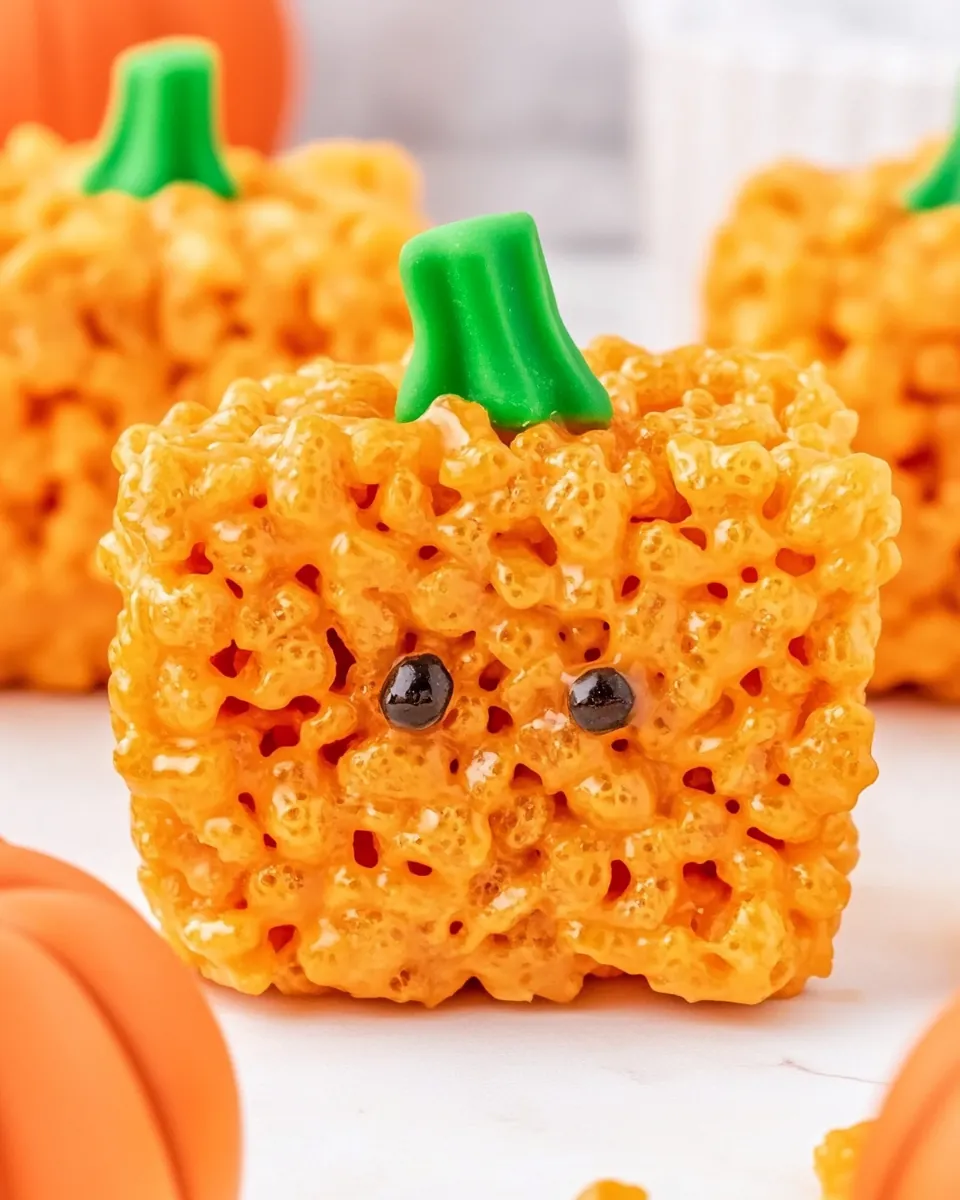
The ingredients for Pumpkin Rice Krispie Treats are simple yet effective. The star of the show, of course, is the rice krispies, which provide that iconic crunch. The butter and miniature marshmallows create the ooey-gooey texture that binds everything together, while a splash of orange gel food coloring adds a festive touch to the mix. A few green M&Ms give the pumpkins their character, and a sprinkle of semi-sweet chocolate chunks for the stems adds a rich flavor contrast. Together, they create a delightful treat that’s bound to please!
- 4 tablespoons salted butter: Acts as the binding agent, providing richness and flavor.
- 10 ounces miniature marshmallows: Essential for that gooey texture.
- orange gel food coloring: Adds a fun, festive color to the treats.
- 5 cups rice krispies cereal: The classic crunch that makes these treats so enjoyable.
- 12 green M&Ms: For decoration as leaves.
- ⅓ cup semi-sweet chocolate baking chunks: For adding rich chocolate flavor.
- 12 semi-sweet chocolate baking chunks: Used for the pumpkin stems.
How to Assemble Pumpkin Rice Krispie Treats
Assembling Pumpkin Rice Krispie Treats is a fun experience that brings out the kid in all of us. Gather your ingredients and let’s dive into the process! Follow these detailed steps to create your adorable pumpkin treats.
Start by lining a large sheet pan with parchment paper or a silicone baking mat. This ensures that your Pumpkin Rice Krispie Treats won’t stick. Set this aside for later use.
In a large pot or Dutch oven, add 4 tablespoons of salted butter and turn the heat to medium-low. Stir the butter until it melts completely, creating a warm and inviting aroma. This is the first step to combining all of those wonderful flavors.
Next, add 10 ounces of miniature marshmallows to the pot. Stir continuously until the marshmallows have melted into a smooth, velvety mixture. You want to achieve a consistency that’s creamy and slightly elastic. This is where the magic happens!
Once the marshmallows have melted, carefully add several drops of orange gel food coloring and mix well. Adjust the color to your liking; you might want a vibrant orange for those perfect pumpkin treats!
Remove the pot from the heat and add 5 cups of rice krispies cereal. Gently fold the cereal into the marshmallow mixture, making sure every piece is coated. The mixture should look well combined but be careful not to over-mix as you want to maintain that delightful crunch.
Let the mixture cool for about 15 to 20 minutes, or until it’s cool enough to handle. This is an essential step as it allows you to shape your pumpkins without burning your hands!
While waiting, prepare your green M&Ms by cutting them in half for the leaves. Alternatively, you can leave them whole and press them into the pumpkins later. The choice is yours!
Next, lightly spray a large cookie scoop or ice cream scoop with cooking spray. Use this to scoop out the rice krispie mixture and form large balls, pressing firmly to ensure they hold their shape. Place them on the lined sheet pan.
In a small, microwave-safe bowl, place ⅓ cup of semi-sweet chocolate baking chunks. Microwave in 30-second increments at half power, stirring in between, until the chocolate is completely melted. This will be used for creating the pumpkin stems.
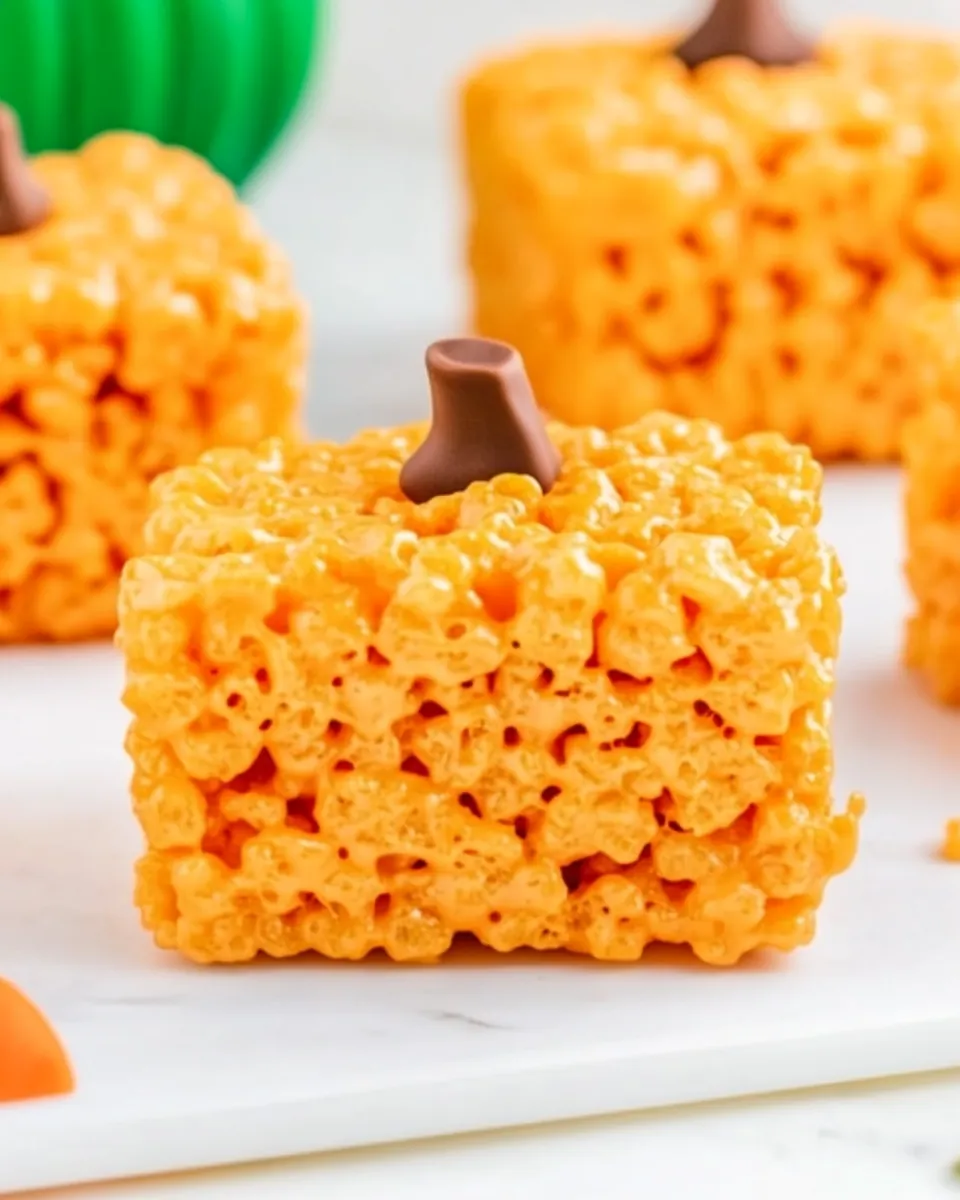
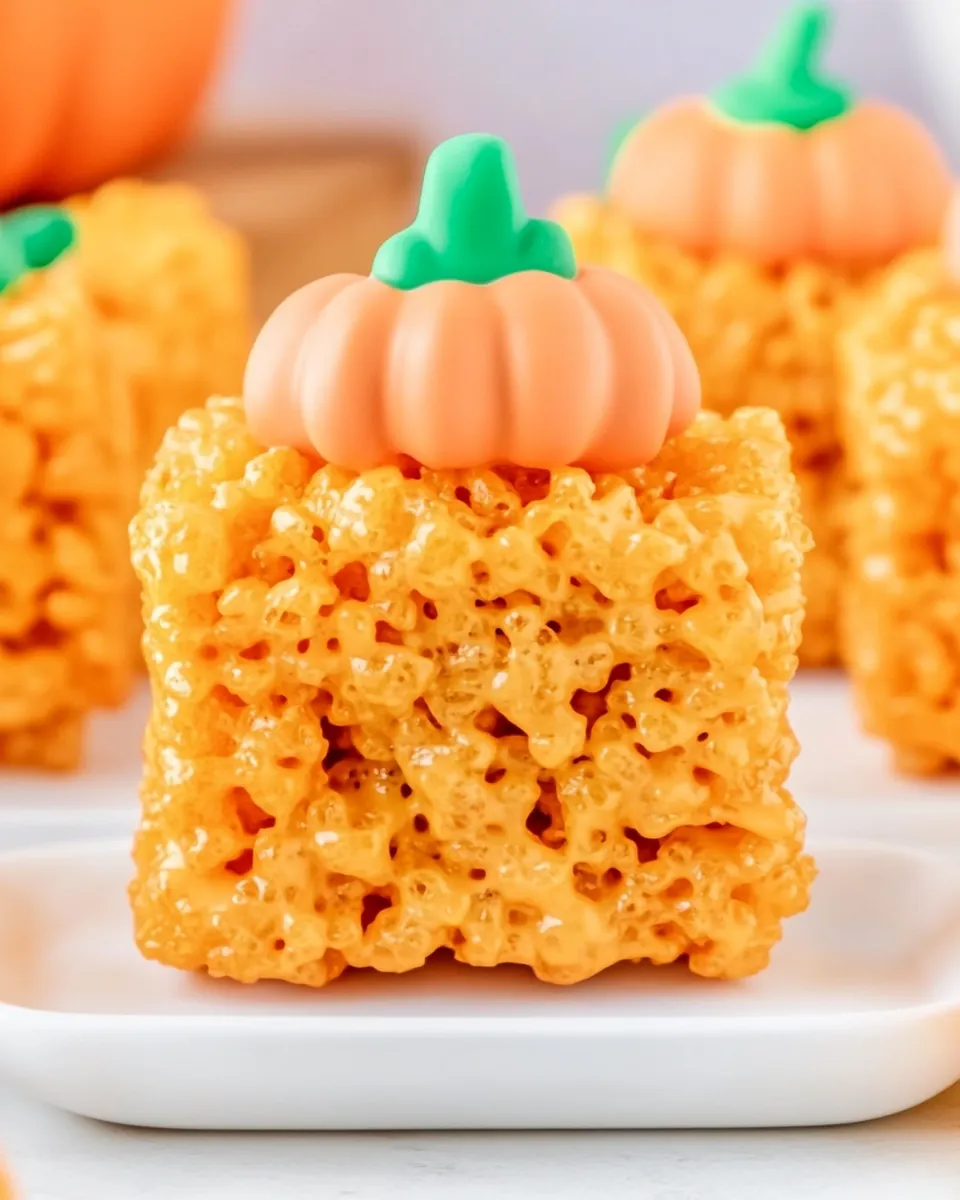
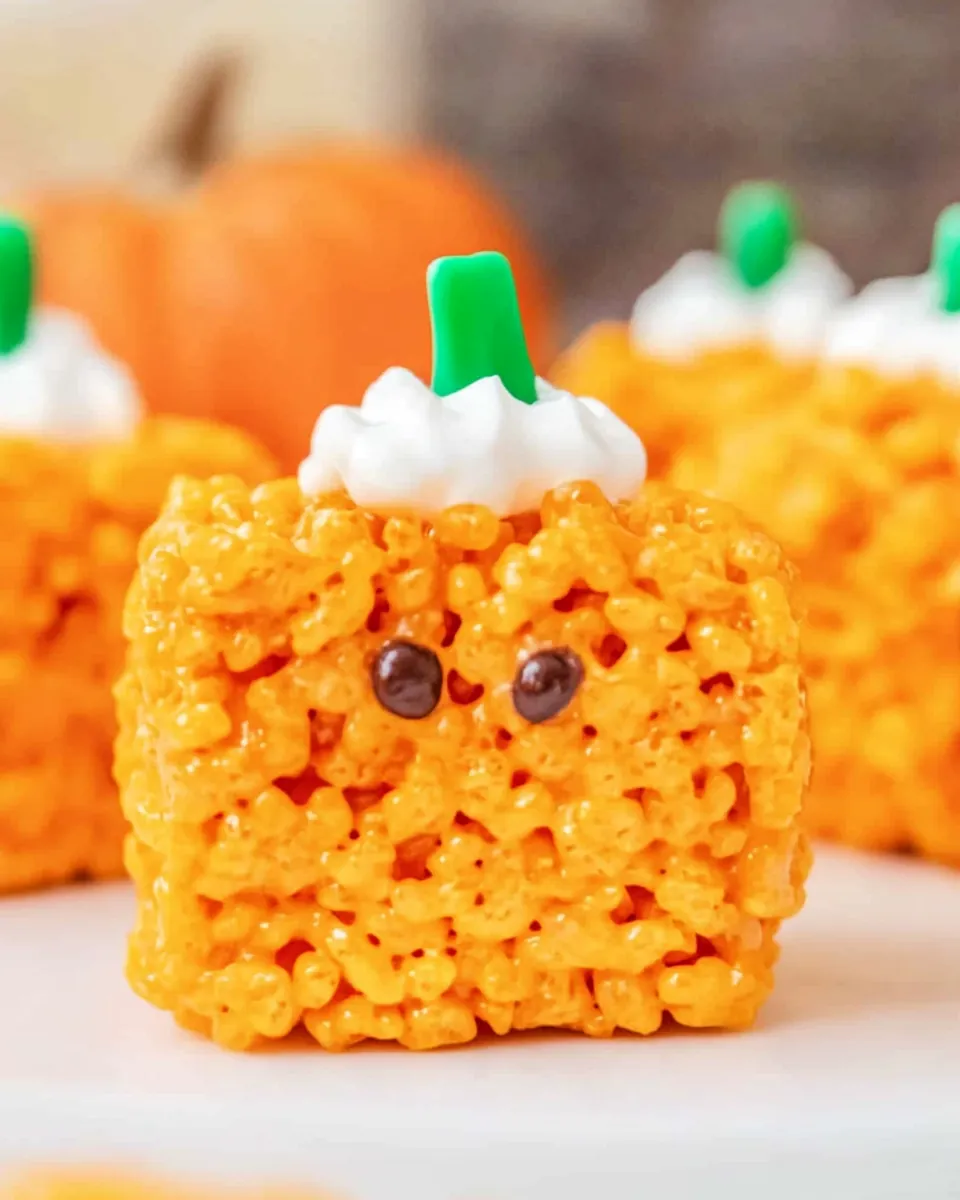
For each pumpkin, dip a chocolate baking chunk into the melted chocolate and gently press it into the top of one of your rice krispie pumpkins. This will act as the stem.
Take two green M&M halves and place them next to the stem for leaves. If they don’t stick, you can dip them in the melted chocolate as well. It’s all about making them as cute as possible!
Finally, allow the pumpkins to set up for about 10 minutes before serving. This will help the chocolate to harden and keep everything in place. Enjoy!
Things Worth Knowing
- Be patient while melting: It’s important to melt the butter and marshmallows slowly on low heat. This ensures you don’t burn them and allows for an even mixture.
- Cool mixture before shaping: Letting the mixture cool for the right amount of time will make it easier to handle and shape into pumpkins without burning yourself.
- Press firmly: When shaping the rice krispies into balls, press firmly to ensure they hold their shape. If they’re too loose, they’ll fall apart.
- Use cooking spray: Lightly spraying your hands and tools with cooking spray helps to prevent the sticky mixture from sticking to you.
Change It Up
If you want to get creative with your Pumpkin Rice Krispie Treats, here are some fun ways to modify the recipe:
- Storage: You can store leftover pumpkin rice krispie treats in an airtight container at room temperature for up to three days. I recommend wrapping them individually in plastic wrap for best freshness.
- Freezing: I do not recommend freezing these treats as they can lose their delightful texture. However, if you have to, freeze them in an airtight container, but be aware they may become a bit chewy.
- Pairing: These treats are perfect for pairing with fall-themed beverages like hot apple cider or pumpkin spice lattes. They make a lovely dessert during family gatherings.
- Variations: Try using different food colorings to create other fun shapes like ghosts or monsters, adjusting the treats for different holidays.
- Decorations: Use different candies for decorating, such as edible eyes for a spooky touch, or swap the chocolate for white chocolate for a different flavor profile.
Serving Suggestions
When it comes to serving Pumpkin Rice Krispie Treats, the options are delightfully versatile:
- Perfect for Parties: These treats are a hit at Halloween parties, providing a fun and sweet addition that kids and adults will love.
- Great for Lunchboxes: Pack them in lunchboxes as a sweet surprise for your kids. They’ll appreciate the thoughtful treat amid their regular meals.
- Autumn Picnics: Bring them along for autumn picnics or gatherings outside. They’re easy to transport and do not require any utensils.
- Halloween Treats: Display them on a festive platter at your Halloween celebrations, along with other spooky snacks to create a fun theme.
- Festive Gift: Wrap them up nicely and give them as gifts to neighbors or friends. They’re a sweet gesture that captures the spirit of the season.
- Complement with Drinks: Serve alongside warm apple cider or hot chocolate for a delightful treat pairing that resonates with the fall vibe.
FAQ
Conclusion
The charm of Pumpkin Rice Krispie Treats lies in their delightful combination of flavors and festive appearance. They’re the perfect treat to celebrate the fall season, bringing joy to both kids and adults alike. I encourage you to gather your loved ones and start creating these pumpkin-shaped delights together. It’s a sweet tradition that is sure to become a favorite in your household!
Pumpkin Rice Krispie Treats
Ingredients
Equipment
Method
- Line a large sheet pan with parchment paper or a silicone baking mat. Set aside.
- In a large pot or dutch oven, add 4 tablespoons of salted butter and stir over medium low heat, until melted. Add 10 ounces of miniature marshmallows and stir until melted.
- Add several drops of orange food coloring and stir until incorporated. Remove from heat.
- Add 5 cups of rice krispies cereal and gently stir together with the marshmallow mixture until fully combined. Let mixture cool for 15 to 20 minutes or until cool enough to handle.
- Cut the green M&Ms in half for the leaves. You can also leave them whole and just press into the pumpkin.
- Spray a large cookies coop or ice cream scoop lightly with cooking spray and use it to scoop out the rice krispie mixture and form into large balls, making sure to press the ball together firmly so they hold their shape. Place on the parchment paper.
- Place ⅓ cup of semi sweet baking chunks in a small, microwave safe bowl. Microwave in 30 second increments at 50% power, stirring in between, until chocolate is fully melted.
- For each pumpkin, dip a chocolate baking chunk into the melted chocolate and then gently press it into the top of one of the rice krispie pumpkins.
- Place two green M&M halves next to the “stem” for leaves (dipping in the melted chocolate if they do not stick).
- Allow the pumpkins to set up for 10 minutes or so before serving.
Notes
- Storage: Leftover pumpkin rice krispie treats can be stored in an airtight container at room temperature for up to 3 days. I do recommend wrapping them individually in plastic wrap.
- Freezing: I do not recommend freezing the treats.