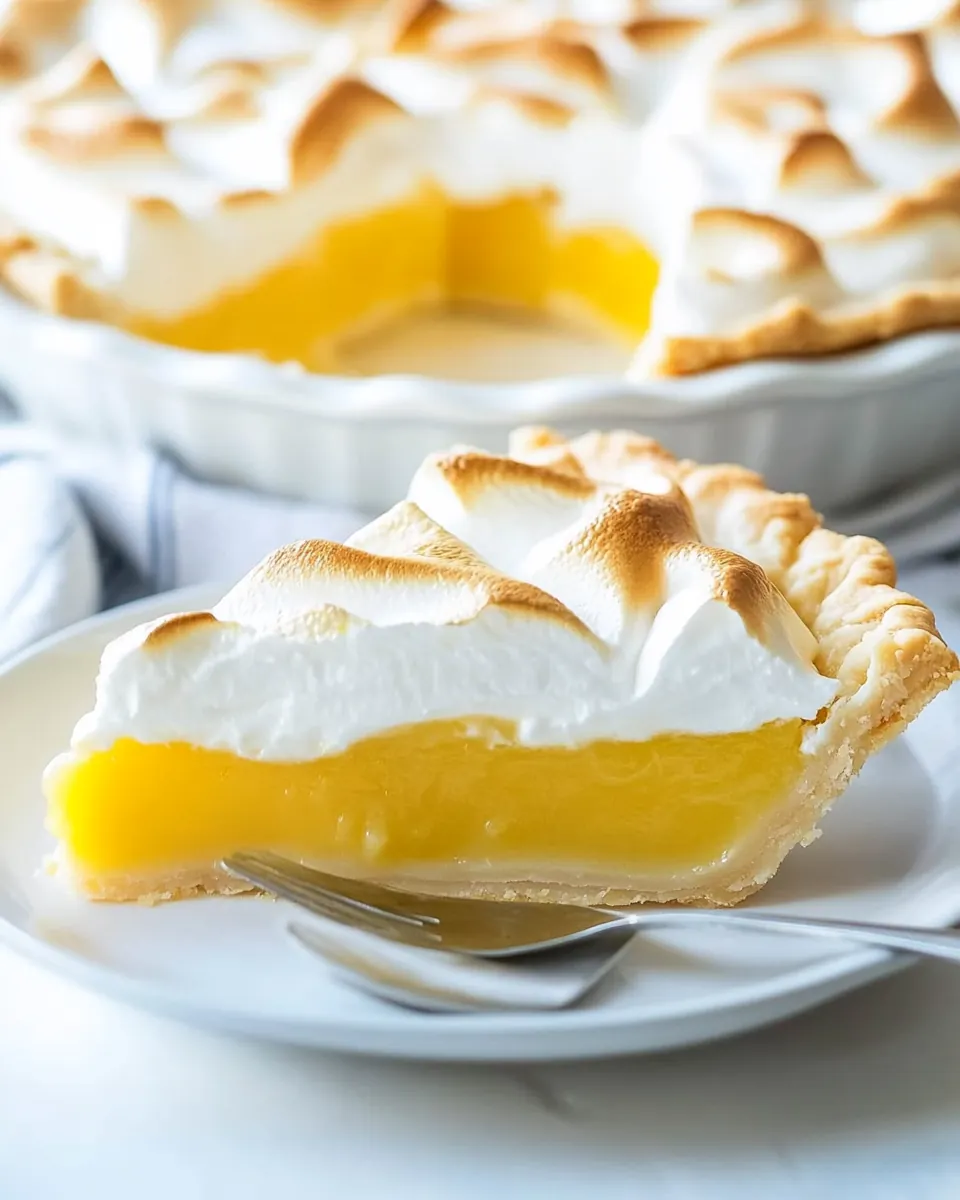
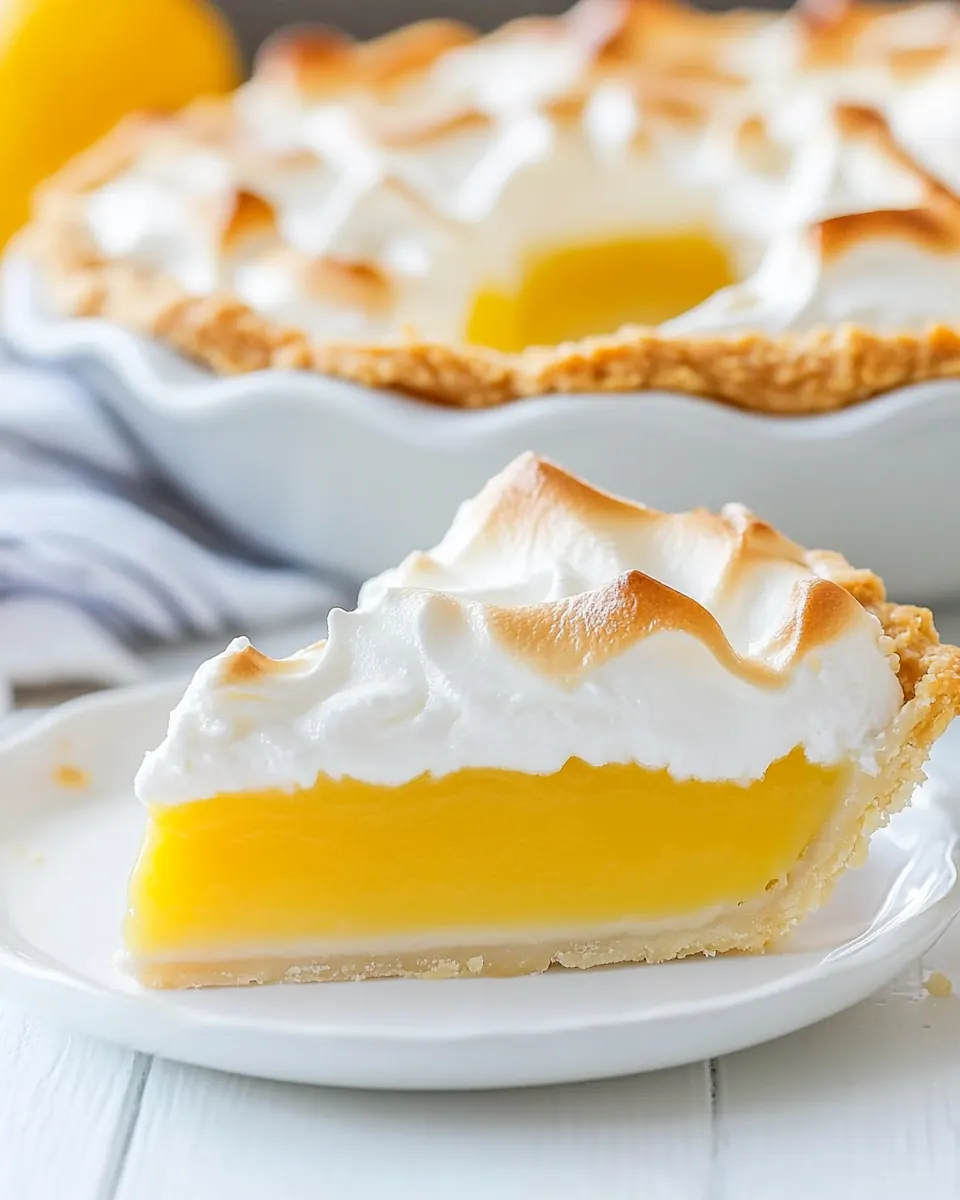
Lemon Meringue Pie
There’s something truly special about a perfect Lemon Meringue Pie. It brings back memories of sunny days and gatherings filled with laughter. I remember the first time I tried making one; the tangy lemon filling paired with the fluffy meringue made my taste buds dance. Each bite is a delightful combination of sweet and tart, with a texture that’s both creamy and airy. It’s a dessert that never fails to impress, whether enjoyed at a family gathering or a casual afternoon tea. What’s more, the vibrant yellow filling is an eye-catching centerpiece on any table. If you’re looking for a dessert that’s sure to be the star of the show, then this Lemon Meringue Pie is the one to make.
Recipe Snapshot
2 hr 20 mins
80 mins
60 mins
Hard
350 kcal
6 g
Keto, Gluten-Free, Low FODMAP
15 g
Electric hand mixer, Stand mixer with whisk, Hand mixer
Why We Love This Lemon Meringue Pie
1. A Burst of Flavor
The Lemon Meringue Pie stands out because of its bright and zesty flavor. The freshness of the lemon juice combined with the sweetness of the meringue creates a balance that is simply irresistible. It’s like a sunshine-filled bite on your plate!
2. Visual Appeal
Let’s talk about presentation. The pie’s golden meringue peaks atop the bright yellow filling are a sight to behold. It’s a dessert that not only tastes good but looks stunning, making it perfect for entertaining guests.
3. Comfort Food
There’s comfort in recreating a classic recipe like this one. Making a Lemon Meringue Pie is a nostalgic experience for many, reminding us of our childhood, family gatherings, or time spent with loved ones.
4. A Labor of Love
This pie does take a bit of time and care to make, but that’s what makes it special. The process of rolling out the dough, preparing the filling, and whipping the meringue by hand (or using an electric mixer) adds to the satisfaction when you finally slice into it.
5. Versatility
This recipe is flexible. You can adjust the sweetness or tartness to your liking. Want it extra zesty? Add more lemon zest! It’s a pie that invites you to put your personal spin on it.
What You Need for Lemon Meringue Pie
When it comes to the ingredients for Lemon Meringue Pie, each one plays a crucial role in creating that perfect balance of flavors and textures. The tartness from the lemon, sweetness from the sugar, and creaminess from the butter and egg yolks combine to create an unforgettable experience. Here’s what you’ll need:
- Two perfect pie crusts: The base of our pie, providing a deliciously flaky texture.
- 1⅓ cups water: Used to create the filling and provide moisture.
- ¼ cup lemon juice: This is the star ingredient, responsible for that zesty flavor!
- 5 tablespoons corn starch: Essential for thickening the lemon filling.
- 1⅓ cups sugar: Sweetens the filling and the meringue.
- 4 egg yolks: These enrich the filling, making it creamy.
- 1 tablespoon lemon zest: Adds an extra punch of lemony goodness.
- 2 tablespoons unsalted butter: Gives richness to the filling.
- 4 egg whites: Used to create the fluffy meringue topping.
- ¼ teaspoon cream of tartar: Helps stabilize the meringue.
- ⅔ cups sugar: Sweetens the meringue.
The Method for Lemon Meringue Pie
Making a Lemon Meringue Pie is an enjoyable process that requires patience and attention to detail. Follow these steps closely to ensure your pie turns out perfectly!
- Start by rolling out your pie dough to a 12-inch diameter. Carefully roll it up with your rolling pin, and place it in a 9-inch pie dish. Use your fingers to press the dough along the sides of the dish, ensuring it’s snug.
- Optionally, take the second dough and cut strips to lay across the top of the dish. Pinch the edges to crimp them together, ensuring a beautiful finish.
- Put the pie crust in the refrigerator for at least 30 minutes, or up to 3 hours. This will help the crust maintain its shape while baking.
- Preheat your oven to 400°F. Remove the crust from the fridge. You can use pie weights or fill the crust with parchment paper and dried beans to prevent it from puffing up. Bake for 17 minutes.
- Once baked, carefully take out the weights or parchment and use a fork to poke holes across the bottom of the pie crust. Place it back in the oven and bake until lightly browned, about another 10 minutes. Remove and set aside.
- In a medium-sized pan, add water and lemon juice. Stir in corn starch and whisk until fully dissolved. Add in sugar and continue whisking until it dissolves.
- Turn the heat to medium-high, whisking continuously until the mixture comes to a boil. Simmer for exactly 1 minute while whisking constantly until it thickens.
- Remove from heat and ladle about ⅓ of the corn starch mixture into the egg yolks, whisking constantly to temper the eggs. Then, add the tempered yolks back into the pan.
- Place the pan back on medium heat and whisk often until it simmers for another minute. Look for big crater-like bubbles forming on the surface.
- Remove from heat and stir in butter and lemon zest. Pour this luscious filling into the pie crust.
- Turn your oven down to 375°F. In a large bowl, whisk the egg whites with cream of tartar until foamy. Gradually add in sugar while mixing on high speed until stiff peaks form.
- Spread the meringue on top of the warm lemon filling, using a small knife or spatula to create peaks.
- Bake the pie for 10 minutes, just until the tips of the meringue start to brown. Keep a close eye to prevent burning!
- Finally, chill the pie for at least 4 hours before serving. This allows the filling to set and the flavors to meld.
Things Worth Knowing
- Blind Baking: Ensure your crust is fully baked before adding the filling to avoid a soggy bottom.
- Tempering Eggs: This technique prevents the eggs from scrambling when combined with hot mixtures.
- Beating Egg Whites: Make sure your mixing bowl is clean and grease-free for the best meringue consistency.
- Storing the Pie: Always keep your pie refrigerated to maintain its texture and flavor.
Recipe Tips about Lemon Meringue Pie

Here are some tips to help you succeed in making the best Lemon Meringue Pie:
- Storage: Keep leftover pie covered in the refrigerator for up to a week. This helps retain its freshness.
- Freezing: While freezing is not recommended for this pie, you can freeze the crust and fill it fresh when ready to serve.
- Pairing: Try serving this pie with whipped cream on the side for an added touch of sweetness.
- Serving Temperature: Chilling the pie for at least four hours enhances its flavor and texture.
- Adjusting Sweetness: Feel free to adjust the sugar in the filling and meringue to suit your taste.
What to Serve With Lemon Meringue Pie
- Fresh Berries: Serve with a side of strawberries, blueberries, or raspberries to complement the tartness of the pie.
- Ice Cream: A scoop of vanilla or lemon sorbet pairs beautifully with the pie’s flavors.
- Whipped Cream: Top each slice of pie with a dollop of whipped cream for added creaminess.
- Tea or Coffee: Enjoy alongside a cup of herbal tea or coffee for a delightful afternoon treat.
- Seasonal Fruits: Incorporate seasonal fruits like sliced peaches or cherries for a refreshing twist.
- Occasions: Perfect for summer picnics, birthdays, or holiday gatherings as a refreshing dessert option.
FAQ
Conclusion
The Lemon Meringue Pie is truly a classic dessert that combines the perfect balance of tartness and sweetness. This iconic dish will surely impress your friends and family. I encourage you to try making it yourself; it’s a rewarding experience that’ll leave you feeling accomplished and satisfied. Your taste buds will thank you!

Lemon Meringue Pie
Ingredients
Equipment
Method
- Start by rolling out your pie dough to a 12-inch diameter. Carefully roll it up with your rolling pin, and place it in a 9-inch pie dish. Use your fingers to press the dough along the sides of the dish, ensuring it’s snug.
- Optionally, take the second dough and cut strips to lay across the top of the dish. Pinch the edges to crimp them together, ensuring a beautiful finish.
- Put the pie crust in the refrigerator for at least 30 minutes, or up to 3 hours. This will help the crust maintain its shape while baking.
- Preheat your oven to 400°F. Remove the crust from the fridge. You can use pie weights or fill the crust with parchment paper and dried beans to prevent it from puffing up. Bake for 17 minutes.
- Once baked, carefully take out the weights or parchment and use a fork to poke holes across the bottom of the pie crust. Place it back in the oven and bake until lightly browned, about another 10 minutes. Remove and set aside.
- In a medium-sized pan, add water and lemon juice. Stir in corn starch and whisk until fully dissolved. Add in sugar and continue whisking until it dissolves.
- Turn the heat to medium-high, whisking continuously until the mixture comes to a boil. Simmer for exactly 1 minute while whisking constantly until it thickens.
- Remove from heat and ladle about ⅓ of the corn starch mixture into the egg yolks, whisking constantly to temper the eggs. Then, add the tempered yolks back into the pan.
- Place the pan back on medium heat and whisk often until it simmers for another minute. Look for big crater-like bubbles forming on the surface.
- Remove from heat and stir in butter and lemon zest. Pour this luscious filling into the pie crust.
- Turn your oven down to 375°F. In a large bowl, whisk the egg whites with cream of tartar until foamy. Gradually add in sugar while mixing on high speed until stiff peaks form.
- Spread the meringue on top of the warm lemon filling, using a small knife or spatula to create peaks.
- Bake the pie for 10 minutes, just until the tips of the meringue start to brown. Keep a close eye to prevent burning!
- Finally, chill the pie for at least 4 hours before serving. This allows the filling to set and the flavors to meld.
Notes
- Tip 1: We recommend using the scraps of the 2nd pie dough to reinforce the top of the pie crust.
- Tip 2: Be sure to have all of your ingredients measured out and ready to go before you start the filling. Timing is key here.
- Tip 3: If the meringue pulls away from the crust while it's chilling, don't be upset; it's very common.
- Tip 4: You will also likely see small beads of liquid that form on the top of the pie. This is called 'weeping', and it's almost unpreventable.
- Tip 5: Keep leftovers chilled in the fridge for up to 1 week.