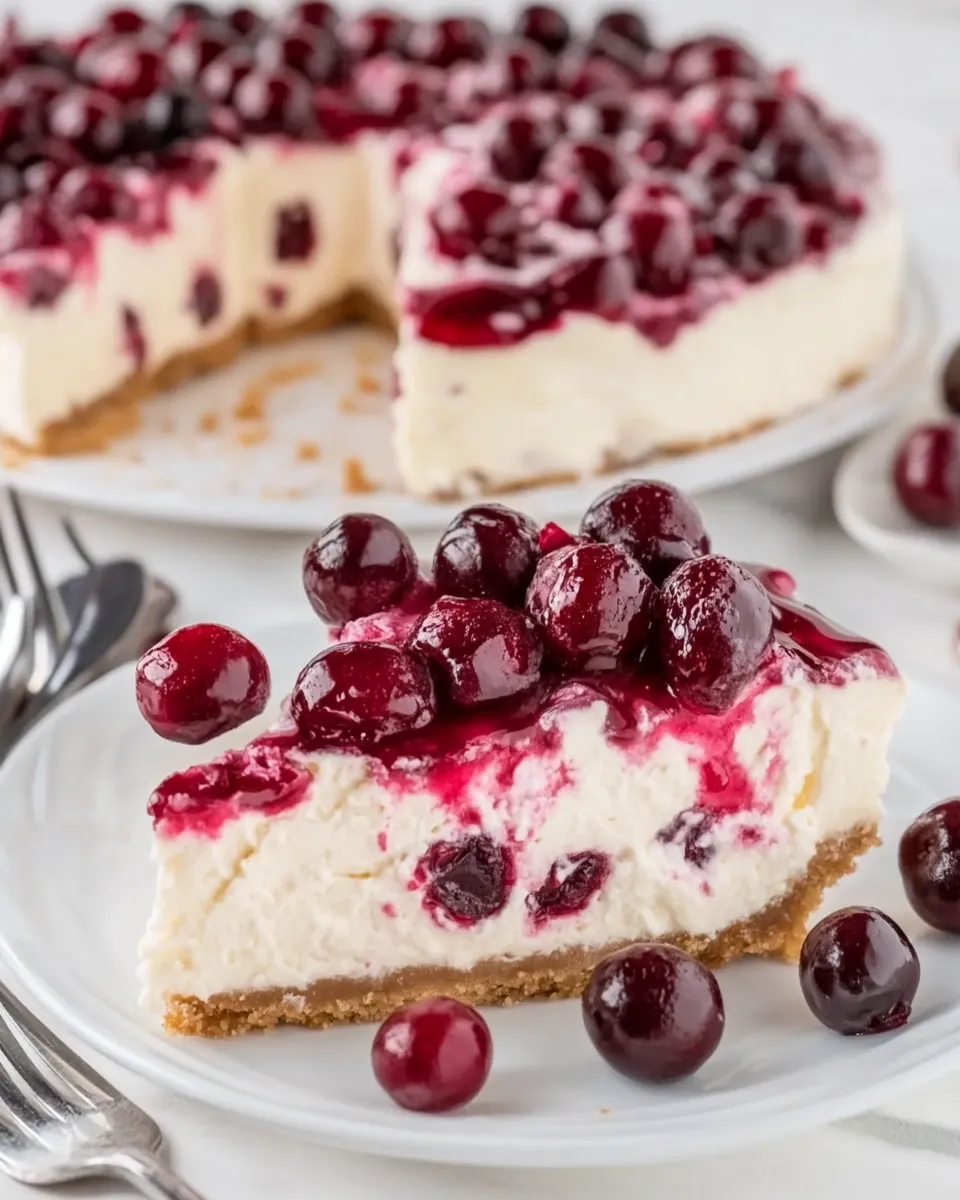
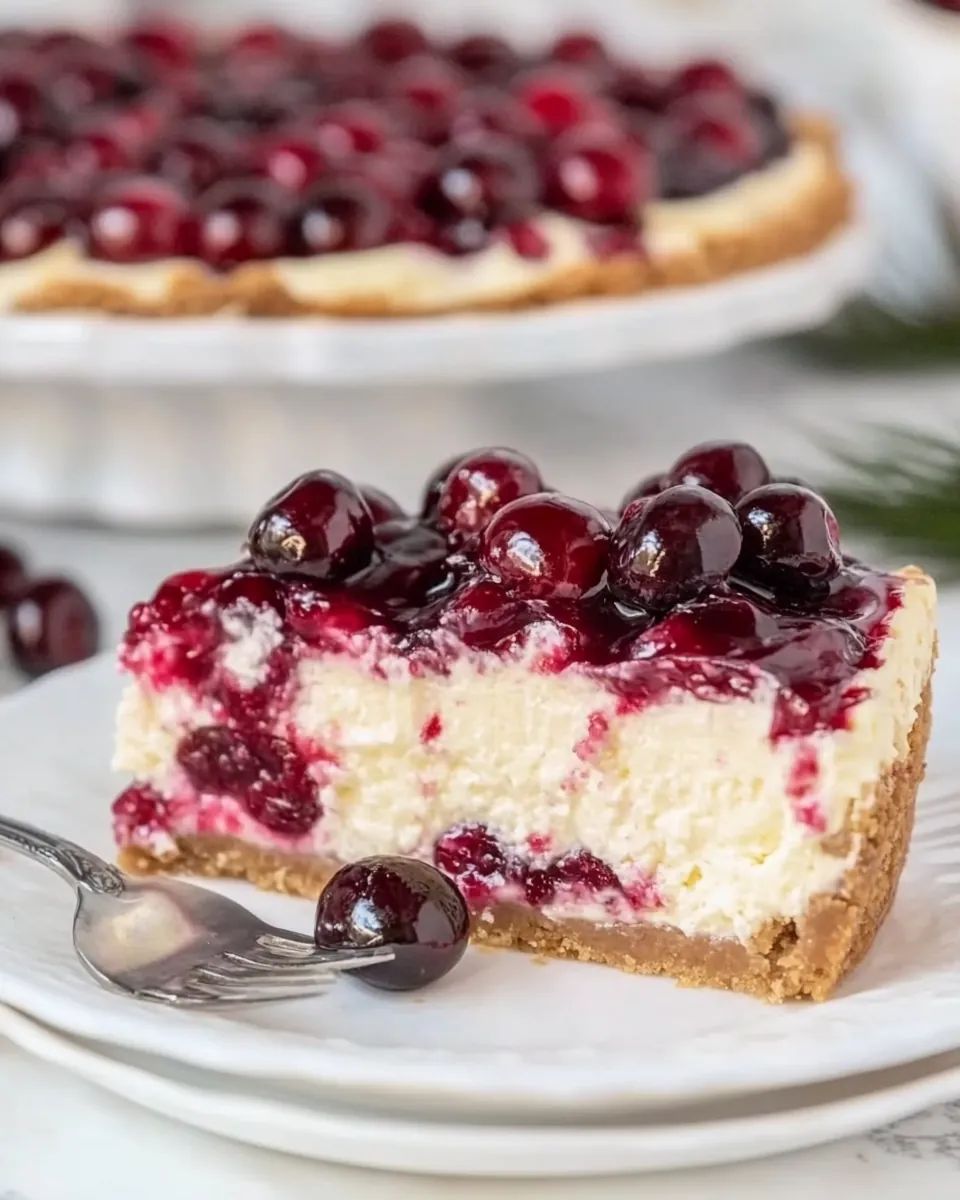
Cherry Cheesecake
Whenever I think of Cherry Cheesecake, I’m transported to summer afternoons spent with family, laughing and indulging in sweet treats. This dessert holds a special place in my heart, as it reminds me of gatherings filled with love and laughter. With its creamy filling and tangy cherry topping, Cherry Cheesecake is the ultimate star of any occasion. Whether it’s a birthday celebration, a picnic in the park, or just a Tuesday craving, this cheesecake never fails to impress. I remember the first time I made it; the excitement of watching it bake and the anticipation of the first slice. It’s a recipe that brings people together, and every bite is a delightful reminder of those cherished memories.
Recipe Snapshot
1 hr 15 mins
5 mins
70 mins
Medium
370 kcal
6 g
Gluten-Free, Low FODMAP
15 g
Food Processor, Oven, Baking Sheet, Blender, Frying Pan, Wooden Spoon, Whisk, Chef’s Knife, Mixing Bowl
The Best Thing About This Cherry Cheesecake
Rich and Creamy Texture
The texture of Cherry Cheesecake is simply irresistible. It’s rich, creamy, and melts in your mouth with every bite. The combination of cream cheese and sour cream creates a luscious filling that perfectly balances the sweetness of the cherries. As you slice through the cheesecake, you’ll notice the smoothness that has everyone asking for seconds!
Perfect Balance of Sweet and Tart
One of the standout features of Cherry Cheesecake is its delightful balance of flavors. The sweetness of the cheesecake filling complements the tartness of the cherries, creating a harmonious blend that tantalizes the taste buds. Each forkful is a dance of flavors that keeps you coming back for more!
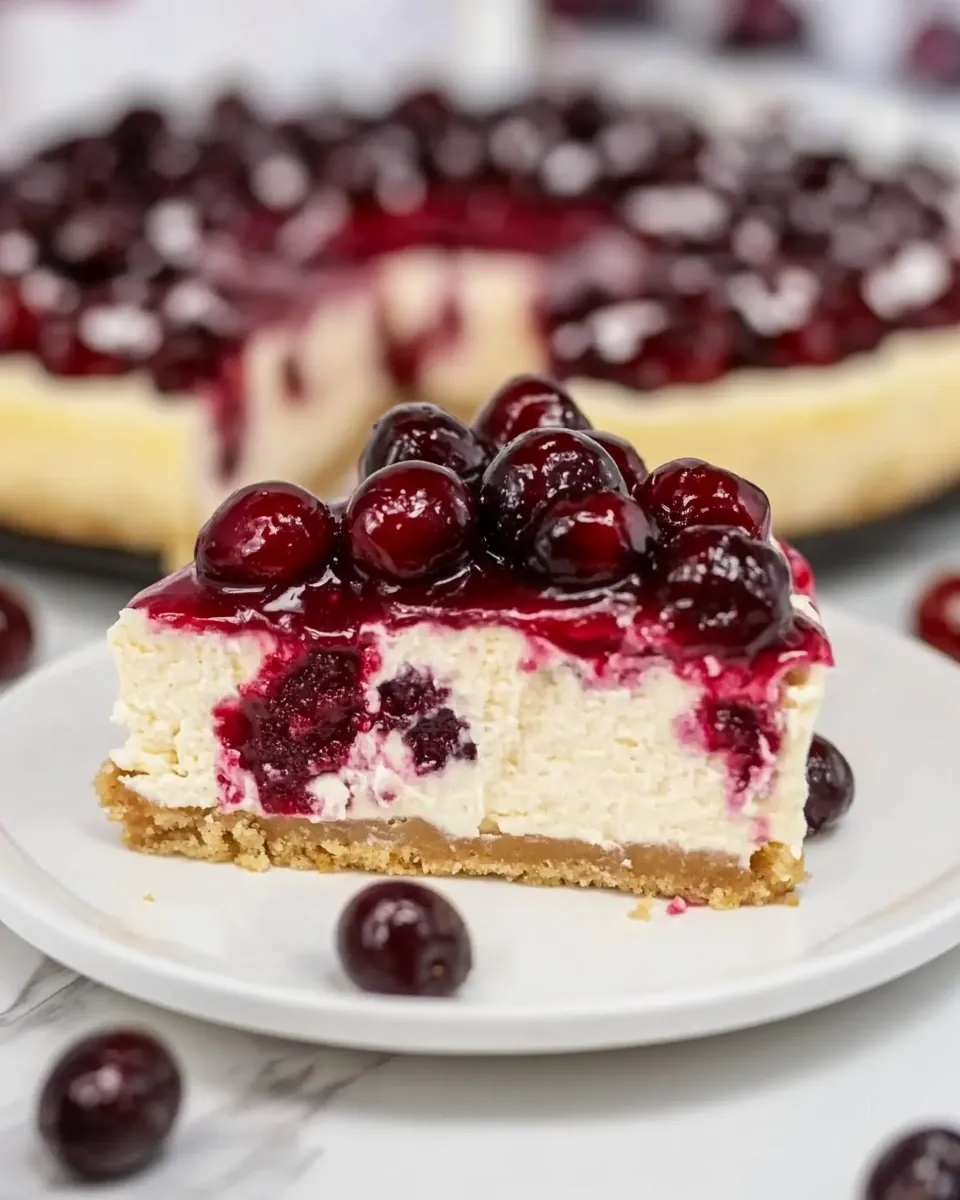
Beautiful Presentation
This dessert isn’t just delicious; it’s a feast for the eyes too! The vibrant red cherries atop the creamy white cheesecake create a stunning visual contrast that’s sure to impress your guests. Whether you’re serving it at a dinner party or a casual family gathering, Cherry Cheesecake is a showstopper that deserves to be the centerpiece of your dessert table.
Simple Ingredients
What I love about this recipe is that it uses simple ingredients that are easily accessible. The combination of graham cracker crumbs, butter, and sugar for the crust, along with the creaminess of cream cheese and sour cream, makes it not only delicious but also fun to make. You don’t need any fancy gadgets or techniques—just a little love and attention to detail!
Versatile for Any Occasion
Cherry Cheesecake is incredibly versatile. It’s perfect for any season, from summer BBQs to holiday gatherings. You can serve it as a refreshing treat on warm days or enjoy it as a comforting dessert during the cooler months. Plus, you can easily adapt the recipe by swapping out the cherries for other fruits, making it a year-round favorite!
Great for Sharing
This recipe yields a generous amount, making it ideal for sharing with friends and family. Whether you’re hosting a party or simply want to make someone’s day, Cherry Cheesecake is a crowd-pleaser. There’s something special about watching people enjoy a slice and sharing in the joy of good food together.
Ingredients Overview for Cherry Cheesecake
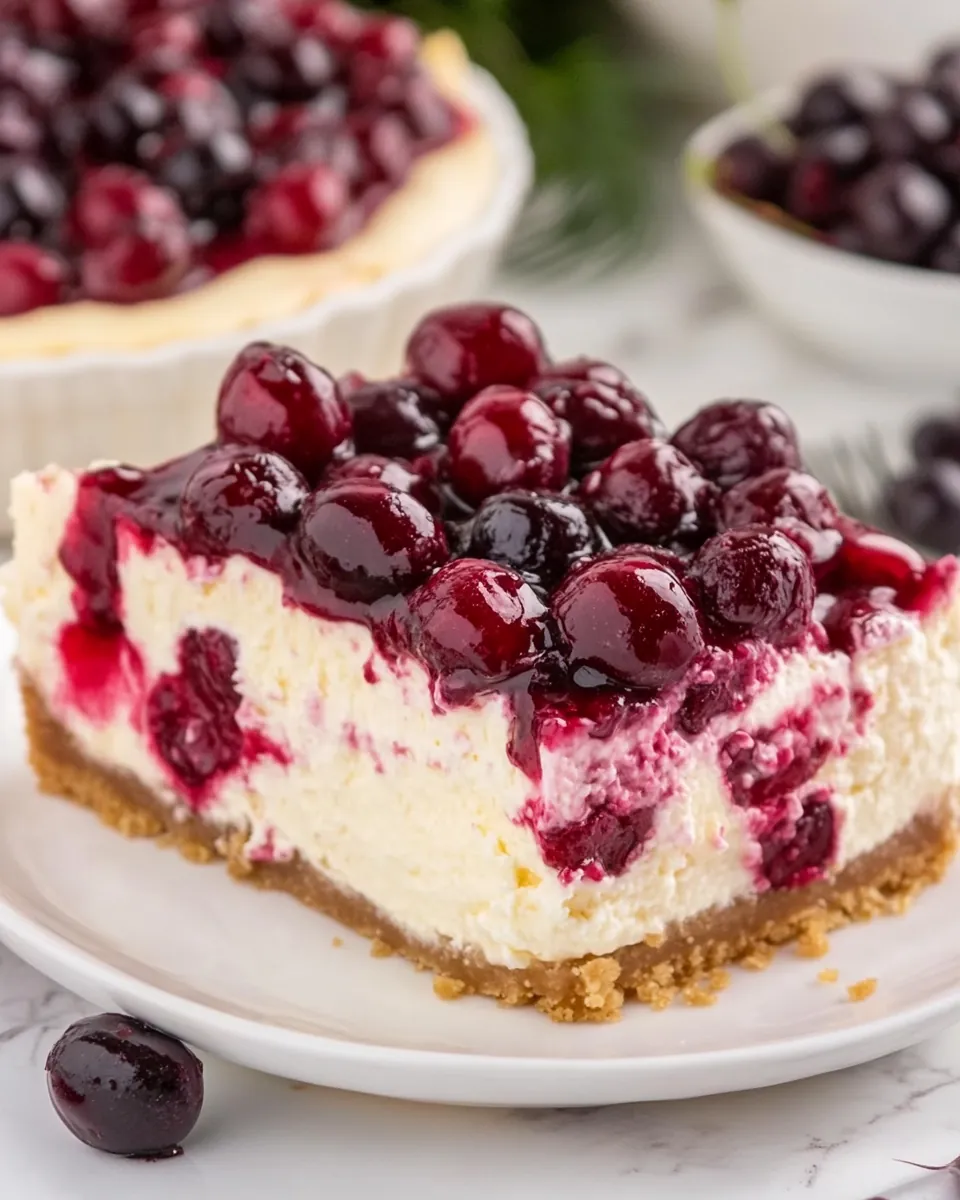
The ingredients for Cherry Cheesecake work together in perfect harmony to create a dessert that’s not just delicious but also satisfying. The base of graham cracker crumbs provides a delightful crunch, while the cream cheese and sour cream bring a creamy richness that melts in your mouth. The sweet cherries on top add a refreshing tartness that elevates this dessert to the next level.
- 1 1/2 cups graham cracker crumbs: This forms the crunchy base of your cheesecake, providing a delightful contrast to the creamy filling.
- 5 tablespoons sugar: Sweetens the crust and adds a touch of sweetness to the filling.
- 6 tablespoons butter: This helps bind the crust together, making it rich and flavorful.
- 4 cups cream cheese: The star ingredient that gives the cheesecake its creamy texture and richness.
- 1 cup sour cream: Adds a tangy flavor that balances the sweetness of the cheesecake.
- 1 1/3 cups sugar: Sweetens the cheesecake filling perfectly.
- 1 teaspoon vanilla extract: A classic flavor that enhances the overall taste.
- 4 large eggs, whisked: These provide structure to the cheesecake and help it rise while baking.
- 22 oz cherries, pitted and divided: Fresh cherries are key for the delicious topping.
- 2 tablespoons cornstarch: Helps thicken the cherry topping for a perfect consistency.
- 1 cup sugar: Used for sweetening the cherry sauce.
Making Cherry Cheesecake
Creating the perfect Cherry Cheesecake is a rewarding experience that fills your kitchen with the most delightful aromas. Follow these simple steps, and soon you’ll have a cheesecake that’s not only beautiful but also incredibly delicious. Let’s get started!
- Preheat your oven to 150C/300F. This is an important step to ensure your cheesecake bakes evenly. A properly preheated oven will help achieve that smooth, creamy texture we’re looking for.
- In a medium bowl, blend graham cracker crumbs, 5 tablespoons of sugar, and 6 tablespoons of butter until the mixture resembles wet sand. This will be the base of your cheesecake. Make sure the crumbs are well combined with the butter for a rich flavor.
- Press the crumb mixture firmly into the bottom of a 9-inch springform pie pan, creating an even layer. Use the back of a measuring cup to pack it down tightly. This crust will hold everything together, so take your time to make it solid.
- In a large mixing bowl or stand mixer, beat 4 cups of cream cheese until it’s smooth and creamy. This step is crucial; you want to avoid any lumps for a velvety filling.
- Add 1 cup of sour cream and 1 1/3 cups of sugar to the cream cheese. Beat until well combined. The sour cream adds a nice tang that balances the sweetness of the filling.
- Mix in 1 teaspoon of vanilla extract, enhancing the flavor profile of your cheesecake.
- Gently fold in the 4 large whisked eggs, one at a time, until fully incorporated. Avoid over-mixing at this stage to keep your filling light and airy.
- Carefully transfer the cheesecake filling to the prepared crust, smoothing out the top with a spatula. This will ensure an even bake and a beautiful finish.
- Bake in the preheated oven for 60 to 70 minutes, until the edges are set and the center is still slightly jiggly when touched. It’s vital not to over-bake the cheesecake, as it will firm up as it cools.
- Once baked, allow the cheesecake to cool completely in the pan. This cooling step is essential for achieving that perfect creamy texture.
- In a food processor, blend about two-thirds of the cherries with 2 tablespoons of cornstarch until smooth. This will create a delightful cherry sauce.
- Transfer the blended cherry mixture to a small saucepan and add 1 cup of sugar. Cook over medium heat for about 10 to 15 minutes, stirring occasionally until it thickens. You want a nice syrup consistency for topping your cheesecake.
- Remove the cherry filling from heat and stir in the remaining chopped cherries. Allow the mixture to cool completely, stirring regularly to maintain its freshness.
- Once cooled, spread the cherry topping evenly over the cheesecake. The vibrant color will make your cheesecake pop!
Things Worth Knowing
- Invest in a quality springform pan for easy removal of your cheesecake. This ensures that your cheesecake maintains its shape while serving.
- Let your cheesecake cool in the oven with the door slightly ajar for a few minutes after baking. This helps prevent cracks from forming on the surface.
- Make sure all your ingredients are at room temperature before mixing. This helps achieve a smoother filling.
- Don’t rush the cooling process. For the best texture, let the cheesecake chill in the refrigerator for at least 4 hours, or overnight if you can wait.
Helpful Hints
When it comes to making Cherry Cheesecake, a few helpful tips can make all the difference. Here are some suggestions to ensure your cheesecake turns out perfectly every time:
- Storage: Store any leftover cheesecake in an airtight container in the refrigerator for up to 4 to 5 days to maintain freshness.
- Freezing: You can wrap leftover slices in foil and freeze them in a freezer-safe bag for 2 to 3 months. Let them thaw overnight in the fridge before enjoying.
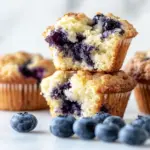
- Variations: Feel free to experiment with different fruits for the topping. Try using blueberries or strawberries for a twist on the classic!
- Serving Temperature: For the best flavor, serve your cheesecake chilled. Let it sit at room temperature for about 15 minutes before serving for a softer texture.
- Garnishing: Consider adding whipped cream or chocolate shavings on top for an extra touch of elegance.
Perfect Pairings for Cherry Cheesecake
When it comes to serving Cherry Cheesecake, the possibilities are endless! Here are some great ideas to elevate your dining experience:
- Serve with fresh fruit: A side of fresh berries can complement the cheesecake beautifully, adding a refreshing touch.
- Pair with coffee: Enjoy your cheesecake with a cup of coffee or espresso for a delightful dessert combo during brunch.
- Perfect for celebrations: This cheesecake is ideal for birthdays, anniversaries, and festive occasions. It adds a touch of elegance to any event.
- Lunch or picnic treat: Slice it up and take it along for a picnic or serve it as a sweet treat after a light lunch.
- Seasonal flavors: During different seasons, consider adjusting the toppings—pumpkin spice for fall or citrus for spring!
FAQ
Conclusion
The Cherry Cheesecake is truly a standout dessert that brings joy and indulgence to any occasion. Its rich texture and perfect balance of flavors make it a crowd favorite. I encourage you to try making this delightful cheesecake and share it with your loved ones; it’s sure to create sweet memories just like it did for me!
Cherry Cheesecake
Ingredients
Equipment
Method
- Preheat your oven to 150C/300F. This is an important step to ensure your cheesecake bakes evenly. A properly preheated oven will help achieve that smooth, creamy texture we’re looking for.
- In a medium bowl, blend graham cracker crumbs, 5 tablespoons of sugar, and 6 tablespoons of butter until the mixture resembles wet sand. This will be the base of your cheesecake. Make sure the crumbs are well combined with the butter for a rich flavor.
- Press the crumb mixture firmly into the bottom of a 9-inch springform pie pan, creating an even layer. Use the back of a measuring cup to pack it down tightly. This crust will hold everything together, so take your time to make it solid.
- In a large mixing bowl or stand mixer, beat 4 cups of cream cheese until it’s smooth and creamy. This step is crucial; you want to avoid any lumps for a velvety filling.
- Add 1 cup of sour cream and 1 1/3 cups of sugar to the cream cheese. Beat until well combined. The sour cream adds a nice tang that balances the sweetness of the filling.
- Mix in 1 teaspoon of vanilla extract, enhancing the flavor profile of your cheesecake.
- Gently fold in the 4 large whisked eggs, one at a time, until fully incorporated. Avoid over-mixing at this stage to keep your filling light and airy.
- Carefully transfer the cheesecake filling to the prepared crust, smoothing out the top with a spatula. This will ensure an even bake and a beautiful finish.
- Bake in the preheated oven for 60 to 70 minutes, until the edges are set and the center is still slightly jiggly when touched. It’s vital not to over-bake the cheesecake, as it will firm up as it cools.
- Once baked, allow the cheesecake to cool completely in the pan. This cooling step is essential for achieving that perfect creamy texture.
- In a food processor, blend about two-thirds of the cherries with 2 tablespoons of cornstarch until smooth. This will create a delightful cherry sauce.
- Transfer the blended cherry mixture to a small saucepan and add 1 cup of sugar. Cook over medium heat for about 10 to 15 minutes, stirring occasionally until it thickens. You want a nice syrup consistency for topping your cheesecake.
- Remove the cherry filling from heat and stir in the remaining chopped cherries. Allow the mixture to cool completely, stirring regularly to maintain its freshness.
- Once cooled, spread the cherry topping evenly over the cheesecake. The vibrant color will make your cheesecake pop!
Notes
- Storage: Store any leftover cheesecake in an airtight container in the refrigerator for up to 4 to 5 days to maintain freshness.
- Freezing: You can wrap leftover slices in foil and freeze them in a freezer-safe bag for 2 to 3 months. Let them thaw overnight in the fridge before enjoying.
- Variations: Feel free to experiment with different fruits for the topping. Try using blueberries or strawberries for a twist on the classic!
- Serving Temperature: For the best flavor, serve your cheesecake chilled. Let it sit at room temperature for about 15 minutes before serving for a softer texture.
- Garnishing: Consider adding whipped cream or chocolate shavings on top for an extra touch of elegance.