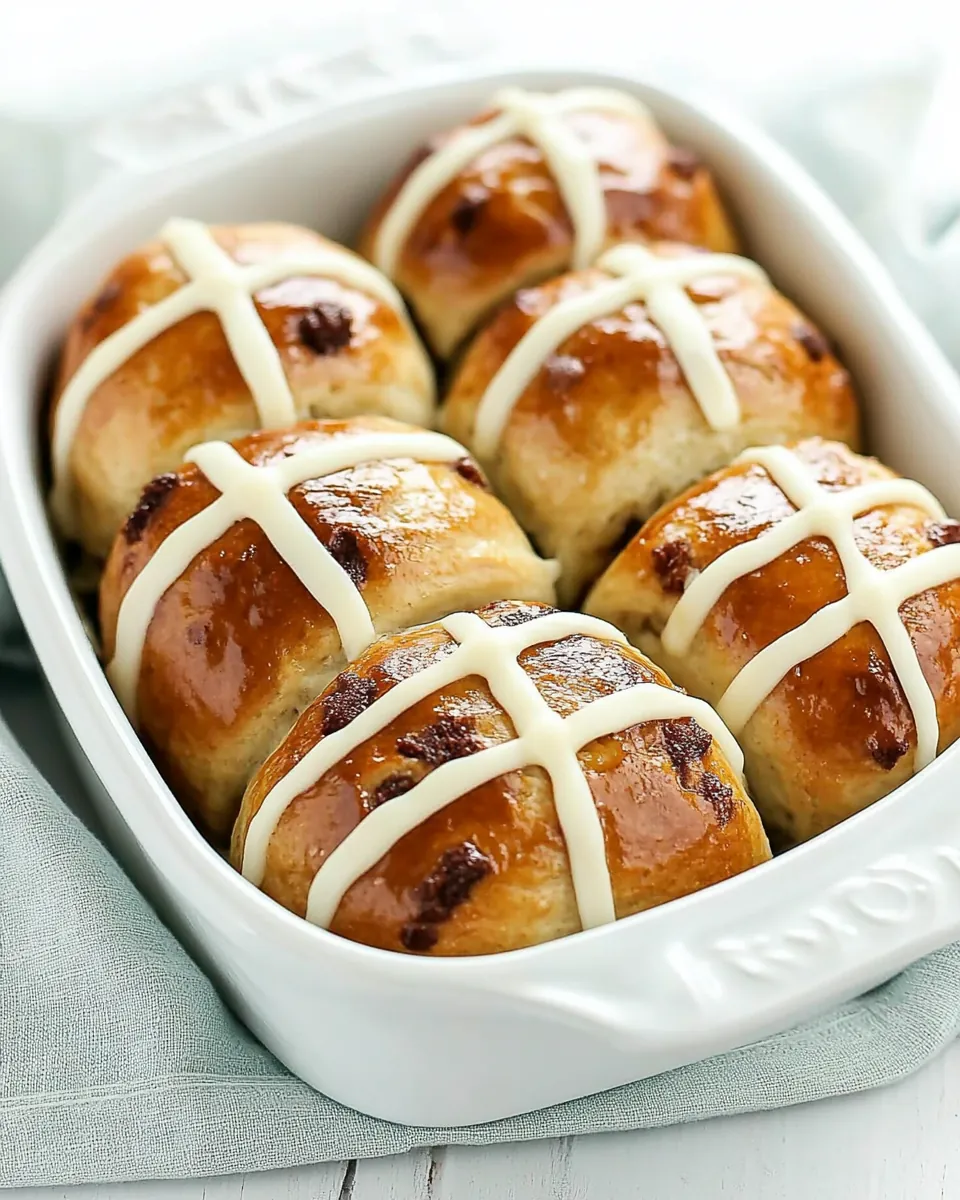
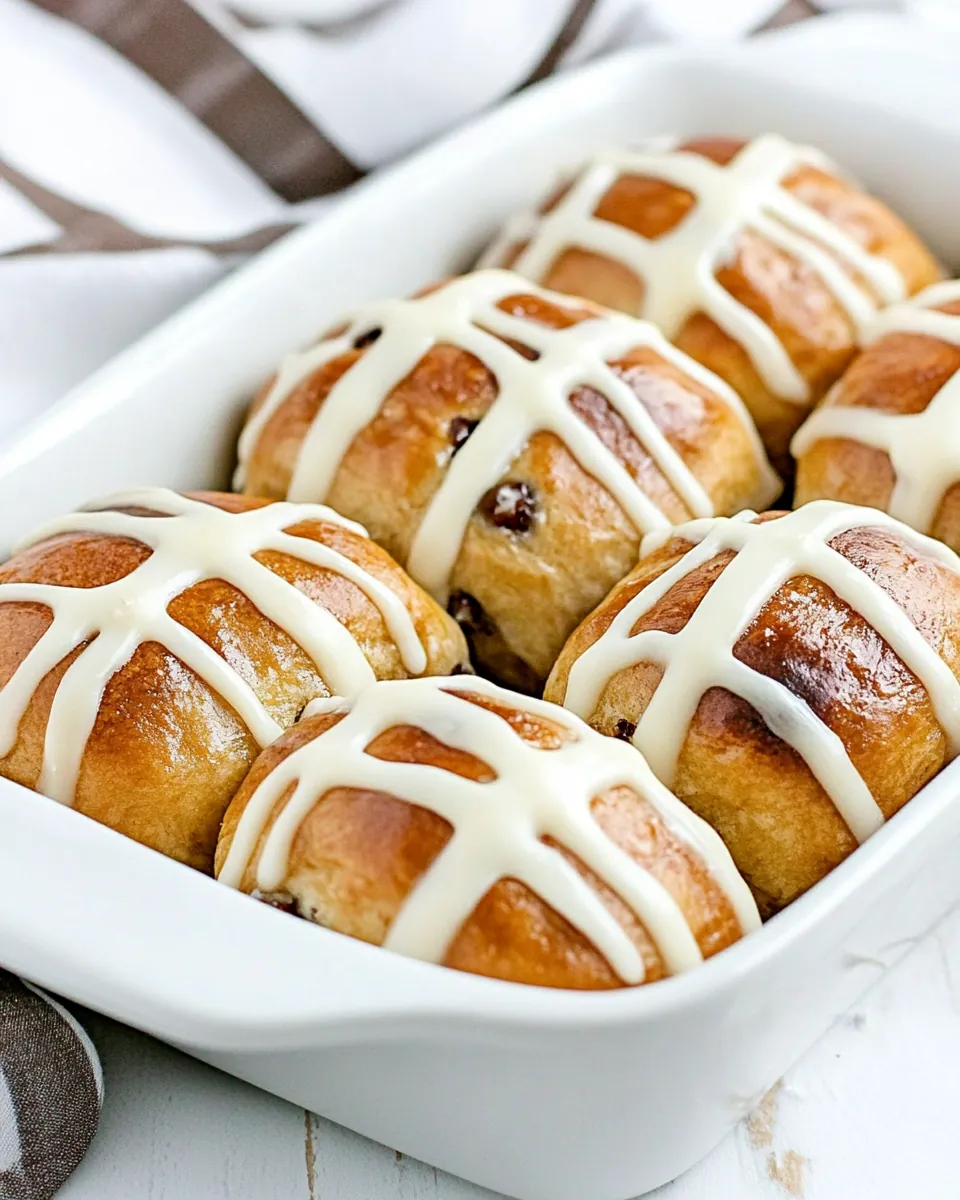
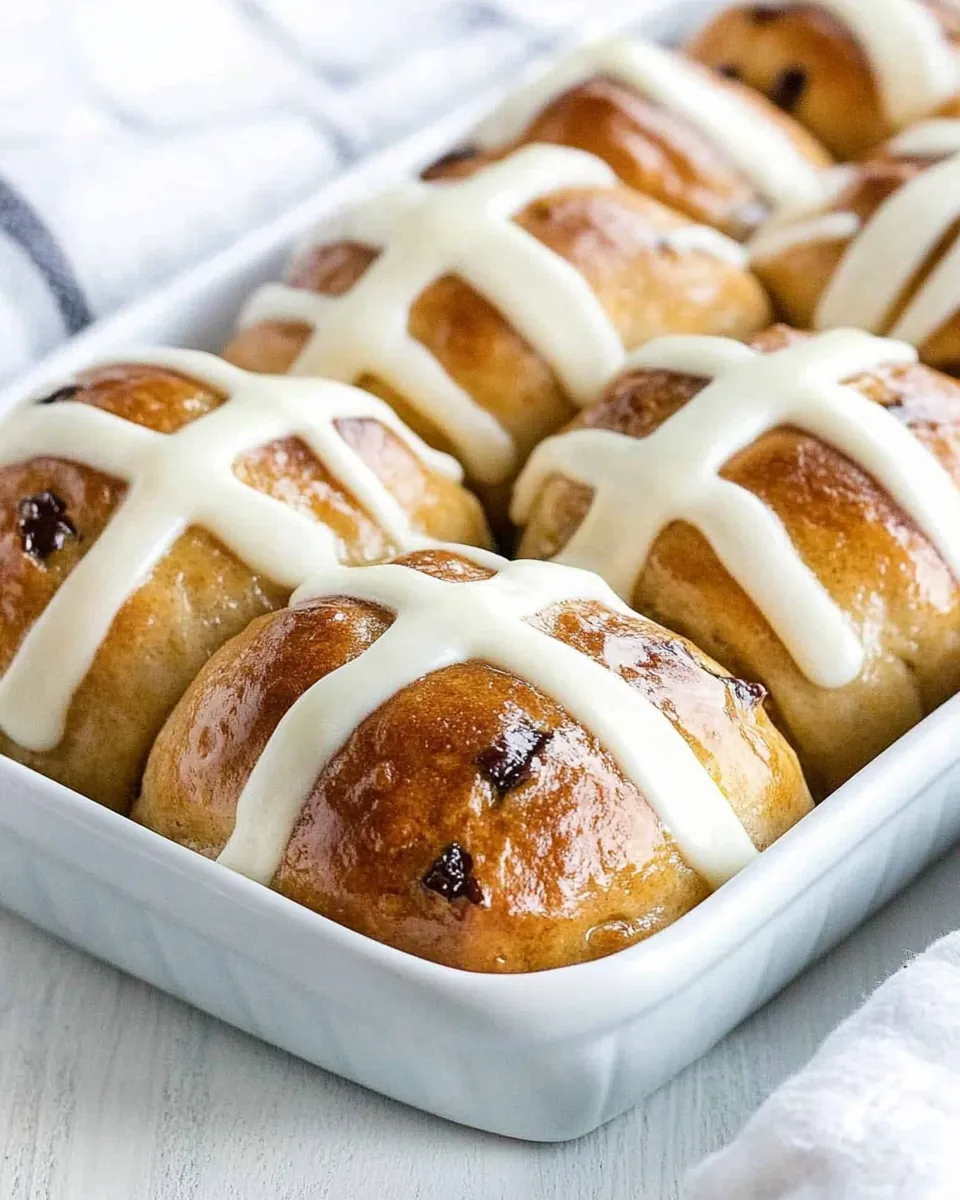
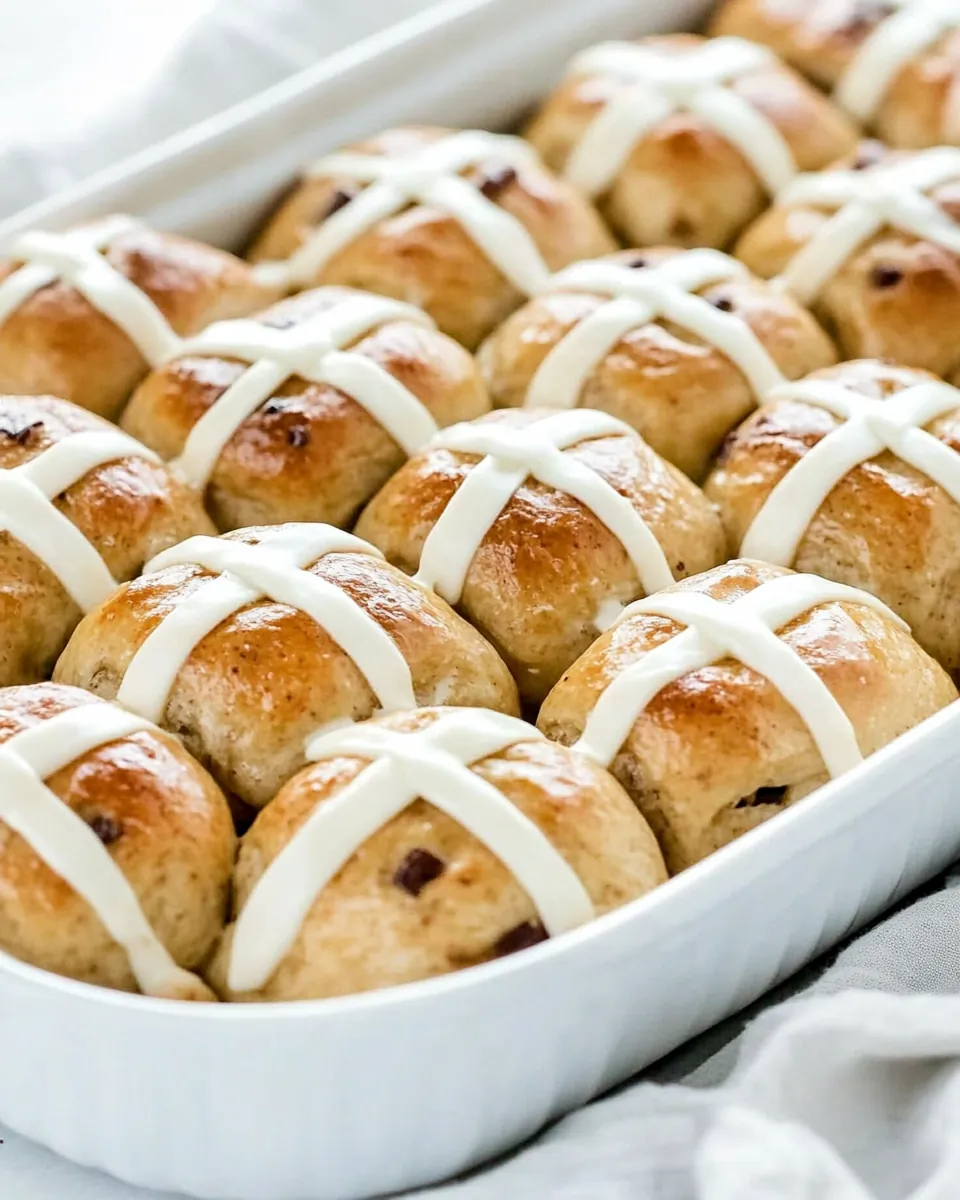
Hot Cross Buns
There’s just something magical about the aroma of freshly baked Hot Cross Buns wafting through the house. I still remember the first time I made them, inspired by the sweet tradition my grandmother passed down. It was a cozy spring afternoon, and as the dough rose, I could hardly contain my excitement. The combination of spices and sweetness filled the air, bringing back memories of family gatherings and joyful celebrations during Easter. I loved how each bun was marked with a cross, symbolizing the end of Lent and the beginning of spring. Making Hot Cross Buns has become a cherished ritual in my home, an occasion not just for baking, but for sharing warmth and love with those around me. Whether enjoyed fresh out of the oven or toasted with a pat of butter, these buns bring comfort and joy with every bite. There’s nothing quite like breaking bread with family, and these delicious treats are the perfect centerpiece for any gathering.
Recipe Snapshot
40 mins
20 mins
20 mins
Medium
200 kcal
4 g
Gluten-Free, Low FODMAP
6 g
Oven, Baking Sheet, Wooden Spoon, Whisk, Mixing Bowl
The Charm of This Hot Cross Buns
Tradition and Nostalgia
One of the most special aspects of Hot Cross Buns is their rich history. Traditionally eaten on Good Friday, these buns carry with them a wealth of symbolism and tradition that spans centuries. The cross on top represents the crucifixion and serves as a reminder of faith. Making these buns not only fills your home with delightful scents but also connects you with generations who have enjoyed them before.
A Perfect Balance of Flavors
What makes Hot Cross Buns truly stand out is the combination of fragrant spices and sweetness. The inclusion of ground cinnamon and allspice creates a warm, inviting flavor profile, while the addition of raisins provides a lovely chewiness and natural sweetness. Each bite is a delightful experience, bringing a sense of warmth and comfort that is perfect for springtime.
Versatile and Adaptable
Another reason to love Hot Cross Buns is their versatility. You can easily adapt the recipe to suit your taste. Whether you prefer a little more spice or additional dried fruit, the options are endless. You can even experiment with the icing on top, adding a personal touch to make them uniquely yours.
Great for Sharing
These buns are not just a treat for yourself; they’re perfect for sharing with friends and family. Imagine serving a basket of warm Hot Cross Buns at your next gathering or gifting them to neighbors during the holiday season. They’re an excellent way to spread joy and kindness, making them a heartfelt addition to any occasion.
An Excuse to Gather
Finally, making Hot Cross Buns is a wonderful excuse to gather around the kitchen. Whether you’re teaching your children to bake or inviting friends over for a fun baking day, the process of making these buns brings people together. It’s about creating memories, sharing laughter, and enjoying the fruits of your labor together.
What You Need for Hot Cross Buns
When it comes to making Hot Cross Buns, the ingredients are simple yet essential for achieving that perfect fluffy texture and sweet flavor. Each component plays a crucial role in creating these beloved buns. The key players here include active dry yeast for leavening, flour for structure, and an array of spices to bring warmth and depth. Together, they create a symphony of flavors that culminate in a delightful treat that’s perfect for any occasion.
- Active dry yeast: 1 packet (2 ¼ teaspoons). This is essential for helping the dough rise, creating those fluffy buns we all love.
- Warm milk: ¾ cup, about 105 to 110 degrees F. This activates the yeast, so it’s important to check the temperature to avoid killing it.
- Granulated sugar: ¼ cup. This sweetens the dough and also helps to activate the yeast.
- All-purpose flour: 3 to 3 ½ cups. The main structure of the buns comes from this versatile ingredient.
- Ground cinnamon: 1 teaspoon. This spice adds a warm, comforting flavor to the buns.
- Ground allspice: ¼ teaspoon. This spice enhances the flavor profile and adds depth.
- Salt: 1 teaspoon. Essential for balancing flavors and strengthening the dough.
- Unsalted butter: ¼ cup, softened. This enriches the dough and adds a lovely flavor.
- Large eggs: 2, at room temperature. Eggs help to enrich the dough and provide structure.
- Raisins: 1 cup, plumped in hot water and drained. These add sweetness and texture to the buns.
- Glaze: 1 large egg and 1 tablespoon of milk for brushing on top before baking.
- Icing: 1 ½ cups powdered sugar and 4 to 5 teaspoons milk. This is piped onto the buns to create the classic cross design.
How to Assemble Hot Cross Buns
Making Hot Cross Buns is a rewarding experience that brings a sense of satisfaction as you see the dough rise and transform into beautiful golden buns. Follow these steps closely for the best results, and remember to enjoy the process!
- In a small bowl, add the warm milk and granulated sugar. Sprinkle the active dry yeast over the top and let it sit until foamy, about 5 minutes. Look for bubbling action, which indicates the yeast is active.
- In a large mixing bowl, whisk together 3 cups of all-purpose flour, ground cinnamon, ground allspice, and salt. This is the dry mixture that will create the structure of your buns.
- Make a well in the center of the flour mixture and add the yeast mixture, softened butter, and large eggs. Combine using a stand mixer or a wooden spoon until well incorporated; the dough should be slightly sticky.
- Stir in the plumped raisins until evenly distributed throughout the dough. This adds bursts of sweetness in every bite.
- Turn the dough onto a floured surface and knead for about 8 to 10 minutes, adding more flour if it’s too sticky. The dough should be smooth and elastic when you’re done.
- Form the dough into a ball and place it back into the mixing bowl. Cover with plastic wrap and place it in a warm area to rise until doubled, about 1 hour. Keep an eye on it; the dough should feel light and airy.
- Once the dough has risen, coat a 13×9 inch baking dish with butter. Punch down the dough and turn it onto a floured surface. Divide the dough evenly and shape into about 14 to 16 balls.
- Place the dough balls on the baking sheet, cover with a towel, and let them rise until doubled again, about 30 to 45 minutes. They should be puffy and touching each other slightly.
- Preheat your oven to 375 degrees F. Optional: Score the tops of the rolls with a knife in a cross pattern to create the traditional look.
- In a small bowl, whisk together the glaze ingredients until smooth. Brush this mixture over the tops of the buns before baking.
- Bake in the preheated oven for 20 to 25 minutes or until lightly browned. Keep an eye on them; they should be golden and smell delicious.
- Remove from the oven and let cool slightly. Then, transfer the buns to a wire rack to cool completely.
- In another small bowl, whisk together the icing ingredients until it’s thin enough to pipe but not too thin. Transfer to a plastic bag, snip off the corner, and pipe a cross onto each bun once they are cooled.
- Allow the icing to set before serving. Store any leftovers in an airtight container to keep them fresh.
Things Worth Knowing
- Yeast Activation: Make sure the milk is at the right temperature (105 to 110 degrees F) to activate the yeast without killing it.
- Kneading Technique: You can knead the dough by hand if you don’t have a stand mixer. It may take longer, but it’s a good workout!
- Rising Time: Ensure the dough rises in a warm place without drafts for optimal results.
- Storing Buns: Store Hot Cross Buns in an airtight container for 2 to 3 days. They taste best fresh!
Ways to Adapt This Recipe
If you’re looking to put your own spin on Hot Cross Buns, here are a few ideas to consider. These tips will help you customize the recipe to suit your taste and preferences.
- Flavor Variations: Try adding a mix of dried fruits like currants or cranberries for a festive twist.
- Spices: Experiment with spices like nutmeg or ginger to create a different flavor profile.
- Icing Ideas: Instead of traditional icing, consider a flavored glaze such as orange or lemon for a zesty touch.
- Mini Buns: Make smaller versions for bite-sized treats that are perfect for gatherings or gifting.
- Storage: To keep them fresh, store buns in an airtight container at room temperature, or freeze for longer storage.
- Serving Suggestions: Serve with a spread of butter or cream cheese for added richness.
Best Served With
When it comes to enjoying Hot Cross Buns, there are plenty of delightful pairing options to elevate your experience:
- Tea or Coffee: A warm cup of tea or coffee perfectly complements these sweet buns, making for a cozy afternoon treat.
- Brunch Gatherings: They’re an excellent addition to any brunch spread, alongside fresh fruit and pastries.
- Seasonal Celebrations: Enjoy them during Easter celebrations, adding a festive touch to your holiday table.
- Storage Tip: If you have leftovers, store them in an airtight container to keep them fresh for up to three days.
- Toasting: Toast leftovers for a delightful breakfast treat, spreading a little butter on top for extra flavor.
FAQ
Conclusion
The charm of Hot Cross Buns lies in their delightful mix of spices and sweetness, making them a beloved treat for many. Whether you’re celebrating a holiday or simply indulging in a comforting snack, these buns are sure to impress. I encourage you to give this recipe a try; the joy of creating something so special is truly rewarding. Gather your loved ones, bake these buns together, and savor the happiness they bring!
Hot Cross Buns
Ingredients
Equipment
Method
- In a small bowl, add warm milk and granulated sugar, sprinkle yeast over the top of the mixture. Let set until foamy, about 5 minutes.
- In a large mixing bowl, whisk together 3 cups of all-purpose flour, ground cinnamon, ground allspice, and salt. This is the dry mixture that will create the structure of your buns.
- Make a well in the center of the flour mixture and add the yeast mixture, butter, and eggs. Combine using a stand mixer or a wooden spoon until well incorporated; the dough should be slightly sticky.
- Stir in the plumped raisins until evenly distributed throughout the dough. This adds bursts of sweetness in every bite.
- Turn the dough onto a floured surface and knead for about 8 to 10 minutes, adding more flour if it’s too sticky. The dough should be smooth and elastic when you’re done.
- Form the dough into a ball and place it back into the mixing bowl. Cover with plastic wrap and place in a warm area to rise until doubled, about 1 hour. Keep an eye on it; the dough should feel light and airy.
- Once the dough has risen, coat a 13x9 inch baking dish with butter. Punch down the dough and turn it onto a floured surface. Divide the dough evenly and shape into about 14 to 16 balls.
- Place the dough balls on the baking sheet, cover with a towel, and let them rise until doubled again, about 30 to 45 minutes. They should be puffy and touching each other slightly.
- Preheat your oven to 375 degrees F. Optional: Score the tops of the rolls with a knife in a cross pattern to create the traditional look.
- In a small bowl, whisk together the glaze ingredients until smooth. Brush this mixture over the tops of the buns before baking.
- Bake in the preheated oven for 20 to 25 minutes or until lightly browned. Keep an eye on them; they should be golden and smell delicious.
- Remove from the oven and let cool slightly. Then, transfer the buns to a wire rack to cool completely.
- In another small bowl, whisk together the icing ingredients until it’s thin enough to pipe but not too thin. Transfer to a plastic bag, snip off the corner, and pipe a cross onto each bun once they are cooled.
- Allow the icing to set before serving. Store any leftovers in an airtight container to keep them fresh.
Notes
- Yeast Tips: Check the expiration date for the yeast. If it’s expired, toss it and use a new packet. Use warm milk between 105 to 110°F; if it’s too hot, it can kill the yeast. If it’s too cold, it might not activate.
- Mixing Option: You don’t need a stand mixer! You can mix the dough with a spoon and knead it by hand, though it will take longer.
- Storage Tip: Hot Cross Buns will keep in an airtight container for two to three days. For the freshest taste, don’t make them more than a day in advance.