Candy Cane Coffee Cake
When the holiday season rolls around, there’s nothing quite like a festive treat to bring everyone together, and that’s where my beloved Candy Cane Coffee Cake comes in. Every year, as the snowflakes start to fall and the scent of pine fills the air, I’m reminded of the joy of baking with my family. This cake has become a tradition in our home, bringing warmth and sweetness to our gatherings. The blend of flavors and the beautiful presentation make it a standout dessert that everyone looks forward to. I often find myself reminiscing about the first time I served it, and the delighted smiles it brought to the faces of my loved ones. The glossy, drizzled glaze on top makes it not just a treat for the taste buds, but also a feast for the eyes. There’s something magical about gathering around the table with a slice of this cake and a hot cup of coffee, sharing stories and laughter. It’s those moments that I cherish the most, and this cake is always at the center of them.
Recipe Snapshot
50 mins
45 mins
5 mins
Medium
320 kcal
5 g
Gluten-Free, Low FODMAP
9 g
Oven, Baking Sheet, Frying Pan, Peeler, Wooden Spoon, Whisk, Mixing Bowl
The Magic of This Candy Cane Coffee Cake
A Tradition Worth Sharing
The Candy Cane Coffee Cake isn’t just a recipe; it’s a piece of my family history. Each bite is infused with memories of family traditions, laughter, and the spirit of the season. The bright notes of frozen raspberries offer a delightful contrast to the soft, fluffy cake, creating a harmonious blend that resonates with all who taste it.
Visual Appeal
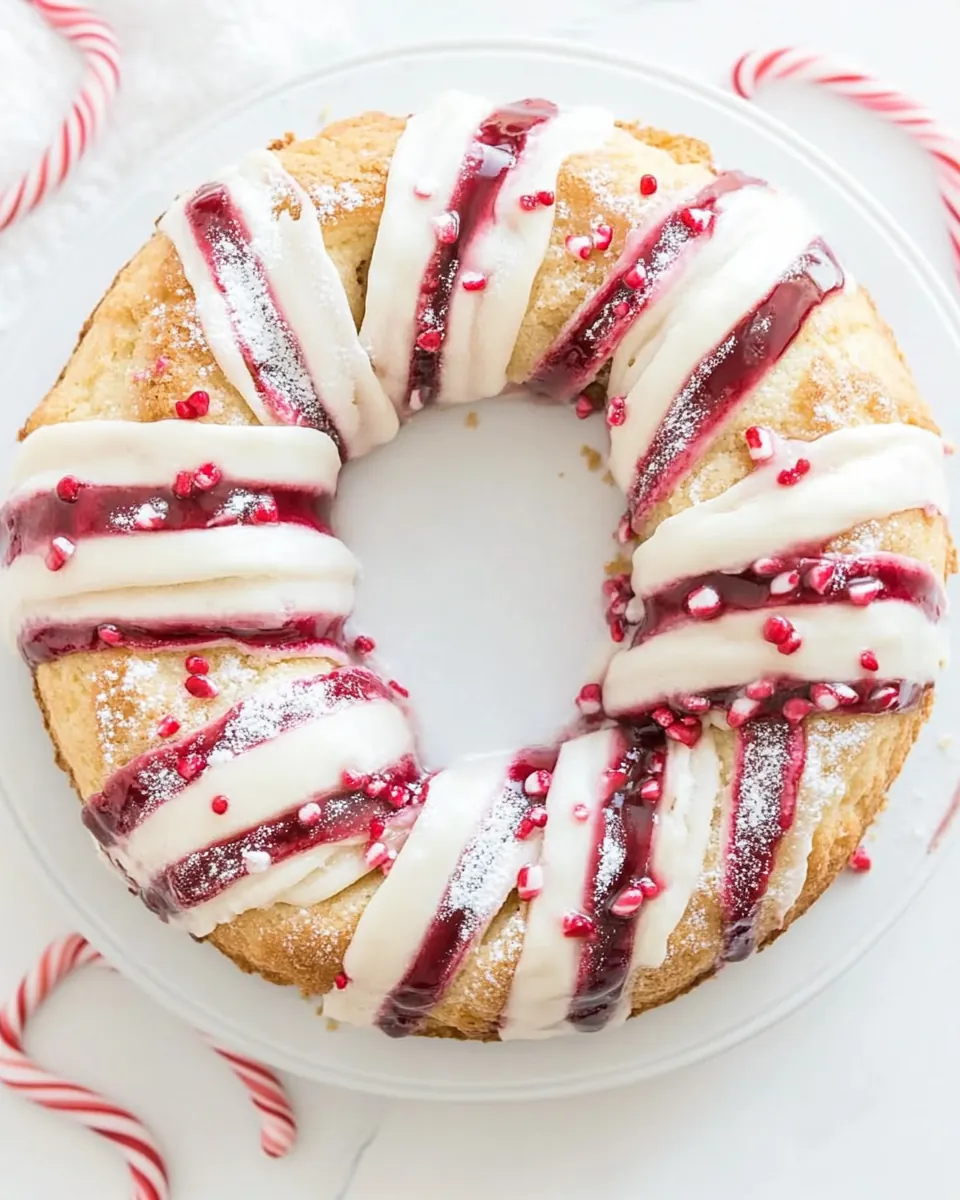
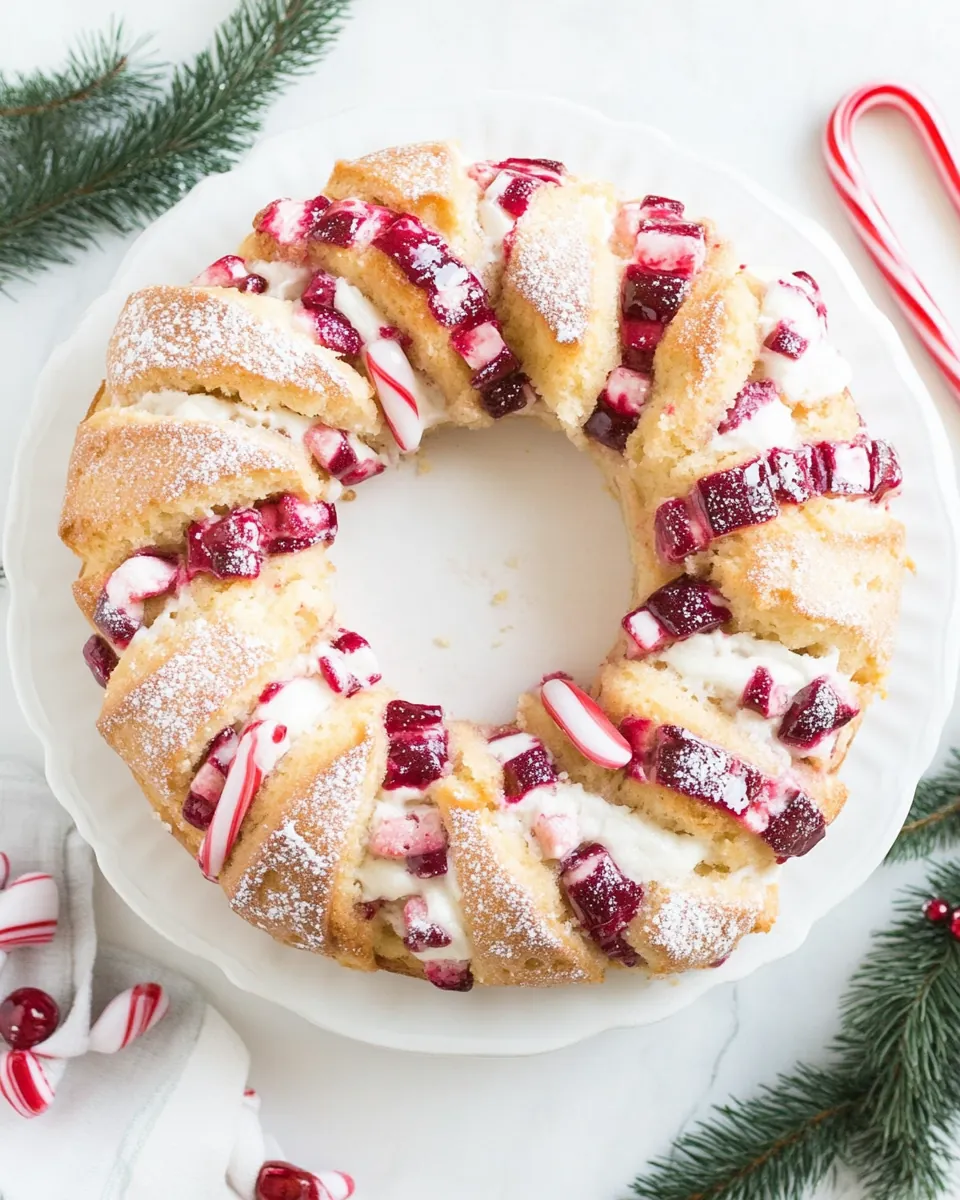
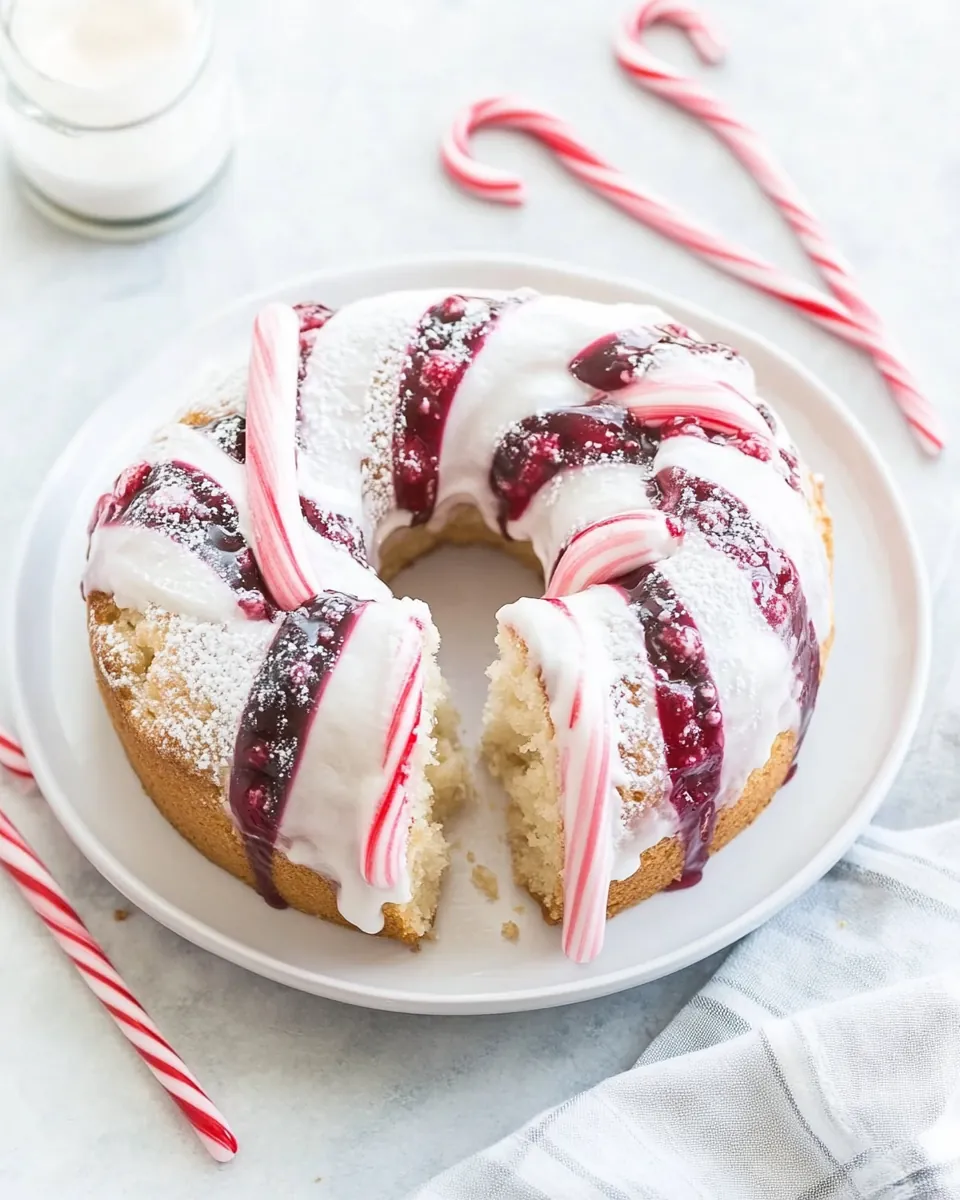
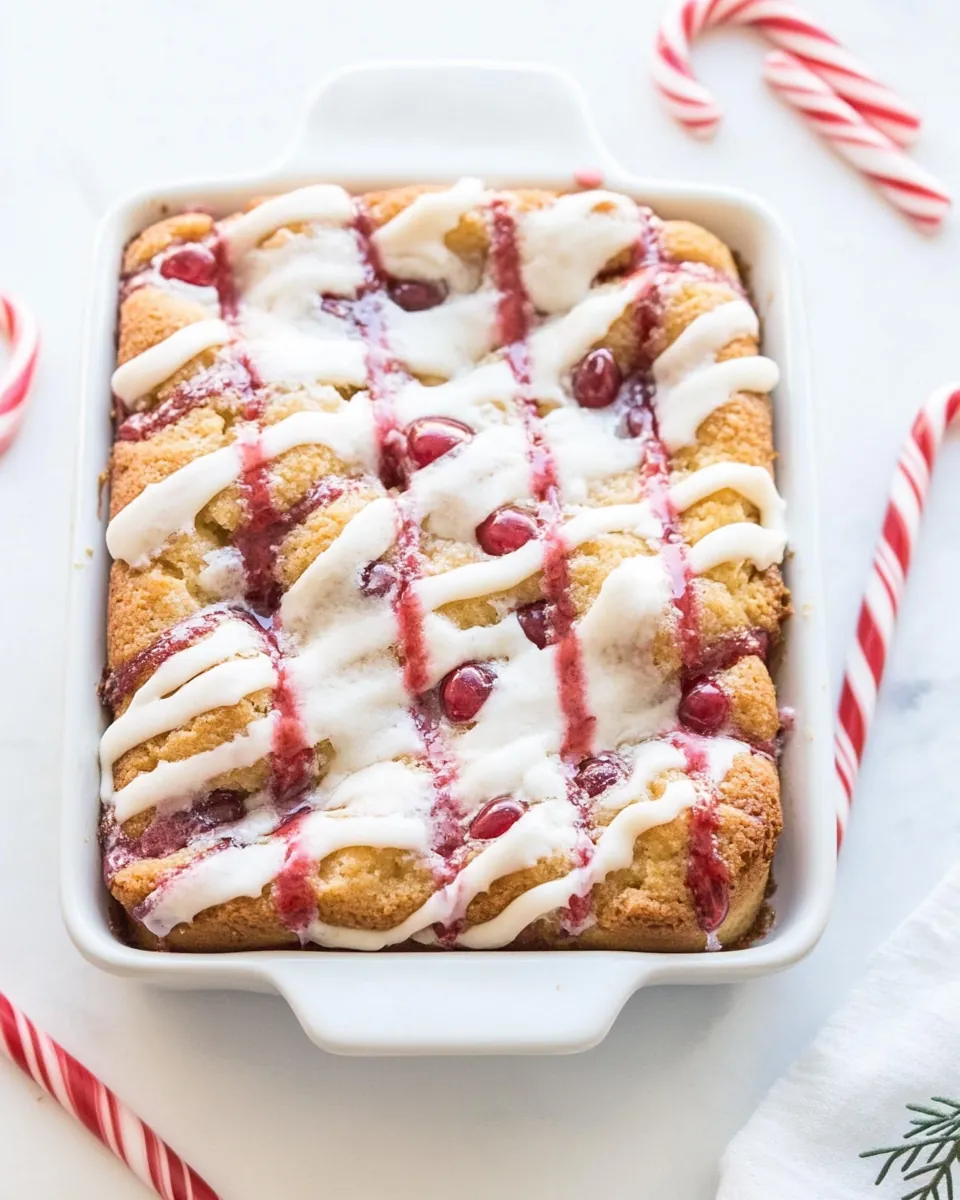
What really sets this cake apart is its stunning appearance. The crisscross design of the bread mimics the iconic candy cane shape, making it a perfect centerpiece for any holiday table. The glaze drizzled on top enhances the cake’s visual charm, enticing your guests even before they take their first bite.
Perfect for Any Occasion
While it’s dubbed a coffee cake, it truly shines at any gathering. Whether it’s an afternoon tea with friends or a festive holiday brunch, the Candy Cane Coffee Cake is versatile enough to be enjoyed any time of the day. It’s not just about the cake; it’s about the connections we make while enjoying it.
Easy to Make
Many appreciate the Candy Cane Coffee Cake for being remarkably simple to prepare. With straightforward steps and easily accessible ingredients, even novice bakers can whip this up without a hitch. I love how it gives everyone a chance to step into the kitchen and create something beautiful.
Bring Joy to Your Table
Ultimately, the heart of this recipe lies in the joy it brings. Sharing slices of this cake with friends and family creates an atmosphere of warmth and happiness. It’s more than just a dessert; it’s a way to spread joy and celebrate togetherness.
Recipe Ingredients for Candy Cane Coffee Cake
When it comes to making the Candy Cane Coffee Cake, each ingredient plays a vital role in creating the rich flavors and delightful textures that we all love. The combination of sweet and tart from the frozen raspberries, creamy buttermilk, and rich butter comes together to make a cake that is both satisfying and indulgent. Each element complements one another beautifully, ensuring that every bite is a little piece of heaven.
- 12 ounces frozen raspberries: These sweet, fruity gems provide a burst of flavor and a lovely color contrast to the cake.
- 2 teaspoons cornstarch: This helps thicken the raspberry filling, creating a luscious texture that holds up beautifully.
- 1/4 teaspoon almond extract: It adds a subtle nutty flavor that enhances the overall taste of the cake.
- 1/8 teaspoon ground cardamom: This spice introduces a warm, aromatic note that elevates the flavor profile.
- 2 envelopes (4 1/2 teaspoons) active dry yeast: The yeast is essential for creating that soft, fluffy texture we all love in a coffee cake.
- 1/2 cup water (warmed to 105 to 115 degrees F): Vital for activating the yeast, ensuring a perfect rise in the dough.
- 1 1/4 cups buttermilk: This ingredient keeps the cake moist and adds a slight tang that balances the sweetness.
- 2 large eggs: They help bind everything together while contributing to the cake’s airy structure.
- 5 1/2 to 6 cups bread flour: This type of flour provides the strength needed for a good rise and chewy texture.
- 1/2 cup (1 stick) butter, at room temperature: Rich and creamy, it adds flavor and moisture to the cake.
- 1/2 cup granulated white sugar: Sweetness is key, and this helps balance the tartness of the raspberries.
- 2 teaspoons baking powder: A necessary leavening agent for achieving a light and fluffy cake.
- 2 teaspoons salt: Enhances all the flavors and balances the sweetness of the cake.
- 3 cups powdered sugar, sifted (divided): Used for making a sweet glaze that tops off the cake perfectly.
- 9 teaspoons water (divided): This helps adjust the glaze’s consistency for the perfect drizzle.
- 3 teaspoons almond extract (divided): Used in the glaze, it ties all flavors together beautifully.
Step by Step Instructions for Candy Cane Coffee Cake
Making the Candy Cane Coffee Cake is a joyous experience, filled with delightful aromas and a sense of accomplishment as you bring it to life. The steps are straightforward, and I love how the dough transforms throughout the process. Let’s dive into the delicious details so you can create your own masterpiece!
- Begin by placing all the filling ingredients, including the frozen raspberries, cornstarch, and a pinch of almond extract, into a saucepan. Heat them over medium heat, stirring occasionally until the raspberries start to melt and the mixture thickens slightly. This will create a luscious filling that will burst with flavor in every bite.
- In a large bowl, dissolve the active dry yeast in the warm water. Let it sit for about five minutes until frothy—this means your yeast is active and ready to do its magic.
- Add the buttermilk, granulated sugar, butter, eggs, baking powder, salt, and 2 1/2 cups of the bread flour to the yeast mixture. Using an electric mixer, beat on low speed for thirty seconds, scraping down the bowl occasionally. Then, increase to medium speed and beat for another two minutes. You’ll notice the mixture becoming smooth and well combined.
- Gradually add enough of the remaining bread flour until the dough is soft and slightly sticky. It should be easy to handle but not overly wet.
- Grease three cookie sheets and turn the dough out onto a surface sprinkled with flour. Knead the dough gently for about five minutes until it’s smooth and elastic. You can use a stand mixer with a dough hook if you prefer.
- Divide the dough into three equal parts, each weighing a little over a pound. Roll one part into a rectangle about 15 by 9 inches. This is the canvas for your delicious filling!
- Spread one-third of the raspberry filling down the center of the rectangle, leaving space at the edges. Now, make cuts on either side of the filling at half-inch intervals, almost reaching the filling.
- Fold the strips over the filling, crisscrossing them over each other. This is where the cake gets its candy cane appearance, so take your time to make it look beautiful!
- Carefully stretch the dough, curving one end to form the top of the cane. Don’t worry; the dough is forgiving and easy to shape. Just let your creativity shine!
- Repeat the process with the remaining two parts of dough, ensuring each cake is as lovely as the last. Once you’ve shaped them, cover with a clean kitchen towel and let them rise in a warm spot for about one hour, or until doubled in size. To check, gently press the dough, and if an indentation remains, it’s ready.
- Preheat your oven to 375°F (190°C). Bake the cakes for 13 to 17 minutes, or until they are lightly browned and firm to the touch. The aroma that fills your kitchen will be simply irresistible!
- While the cakes are baking, prepare the glaze. In a small bowl, whisk together one cup of sifted powdered sugar, three teaspoons of water, and one teaspoon of almond extract. Once the cakes are out of the oven, let them cool for a few minutes.
- Transfer a warm cake to a cooling rack. Snip off a corner of a zip baggie filled with the glaze and drizzle it over the cake in a beautiful pattern. Let the glaze set for at least thirty minutes before serving.
- Finally, wrap a festive bow around the cane-shaped cake and serve to your delighted guests! Enjoy every slice of this Candy Cane Coffee Cake and the joy it brings.
Things Worth Knowing
- Check the dough: Your dough should be soft and slightly sticky. If it’s too dry, add a little more water while kneading.
- Rising time: A warm environment is key for the dough to rise. If your kitchen is cool, consider using the oven light to create warmth.
- Glaze consistency: Adjust the glaze by adding more water if it’s too thick for drizzling. You want it to flow easily but not be runny.
- Make-ahead tips: You can prepare the filling and dough the night before. Just let them rise in the fridge overnight and bring them to room temperature before baking.
Ways to Adapt This Recipe
The Candy Cane Coffee Cake is versatile, and there are plenty of ways to make it your own! Here are some ideas to inspire you:
- Flavor variations: Substitute the raspberry filling with other fruits like strawberries or blueberries for a different taste.
- Different glazes: Experiment with different flavors of glaze, such as citrus or vanilla, for a unique touch.
- Gluten-free option: Use a gluten-free flour blend to make this cake suitable for those with gluten sensitivities.
- Less sweet: If you prefer a less sweet cake, reduce the amount of granulated sugar in the batter and glaze.
- Add nuts: Incorporate chopped nuts like walnuts or pecans into the filling for added texture and flavor.
- Seasonal sprinkles: Top the glaze with festive sprinkles for an extra holiday touch!
Pairing Suggestions for Candy Cane Coffee Cake
The Candy Cane Coffee Cake is a delightful treat that pairs beautifully with various dishes and occasions. Here are some ideas for serving:
- Brunch gatherings: Serve this cake at holiday brunch along with fresh fruit and a warm beverage like coffee or hot chocolate for a cozy morning.
- Afternoon tea: Slice it up for a charming afternoon tea party. It complements herbal teas and is perfect for entertaining.
- Breakfast treat: Enjoy a slice with your morning coffee for a sweet start to the day. It makes an excellent breakfast option during the festive season.
- Picnic dessert: Pack slices for a picnic in the park. It’s easy to transport and a crowd-pleaser.
- Gift giving: Wrap a cake in festive packaging to share with neighbors and friends during the holidays.
- Holiday dessert table: Make it a centerpiece on your holiday dessert table, alongside cookies and pies for a delightful spread.
FAQ
Conclusion
The Candy Cane Coffee Cake is a delightful holiday treat that brings joy and warmth to any gathering. With its beautiful design and harmonious flavors, it’s sure to impress your family and friends. I encourage you to try this recipe and create special memories around the table. There’s nothing quite like sharing a delicious homemade cake with loved ones, and this one is sure to become a cherished tradition in your home!
Candy Cane Coffee Cake
Ingredients
Equipment
Method
- Place all the filling ingredients in a saucepan. Heat until the raspberries 'melt,' and stir until slightly thickened. Remove from heat. It will thicken a little bit more upon cooling.
- Dissolve the yeast in warm water in a large bowl. Add the buttermilk, sugar, butter, eggs, baking powder, salt and 2 1/2 cups of the flour. Beat with an electric mixer on low speed for 30 seconds, scraping the bowl constantly. Beat on medium speed for 2 minutes, scraping the bowl occasionally. Stir in enough remaining flour to make the dough easy to handle. (The dough should be soft and slightly sticky.)
- Grease 3 cookies sheets. Turn the dough onto parchment paper that has been sprinkled with flour; gently knead about 5 minutes or until smooth and elastic (Or you can use a stand mixer with a dough hook to do the kneading for you).
- Divide the dough into 3 equal parts (should be a little over a pound each). Roll one part into a rectangle, 15x9-inches. Turn the parchment paper onto a cookie sheet and peel away the parchment. Spread 1/3 of the raspberry filling in a strip about 2 1/2 inches wide lengthwise down the center of the rectangle. Make cuts in the dough at 1/2-inch intervals on both 15-inch sides almost to the filling. Fold the strips over the filling, overlapping and crossing in the center (crisscross back and forth).
- Carefully stretch the dough until about 22 inches long; curve one end to form top of cane. The dough is very forgiving and easy to work with, so just gently move it around to get the look that you want.
- Repeat the preparations with the 2 remaining balls of dough. Cover and let rise in a warm place for about an hour (or until double). The dough is ready if an indentation remains when touched.
- Preheat the oven to 375°F. Bake 13 to 17 minutes (or until lightly browned and slightly firm to touch).
- Prepare 1 recipe of glaze at a time... whisk together 1 cup of powdered sugar, 3 teaspoons water and 1 teaspoon extract and pour into a small zip baggie. Snip off a corner and squeeze to drizzle the glaze onto one of the warm cakes. Follow the design of the weave for the best look.
- Let the glaze set for at least half an hour. Wrap a festive bow around the longer part of the cake. Ready to serve!
Notes
- If your frozen raspberries are not sweetened: toss them with 1 tablespoon of granulated white sugar.
- Make ahead: These cakes can be partially prepared the night before. Prepare until the point just before you let them rise. Cover the cookie sheets well with plastic wrap and store in the refrigerator. Unwrap in the morning, let them sit at room temperature for about a half hour and then cover and continue with the recipe... let rise, etc.
- To simulate a warm place to rise: turn your oven on to 500 degrees F. for one minute. Turn on the oven light too. Turn off the heat after a minute and place your cake in the slightly warmed oven for rising. Don't forget to turn the oven off!