Christmas Monster Cookies
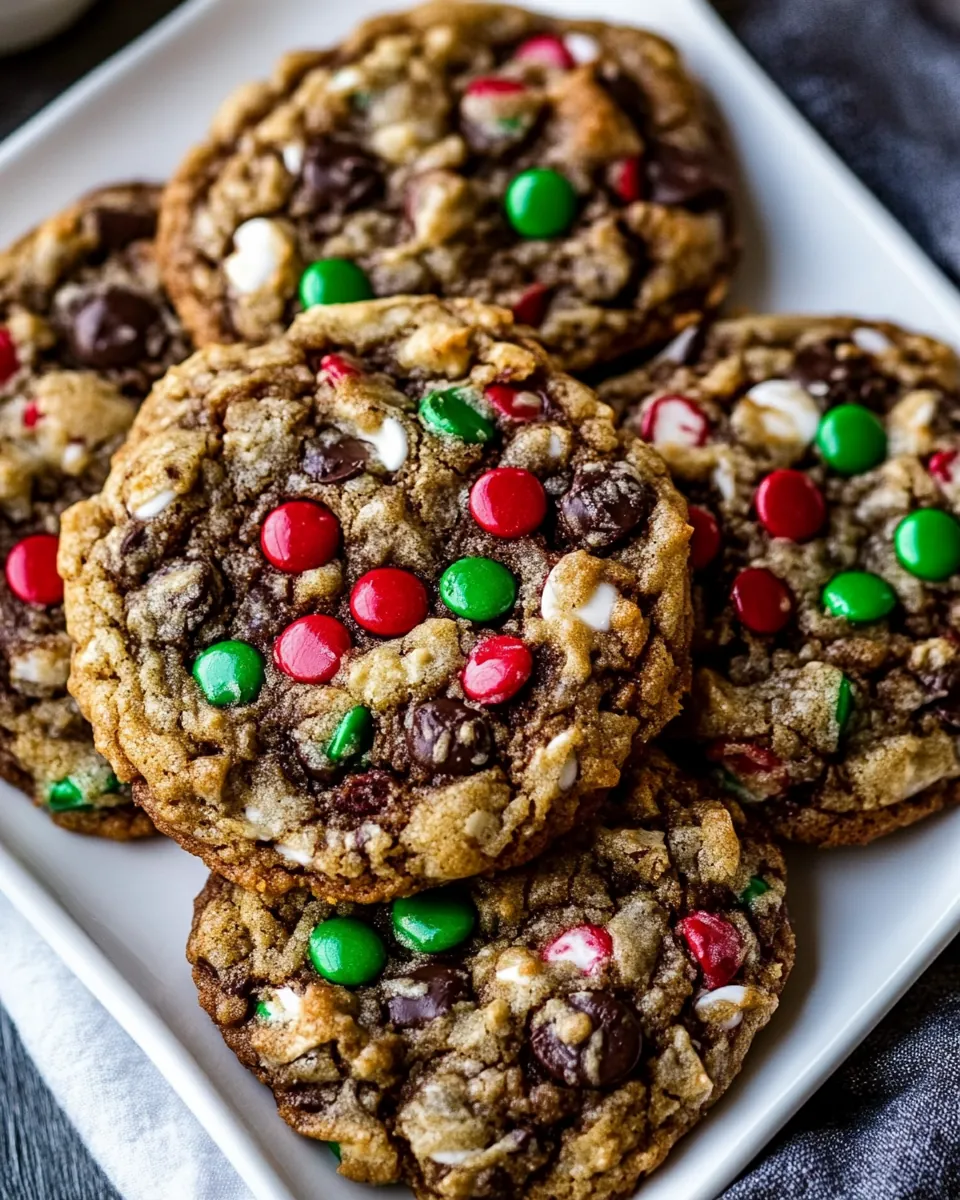
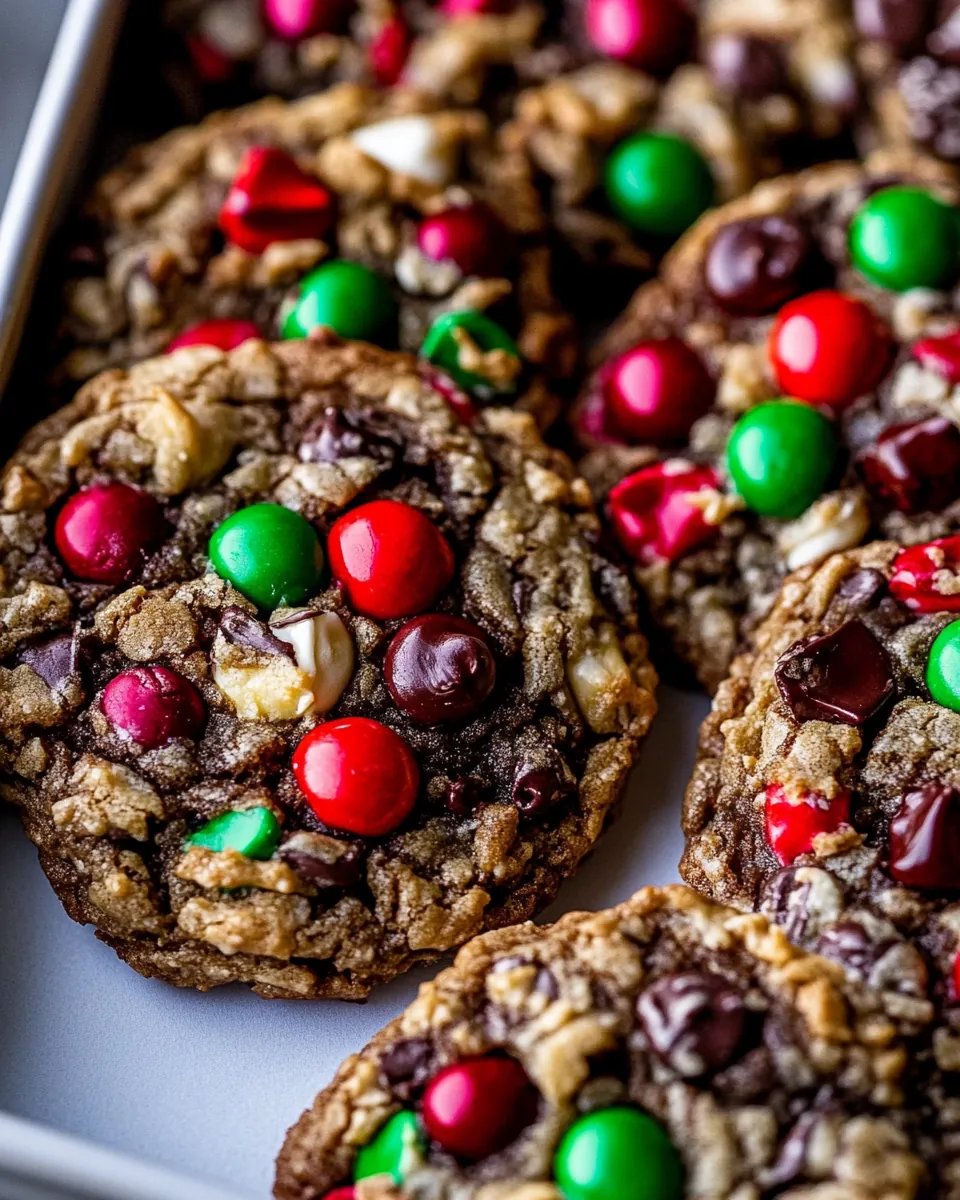
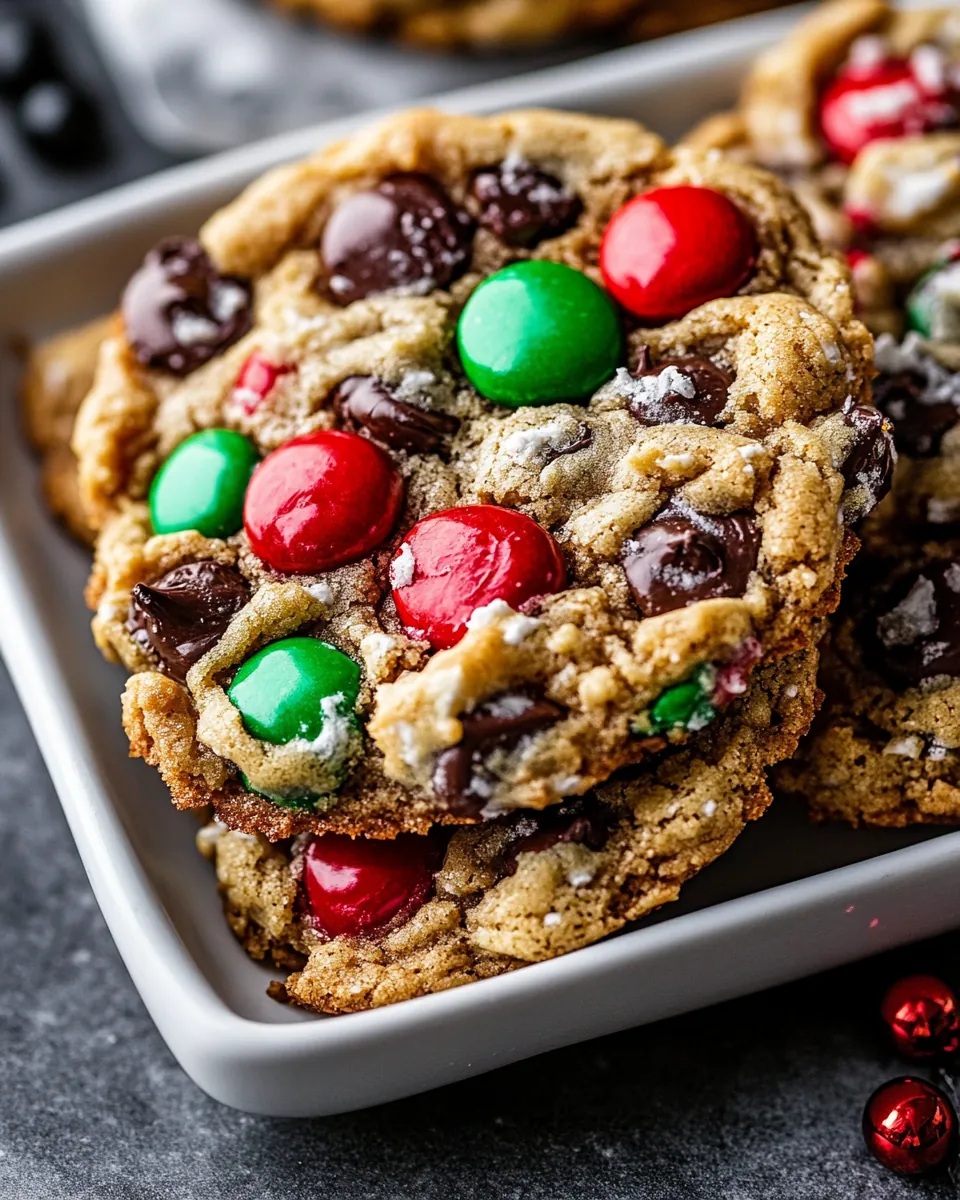
Every Christmas season, I find myself craving something sweet, colorful, and utterly comforting. That’s where my love for Christmas Monster Cookies comes in. These cookies aren’t just your average treats; they’re a delightful mix of flavors and textures, bringing the holiday spirit right to your kitchen. Picture this: a cozy evening, the smell of baking cookies wafting through the air, and the excitement of kids (and adults) waiting impatiently for the first batch to come out of the oven. With their festive colors from M&M’s and a crunch from pretzels, these cookies have quickly become a staple in my holiday baking repertoire. They’re perfect for sharing at gatherings, and trust me, once you taste them, you won’t be able to stop at just one!
Recipe Snapshot
35 mins
20 mins
15 mins
Medium
200 kcal
3 g
Gluten-Free, Low FODMAP
10 g
Oven, Baking Sheet, Mixing Bowl, Frying Pan
What Makes This Christmas Monster Cookies Special
1. Irresistible Flavor Combinations
The Christmas Monster Cookies are packed with a burst of flavors. Combining sweet and salty elements like chocolate chips and pretzel sticks creates a unique taste adventure in every bite. Each cookie offers a perfect balance, making it hard to resist reaching for another.
2. Fun to Make
Baking these cookies is an enjoyable experience, especially when making them with family or friends. The process of rolling the dough into balls and placing them on the baking sheet is bound to spark joy and laughter, turning an ordinary baking session into a fun holiday tradition.
3. Customize to Your Liking
One of the best features of Christmas Monster Cookies is their versatility. You can easily tailor them to suit your taste by adding different mix-ins like nuts or dried fruits. This customization allows everyone to make their version, making it a great recipe for gatherings.
4. Perfect for Gifting
What better way to spread holiday cheer than with homemade cookies? These vibrant cookies are not only delicious but also visually appealing. Package them in a festive tin or box, and you have a perfect gift that friends and family will love.
5. A Delicious Holiday Tradition
In my house, Christmas Monster Cookies have become a cherished holiday tradition. Each year, we gather to bake these cookies, filling our home with laughter and the wonderful aroma of baking. This recipe creates not just cookies but lasting memories.
What You Need for Christmas Monster Cookies
The magic of Christmas Monster Cookies lies in their delicious ingredients, which work harmoniously. Each component plays a vital role in creating the perfect cookie. From the rich flavor of butter to the sweetness of chocolate chips, these ingredients come together to make something truly special.
- 2 sticks (1 cup) salted butter at room temperature – The base of our cookies, giving them a rich, creamy flavor.
- 1 cup dark brown sugar – Adds moisture and a hint of caramel flavor.
- 1/2 cup granulated sugar – Balances the richness of brown sugar with sweetness.
- 2 large eggs, plus 1 egg yolk – Essential for binding the ingredients together.
- 2 cups all-purpose flour – The backbone of our cookie dough.
- 2 teaspoons baking soda – Helps the cookies rise and become fluffy.
- 2 teaspoons baking powder – Works with baking soda for a lighter texture.
- 1/2 teaspoon kosher salt – Enhances the overall flavors.
- 2 cups old-fashioned oats – Adds chewiness and a wholesome touch.
- 1 1/4 cups holiday M&M’s – Perfect for a festive, colorful touch.
- 1 cup mini pretzel sticks, crushed – Introduces a delightful crunch and salty flavor.
- 1 cup semi-sweet chocolate chips – Brings rich chocolate flavor.
- 1/2 cup white chocolate chips – Adds a creamy sweetness to the mix.
Christmas Monster Cookies Instructions

Making Christmas Monster Cookies is a delightful process that fills your home with the aroma of fresh baking. Let’s dive right into the steps to create these festive treats!
Preheat your oven to 350° F. Make sure your baking sheet is lined with parchment paper, which will prevent the cookies from sticking and make cleanup a breeze.
In a large mixing bowl, combine the butter, brown sugar, and granulated sugar. Beat them together until you achieve a smooth and creamy mixture. The color should change to a lighter shade, indicating that air has been incorporated.
Add the eggs and the additional egg yolk, one at a time, mixing well after each addition. This ensures everything is well combined and contributes to that lovely texture.
Now, it’s time to scoop in the flour, baking soda, baking powder, and salt. Beat these dry ingredients into the wet mixture until just combined. Be careful not to overmix!
Fold in the old-fashioned oats gently using a spatula. This will add the chewy texture that we love.
Next, it’s time to mix in the fun stuff! Add the M&M’s, crushed pretzel sticks, chocolate chips, and white chocolate chips. Gently fold these in until evenly distributed.
Using your hands or a cookie scoop, roll the dough into balls about 1/4 cup in size. Place the dough balls on the prepared baking sheet, making sure to leave 3 inches of space between them.
Transfer the baking sheet to the preheated oven and bake for 8 minutes. After this time, rotate the pan to ensure even baking and bake for an additional 2 minutes. The cookies should be lightly golden.
Remove the pan from the oven, and immediately push a few extra M&M’s into the top of each cookie. Return to the oven for an additional 2 to 3 minutes. This will give you that lovely, warm, and gooey center!
Once baked, let the cookies cool on the baking sheet for a few minutes. They will continue to cook slightly as they sit. I recommend eating at least one warm for the best experience!
Things Worth Knowing
- Chilling the Dough: For even thicker cookies, consider chilling the cookie dough for 30 minutes before baking. This helps to maintain the cookies’ shape.
- Mixing Techniques: Use a rubber spatula for folding in the mix-ins to prevent deflating the dough.
- Storage: Store cookies in an airtight container at room temperature. They should stay fresh for up to four days.
- Don’t Overbake: Keep an eye on the cookies while baking to ensure they’re not overbaked; they should look slightly underdone when you take them out.
Ways to Customize
There are endless ways to customize Christmas Monster Cookies, making them uniquely yours. Here are some fantastic tips:
- Flavor Variations: Experiment with different mix-ins like peanut butter chips or butterscotch chips for a new flavor profile.
- Add Nuts: Include chopped nuts like pecans or walnuts to add a delightful crunch.
- Try Different Oats: Use quick oats in place of old-fashioned oats for a different texture.
- Make Them Gluten-Free: Substitute all-purpose flour with a gluten-free blend to accommodate dietary restrictions.
- Experiment with Spices: Add a touch of cinnamon or nutmeg to the batter for a warm, festive flavor.
- Layer with Frosting: For an extra indulgence, top the cooled cookies with cream cheese frosting.
What to Pair With Christmas Monster Cookies
- Milk: A classic pairing, milk complements the sweetness of the cookies perfectly.
- Coffee: Enjoy them with a cup of strong coffee for a delightful afternoon treat.
- Ice Cream: Crumble cookies over vanilla ice cream for a decadent dessert.
- Fruit Salad: Serve with a side of fresh fruit to balance the sweetness.
- Gift Baskets: These cookies make a great addition to holiday gift baskets along with other homemade treats.
- Festive Parties: Perfect for holiday gatherings, potlucks, or cookie exchanges.
FAQ
Conclusion
The Christmas Monster Cookies are more than just cookies; they’re a celebration of flavors, textures, and memories. With their festive colors and delightful crunch, they make every holiday gathering even more special. I encourage you to bake a batch of these cookies and share them with your loved ones. You’ll find joy in both the baking process and the smiles they bring!
Christmas Monster Cookies
Ingredients
Equipment
Method
- 1. Preheat your oven to 350° F. Make sure your baking sheet is lined with parchment paper, which will prevent the cookies from sticking and make cleanup a breeze.
- 2. In a large mixing bowl, combine the butter, brown sugar, and granulated sugar. Beat them together until you achieve a smooth and creamy mixture. The color should change to a lighter shade, indicating that air has been incorporated.
- 3. Add the eggs and the additional egg yolk, one at a time, mixing well after each addition. This ensures everything is well combined and contributes to that lovely texture.
- 4. Now, it’s time to scoop in the flour, baking soda, baking powder, and salt. Beat these dry ingredients into the wet mixture until just combined. Be careful not to overmix!
- 5. Fold in the old-fashioned oats gently using a spatula. This will add the chewy texture that we love.
- 6. Next, it’s time to mix in the fun stuff! Add the M&M's, crushed pretzel sticks, chocolate chips, and white chocolate chips. Gently fold these in until evenly distributed.
- 7. Using your hands or a cookie scoop, roll the dough into balls about 1/4 cup in size. Place the dough balls on the prepared baking sheet, making sure to leave 3 inches of space between them.
- 8. Transfer the baking sheet to the preheated oven and bake for 8 minutes. After this time, rotate the pan to ensure even baking and bake for an additional 2 minutes. The cookies should be lightly golden.
- 9. Remove the pan from the oven, and immediately push a few extra M&M's into the top of each cookie. Return to the oven for an additional 2 to 3 minutes. This will give you that lovely, warm, and gooey center!
- 10. Once baked, let the cookies cool on the baking sheet for a few minutes. They will continue to cook slightly as they sit. I recommend eating at least one warm for the best experience!
Notes
- Storage: Store cookies in an airtight container at room temperature. They should stay fresh for up to four days.
- Don't Overbake: Keep an eye on the cookies while baking to ensure they’re not overbaked; they should look slightly underdone when you take them out.
- Chilling the Dough: For even thicker cookies, consider chilling the cookie dough for 30 minutes before baking. This helps to maintain the cookies’ shape.
- Mixing Techniques: Use a rubber spatula for folding in the mix-ins to prevent deflating the dough.
- Freezing: You can freeze the cookie dough for up to three months. Just roll into balls and store in an airtight container. Bake directly from frozen, adding a couple of extra minutes to the baking time.
- Experiment: Feel free to mix and match your favorite add-ins for a personalized touch.