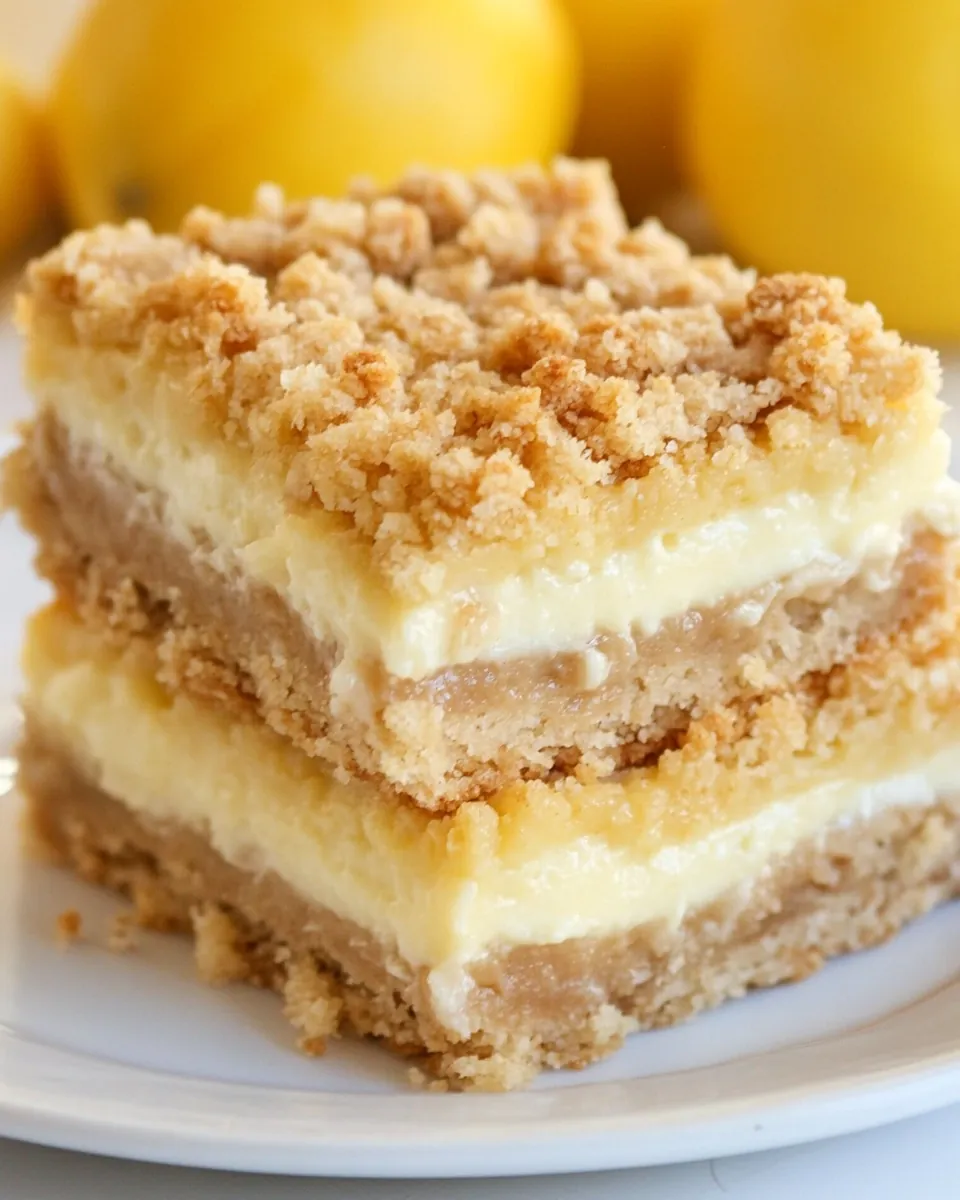
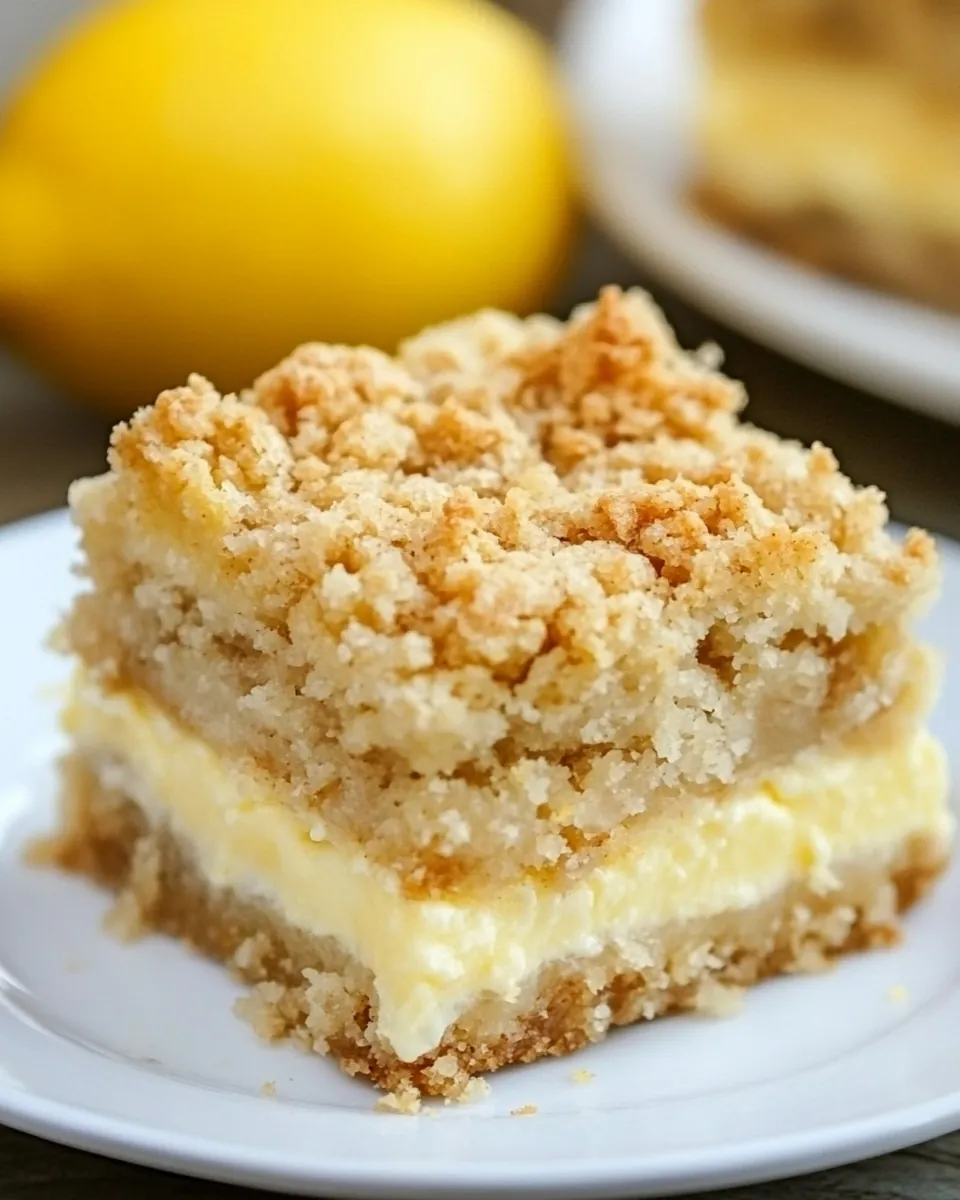
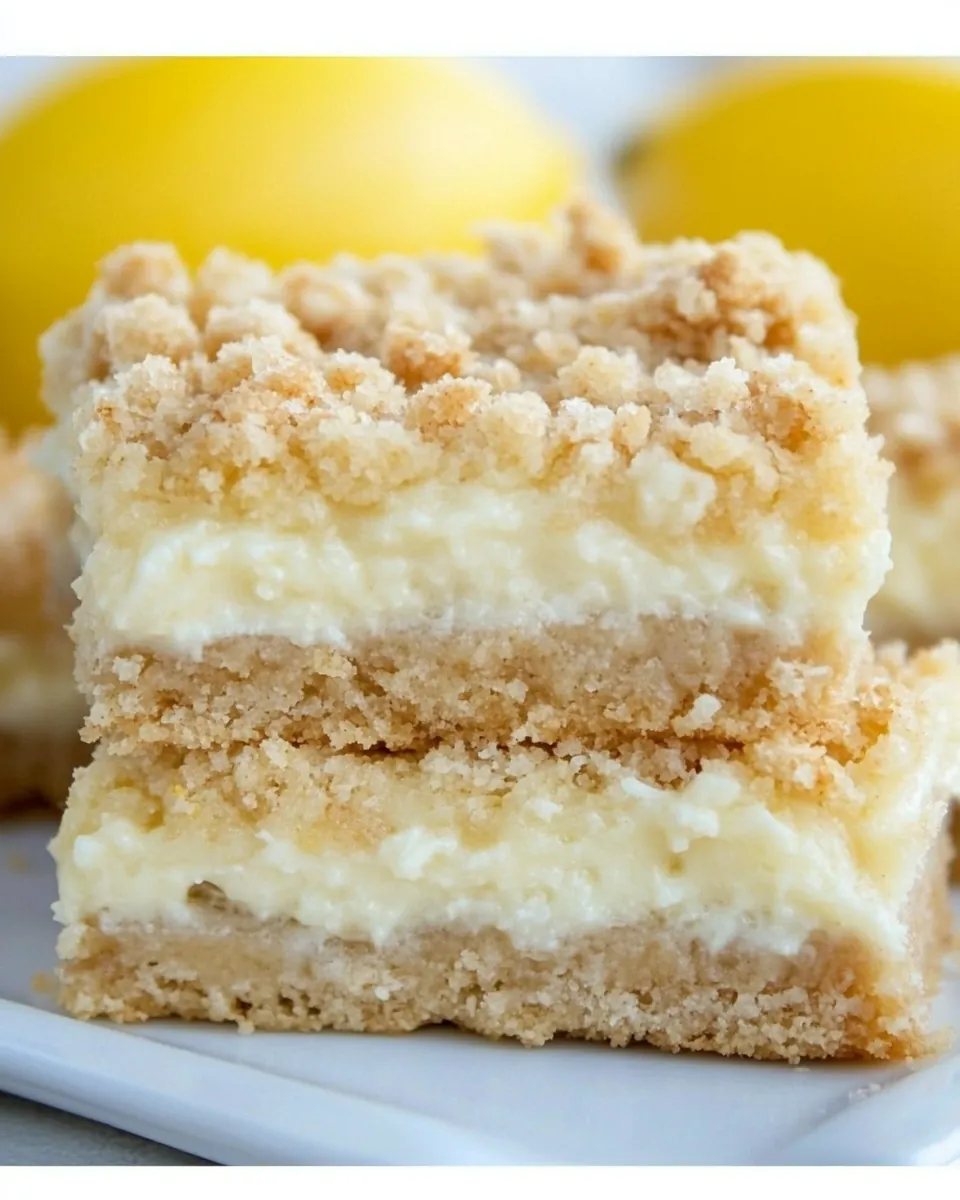
Creamy Lemon Crumb Bars
There’s something about the arrival of spring that always inspires me to whip up something light and refreshing. That’s when I discovered these Creamy Lemon Crumb Bars. The perfect blend of tart and sweet, they make for an irresistible treat that’s hard to resist. I remember one sunny afternoon when I had some friends over. We were lounging in the garden, and I decided to surprise them with these bars. As I took the first bite, the creamy filling contrasted beautifully with the crumbly topping, and I could see their faces light up with delight. That’s the magic of these Creamy Lemon Crumb Bars—they not only taste amazing, but they also bring people together.
Recipe Snapshot
43 mins
15 mins
28 mins
Medium
220 kcal
3 g
Gluten-Free, Low FODMAP
10 g
Oven, Baking Sheet, Frying Pan, Wooden Spoon, Mixing Bowl
What Sets This Creamy Lemon Crumb Bars Apart
Why do we love these Creamy Lemon Crumb Bars? Here are just a few reasons:
1. Bright and Zesty Flavor
The lemon juice and zest in these bars provide a refreshing zing that wakes up your taste buds. It’s like a burst of sunshine on a plate!
2. Perfectly Balanced
The combination of the sweet granulated sugar and the tartness of the lemon is a match made in heaven. Each bite is a delightful dance of flavors, making it hard to stop at just one.
3. Creamy Texture
The filling, made creamy with sour cream or Greek yogurt, adds a delightful richness that complements the crumbly topping perfectly. It’s like experiencing two textures in one delicious dessert.
4. Easy to Make
Even if you’re not a seasoned baker, these bars are straightforward to whip up. Just mix, bake, and enjoy—no complicated techniques needed.
5. Versatile for Any Occasion
Whether you’re hosting a spring gathering, looking for a potluck dish, or simply treating yourself, these Creamy Lemon Crumb Bars fit the bill. They’re sure to impress anyone who tries them.
6. Make Ahead Friendly
These bars can be made in advance, making them a great option for parties or family gatherings. Just cool, cut, and store them in the fridge until you’re ready to serve!
Key Ingredients for Creamy Lemon Crumb Bars
The ingredients for these Creamy Lemon Crumb Bars come together to create a perfect balance of flavors and textures. The key players include the rich butter, which forms a crumbly base; granulated sugar for sweetness; and the lemon, which provides that bright, zesty flavor everyone adores. Each ingredient plays a crucial role in making this dessert special.
- ½ cup unsalted butter, melted, cooled to room temperature: This is the backbone of the crumbly crust and topping, providing a rich flavor.
- ½ cup packed light or dark brown sugar: Adds depth and moisture to the crumb mixture.
- 1.5 cups all-purpose flour: The essential building block for creating the crust and topping.
- ½ teaspoon baking soda: Helps the crust rise slightly for a fluffy texture.
- ¼ teaspoon salt: Enhances and balances the sweetness of the bars.
- 1 cup sour cream or Greek yogurt: Provides creaminess and tang to the filling.
- ¾ cup granulated sugar: Sweetens the filling perfectly, creating a delightful contrast with the lemon.
- 2 tablespoons all-purpose flour: Helps to stabilize the filling.
- 1 large egg: Binds the filling together, adding richness.
- 1 teaspoon vanilla extract: Adds a subtle sweetness and depth of flavor.
- Juice and zest from ½ lemon: The star ingredient that infuses the bars with their signature bright flavor.
Recipe Steps for Creamy Lemon Crumb Bars
Making these Creamy Lemon Crumb Bars is a delightful process that you’ll love. With a few simple steps, you’ll have a treat that is sure to impress. Let’s dive in!
- Line an 8-inch square baking pan with aluminum foil or parchment paper, making sure it hangs over the edges for easy removal later. This will allow you to lift the bars out without any fuss once they’re baked. Set the lined pan aside.
- Preheat your oven to 375 degrees F (190 degrees C). It’s important to have your oven ready, so the bars bake evenly. While it preheats, you can prepare the crust mixture.
- In a medium mixing bowl, stir together the crust and topping ingredients: the melted butter, brown sugar, flour, baking soda, and salt. Use a fork or your fingers to combine until the mixture resembles coarse crumbs. Save ¾ cup of this mixture for the topping later.
- In another medium mixing bowl, mix all the filling ingredients: sour cream, granulated sugar, flour, egg, vanilla extract, and the lemon juice and zest. Use an electric mixer to blend everything until smooth and creamy. The filling should be thick but pourable.
- Press down the remaining crust mixture firmly into the bottom of the prepared pan. This creates a solid base for the filling. Don’t skip this step—make sure it’s compact.
- Pour the creamy filling over the crust, spreading it evenly with a spatula. You want every bite to have that luscious lemon flavor, so take your time with this step.
- Sprinkle the reserved crumb mixture over the filling, covering it evenly for a nice crunchy topping. This will create a delightful contrast in texture.
- Bake in the preheated oven for 25 to 28 minutes. Look for a golden brown topping and a set filling—there should be no jiggly bits in the center when you gently shake the pan. The smell will be incredible!
- Once baked, remove the pan from the oven and allow it to cool completely at room temperature. This step is crucial for cutting clean bars later. Let them rest for at least an hour.
- Using the overhanging foil or parchment paper, lift the bars out of the pan. Cut them into squares or rectangles, and they’re ready to be served!
Things Worth Knowing
- Cooling Time: Be patient and allow the bars to cool completely before cutting. This helps them set and makes them easier to slice.
- Storage: Store leftover bars in an airtight container in the fridge for up to a week. They taste even better the next day!
- Serving Temperature: These bars can be served chilled or at room temperature. Both ways are delicious!
- Storing Zest: If you have leftover lemon zest, you can freeze it in an airtight container for future use.
Making Adjustments
Every recipe can be adjusted to fit your taste. Here are some tips to help you personalize these Creamy Lemon Crumb Bars:
- Storage: Keep the bars in an airtight container in the fridge to maintain freshness. They can last up to one week, but they’re best enjoyed within the first few days.
- Freezing: You can freeze these bars for up to three months. Just ensure they’re well-wrapped to prevent freezer burn. Thaw them in the fridge before serving.
- Pairing: These bars pair beautifully with a cup of tea or coffee. They’re perfect for an afternoon snack or dessert!
- Variations: Consider adding some poppy seeds to the filling for a delightful crunch or even mixing in some fresh berries.
- Cutting Tips: For clean cuts, use a sharp knife that has been warmed under hot water.
Pairing Suggestions for Creamy Lemon Crumb Bars
These Creamy Lemon Crumb Bars are incredibly versatile and can be enjoyed in various settings. Here are some suggestions for pairing them:
- Tea Parties: Serve them at your next tea party alongside a selection of herbal teas. Their bright flavor is the perfect complement to a warm cup.
- Picnics: Pack these bars for a picnic in the park. They’re easy to transport and provide a sweet treat after a savory lunch.
- Spring Celebrations: Consider serving these bars at spring-themed events like bridal showers, baby showers, or Easter gatherings.
- Sweet Breakfast: Enjoy them as a sweet addition to your breakfast spread. They’re especially delightful with a side of fresh fruit.
- Simple Desserts: Pair these bars with a scoop of vanilla ice cream or some fresh whipped cream for an elegant dessert option.
FAQ
Conclusion
The Creamy Lemon Crumb Bars are a delightful treat that balances creamy and zesty flavors beautifully. Their easy preparation makes them a must-try for any occasion. I encourage you to whip up a batch and share them with family and friends; they’re sure to become a favorite in your home!

Creamy Lemon Crumb Bars
Ingredients
Equipment
Method
- Line an 8-inch square baking pan with aluminum foil or parchment paper, making sure it hangs over the edges for easy removal later. This will allow you to lift the bars out without any fuss once they’re baked. Set the lined pan aside.
- Preheat your oven to 375 degrees F (190 degrees C). It’s important to have your oven ready, so the bars bake evenly. While it preheats, you can prepare the crust mixture.
- In a medium mixing bowl, stir together the crust and topping ingredients: the melted butter, brown sugar, flour, baking soda, and salt. Use a fork or your fingers to combine until the mixture resembles coarse crumbs. Save ¾ cup of this mixture for the topping later.
- In another medium mixing bowl, mix all the filling ingredients: sour cream, granulated sugar, flour, egg, vanilla extract, and the lemon juice and zest. Use an electric mixer to blend everything until smooth and creamy. The filling should be thick but pourable.
- Press down the remaining crust mixture firmly into the bottom of the prepared pan. This creates a solid base for the filling. Don’t skip this step—make sure it’s compact.
- Pour the creamy filling over the crust, spreading it evenly with a spatula. You want every bite to have that luscious lemon flavor, so take your time with this step.
- Sprinkle the reserved crumb mixture over the filling, covering it evenly for a nice crunchy topping. This will create a delightful contrast in texture.
- Bake in the preheated oven for 25 to 28 minutes. Look for a golden brown topping and a set filling—there should be no jiggly bits in the center when you gently shake the pan. The smell will be incredible!
- Once baked, remove the pan from the oven and allow it to cool completely at room temperature. This step is crucial for cutting clean bars later. Let them rest for at least an hour.
- Using the overhanging foil or parchment paper, lift the bars out of the pan. Cut them into squares or rectangles, and they’re ready to be served!