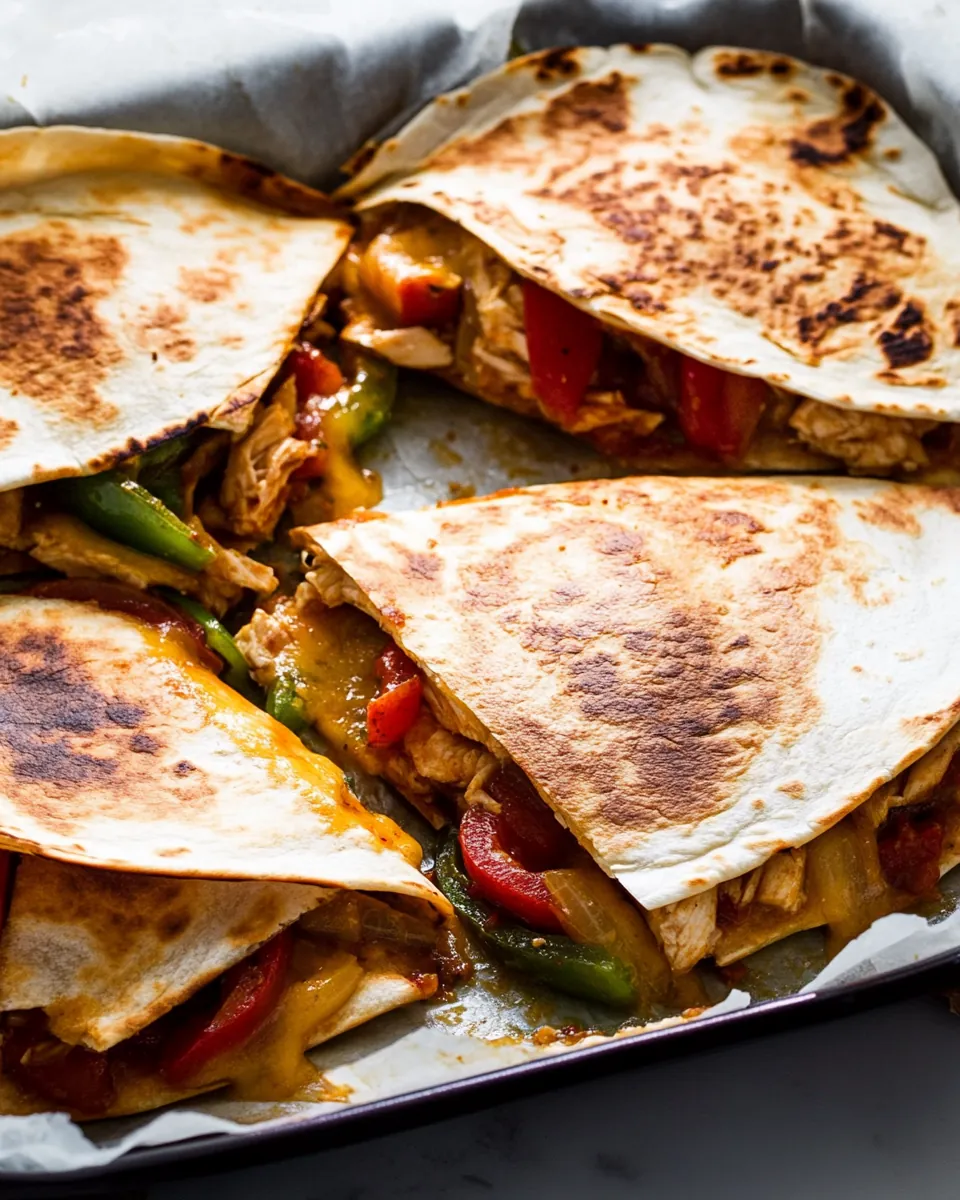
Crispy Baked Chicken Fajita Quesadillas
There’s something about the aroma of Crispy Baked Chicken Fajita Quesadillas wafting through the kitchen that just makes my heart sing. I remember the first time I made these delicious quesadillas; it was a casual Friday evening, and I wanted to whip up something quick yet satisfying. The sizzle of the chicken and the vibrant colors of the peppers and onions were a feast for the senses, making the kitchen feel alive with excitement. As I folded the tortillas, I couldn’t help but dream of the memories these would bring—gathering around the table with friends, dipping the crispy edges in homemade salsa, and sharing laughter and stories. That’s the magic of quesadillas—they’re not just food; they’re a way to connect with loved ones and create unforgettable moments.
Recipe Snapshot
35 mins
15 mins
20 mins
Medium
400 kcal
25 g
Gluten-Free, Low FODMAP
20 g
Chef’s Knife, Mixing Bowl, Baking Sheet, Oven, Frying Pan, Blender
Why You Need This Crispy Baked Chicken Fajita Quesadillas
Quick and Easy to Prepare
One of the best things about Crispy Baked Chicken Fajita Quesadillas is how quickly they come together. With simple ingredients and minimal prep time, you can have a delicious meal ready in no time. This is exactly what you need after a long day—comfort food that doesn’t keep you in the kitchen for hours.
Full of Flavor
With the combination of seasoned chicken, sautéed peppers, and melted cheese, each bite offers an explosion of flavors. The fajita seasoning adds just the right amount of spice, making these quesadillas anything but boring. Trust me; your taste buds will thank you!
Perfect for Sharing
Whether it’s a family dinner or a casual get-together with friends, these quesadillas are perfect for sharing. They’re easy to slice into wedges, making them great finger food that everyone can enjoy. Plus, you can customize the fillings based on what you love or what you have on hand.
Versatile Ingredients
You can easily tweak the ingredients to suit your preferences or dietary needs. Add in some black beans for an extra dose of protein, or toss in fresh spinach for a pop of color and nutrition. The possibilities are endless!
Kid-Friendly
Kids love quesadillas, and this recipe is no exception. Allowing them to help fill the tortillas with their favorite ingredients not only makes dinner a fun activity but also teaches them valuable cooking skills. It’s a win-win!
Ingredients Required for Crispy Baked Chicken Fajita Quesadillas
The beauty of the ingredients in Crispy Baked Chicken Fajita Quesadillas lies in their simplicity and flavor. The key players include tender chicken, vibrant bell peppers, and a blend of spices that bring everything together. Each component contributes to a satisfying crunch and rich flavor, making this a standout dish that can be enjoyed year-round. Let’s dive into what you’ll need to create this mouthwatering meal!
- 3 small or 2 medium chicken breasts, pounded evenly
- 2 tablespoons fajita seasoning, or see the note below for fajita spice recipe
- 1 tablespoon olive oil
- 1/2 onion, sliced
- 1 large bell pepper, sliced (any color)
- 4 (8 inch) flour tortillas
- Olive oil spray
- 1 cup shredded cheese, any blend (Mozzarella, Cheddar, Monterey Jack, Pepper Jack, or Mexican blend)
- Cooking spray
Cooking Instructions for Crispy Baked Chicken Fajita Quesadillas
Cooking these Crispy Baked Chicken Fajita Quesadillas is as fun as eating them! You’ll enjoy the process as you infuse your kitchen with the lovely scents of spices and sizzling chicken. Here’s how to make them:
- Start by preheating your oven to 400°F (200°C). While it’s heating up, grab a large baking sheet and lightly grease it with cooking spray or olive oil. This ensures a crispy finish on your quesadillas.
- Next, take your chicken breasts and place them in a ziplock bag or a large bowl. Sprinkle the fajita seasoning over the chicken, ensuring that each piece is well coated. This step is crucial for flavor, so don’t rush it!
- In a heavy-duty pan, heat 1 tablespoon of olive oil over medium-high heat for about 2 minutes until it’s hot. Carefully add the seasoned chicken to the pan and cook for about 5 to 6 minutes on each side or until the chicken is golden brown and cooked through. You’ll know it’s ready when the juices run clear and the meat is no longer pink.
- Once cooked, remove the chicken from the pan and let it cool for about 4 to 5 minutes. Then, chop it into small, bite-sized pieces. This makes it easier to fill your tortillas later on.
- In the same pan, add the sliced onion and bell peppers. Cook on high heat for 2 to 3 minutes, stirring occasionally, until they are lightly charred and caramelized. The sweetness of the vegetables will complement the spices beautifully.
- Now it’s time to assemble your quesadillas. Take the prepared tortillas and lay them on the greased baking sheet. On one half of each tortilla, add 1/4 of the chopped chicken, followed by 1/4 of the bell pepper and onion mixture, and then top it off with 1/4 cup of your favorite shredded cheese. Fold the other half of the tortilla over to create a pocket.
- Lightly spray the tops of the folded tortillas with cooking spray. This will help them achieve that perfect golden brown color while baking.
- Place the baking sheet in your preheated oven and bake for 10 minutes. After that, carefully flip each quesadilla and bake for another 10 minutes. They should be crispy and golden brown when they’re done.
- Once baked, remove the quesadillas from the oven and let them cool slightly. Serve immediately while they’re hot, with salsa, sour cream, or guacamole on the side for dipping. Enjoy the flavors and the company of your loved ones!
Things Worth Knowing
- Cooking Temperature: Make sure your oven is fully preheated before baking the quesadillas. This ensures they cook evenly and get that perfect crispiness.
- Chicken Cooking Tips: Always check the internal temperature of the chicken with a meat thermometer. It should reach 165°F (75°C) to ensure it’s safe to eat.
- Cheese Melting: For the best melting effect, use a combination of cheeses. This not only enhances flavor but also improves texture.
- Vegetable Choices: Feel free to experiment with different vegetables like zucchini or mushrooms for a unique twist!
Expert Tips about Crispy Baked Chicken Fajita Quesadillas
If you want to elevate your Crispy Baked Chicken Fajita Quesadillas, here are some tips to keep in mind. These helpful suggestions will ensure you achieve great results every time:
- Storage: Store any leftover quesadillas in an airtight container in the refrigerator for up to three days. Reheat in the oven or air fryer for the best texture.
- Freezing: You can freeze unbaked quesadillas. Just assemble them, wrap them tightly, and store in the freezer for up to a month. When ready to eat, bake directly from frozen, adding a few extra minutes to the cooking time.
- Pairing: Serve your quesadillas with a fresh salad, corn on the cob, or a light soup for a balanced meal.
- Flavor Variations: Experiment with different cheese blends or add jalapeños for a spicy kick! You could also use shrimp or beef if you prefer a different protein.
- Make Ahead: Prepare the chicken and vegetables ahead of time and store them separately in the fridge. When it’s time to eat, assembling and baking will be a breeze!
Side Dish Ideas for Crispy Baked Chicken Fajita Quesadillas
When serving Crispy Baked Chicken Fajita Quesadillas, consider these delicious side dishes and serving suggestions:
- Fresh Guacamole: Pairing your quesadillas with homemade guacamole enhances the creamy texture and provides a refreshing contrast to the spices.
- Mexican Street Corn: Also known as Elote, this flavorful corn dish with lime, cheese, and spices complements the quesadillas perfectly.
- Simple Salad: A light salad with mixed greens, tomatoes, and a tangy vinaigrette can balance the richness of the quesadillas.
- Salsa Choices: Serve a variety of salsas, from mild to spicy, to cater to different palates and enhance the overall experience.
- Occasional Serving: These quesadillas are perfect for casual get-togethers, game nights, or even as a fun lunch option. They fit well into any occasion!
FAQ
Conclusion
Crispy Baked Chicken Fajita Quesadillas are such a delightful dish that showcase the perfect combination of savory chicken, colorful vegetables, and gooey cheese. They’re a versatile meal that can easily be tailored to your tastes, which makes them a favorite in my home. I encourage you to give this recipe a try, as it’s not only simple but also guaranteed to bring joy to your dining table. Happy cooking!
Crispy Baked Chicken Fajita Quesadillas
Ingredients
Equipment
Method
- Start by preheating your oven to 400°F (200°C). While it’s heating up, grab a large baking sheet and lightly grease it with cooking spray or olive oil. This ensures a crispy finish on your quesadillas.
- Next, take your chicken breasts and place them in a ziplock bag or a large bowl. Sprinkle the fajita seasoning over the chicken, ensuring that each piece is well coated. This step is crucial for flavor, so don’t rush it!
- In a heavy-duty pan, heat 1 tablespoon of olive oil over medium-high heat for about 2 minutes until it’s hot. Carefully add the seasoned chicken to the pan and cook for about 5 to 6 minutes on each side or until the chicken is golden brown and cooked through. You’ll know it’s ready when the juices run clear and the meat is no longer pink.
- Once cooked, remove the chicken from the pan and let it cool for about 4 to 5 minutes. Then, chop it into small, bite-sized pieces. This makes it easier to fill your tortillas later on.
- In the same pan, add the sliced onion and bell peppers. Cook on high heat for 2 to 3 minutes, stirring occasionally, until they are lightly charred and caramelized. The sweetness of the vegetables will complement the spices beautifully.
- Now it’s time to assemble your quesadillas. Take the prepared tortillas and lay them on the greased baking sheet. On one half of each tortilla, add 1/4 of the chopped chicken, followed by 1/4 of the bell pepper and onion mixture, and then top it off with 1/4 cup of your favorite shredded cheese. Fold the other half of the tortilla over to create a pocket.
- Lightly spray the tops of the folded tortillas with cooking spray. This will help them achieve that perfect golden brown color while baking.
- Place the baking sheet in your preheated oven and bake for 10 minutes. After that, carefully flip each quesadilla and bake for another 10 minutes. They should be crispy and golden brown when they’re done.
- Once baked, remove the quesadillas from the oven and let them cool slightly. Serve immediately while they’re hot, with salsa, sour cream, or guacamole on the side for dipping. Enjoy the flavors and the company of your loved ones!
Notes
- Tip 1: Store any leftover quesadillas in an airtight container in the refrigerator for up to three days. Reheat in the oven or air fryer for the best texture.
- Tip 2: You can freeze unbaked quesadillas. Just assemble them, wrap them tightly, and store in the freezer for up to a month. When ready to eat, bake directly from frozen, adding a few extra minutes to the cooking time.
- Tip 3: Serve a variety of salsas, from mild to spicy, to cater to different palates and enhance the overall experience.
- Tip 4: Experiment with different cheese blends or add jalapeños for a spicy kick!
- Tip 5: Prepare the chicken and vegetables ahead of time and store them separately in the fridge. When it’s time to eat, assembling and baking will be a breeze!