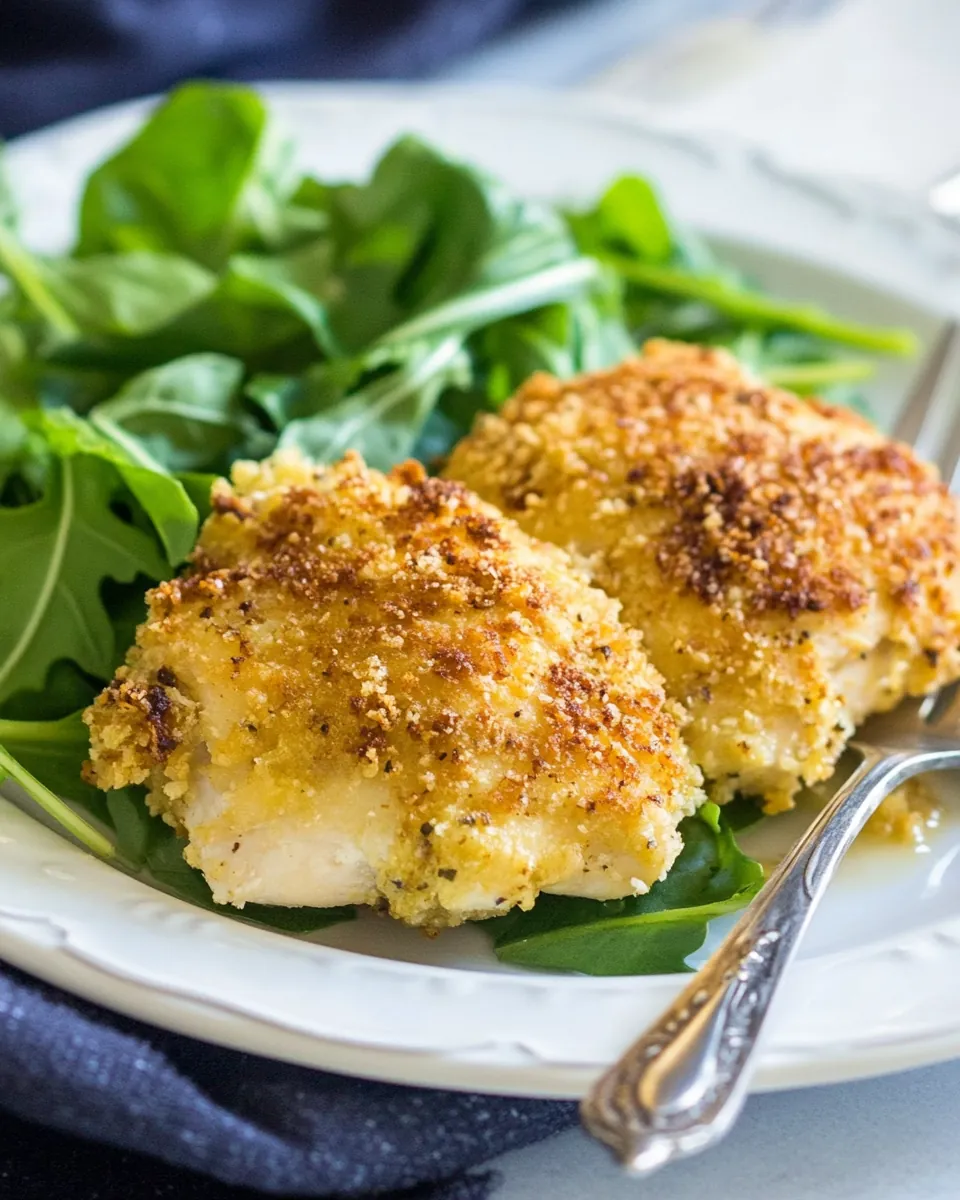
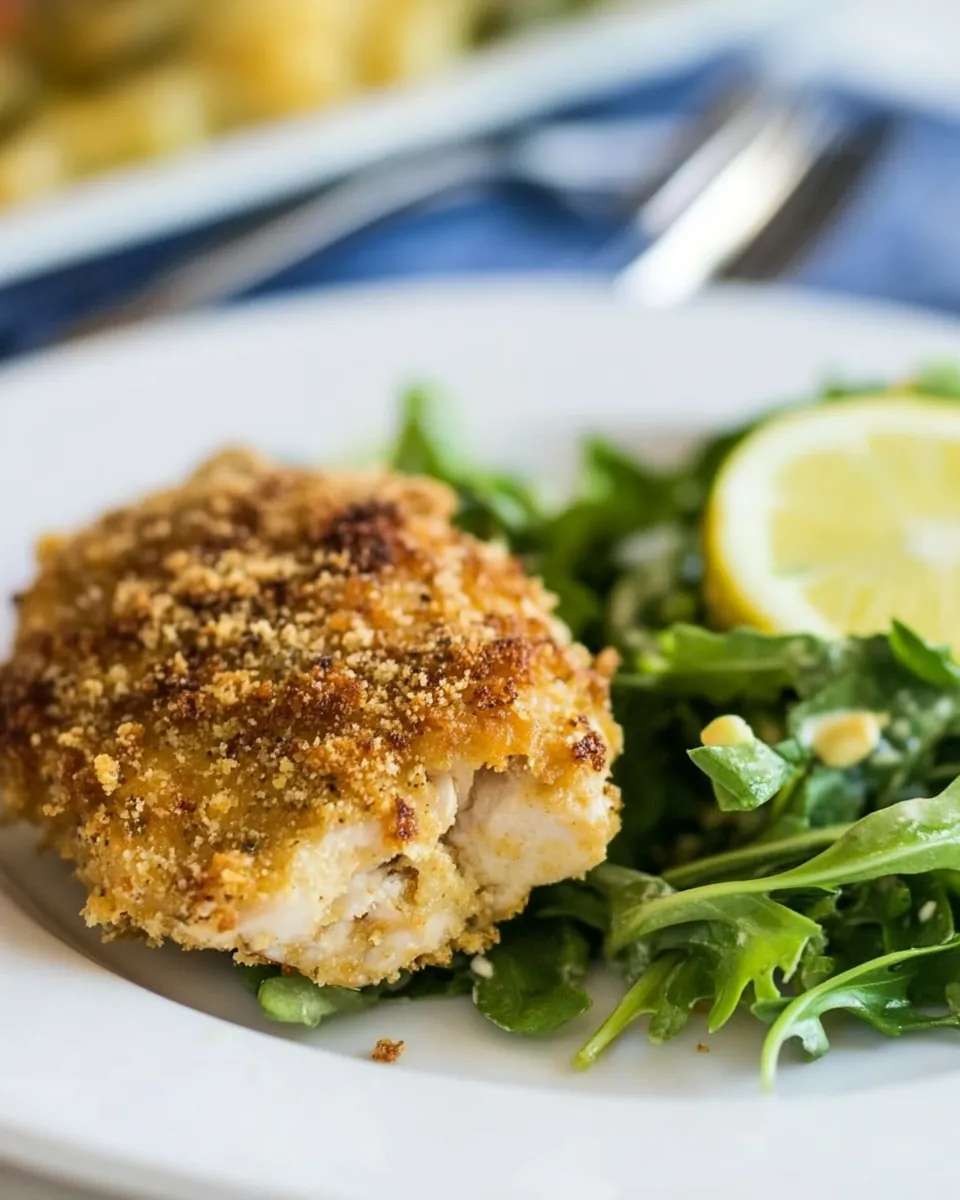
Crispy Chicken Caesar Thighs
The moment you take your first bite of Crispy Chicken Caesar Thighs, you’ll understand why this dish is a household favorite. It’s always challenging to find a meal that’s not only delicious but also satisfies everyone’s cravings. In my home, we have a special love for crispy chicken. It brings back memories of family gatherings where chicken was the star of the show. I remember the laughter, the chatter, and that unforgettable crunch as we dug into the crispy skin of the chicken thighs. Pairing this with a creamy Caesar salad elevates the experience to a whole new level. I can still see my family eagerly waiting around the table as the aroma filled the air, each of us excited to dive into this mouthwatering dish.
Recipe Snapshot
50 mins
15 mins
35 mins
Medium
440 kcal
34 g
Gluten-Free
27 g
Oven, Grater, Chef’s Knife, Baking Sheet
What You’ll Enjoy About This Crispy Chicken Caesar Thighs
It’s All About the Crunch
One of the coolest things about the Crispy Chicken Caesar Thighs is that crunch! That crispy exterior, combined with the tender chicken inside, creates a delightful contrast that keeps everyone coming back for more. I’ve tried many chicken recipes, but there’s something uniquely satisfying about biting into perfectly cooked chicken thighs.
Versatile and Crowd-Pleasing
This recipe is incredibly versatile. Whether you’re hosting a dinner party, prepping for a family meal, or just craving something comforting, these chicken thighs fit the bill. You can easily scale it up or down depending on the number of guests you have. Plus, they’re just as delightful cold the next day, if there are any leftovers!
Healthier Comfort Food
When you make Crispy Chicken Caesar Thighs, you’re not just indulging; you’re also feeding your body with nourishing ingredients. The protein in the chicken and the freshness of the Romaine lettuce and Caesar dressing make for a balanced meal that satisfies without the guilt.
A Perfect Pairing
What’s better than a delicious main dish? A side that complements it perfectly! The Caesar salad adds a refreshing crunch that balances the richness of the crispy chicken. Tossed with croutons and Parmesan cheese, it makes the meal even more delightful.
Simple and Quick to Prepare
This recipe is a breeze to whip up, making it perfect for a weeknight dinner. Even though it looks and tastes gourmet, you won’t spend all night in the kitchen. It’s all about simple steps that come together beautifully.
Key Ingredients for Crispy Chicken Caesar Thighs

What makes the ingredients in Crispy Chicken Caesar Thighs truly special is how they work together to create unforgettable flavors. The star of this dish is undoubtedly the chicken thighs, which are juicy and full of flavor. The croutons add a delicious crunch, while the Caesar dressing brings in that classic tanginess we all love. Each ingredient plays its part in creating a meal that’s not just food, but an experience.
- 8 chicken thighs, bone-in, skin on: These are the perfect cut for achieving that crispy exterior while keeping the meat juicy and flavorful.
- 1 cup finely crushed garlic flavored croutons: They provide that essential crunch that is so satisfying.
- 1/4 cup all-purpose flour: Used for dredging, it helps create a crispy coating when baked.
- 3/4 cup grated Parmesan cheese: Adds richness and a savory flavor that complements the chicken.
- 1/2 cup creamy Caesar dressing: This is what ties every flavor together, lending a creamy texture and delicious tang.
- 4 cups chopped Romaine lettuce: Fresh and crisp, it provides a refreshing contrast to the warm chicken.
- 1/2 cup garlic flavored croutons: Adds even more crunch to your Caesar salad!
Step by Step Guide for Crispy Chicken Caesar Thighs

Getting started with Crispy Chicken Caesar Thighs is easier than you might think! Follow these steps, and you’ll be enjoying a delicious meal in no time. There’s something so rewarding about cooking this dish, and you’ll love how simple yet satisfying it is.
- Preheat your oven to 375° F. This initial step is crucial, as a hot oven ensures that the chicken thighs will crisp up beautifully.
- Line a rimmed baking sheet with aluminum foil and place an oven-safe cooling rack inside. Lightly spray the rack with non-stick cooking spray. This helps the chicken cook evenly while allowing any excess fat to drip away.
- In a bowl, combine the crushed croutons and Parmesan cheese. Mix well to ensure the flavors meld together.
- In another bowl, place the flour. This will be your dredging station for the chicken thighs.
- Fill a third bowl with the Caesar dressing. This mixture will give the chicken its flavor and help the crouton coating stick.
- Take each chicken thigh and dredge the skinned part in the flour so that it’s well coated.
- Next, dip the floured side into the Caesar dressing ensuring it’s fully covered.
- Finally, press the dressing-coated side into the crouton and cheese mixture, ensuring a generous layer adheres. This step is key to achieving that crispy crust.
- Place the chicken thighs skin side up on the prepared rack. This will allow the skin to crisp up while baking.
- Bake for 35 to 40 minutes or until the chicken is cooked through and golden brown on the outside. You want to see that beautiful color and hear that crunch when you bite into it!
- While the chicken is baking, toss the Romaine lettuce with the remaining Caesar dressing, Parmesan cheese, and croutons in a large bowl. This will be your refreshing side salad.
- Once the chicken is done, serve it hot alongside the Caesar salad. Enjoy every crispy, creamy bite!
Things Worth Knowing
- Cooking Temperature: Ensure your oven is preheated to the right temperature to achieve that crispy texture.
- Resting Time: Let the chicken rest for a few minutes after baking. This allows the juices to redistribute.
- Use Quality Ingredients: Opt for high-quality chicken and Caesar dressing for the best flavor.
- Don’t Skip the Rack: Using a cooling rack elevates the chicken, allowing for even cooking and crispiness.
Helpful Hints
When it comes to making Crispy Chicken Caesar Thighs, a few tips can enhance your cooking experience. Here are some practical hints that will help you achieve the best results.
- Storage: Leftover chicken can be stored in an airtight container in the fridge for up to three days. Reheat in the oven for the best texture.
- Freezing: You can freeze cooked chicken thighs. Store in a freezer-safe container for up to three months. Just thaw and reheat when you’re ready to enjoy.
- Pairing: This dish pairs well with a light white wine or sparkling water to complement the flavors.
- Variations: Try adding fresh herbs like parsley or basil to the crouton mixture for an extra burst of flavor.
- Serving Suggestions: Consider adding grilled vegetables or a side of mashed potatoes for a heartier meal.
What to Pair With Crispy Chicken Caesar Thighs
When serving Crispy Chicken Caesar Thighs, the goal is to create a balanced meal that satisfies. Here are some fantastic pairing ideas:
- Garlic Bread: A side of warm garlic bread complements the flavors beautifully and is perfect for sopping up any leftover dressing.
- Steamed Vegetables: Freshly steamed broccoli or green beans add a nutritious touch and vibrant color to your dinner plate.
- Roasted Potatoes: Crispy roasted potatoes offer a delightful contrast to the chicken’s texture and are always a hit.
- Seasonal Salads: In addition to the Caesar, a seasonal salad with seasonal veggies can brighten the meal.
- Casual Gatherings: This dish is perfect for informal dinners or get-togethers with friends. It’s easy to make and serves a crowd!
- Family Dinner: Ideal for family meals, Crispy Chicken Caesar Thighs will please both kids and adults alike.
FAQ
Conclusion
The charm of Crispy Chicken Caesar Thighs lies in its perfect combination of crunchy texture and juicy flavor. It’s a dish that not only brings joy to your taste buds but also creates lasting memories around the dinner table. So, gather your ingredients and embrace the deliciousness this recipe offers. I can’t wait for you to try it out and see how quickly it becomes a favorite in your home!
Crispy Chicken Caesar Thighs
Ingredients
Equipment
Method
- Preheat your oven to 375° F. This initial step is crucial, as a hot oven ensures that the chicken thighs will crisp up beautifully.
- Line a rimmed baking sheet with aluminum foil and place an oven-safe cooling rack inside. Lightly spray the rack with non-stick cooking spray. This helps the chicken cook evenly while allowing any excess fat to drip away.
- In a bowl, combine the crushed croutons and Parmesan cheese. Mix well to ensure the flavors meld together.
- In another bowl, place the flour. This will be your dredging station for the chicken thighs.
- Fill a third bowl with the Caesar dressing. This mixture will give the chicken its flavor and help the crouton coating stick.
- Take each chicken thigh and dredge the skinned part in the flour so that it’s well coated.
- Next, dip the floured side into the Caesar dressing ensuring it's fully covered.
- Finally, press the dressing-coated side into the crouton and cheese mixture, ensuring a generous layer adheres. This step is key to achieving that crispy crust.
- Place the chicken thighs skin side up on the prepared rack. This will allow the skin to crisp up while baking.
- Bake for 35 to 40 minutes or until the chicken is cooked through and golden brown on the outside. You want to see that beautiful color and hear that crunch when you bite into it!
- While the chicken is baking, toss the Romaine lettuce with the remaining Caesar dressing, Parmesan cheese, and croutons in a large bowl. This will be your refreshing side salad.
- Once the chicken is done, serve it hot alongside the Caesar salad. Enjoy every crispy, creamy bite!