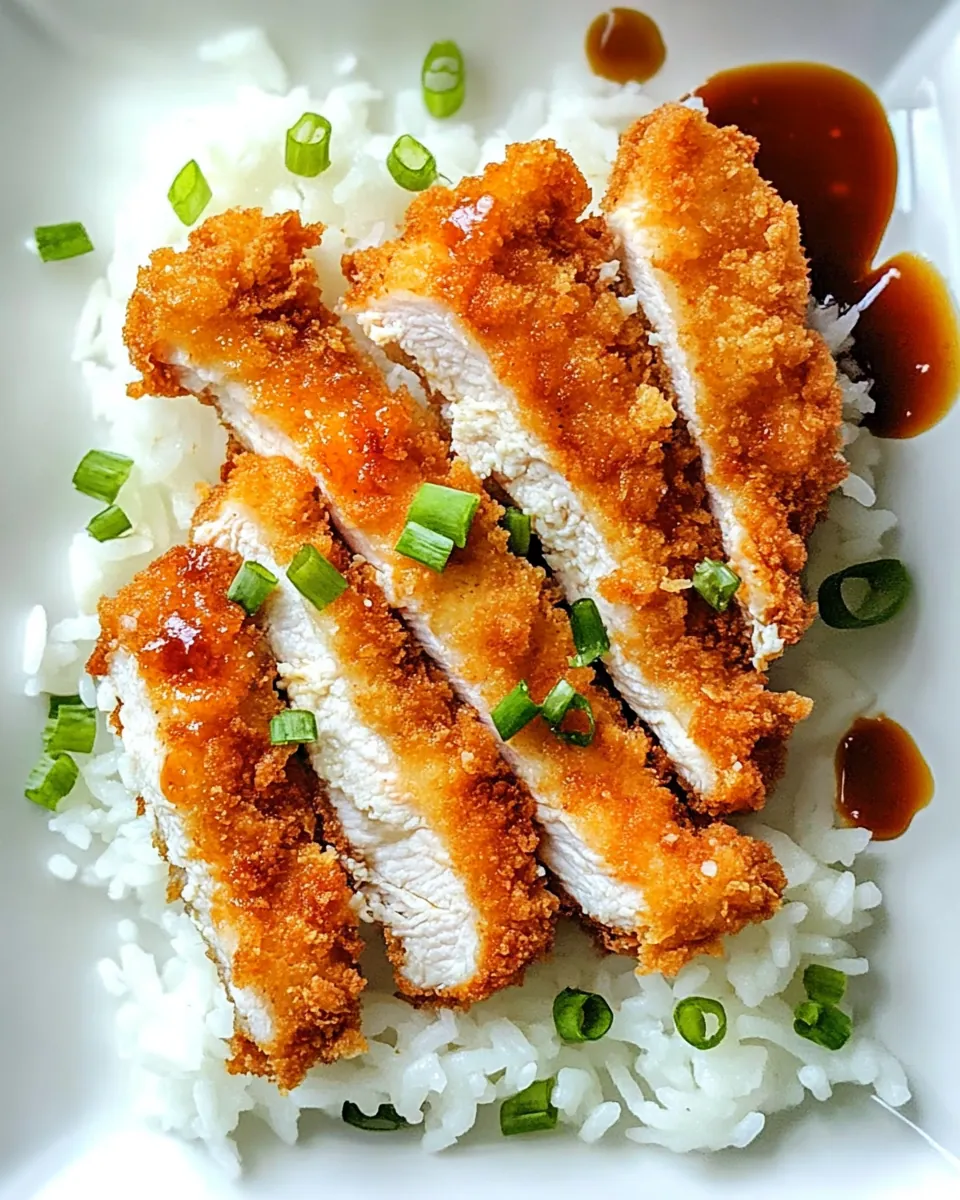
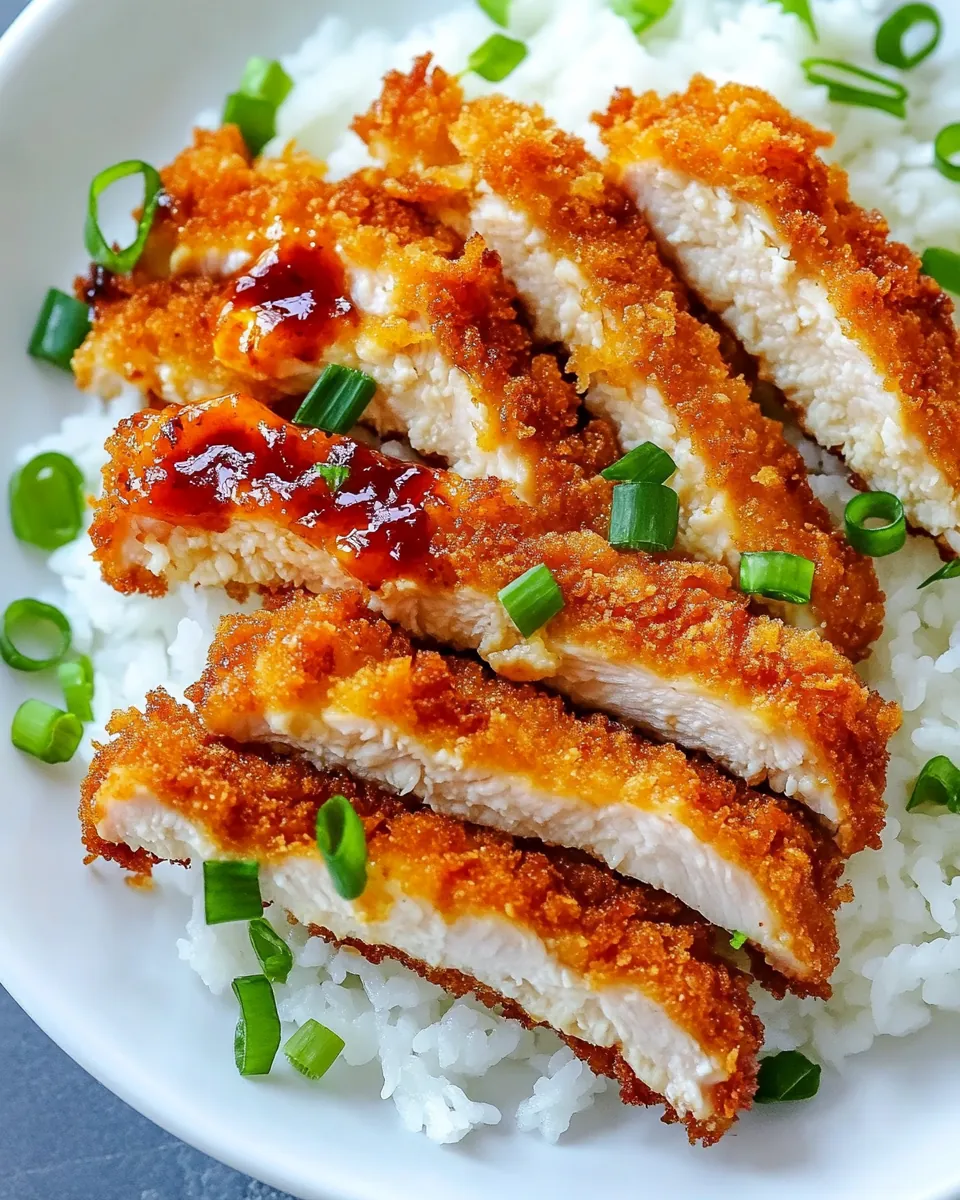
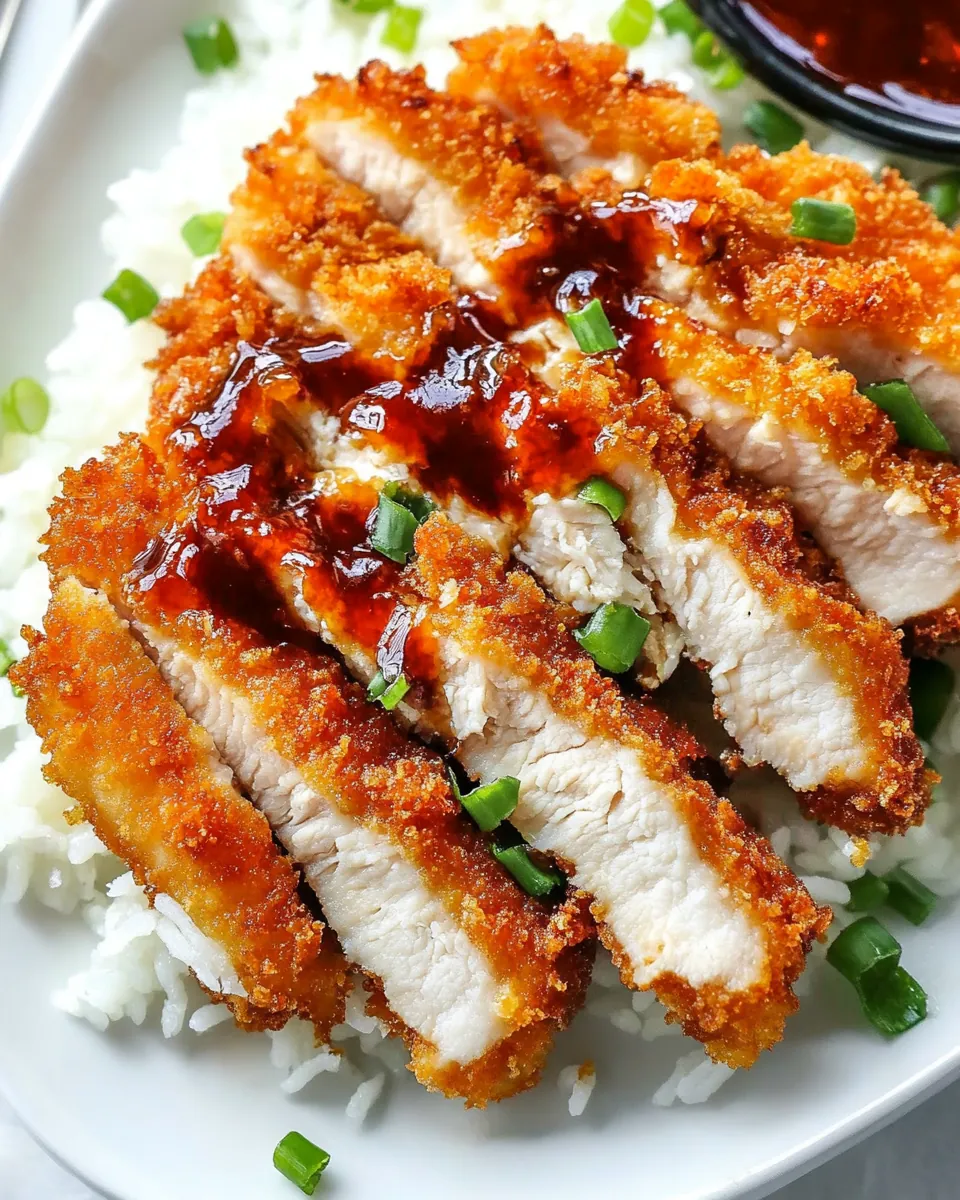
Crispy Japanese Chicken Katsu
The moment I think of comfort food, Crispy Japanese Chicken Katsu comes to mind. Growing up, my family had a tradition of gathering around the dinner table on Sundays, and one of our favorite meals was chicken katsu. The atmosphere was rich with the sounds of laughter and the enticing aroma of frying chicken. It was more than just a dish; it was a celebration of flavors shared among loved ones. I remember my mother teaching me how to pound the chicken just right, ensuring it would be tender and juicy. The golden, crunchy coating always made my mouth water, and the homemade tonkatsu sauce was the perfect finishing touch. Now, as an adult, I’ve embraced this recipe, always sharing it with friends or whipping it up when I’m craving something that feels like a warm hug.
Recipe Snapshot
30 mins
10 mins
20 mins
Medium
480 kcal
30 g
Gluten-Free, AIP
25 g
Skillet, Grater, Wooden Spoon, Chef’s Knife, Oven, Frying Pan
What Sets This Crispy Japanese Chicken Katsu Apart
It’s All About the Crunch
What sets Crispy Japanese Chicken Katsu apart is undoubtedly its satisfying crunch. The secret lies in the panko breadcrumbs, which create a light and airy texture that regular breadcrumbs simply can’t replicate. Each bite offers that delightful crunch, making it hard to stop at just one piece.
Flavor Explosion
The combination of flavors is another reason I adore this dish. The tonkatsu sauce is a symphony of sweet, tangy, and savory notes that elevate the simple breaded chicken to gourmet status. It’s easy to make at home, and the flavor is unmatched compared to store-bought options.
A Versatile Meal
This recipe is incredibly versatile. You can serve Crispy Japanese Chicken Katsu with rice, salad, or even as a sandwich. It fits perfectly into any meal, from a casual lunch to a more formal dinner. Plus, it’s simple enough for a weeknight, yet impressive enough for guests.
Perfectly Tender Chicken
By pounding the chicken breast to an even thickness, you ensure that it cooks evenly and remains juicy. The salting process before cooking also helps to lock in moisture, resulting in delicious, succulent chicken.
Fun Cooking Experience
Breading the chicken can be a fun activity to do with kids or friends. It’s a hands-on experience that brings everyone together in the kitchen, creating memories along with a fantastic dish. Watching the transformation of raw chicken to beautifully golden katsu is just the cherry on top!
Recipe Ingredients for Crispy Japanese Chicken Katsu
In creating Crispy Japanese Chicken Katsu, the ingredients work harmoniously to contribute to the dish’s delightful flavor and texture. Each component plays a vital role in achieving that perfect balance of crunch and taste.
- Ketchup: 1/2 cup – This is the base for the tonkatsu sauce, adding sweetness and acidity.
- Soy Sauce: 2 tablespoons – It brings depth of flavor and umami to the sauce.
- Brown Sugar: 2 teaspoons – A touch of sweetness enhances the overall flavor of the sauce.
- Mirin: 1 tablespoon – This Japanese rice wine contributes a mild sweetness and depth.
- Worcestershire Sauce: 2 teaspoons – Offers a tangy kick that complements the other flavors.
- Freshly Grated Ginger: 1 teaspoon – Adds a warm spice that brightens the dish.
- Finely Minced Garlic: 1 teaspoon – Provides a savory depth to the sauce.
- Boneless Skinless Chicken Breast: 1 pound – The star of the dish, it needs to be pounded to a uniform thickness.
- Salt: To taste – Essential for enhancing flavor.
- All-Purpose Flour: 1 1/2 cups – Used for dredging the chicken before the egg wash.
- Eggs: 3 – The binding agent that helps the breadcrumbs adhere to the chicken.
- Water: 1 1/2 tablespoons – Mixed with eggs for the egg wash to provide the right consistency.
- Panko Breadcrumbs: 3 cups – Essential for that crispy texture.
- Vegetable Oil: For cooking – Needed for frying the chicken to golden perfection.
Instructions for Crispy Japanese Chicken Katsu
Cooking Crispy Japanese Chicken Katsu is not just about following steps; it’s about enjoying the process. I love setting everything up and watching the transformation happen. Let’s dive into the delicious details!
Begin by preparing the tonkatsu sauce. In a small bowl, combine the ketchup, soy sauce, brown sugar, mirin, Worcestershire sauce, ginger, and garlic. Stir well to combine all the ingredients thoroughly. Allow the sauce to rest for at least 30 minutes to let the flavors meld beautifully.
While the sauce is resting, prepare your chicken. Take your halved chicken breast and place it between two sheets of plastic wrap. With a meat mallet, gently pound the chicken until it is about ¼ inch thick. This step is crucial for ensuring even cooking and tender results.
Once pounded, sprinkle the chicken liberally with salt. Cover it and place it in the refrigerator for about one hour. This salting helps to break down the proteins, making the chicken super juicy and flavorful.
After marinating, it’s time to set up your breading station. In three separate bowls, place the all-purpose flour in the first bowl, beat the eggs with the water in the second bowl, and fill the third bowl with panko breadcrumbs.
Now, it’s time to coat the chicken. Take a piece of the chicken and first dip it into the flour, shaking off any excess. Next, dip it into the egg wash, ensuring it’s completely coated, and then dredge it in the panko breadcrumbs until it’s fully covered. Repeat this for all pieces of chicken.
Once the chicken is breaded, place it on a wire rack to let the excess breadcrumbs fall off. This step helps ensure a crispier end result.
Next, preheat your oven to 200°F (95°C). This will keep the chicken warm while you fry it.
In a large skillet, add enough vegetable oil to coat the bottom about ½ inch deep. Heat the oil to 350°F (175°C). Ensure your pan is large enough to avoid overcrowding the chicken pieces.
Carefully add the chicken to the hot oil. Cook for about 1 to 2 minutes, just until the crust sets and turns golden. Flip the chicken over and cook for another 1 to 2 minutes until golden brown on the other side.
Continue cooking and flipping the chicken until it’s beautifully golden brown on both sides. Once cooked through, remove the chicken and place it on a clean wire rack. Transfer it to the preheated oven for about 7 to 8 more minutes to ensure it’s cooked all the way through. The internal temperature should reach 165°F (74°C).
Once fully cooked, remove the chicken from the oven and let it rest for a few minutes. Then, slice the chicken into thin strips that are easy to pick up with chopsticks.
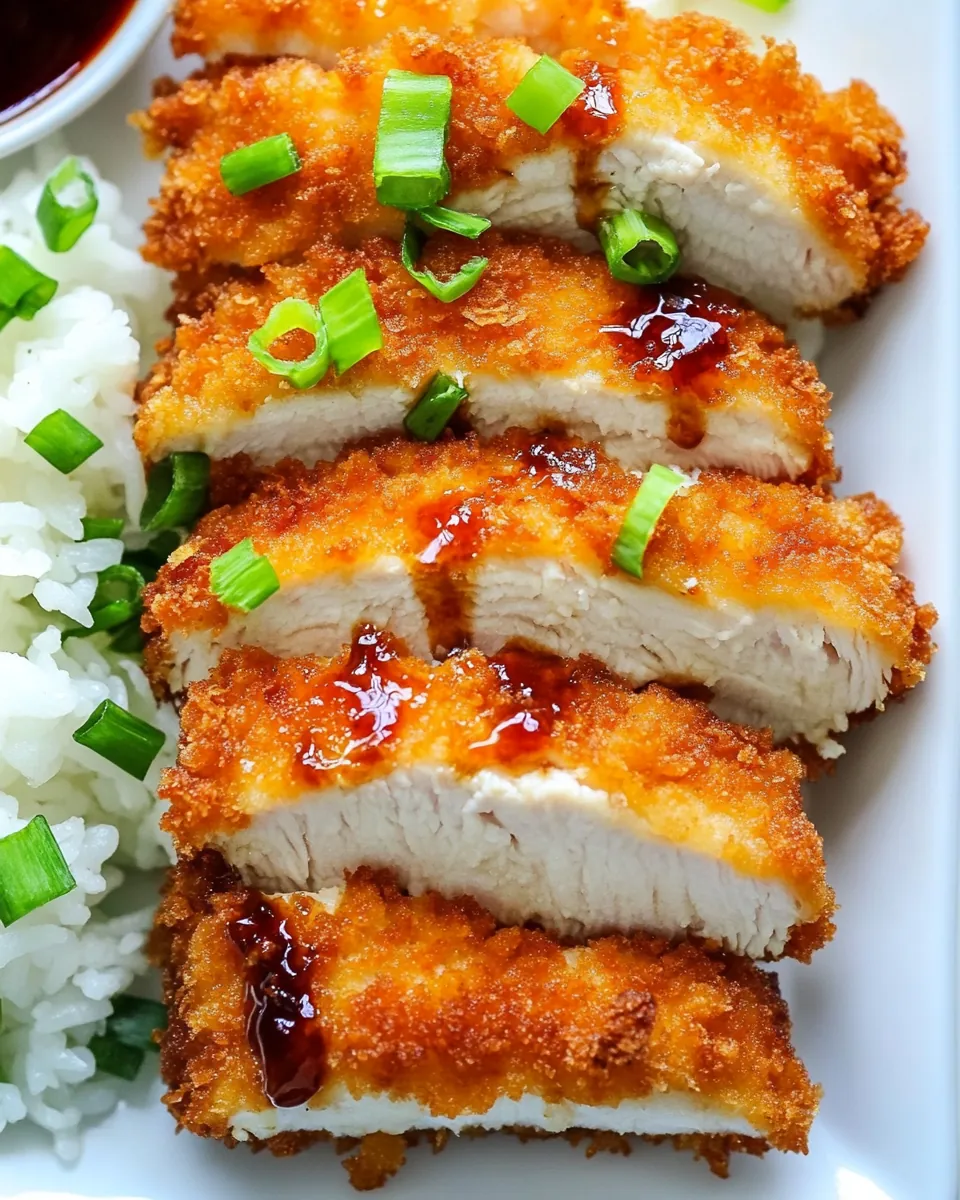
To serve, plate the Crispy Japanese Chicken Katsu with a generous drizzle of the tonkatsu sauce and enjoy it with rice and perhaps a side salad. You can also serve it with your favorite brown sauce for a delightful twist!
Things Worth Knowing
- Tip 1: Use fresh panko breadcrumbs for the best crunch. Stale breadcrumbs can result in a less satisfying texture.
- Tip 2: For extra flavor, you can marinate the chicken in soy sauce for a couple of hours before breading.
- Tip 3: If you want an even crispier result, double bread the chicken by repeating the flour, egg, and breadcrumb process.
- Tip 4: Always keep a close eye on the oil temperature; too hot can burn the breadcrumbs before the chicken is cooked through.
- Tip 5: Feel free to add some spices to your flour mixture for added flavor.
Substitutions and Tips
To enhance your cooking experience, here are some helpful tips for making Crispy Japanese Chicken Katsu even better!
- Storage: Leftover katsu can be kept in an airtight container in the fridge for up to three days. Reheat in the oven to restore some crunch.
- Freezing: You can freeze the breaded but uncooked chicken for up to a month. Just thaw and cook when you’re ready!
- Pairing: Serve with a light salad to balance the richness of the katsu. A simple cucumber salad works wonders.
- Flavor Boost: Add spices like paprika or onion powder to the flour for a unique twist.
- Serving Style: For a casual meal, serve the chicken in a sandwich with some crunchy vegetables.
Accompaniments for Crispy Japanese Chicken Katsu
When it comes to serving Crispy Japanese Chicken Katsu, the options are bountiful. Here are some wonderful accompaniments to consider:
- Steamed Rice: A classic pairing, the fluffy texture of rice complements the crunchy chicken beautifully.
- Coleslaw: A crunchy slaw adds a fresh and vibrant contrast to the dish, lightening the meal.
- Pickled Vegetables: Adding a side of pickled vegetables can provide a tangy bite that balances the meal.
- Curry Sauce: Drizzle with mild curry sauce for a fusion twist on the traditional flavors.
- Salad: A simple green salad with a sesame dressing is a refreshing side.
- Lunch Box: Excellent for bento boxes, Crispy Japanese Chicken Katsu keeps well and tastes great at room temperature.
- Garnish: Top with sliced green onions or sesame seeds for added texture and visual appeal.
FAQ
Conclusion
Crispy Japanese Chicken Katsu is truly a standout dish that combines the joy of crispy textures with rich flavors, making it a favorite in many households. The process of preparing it brings back cherished memories, reminding us of the love shared around the dinner table. I encourage you to give this recipe a try! It’s not just about the delicious meal; it’s about creating moments with family and friends. Dive in and enjoy the beautiful flavors of this Japanese classic!
Crispy Japanese Chicken Katsu
Ingredients
Equipment
Method
- Begin by preparing the tonkatsu sauce. In a small bowl, combine the ketchup, soy sauce, brown sugar, mirin, Worcestershire sauce, ginger, and garlic. Stir well to combine all the ingredients thoroughly. Allow the sauce to rest for at least 30 minutes to let the flavors meld beautifully.
- While the sauce is resting, prepare your chicken. Take your halved chicken breast and place it between two sheets of plastic wrap. With a meat mallet, gently pound the chicken until it is about ¼ inch thick. This step is crucial for ensuring even cooking and tender results.
- Once pounded, sprinkle the chicken liberally with salt. Cover it and place it in the refrigerator for about one hour. This salting helps to break down the proteins, making the chicken super juicy and flavorful.
- After marinating, it's time to set up your breading station. In three separate bowls, place the all-purpose flour in the first bowl, beat the eggs with the water in the second bowl, and fill the third bowl with panko breadcrumbs.
- Now, it's time to coat the chicken. Take a piece of the chicken and first dip it into the flour, shaking off any excess. Next, dip it into the egg wash, ensuring it’s completely coated, and then dredge it in the panko breadcrumbs until it’s fully covered. Repeat this for all pieces of chicken.
- Once the chicken is breaded, place it on a wire rack to let the excess breadcrumbs fall off. This step helps ensure a crispier end result.
- Next, preheat your oven to 200°F (95°C). This will keep the chicken warm while you fry it.
- In a large skillet, add enough vegetable oil to coat the bottom about ½ inch deep. Heat the oil to 350°F (175°C). Ensure your pan is large enough to avoid overcrowding the chicken pieces.
- Carefully add the chicken to the hot oil. Cook for about 1 to 2 minutes, just until the crust sets and turns golden. Flip the chicken over and cook for another 1 to 2 minutes until golden brown on the other side.
- Continue cooking and flipping the chicken until it's beautifully golden brown on both sides. Once cooked through, remove the chicken and place it on a clean wire rack. Transfer it to the preheated oven for about 7 to 8 more minutes to ensure it's cooked all the way through. The internal temperature should reach 165°F (74°C).
- Once fully cooked, remove the chicken from the oven and let it rest for a few minutes. Then, slice the chicken into thin strips that are easy to pick up with chopsticks.
- To serve, plate the Crispy Japanese Chicken Katsu with a generous drizzle of the tonkatsu sauce and enjoy it with rice and perhaps a side salad. You can also serve it with your favorite brown sauce for a delightful twist!