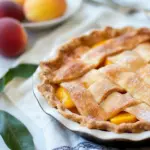
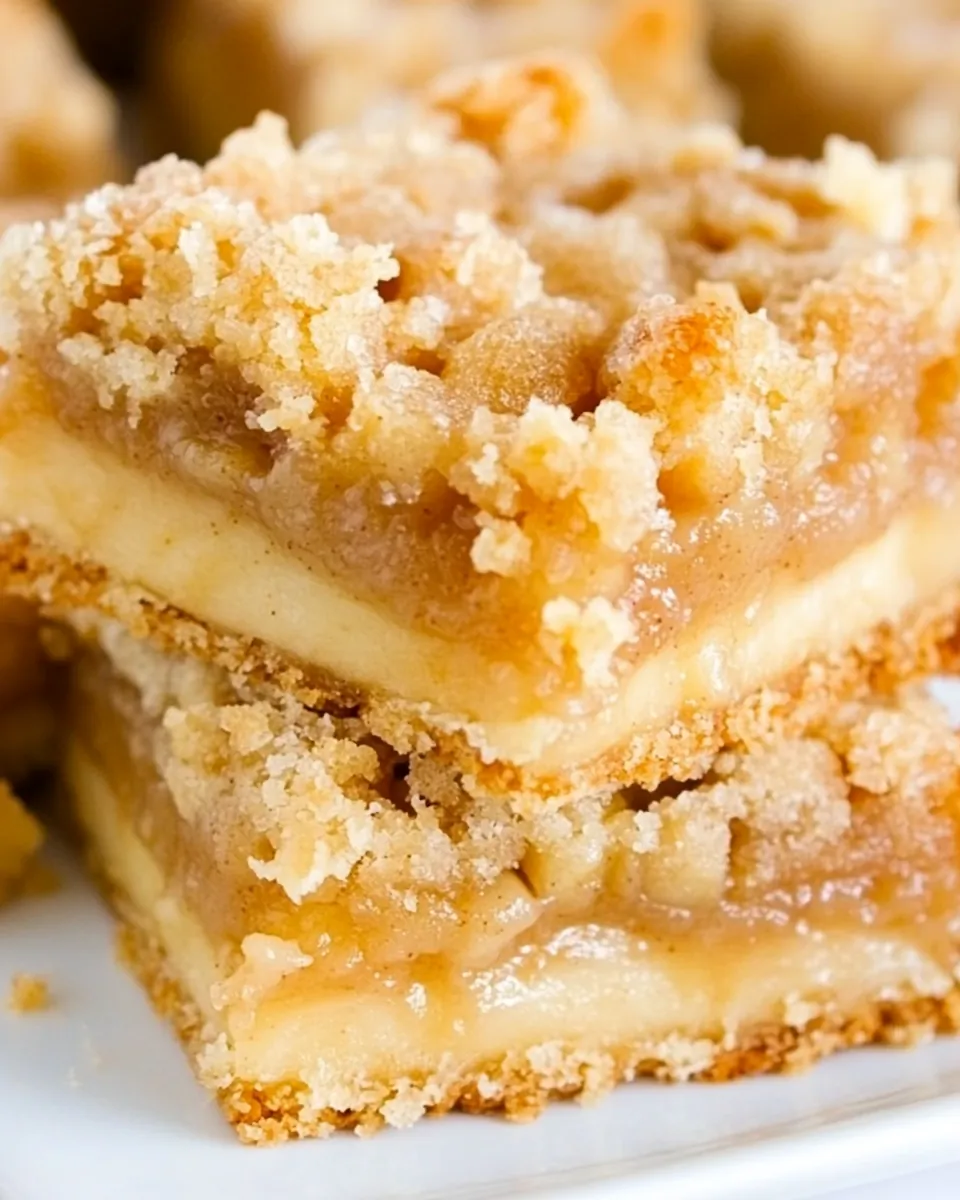
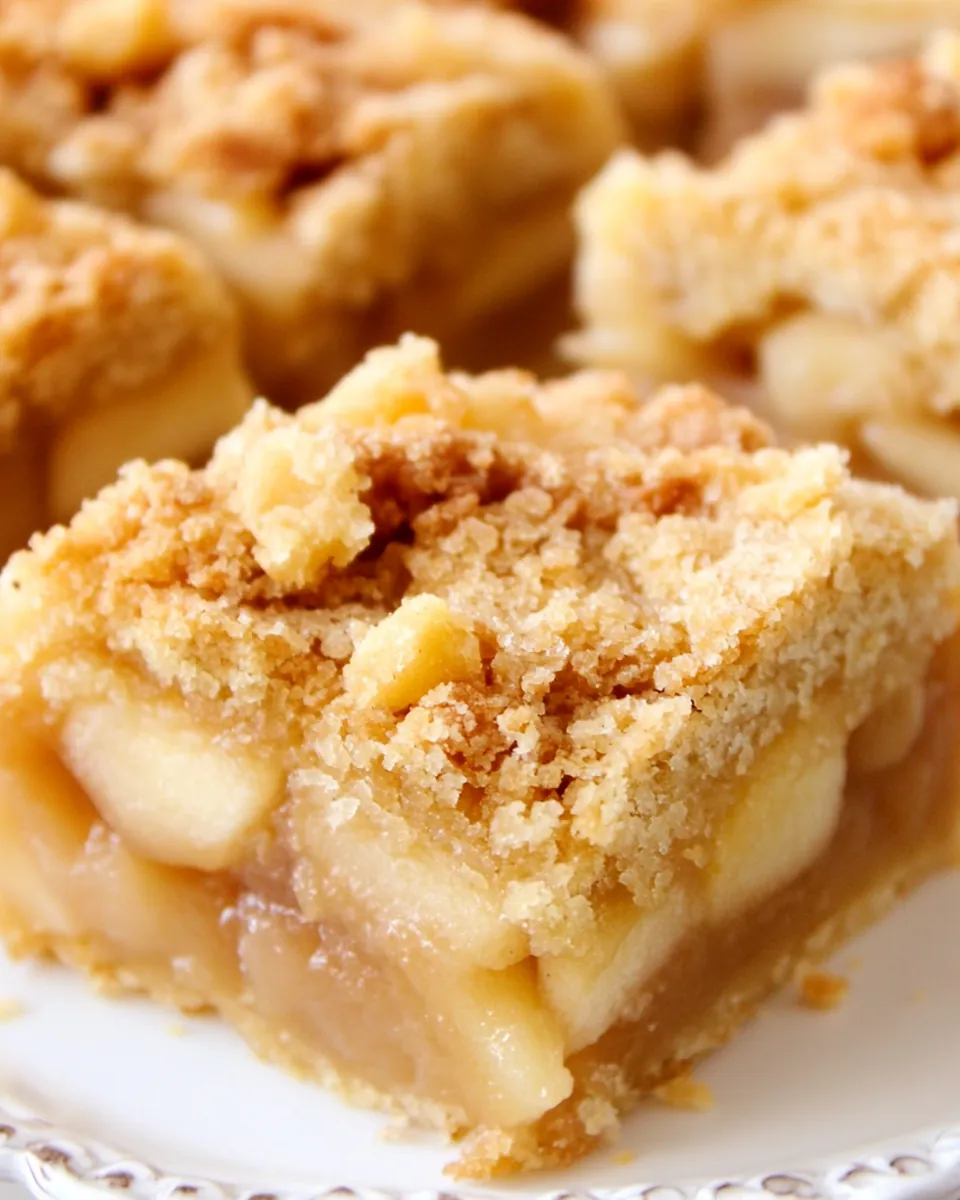
Dutch Apple Pie Bars
There’s something magical about the smell of warm Dutch Apple Pie Bars baking in the oven. I can still remember the first time I made these bars for my family. It was a brisk fall afternoon, leaves dancing outside my window, and the craving for something sweet and comforting was undeniable. I decided to put my own twist on a classic dessert that has been loved through generations. The combination of tart Granny Smith apples, buttery crumbs, and a hint of cinnamon creates a flavor profile that just feels like home. With every bite, you get the perfect mix of sweetness and spice, and the texture is a delightful contrast between the soft filling and crunchy topping. Whether it’s Thanksgiving or a simple family gathering, these bars are always a hit.
Recipe Snapshot
1 hr 30 mins
30 mins
60 mins
Medium
200 kcal
2g g
Gluten-Free, Low FODMAP
9g g
Food Processor, Oven, Baking Sheet, Skillet, Frying Pan, Peeler, Wooden Spoon, Whisk, Chef’s Knife
The Beauty of This Dutch Apple Pie Bars
Perfect for Gatherings
What I love most about Dutch Apple Pie Bars is their shareability. They’re easy to cut into squares, making them perfect for parties, potlucks, or even a cozy family dinner. Everyone can grab their slice without the fuss of traditional pie.
Easy Preparation
Unlike making a full pie, these bars come together quickly and require no special techniques. You don’t have to worry about rolling out crust; just press and bake. It’s a great way to enjoy the flavors of pie without all the work!
Seasonal Delight
These bars are fantastic throughout the fall season, especially around Thanksgiving. The combination of apples and cinnamon evokes a sense of warmth and nostalgia, making them a perfect dessert for autumn gatherings.
Versatile Serving Options
You can serve Dutch Apple Pie Bars warm, at room temperature, or even cold. They pair wonderfully with a scoop of vanilla ice cream or a dollop of whipped cream, making them versatile for any occasion.
Make Ahead
Another reason these bars are special? You can make them ahead of time! They store well in an airtight container, allowing you to prepare in advance and relax when guests arrive.
Nostalgic Flavors
The flavors in these bars remind me of my childhood, gathering around the table after dinner and sharing stories while enjoying a piece of pie. Each bite is a reminder of family traditions and love.
Recipe Ingredients for Dutch Apple Pie Bars
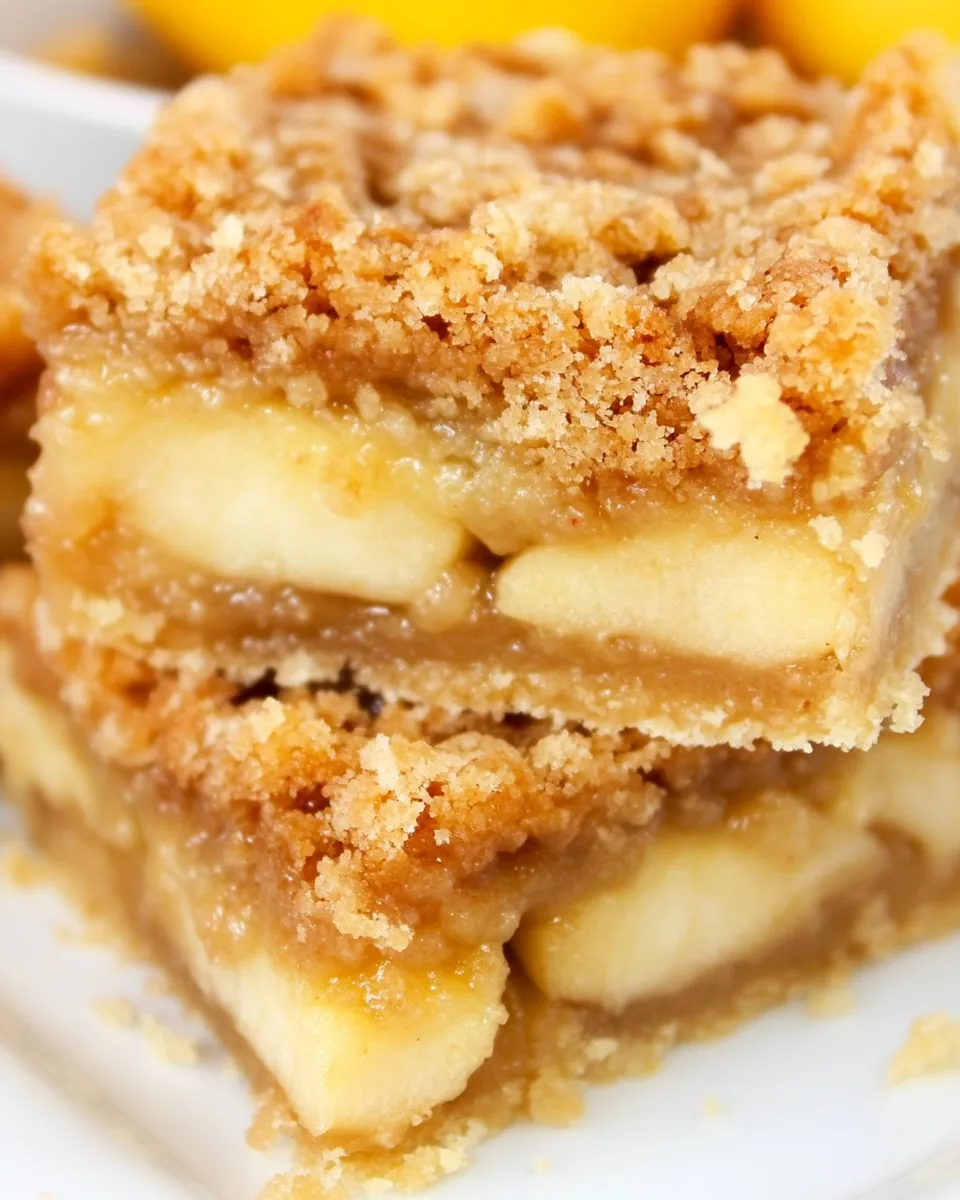
When it comes to the ingredients for Dutch Apple Pie Bars, simplicity is key. Each component plays a vital role in creating the perfect balance of flavors and textures. The crispness of the Granny Smith apples complements the sweetness of the brown sugars, while the buttery crust and streusel topping add heartiness. Here’s what you’ll need:
- 8 ounces animal crackers – These crushed crackers serve as the base for a rich, buttery crust that holds the filling perfectly.
- ⅓ cup light brown sugar – This adds a deep, caramel flavor that enhances the overall taste.
- Pinch salt – A small amount helps balance the sweetness.
- 6 tablespoons unsalted butter, melted – The butter brings richness to the crust.
- 1 cup all-purpose flour – A staple that binds the crust and streusel together.
- ⅓ cup granulated sugar – This sugar adds extra sweetness to the streusel and filling.
- 1 tablespoon cornmeal – This gives the topping a nice texture.
- 2 pounds Granny Smith apples, peeled, cored, and sliced – The star ingredient that provides the signature tart flavor.
- ¼ cup granulated sugar – For sweetening the apple filling.
- ½ teaspoon ground cinnamon – Adds warmth and spice, essential for any apple dessert.
Making This Dutch Apple Pie Bars
Making Dutch Apple Pie Bars is a rewarding experience that fills your kitchen with amazing aromas. Follow these steps, and you’ll enjoy the deliciousness in no time!
Preheat your oven to 375 degrees F. Prepare a 9×13-inch baking pan by lining it with foil or parchment paper, allowing edges to hang over for easy removal later. If you’re using foil, a quick spray with non-stick cooking spray can prevent sticking.
To make the crust, take the animal crackers, brown sugar, and a pinch of salt and process them in a food processor until they become fine crumbs, about 15 seconds. Next, drizzle in the melted butter and pulse until everything is combined. Press this crumb mixture evenly into the bottom of the prepared pan and bake until golden brown, usually around 10 to 13 minutes. Remove from the oven and let cool on a wire rack for about 20 minutes. Keep the oven on.
Now, let’s make the streusel topping. In a medium bowl, whisk together the flour, both types of sugar, and cornmeal. Add in the remaining melted butter and use a fork to combine until all the dry ingredients are evenly moistened. Set this aside for later.
For the filling, combine the sliced apples, melted butter, granulated sugar, ground cinnamon, and a pinch of salt in a large skillet over medium-high heat. Cook while stirring occasionally, until the apples soften and the liquid evaporates, around 8 to 10 minutes.
It’s time to assemble! Spread the cooked apples evenly over the cooled crust. Generously sprinkle the streusel topping over the apples, ensuring an even layer.
Return the pan to the oven and bake until the streusel is golden brown, about 25 to 30 minutes. The aroma will be heavenly!
Once baked, allow the bars to cool completely on a wire rack, which could take about 2 hours. This step is essential for the bars to set properly.
When cooled, carefully lift the bars out of the pan using the foil or parchment overhangs. Cut into squares and serve. These bars can be stored in an airtight container in the refrigerator or at room temperature.
Things Worth Knowing
- Be Mindful of the Apples: Choose tart apples like Granny Smith for the best flavor contrast.
- Crust Texture: Ensure your crust is well-pressed for a sturdy base that holds together.
- Cooling Time: Be patient! Allowing the bars to cool completely helps them set before cutting.
- Streusel Consistency: The streusel should be crumbly but not too dry; incorporate the butter just until mixed.
Recipe Variations about Dutch Apple Pie Bars
While the classic Dutch Apple Pie Bars are simply delightful, there are plenty of ways to switch things up! Here are some fun variations you might consider:
- Add Nuts: Incorporate chopped walnuts or pecans into the streusel topping for added crunch and flavor.
- Spice It Up: Experiment with different spices like nutmeg or ginger for a unique flavor twist.
- Change the Apples: Use a mix of apples like Honeycrisp or Fuji for added sweetness.
- Caramel Sauce: Drizzle with caramel sauce before serving for an indulgent treat.
- Mini Variants: Consider making mini bars in a muffin tin for individual servings.
- Gluten-Free Option: Substitute regular flour with a gluten-free blend to accommodate dietary preferences.
- Cheesecake Layer: Add a cream cheese layer beneath the apples for a cheesecake-like twist.
Great Combinations for Dutch Apple Pie Bars
Serving Dutch Apple Pie Bars can be as fun as making them! Here are some ideas to elevate your dessert experience:
- With Ice Cream: A scoop of vanilla ice cream on top of warm bars is a match made in heaven.
- Whipped Cream: Light and fluffy whipped cream can add a delicious touch to each bite.
- Pair with Coffee: Serve these bars with coffee or tea for a delightful afternoon snack.
- Seasonal Occasions: These bars are perfect for Thanksgiving, Christmas, or autumn gatherings.
- Picnic Treat: They make great portable desserts for picnics or potlucks.
- Storage Tip: Store leftovers in an airtight container in the fridge to keep them fresh.
FAQ
Conclusion
Dutch Apple Pie Bars are a delightful way to enjoy the classic flavors of apple pie in a convenient, shareable form. Their ease of preparation and rich, comforting taste make them a favorite for many occasions. I encourage you to try making these bars for your next gathering; they’re sure to impress your family and friends!
Dutch Apple Pie Bars
Ingredients
Equipment
Method
- Preheat your oven to 375 degrees F. Prepare a 9x13-inch baking pan by lining it with foil or parchment paper, allowing edges to hang over for easy removal later. If you’re using foil, a quick spray with non-stick cooking spray can prevent sticking.
- To make the crust, take the animal crackers, brown sugar, and a pinch of salt and process them in a food processor until they become fine crumbs, about 15 seconds. Next, drizzle in the melted butter and pulse until everything is combined. Press this crumb mixture evenly into the bottom of the prepared pan and bake until golden brown, usually around 10 to 13 minutes. Remove from the oven and let cool on a wire rack for about 20 minutes. Keep the oven on.
- Now, let’s make the streusel topping. In a medium bowl, whisk together the flour, both types of sugar, and cornmeal. Add in the remaining melted butter and use a fork to combine until all the dry ingredients are evenly moistened. Set this aside for later.
- For the filling, combine the sliced apples, melted butter, granulated sugar, ground cinnamon, and a pinch of salt in a large skillet over medium-high heat. Cook while stirring occasionally, until the apples soften and the liquid evaporates, around 8 to 10 minutes.
- It’s time to assemble! Spread the cooked apples evenly over the cooled crust. Generously sprinkle the streusel topping over the apples, ensuring an even layer.
- Return the pan to the oven and bake until the streusel is golden brown, about 25 to 30 minutes. The aroma will be heavenly!
- Once baked, allow the bars to cool completely on a wire rack, which could take about 2 hours. This step is essential for the bars to set properly.
- When cooled, carefully lift the bars out of the pan using the foil or parchment overhangs. Cut into squares and serve. These bars can be stored in an airtight container in the refrigerator or at room temperature.
Notes
- Tip 1: Nutritional values are based on one serving.