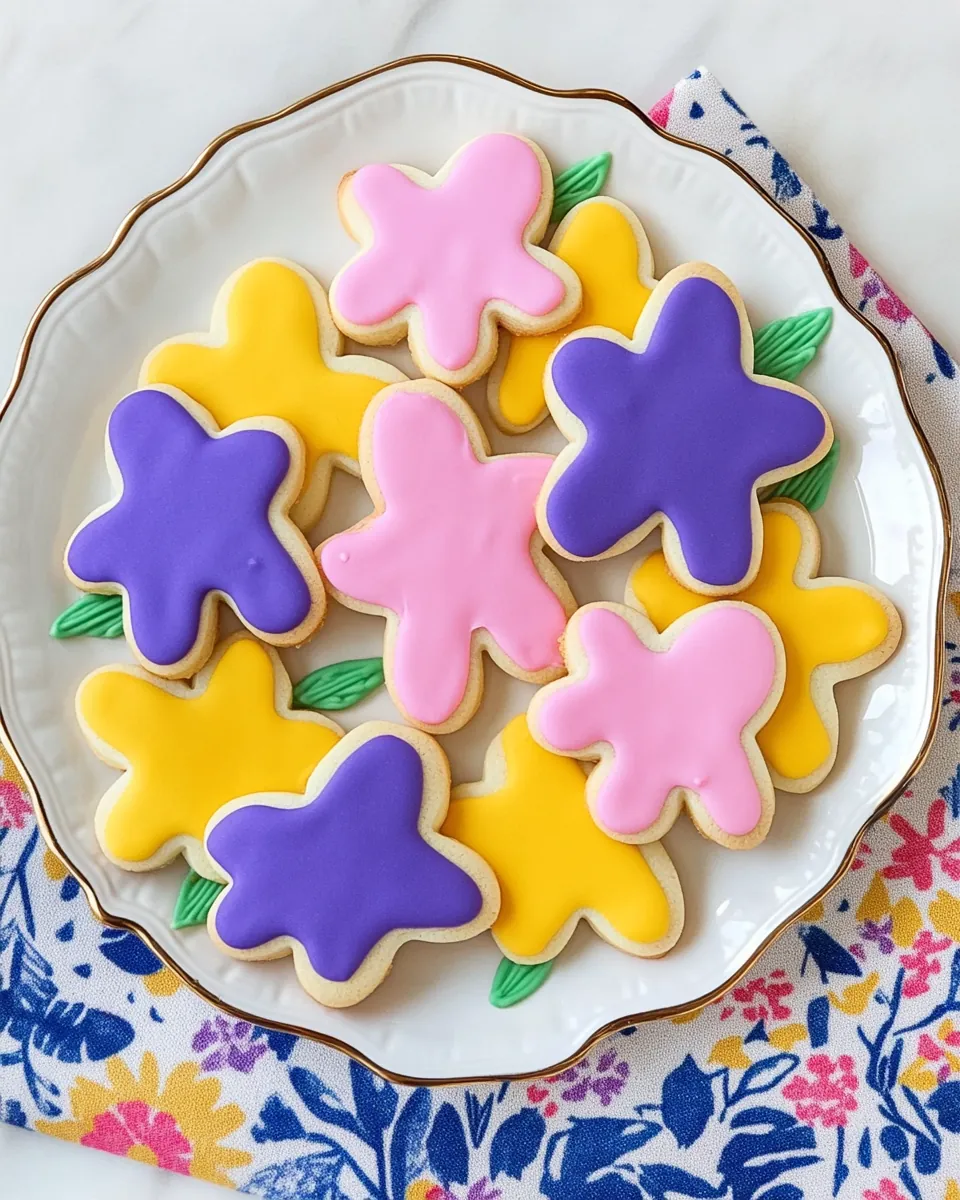
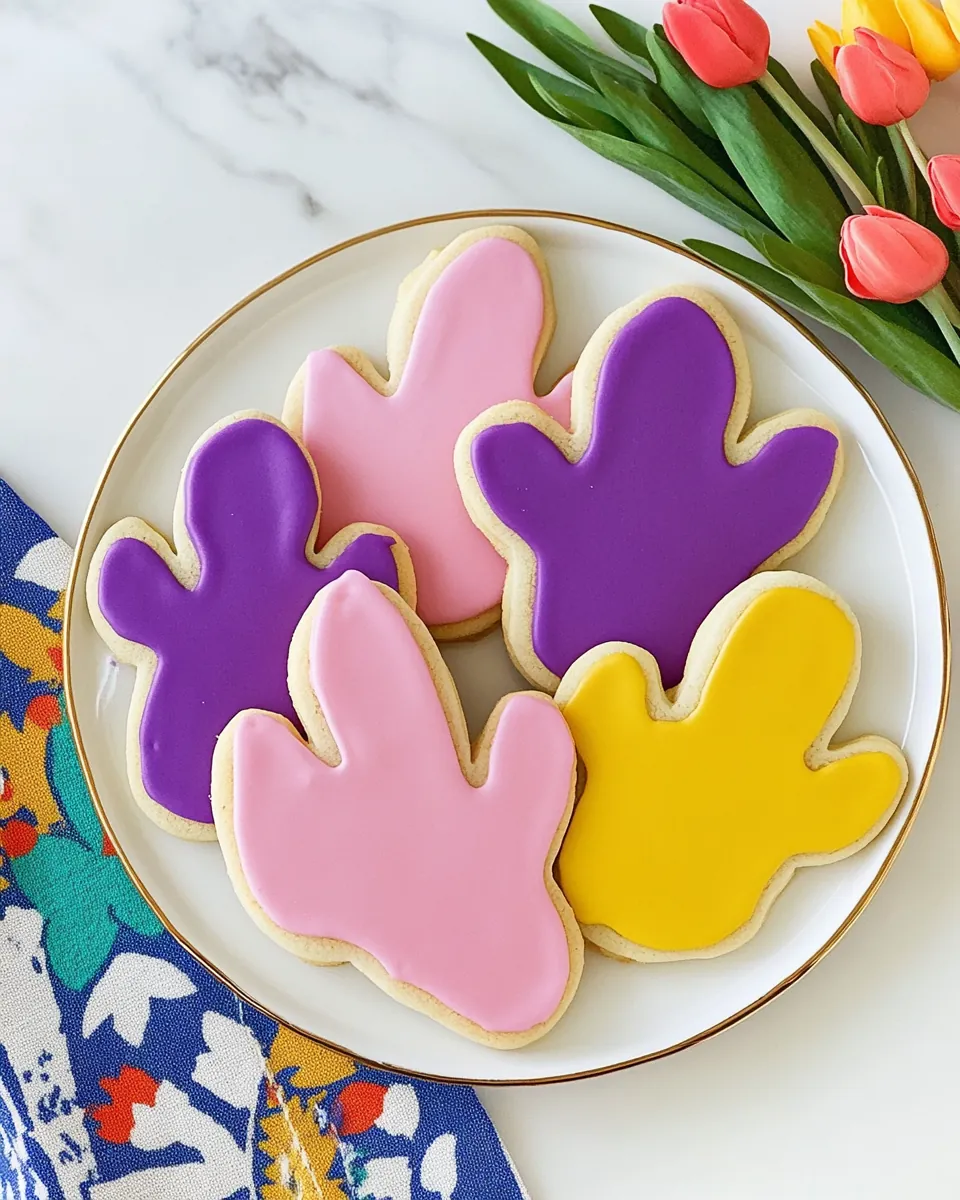
Easter Sugar Cookies
Every year, as Easter approaches, I find myself reminiscing about the sweet aroma of freshly baked Easter Sugar Cookies wafting through my home. These delightful cookies were a staple in my childhood, often decorated with colorful icing and sprinkles that brought joy to family gatherings. I remember the excitement of rolling out the dough and using cookie cutters in all shapes and sizes, transforming plain dough into festive treats. Baking these cookies has become a cherished tradition that I look forward to every spring, filling my kitchen with laughter and warmth.
Recipe Snapshot
28 mins
20 mins
8 mins
Medium
120 kcal
1 g
Gluten-Free, Low FODMAP
6 g
Baking Sheet, Storage Containers
The Charm of This Easter Sugar Cookies
They’re Perfectly Soft
One of the things I absolutely love about Easter Sugar Cookies is their soft texture. Unlike some cookies that can be overly crunchy or hard, these cookies have a melt-in-your-mouth softness that keeps people coming back for more. The secret lies in the balance of butter and sugar, creating a delightful dough that bakes to perfection.
Customization Galore
Another reason I adore this recipe is the endless possibilities for customization. You can add your favorite food colors to the icing or even mix in sprinkles directly into the dough. These cookies can be tailored to suit any celebration, making them not only a treat for Easter but for birthdays, holidays, and any special occasion.
A Fun Family Activity
Baking these cookies isn’t just about the end result; it’s about the joy of spending time with loved ones. I often invite friends or family over to help decorate the cookies, turning it into a fun and creative activity. Everyone can get involved, whether they’re rolling out dough, cutting shapes, or experimenting with icing techniques.
Beautifully Decorative
With their bright colors and whimsical designs, Easter Sugar Cookies are fantastic for decorating. This not only makes them visually appealing but also adds a personal touch. I love seeing how everyone expresses their creativity, from simple pastel icing to elaborate designs that bring out the Easter spirit.
Sweet Memories
Each batch of cookies brings back sweet memories of my childhood. The taste and smell of freshly baked cookies remind me of family gatherings and celebrations, creating a nostalgic experience with each bite. These cookies are more than just treats; they’re a way to connect with my past and share joy with those around me.
Ingredients Required for Easter Sugar Cookies
The ingredients for Easter Sugar Cookies are simple yet fundamental to achieving that delightful taste and texture. Each component plays a unique role in creating that perfect cookie everyone loves. From the basic structure provided by all-purpose flour to the sweetness of sugar, every ingredient comes together in harmony to create a memorable treat.
- 2 cups all-purpose flour – The foundation of our cookie dough, providing structure and chewiness.
- ½ cup sugar – Adds sweetness and helps create a tender texture.
- 1 teaspoon baking powder – This leavening agent helps the cookies rise and become fluffy.
- ½ cup unsalted butter (softened at room temperature) – Brings richness and flavor while ensuring a soft cookie.
- ¼ cup milk – Helps bind the ingredients together and provides moisture.
- 1 teaspoon salt – Balances the sweetness and enhances the overall flavor.
- ¼ cup powdered sugar – Used for icing, adding a smooth sweetness.
- 1-2 teaspoons milk – Adjusts the icing consistency for easy spreading.
- 1-2 drops food coloring (optional) – For vibrant decorations.
Instructions for Easter Sugar Cookies

Making Easter Sugar Cookies is a straightforward process that anyone can master. Just follow these steps, and you’ll soon be enjoying these delightful treats. Let’s dive into the joy of baking!
- Start by placing the dry ingredients, including the flour, baking powder, and salt, into a large mixing bowl. Stir them together well to ensure everything is evenly combined.
- Next, add the remaining ingredients: sugar, unsalted butter, milk, and any desired food coloring. Use your hands or a food processor to mix everything until you form a cohesive dough. If your dough feels crumbly, don’t worry! Just add a little extra milk, one tablespoon at a time, until it comes together nicely.
- Once your dough is ready, make two flattened discs and wrap them in plastic wrap. Refrigerate them for about 30 minutes to let the dough firm up, which will make rolling it out much easier.
- While the dough chills, preheat your oven to 375 degrees Fahrenheit. Line two baking sheets with parchment paper to prevent sticking.
- After chilling, take one disc of dough out of the fridge. Roll it out on a lightly floured surface to about ¼-inch thickness between two pieces of parchment paper. This will keep the dough from sticking to your rolling pin and make cleanup easier!
- Using your favorite cookie cutters, cut out shapes from the rolled dough and transfer them to the prepared baking sheets. If you have any leftover scraps, simply re-roll them and continue cutting out shapes.
- Bake in the preheated oven for 8 to 10 minutes, watching for a light golden color around the edges. If you have different shapes and sizes, smaller cookies may bake quicker, so keep an eye on them!
- Once baked, remove the cookies from the oven and let them cool on the baking sheet for about a minute. Then transfer them to a wire rack to cool completely.
- While the cookies cool, prepare the icing by mixing the powdered sugar with milk in a small bowl. Adjust the consistency to ensure it spreads easily. You can also add more food coloring if desired!
- Finally, once cooled, spread the icing on the cookies using a small butter knife or a paintbrush. If you want to add sprinkles or decorations, do it before the icing dries for best results!
Things Worth Knowing
- Chilling the Dough: Always chill your cookie dough before rolling it out. This helps to prevent the cookies from spreading too much in the oven, ensuring they maintain their shape.
- Use Parchment Paper: Line your baking sheets with parchment paper to make transferring the cookies easier and to prevent sticking.
- Watch the Bake Time: Since oven temperatures can vary, keep an eye on your cookies as they bake to avoid overbaking.
- Storage: To keep cookies fresh, store them in an airtight container at room temperature for up to five days.
Helpful Notes about Easter Sugar Cookies
Whether you’re a seasoned baker or just starting out, here are some helpful tips for making Easter Sugar Cookies even better!
- Storage: Store fully cooled cookies in an airtight container at room temperature for 3 to 5 days for optimal freshness.
- Freezing: You can freeze the cookie dough for up to 3 months. Just wrap individual discs tightly in plastic wrap and place them in a freezer bag.
- Decorating Tips: If you’re using sprinkles, add them to the iced cookies right after icing to ensure they stick well.
- Creaming Butter and Sugar: Make sure your butter is at room temperature before creaming it with sugar for the best texture.
- Experiment with Flavors: Feel free to add flavorings like almond or lemon zest to the dough for a fun twist!
Serving Options for Easter Sugar Cookies
Serving Easter Sugar Cookies is just as fun as baking them! Here are some delightful ways to enjoy these festive treats:
- Pair with Milk: These cookies are perfect with a cold glass of milk, enhancing their sweetness.
- Decorative Platters: Arrange them on a colorful platter for an eye-catching dessert table during Easter gatherings or brunches.
- Gift Giving: Package them in clear bags tied with a ribbon for sweet homemade gifts for friends and family during the holidays.
- Birthday Parties: These cookies can be customized for birthday parties, making them a fun addition to any celebration.
- Seasonal Variations: Change up the decorations and colors for different holidays throughout the year, such as Halloween or Christmas.
FAQ
Conclusion
In summary, Easter Sugar Cookies are not just a dessert; they’re a cherished tradition that brings family and friends together. The joy of baking and decorating these cookies creates lasting memories and delicious treats that everyone will love. So why not try making them for your next gathering? I promise you’ll be glad you did!

Easter Sugar Cookies
Ingredients
Equipment
Method
- Start by placing the dry ingredients, including the flour, baking powder, and salt, into a large mixing bowl. Stir them together well to ensure everything is evenly combined.
- Next, add the remaining ingredients: sugar, unsalted butter, milk, and any desired food coloring. Use your hands or a food processor to mix everything until you form a cohesive dough. If your dough feels crumbly, don’t worry! Just add a little extra milk, one tablespoon at a time, until it comes together nicely.
- Once your dough is ready, make two flattened discs and wrap them in plastic wrap. Refrigerate them for about 30 minutes to let the dough firm up, which will make rolling it out much easier.
- While the dough chills, preheat your oven to 375 degrees Fahrenheit. Line two baking sheets with parchment paper to prevent sticking.
- After chilling, take one disc of dough out of the fridge. Roll it out on a lightly floured surface to about ¼-inch thickness between two pieces of parchment paper. This will keep the dough from sticking to your rolling pin and make cleanup easier!
- Using your favorite cookie cutters, cut out shapes from the rolled dough and transfer them to the prepared baking sheets. If you have any leftover scraps, simply re-roll them and continue cutting out shapes.
- Bake in the preheated oven for 8 to 10 minutes, watching for a light golden color around the edges. If you have different shapes and sizes, smaller cookies may bake quicker, so keep an eye on them!
- Once baked, remove the cookies from the oven and let them cool on the baking sheet for about a minute. Then transfer them to a wire rack to cool completely.
- While the cookies cool, prepare the icing by mixing the powdered sugar with milk in a small bowl. Adjust the consistency to ensure it spreads easily. You can also add more food coloring if desired!
- Finally, once cooled, spread the icing on the cookies using a small butter knife or a paintbrush. If you want to add sprinkles or decorations, do it before the icing dries for best results!