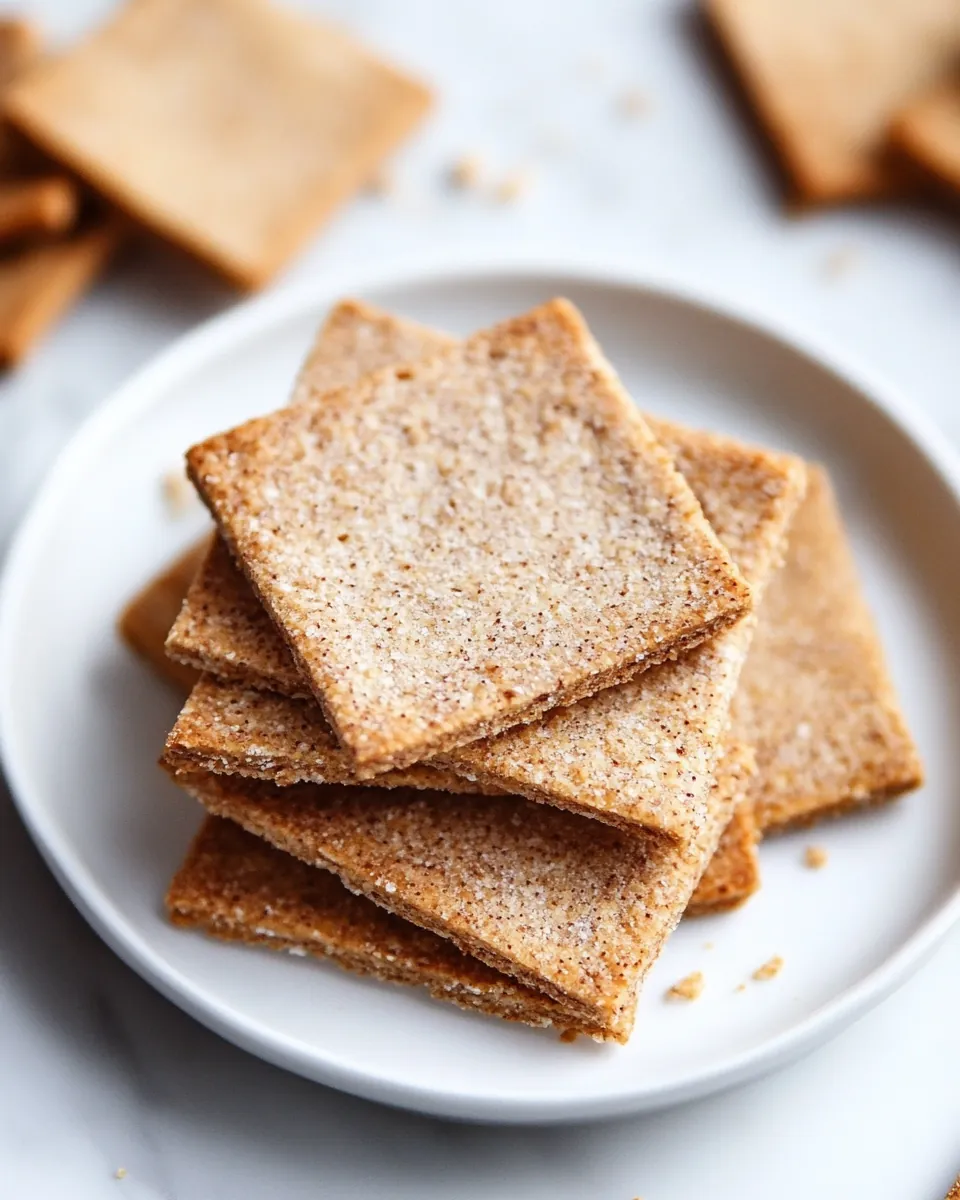
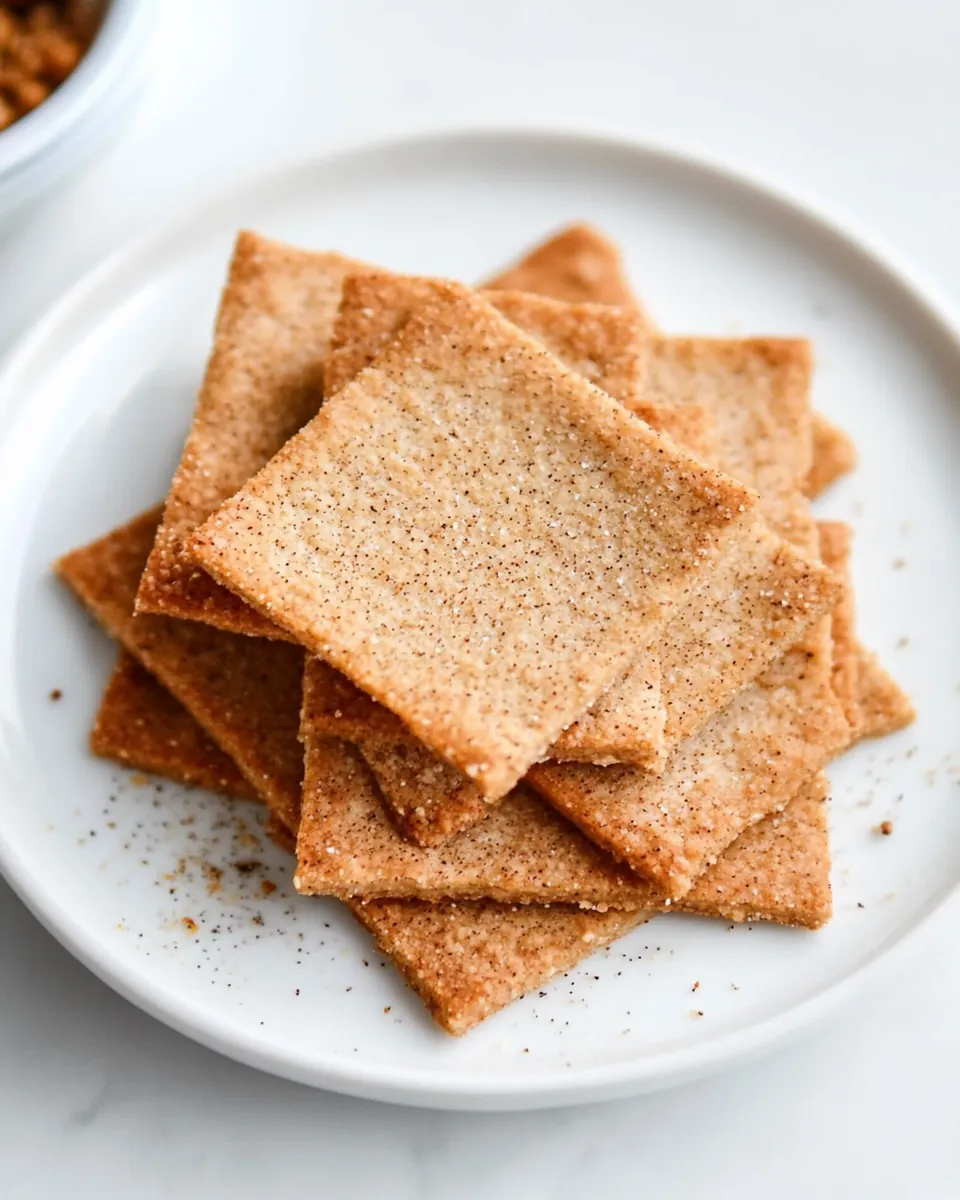
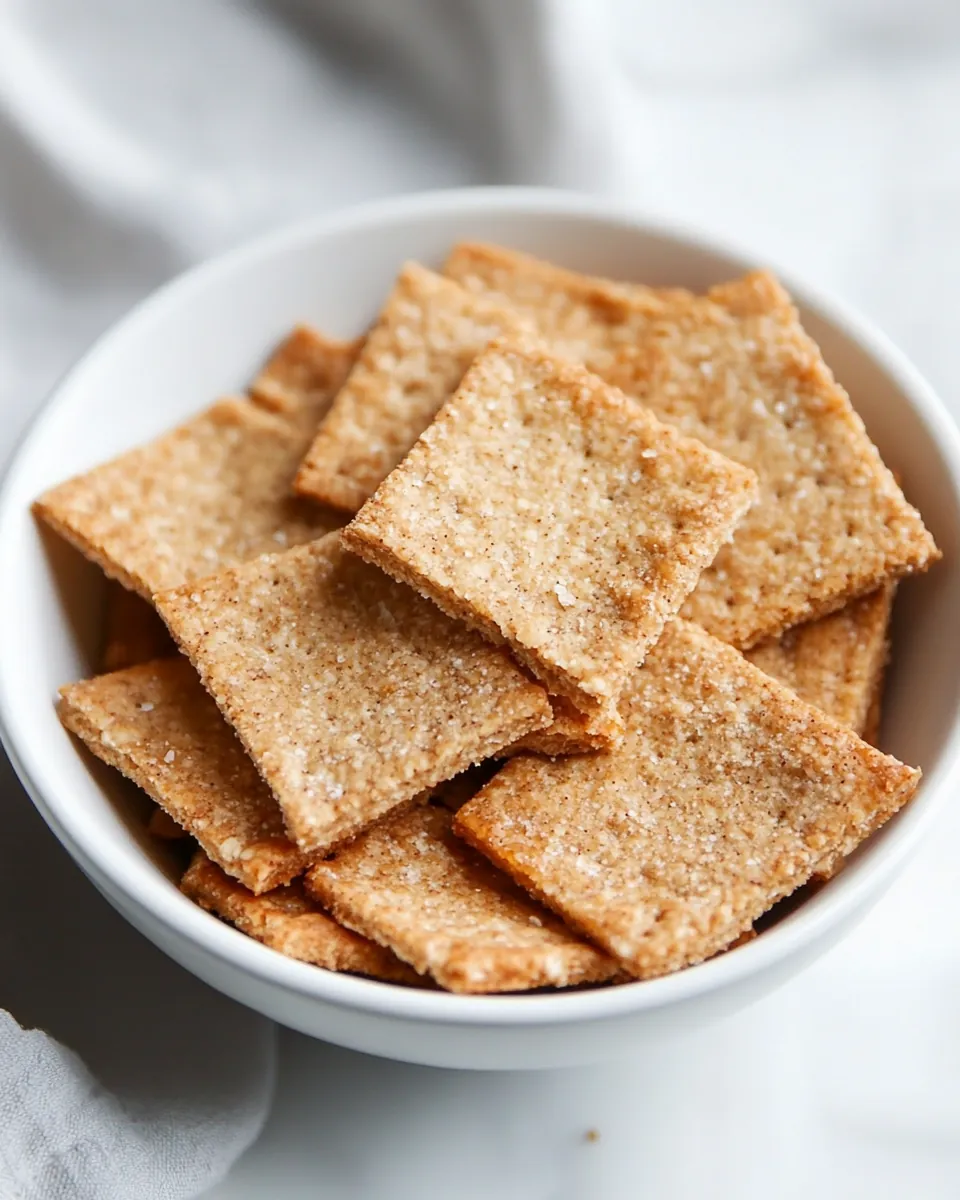
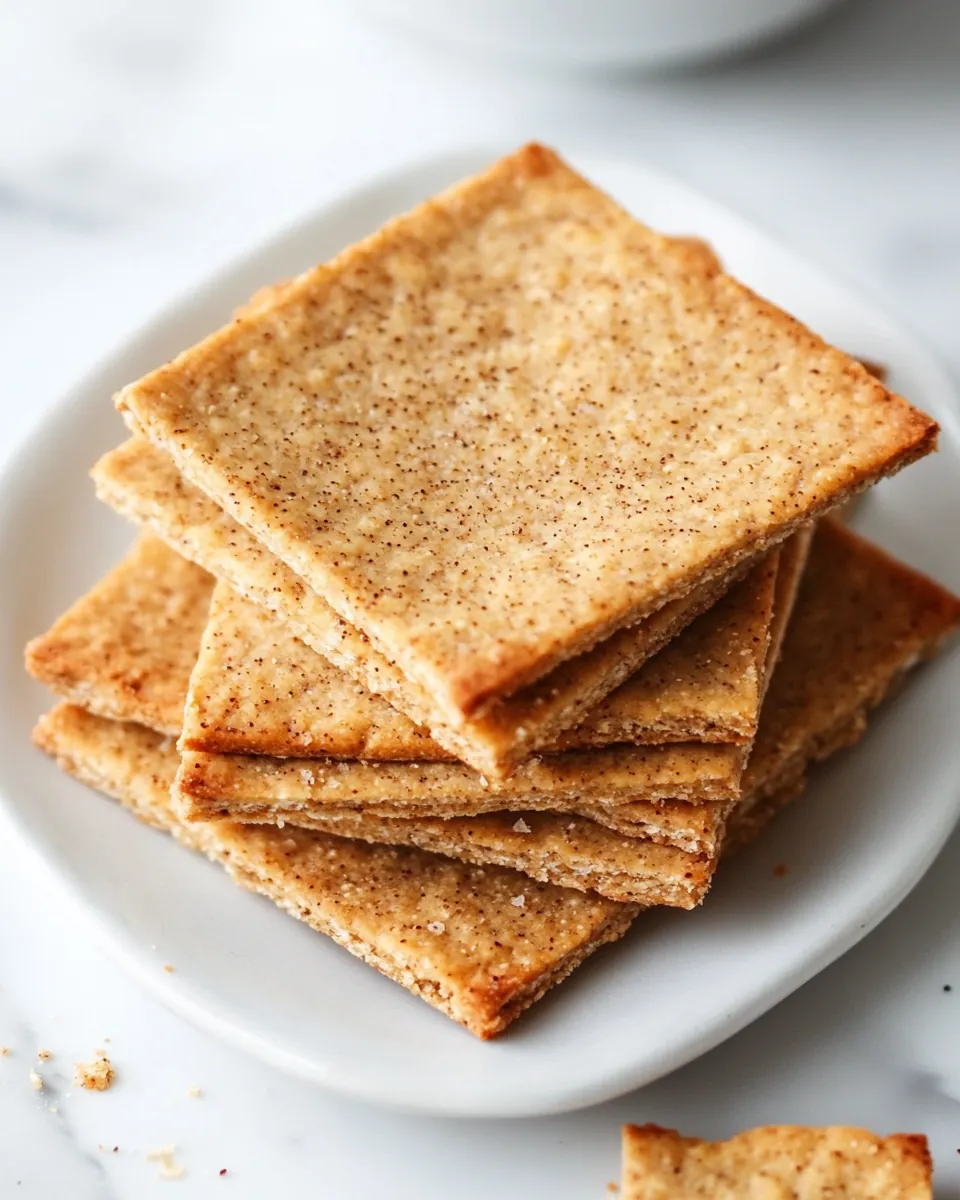
Gluten Free Graham Crackers
There’s something truly special about homemade snacks, and when it comes to the world of treats, Gluten Free Graham Crackers hold a unique place in my heart. I remember the first time I decided to make these delightful little squares. It was a rainy afternoon, and I found myself craving the nostalgic flavors of my childhood. I wanted something sweet, yet wholesome, something that would remind me of cozy family gatherings where laughter and stories were shared over snacks. I rummaged through my cupboards and realized I had all the ingredients at hand to craft these delicious crackers. With every step of the process, from mixing the dry ingredients to the moment they came out of the oven golden and crisp, I felt an overwhelming sense of joy. There’s a certain magic that happens in the kitchen when you realize you can create something so simple yet so satisfying. The aroma that filled my home was simply irresistible, and I couldn’t wait to share my creations with family and friends. These Gluten Free Graham Crackers have quickly become a staple in my household, perfect for snacking, making s’mores, or enjoying with a cup of tea. Join me as I take you through this delightful journey of flavors and textures that will surely bring back those cherished memories.
Recipe Snapshot
30 mins
15 mins
15 mins
Medium
100 kcal
3 g
Keto, Paleo, Gluten-Free
7 g
Oven, Baking Sheet, Whisk, Chef’s Knife, Mixing Bowl
The Best Thing About This Gluten Free Graham Crackers
1. Nostalgic Flavor
One of the best reasons to love these Gluten Free Graham Crackers is the nostalgia they evoke. They remind me of childhood camping trips, where we would roast marshmallows and make s’mores over a crackling fire. Each bite is a trip down memory lane, filled with sweet, nutty undertones that make my heart smile.
2. Perfect for Any Occasion
These delightful crackers are not just for s’mores! I love serving them with cheese, dips, or even crumbling them over yogurt. Their versatility makes them a fantastic addition to any gathering, be it a picnic, a party, or a cozy family movie night.
3. Simple and Wholesome Ingredients
Made with wholesome ingredients like almond flour and ground flax, these crackers are not only gluten-free but also packed with nutrients. Each ingredient plays a vital role in creating a deliciously crispy texture that satisfies your snack cravings without the guilt.
4. Easy to Make
One of the joys of making Gluten Free Graham Crackers is how easy they are to whip up. With minimal ingredients and straightforward steps, you can have a batch ready in no time. It’s a delightful baking project that’s perfect for both seasoned bakers and beginners.
5. Great for Family Bonding
Making these crackers isn’t just about the end product; it’s about the experience. Gather your loved ones, roll out the dough, and let the kids cut them into fun shapes. It’s a fantastic way to create lasting memories while enjoying quality time together.
Shopping List for Gluten Free Graham Crackers
When it comes to baking, the right ingredients can make all the difference. For these Gluten Free Graham Crackers, each component plays a crucial role in achieving that perfect crunch and rich flavor. Let’s explore the key players that make this recipe a winner!
- Almond Flour: This is the star of our recipe, providing a delicious nutty flavor while keeping it gluten-free.
- Ground Flax: Adds healthy omega-3 fatty acids and helps bind the ingredients together.
- Coconut Sugar: A natural sweetener that gives our crackers a hint of caramel flavor.
- Cinnamon: Provides warmth and a comforting aroma that enhances the overall taste.
- Salt: Just a pinch to balance the sweetness and elevate the flavors.
- Butter or Coconut Oil: Adding richness and helping to create that perfect crispy texture.
- Egg: Acts as a binder to hold everything together, ensuring our crackers stay intact.
Recipe Directions for Gluten Free Graham Crackers
Now that we have all our ingredients ready, let’s dive into the steps for creating these delightful Gluten Free Graham Crackers. It’s simpler than you might think. Follow along, and soon you’ll be enjoying your very own homemade snacks!
- Preheat your oven to 300ºF (approximately 150ºC) and position an oven rack in the center of the oven. This ensures your crackers bake evenly, achieving that perfect crisp.
- Line a baking sheet with parchment paper. This not only prevents sticking but also makes cleanup a breeze afterward.
- In a mixing bowl, whisk together the almond flour, ground flax, 1 tablespoon of coconut sugar, 1 teaspoon of cinnamon, and a pinch of salt. The mixture should appear well combined and have a pleasant, inviting aroma.
- Add 2 tablespoons of butter or coconut oil to the dry ingredients. Using your hands, rub the butter into the mixture until it resembles coarse crumbs with no visible chunks of butter remaining.
- Crack in the beaten egg and mix until the dough comes together. It should be a cohesive ball that is slightly sticky but manageable.
- Place the dough ball in the center of the lined baking sheet and cover it with a second piece of parchment paper. This will help you roll it out evenly.
- Using a rolling pin, roll out the dough into a rectangle that’s approximately 1/16” thick. Try to maintain an even thickness for uniform baking.
- Using a pizza cutter, slice the dough into squares or rectangles, depending on your preference. If you have any scraps, gather them and repeat the rolling process.
- Sprinkle the cut dough with the remaining coconut sugar and cinnamon for extra flavor and crunch.
- Bake in the preheated oven for about 15 to 20 minutes, or until they turn golden brown and crispy. Keep an eye on them to avoid burning.
- Once done, remove from the oven and let them cool on the baking sheet for a few minutes before transferring them to an airtight container. Store your crackers for up to 3 days, if they last that long!
Things Worth Knowing
- Texture Check: The key to perfect crackers is in the texture. They should be crispy and crumbly, so make sure to bake them until golden.
- Cooling Time: Allow the crackers to cool completely on a wire rack after baking. This helps them to firm up and maintain their crunch.
- Flavor Variations: Feel free to experiment with spices. A pinch of nutmeg or even a dash of vanilla can add a unique twist to your crackers.
- Thickness Matters: Aim for an even thickness when rolling out your dough. Thinner crackers will turn out crispier, while thicker ones may be chewier.
Tips for Success
Creating Gluten Free Graham Crackers can be a fun and rewarding experience. Here are some tips to ensure your baking adventure goes smoothly:
- Storage: Keep leftover crackers in an airtight container to maintain their crunch. They can stay fresh for up to three days.
- Freezing: You can freeze the dough for up to a month. Roll and cut the crackers before freezing, then just bake them from frozen!
- Pairing: Serve your crackers with various dips or cheese for a savory treat, or enjoy them with a cup of tea for a sweet snack.
- Experiment: Don’t hesitate to try out different flavors by adding nuts or dried fruits into the dough before baking.
- Batch Size: Consider doubling the recipe if you plan to share or want extras on hand. They make fantastic gifts, too!
What to Serve Alongside Gluten Free Graham Crackers
Your homemade Gluten Free Graham Crackers offer endless possibilities when it comes to pairing and serving. Here are some of my favorite suggestions:
- Cheese Board: Create a stunning cheese board featuring your crackers alongside various cheeses, nuts, and fruits.
- With Dips: Serve them with hummus or a spicy bean dip for a savory twist that’s sure to impress.
- Sweet Treats: Use them as the base for a cheesecake or crumble them up over ice cream for a delightful dessert.
- Seasonal Occasions: Enjoy these crackers during holiday gatherings or family events where snacks are a must.
- Picnics: Pack them up for a picnic in the park, paired with fresh fruits and refreshing drinks for a lovely afternoon.
FAQ
Conclusion
Making Gluten Free Graham Crackers is not only rewarding but also a delightful way to enjoy a treat that is both healthy and delicious. With their crispy texture and sweet, nutty flavor, these crackers are perfect for snacking or using in desserts. I encourage you to try this recipe! You’ll be amazed at how simple it is to create something so satisfying at home. Plus, they bring back wonderful memories while creating new ones!
Gluten Free Graham Crackers
Ingredients
Equipment
Method
- Preheat your oven to 300ºF (approximately 150ºC) and position an oven rack in the center of the oven. This ensures your crackers bake evenly, achieving that perfect crisp.
- Line a baking sheet with parchment paper. This not only prevents sticking but also makes cleanup a breeze afterward.
- In a mixing bowl, whisk together the almond flour, ground flax, 1 tablespoon of coconut sugar, 1 teaspoon of cinnamon, and a pinch of salt. The mixture should appear well combined and have a pleasant, inviting aroma.
- Add 2 tablespoons of butter or coconut oil to the dry ingredients. Using your hands, rub the butter into the mixture until it resembles coarse crumbs with no visible chunks of butter remaining.
- Crack in the beaten egg and mix until the dough comes together. It should be a cohesive ball that is slightly sticky but manageable.
- Place the dough ball in the center of the lined baking sheet and cover it with a second piece of parchment paper. This will help you roll it out evenly.
- Using a rolling pin, roll out the dough into a rectangle that’s approximately 1/16” thick. Try to maintain an even thickness for uniform baking.
- Using a pizza cutter, slice the dough into squares or rectangles, depending on your preference. If you have any scraps, gather them and repeat the rolling process.
- Sprinkle the cut dough with the remaining coconut sugar and cinnamon for extra flavor and crunch.
- Bake in the preheated oven for about 15 to 20 minutes, or until they turn golden brown and crispy. Keep an eye on them to avoid burning.
- Once done, remove from the oven and let them cool on the baking sheet for a few minutes before transferring them to an airtight container. Store your crackers for up to 3 days, if they last that long!
Notes
- Tip 1: Keep leftover crackers in an airtight container to maintain their crunch. They can stay fresh for up to three days.
- Tip 2: You can freeze the dough for up to a month. Roll and cut the crackers before freezing, then just bake them from frozen!
- Tip 3: Serve your crackers with various dips or cheese for a savory treat, or enjoy them with a cup of tea for a sweet snack.
- Tip 4: Don’t hesitate to try out different flavors by adding nuts or dried fruits into the dough before baking.
- Tip 5: Consider doubling the recipe if you plan to share or want extras on hand. They make fantastic gifts, too!