Golden Oreo Truffles
The moment I first tasted Golden Oreo Truffles, I knew I had stumbled upon a true gem in the world of desserts. It was a chilly evening, and I was surrounded by friends, each of us indulging in our favorite holiday treats. Suddenly, someone brought out these delightful little orbs, shimmering with golden sprinkles and drizzles of chocolate. With one bite, I was transported to a blissful state of indulgence, where every flavor danced together in perfect harmony. These Golden Oreo Truffles became the highlight of our festive gathering, and ever since, I’ve made it a tradition to whip them up during the holiday season. They’re incredibly easy to prepare, and the best part? No baking is required!
Recipe Snapshot
20 mins
20 mins
0 mins
Medium
70 kcal
1 g
Keto, Paleo, Whole30
4 g
Food Processor, Mixing Bowl, Wooden Spoon
What We Adore About This Golden Oreo Truffles
Effortless Preparation
One of the reasons I adore Golden Oreo Truffles is how simple they are to make. With just a handful of ingredients, you can create something that looks and tastes like it took hours in the kitchen. You start by crushing the cookies, mixing them with cream cheese, and forming lovely little balls. It’s so easy that I often involve my kids in the fun!
Decadent Flavor
The blend of crushed golden Oreos and creamy cream cheese creates a rich flavor profile that’s hard to resist. Once you dip these truffles in chocolate, they transform into a luxurious dessert that satisfies any sweet tooth. Each bite bursts with sweetness, making them perfect for holiday gatherings.
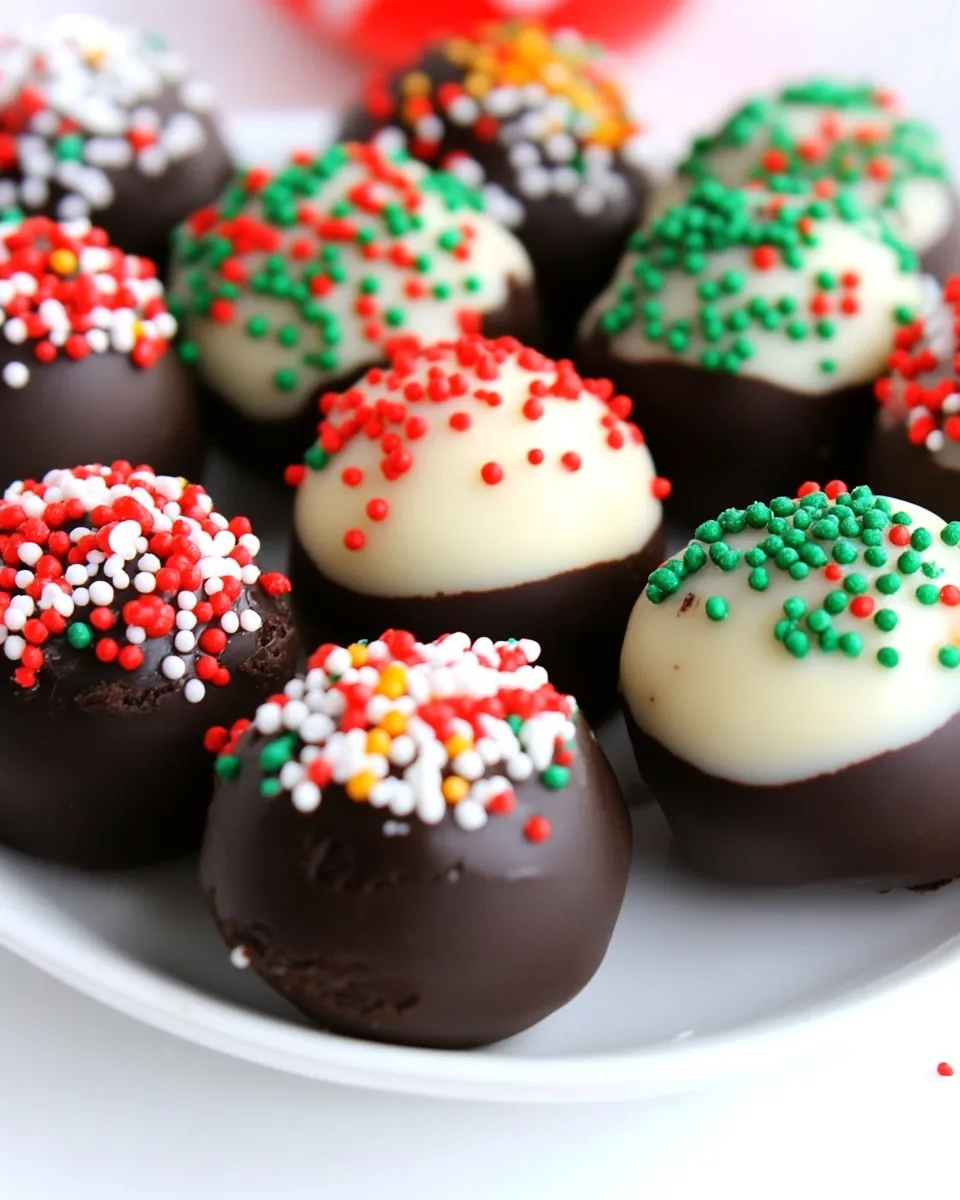
Customizable Toppings
I love to get creative with the toppings on my Golden Oreo Truffles. Whether it’s festive sprinkles, crushed nuts, or even a drizzle of white chocolate, the options are endless. You can match the truffles to any occasion, making them a versatile treat that can adapt to any holiday or celebration.
Perfect for Gifting
These truffles also make fantastic gifts! I often package them in decorative boxes or jars, tied with pretty ribbons. Friends and family can’t resist these treats, and it feels great to share something homemade that brings joy to others. Who wouldn’t love to receive a batch of Golden Oreo Truffles?
Long-Lasting Delight
Another reason to love these truffles is their shelf life. Once made, you can store them in the fridge and enjoy them for up to two weeks. If you want to keep them for longer, they freeze beautifully for up to two months. This makes them a great option for meal prep during the busy holiday season.
What You Need for Golden Oreo Truffles
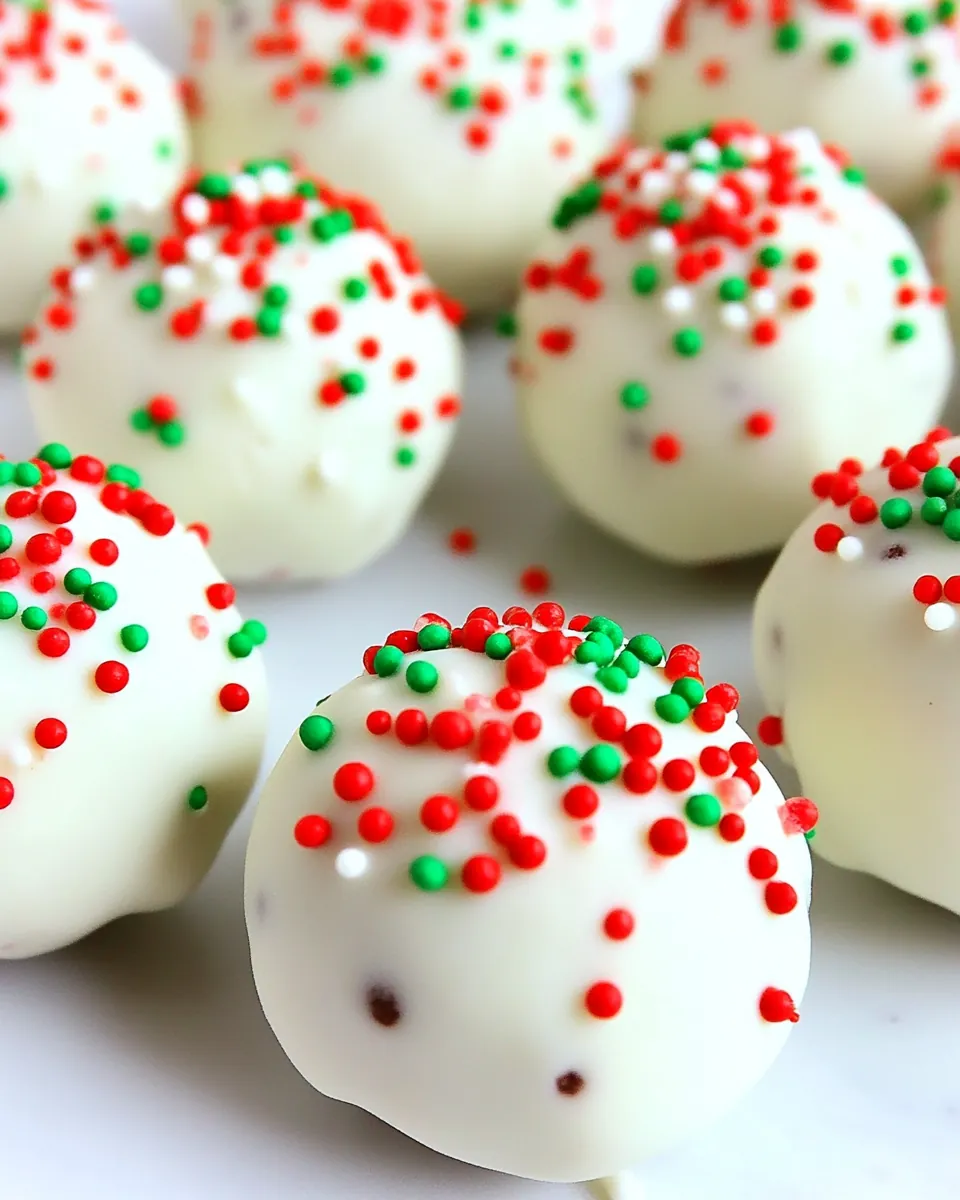
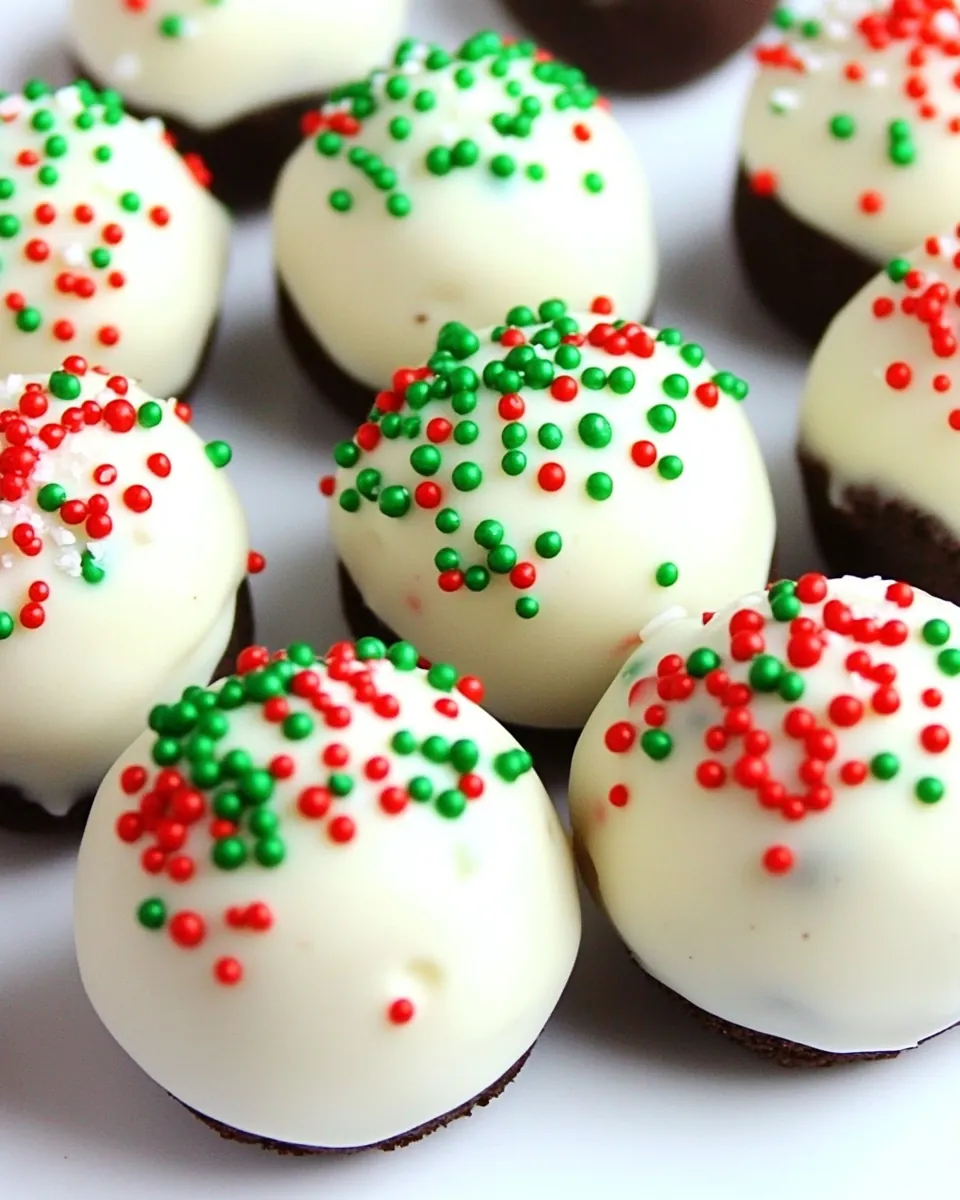
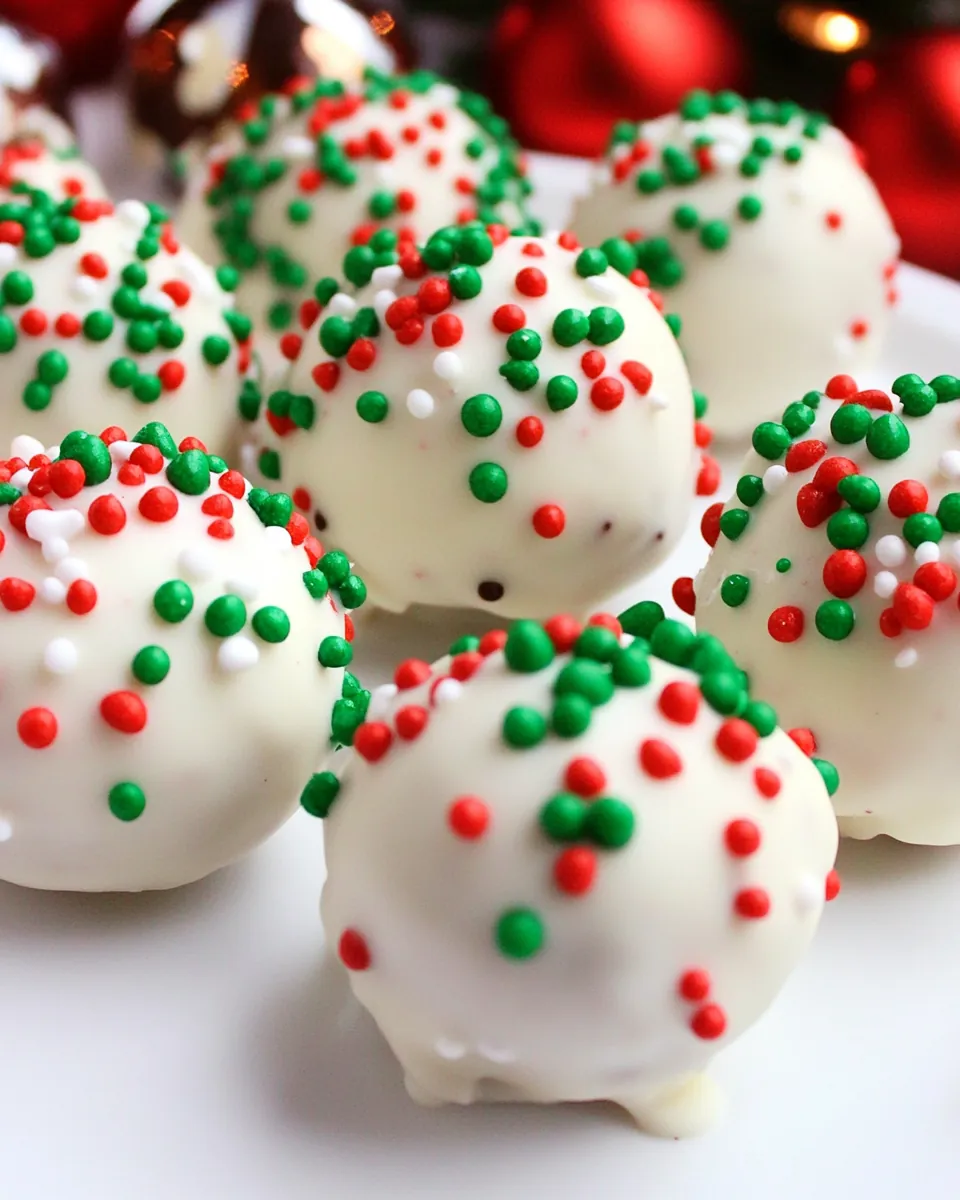
To create the delightful Golden Oreo Truffles, you’ll need a few simple ingredients that work harmoniously together. The key players in this recipe are the golden Oreos, which provide a sweet and crumbly base, and the cream cheese, which adds a velvety texture and moisture. A little bit of chocolate for coating gives them that irresistible finish, while festive sprinkles add the perfect touch of cheer.
- 4 ounces cream cheese (softened) – This ingredient binds the truffles together and offers a creamy texture that complements the cookies perfectly.
- 16 golden Oreos – The star of the show, these cookies are crushed to provide that unique flavor and texture.
- 1 teaspoon vanilla (Optional) – Adds a hint of warmth and enhances the overall flavor. You can choose to skip it if desired.
- 4 ounces chocolate – Used for coating the truffles, melting it creates a delicious outer layer.
- Christmas sprinkles – These are for decoration, adding joy and festivity to your truffles!
Step by Step Instructions for Golden Oreo Truffles
Making your own Golden Oreo Truffles is a fun and straightforward process. Let’s dive into the steps to ensure your truffles turn out perfectly!
Start by adding the golden Oreos into a food processor. Pulse them for about 10 seconds until they transform into fine crumbs. This is the base of your truffles, and it should resemble sand.
Next, add the softened cream cheese into the processor along with the optional vanilla. Process the mixture for an additional 10 seconds, or until you notice that it begins to clump together and forms a dough ball.
Now it’s time to prepare your workspace. Set out a baking sheet lined with parchment paper. Make sure it will fit in your freezer, as your truffles will need some chilling time later.
Using a tablespoon-size scoop or a cookie scoop, measure out portions of the dough. Roll them into balls with your hands, ensuring they are smooth and well-shaped.
Once you’ve shaped all the dough into balls, place them on the lined baking sheet. Pop them in the freezer for about 30 minutes. This will help them harden and hold their shape while you prepare the chocolate.
While the truffles are chilling, melt the chocolate in a microwave-safe bowl. Heat it for 90 seconds at 50% power, stirring every 15 to 20 seconds until it’s fully melted and silky smooth. If it’s too thick, add a tiny bit of vegetable oil to loosen it.
Once the truffles are firm, take them out of the freezer. Dip each ball into the melted chocolate, tossing them gently to coat evenly. Let any excess chocolate drip off before transferring them back to the baking sheet.
While the chocolate is still wet, sprinkle the tops of your truffles with festive sprinkles. This adds a beautiful touch and makes them look extra special!
Finally, return the truffles to the freezer for about 20 minutes to set the chocolate. Once hardened, you can store them in an airtight container in the fridge.
Things Worth Knowing
- One of the keys to a smooth coating is ensuring your chocolate is melted perfectly. Stir frequently and adjust the power level to avoid burning.
- Chilling the truffles thoroughly will prevent them from falling apart during the coating process.
- If your hands get too sticky while rolling the balls, you can lightly coat them with a bit of powdered sugar to make handling easier.
- To add a twist, consider mixing in crushed nuts or different flavored cookies for unique variations.
Make It Your Own
Personalizing your Golden Oreo Truffles can be part of the fun! Here are some ideas to make them even more delightful.
- Flavor Variations: Consider adding a hint of mint or almond extract for a different flavor profile.
- Storage: Store leftovers in an airtight container in the fridge for up to two weeks.
- Freezing: These truffles freeze well! Just ensure they’re sealed in an airtight container, and they can last up to two months.
- Pairing: Serve these truffles alongside a hot cup of cocoa or coffee for a delightful afternoon treat.
- Decoration: Experiment with different toppings like crushed nuts, coconut flakes, or colored sugar to match any holiday theme.
Perfect Matches for Golden Oreo Truffles
When it comes to serving Golden Oreo Truffles, the opportunities are endless! Here are some delightful pairings and occasions to consider:
- Festive Gatherings: These truffles shine at holiday parties, adding a touch of sweetness to your dessert table.
- Gift Giving: Pack them in decorative boxes for a thoughtful homemade gift during the holidays.
- Celebrations: Perfect for birthdays, anniversaries, or any celebration that calls for something sweet.
- Afternoon Snack: Enjoy a truffle with your afternoon tea or coffee for a sweet pick-me-up.
- Seasonal Treats: Make them for events like Halloween or Christmas by adjusting the sprinkles and toppings.
FAQ
Conclusion
The Golden Oreo Truffles are truly a delightful treat that perfectly combines sweetness and creaminess, making them a hit for any occasion. I encourage you to give this no-bake recipe a try, as it not only simplifies your dessert preparations but also guarantees smiles all around. Enjoy sharing these delicious bites of joy with your family and friends—they’re sure to become a beloved favorite!
Golden Oreo Truffles
Ingredients
Equipment
Method
- Add cookies to a food processor and process for 10 seconds until fine crumbs form. Add softened cream cheese and vanilla extract. Process for an additional 10 seconds until dough turns into a ball.
- Set out a baking sheet with parchment paper. Check to make sure baking sheet will fit in freezer and make space.
- Use a tablespoon-size portion scoop (or cookie scoop) to measure dough into balls and shape with hands to smooth.
- Freeze Oreo Truffles for 30 minutes to harden and firm dough before going to the chocolate step.
- Microwave chocolate for 90 seconds at 50% power, stirring every 15-20 seconds until melted.
- Dip balls into dipping chocolate and toss to coat. Let excess chocolate drip off. Place balls onto lined baking sheet.
- Sprinkle truffles with decorate sprinkles while still wet.
- Freeze oreo truffles to harden chocolate, approx 20 minutes.
- Keep stored in air tight container in fridge. Tuffles should keep up to 2 weeks in fridge or 2 months in freezer.
Notes
- Tip 1: Clear out the freezer for a baking sheet because these no-bake balls need some time in the freezer to set. Cover baking sheet with parchment paper.
- Tip 2: If you do not have a cookie sheet that works well for your freezer size, alternatively use a cutting board, serving tray, or large plate.
- Tip 3: I usually coat my truffles in chocolate with a spoon and then remove them from the bowl with a fork, scraping the chocolate off the bottom.
- Tip 4: Sprinkle on holiday sprinkles or sugar on truffles before melted chocolate is set.