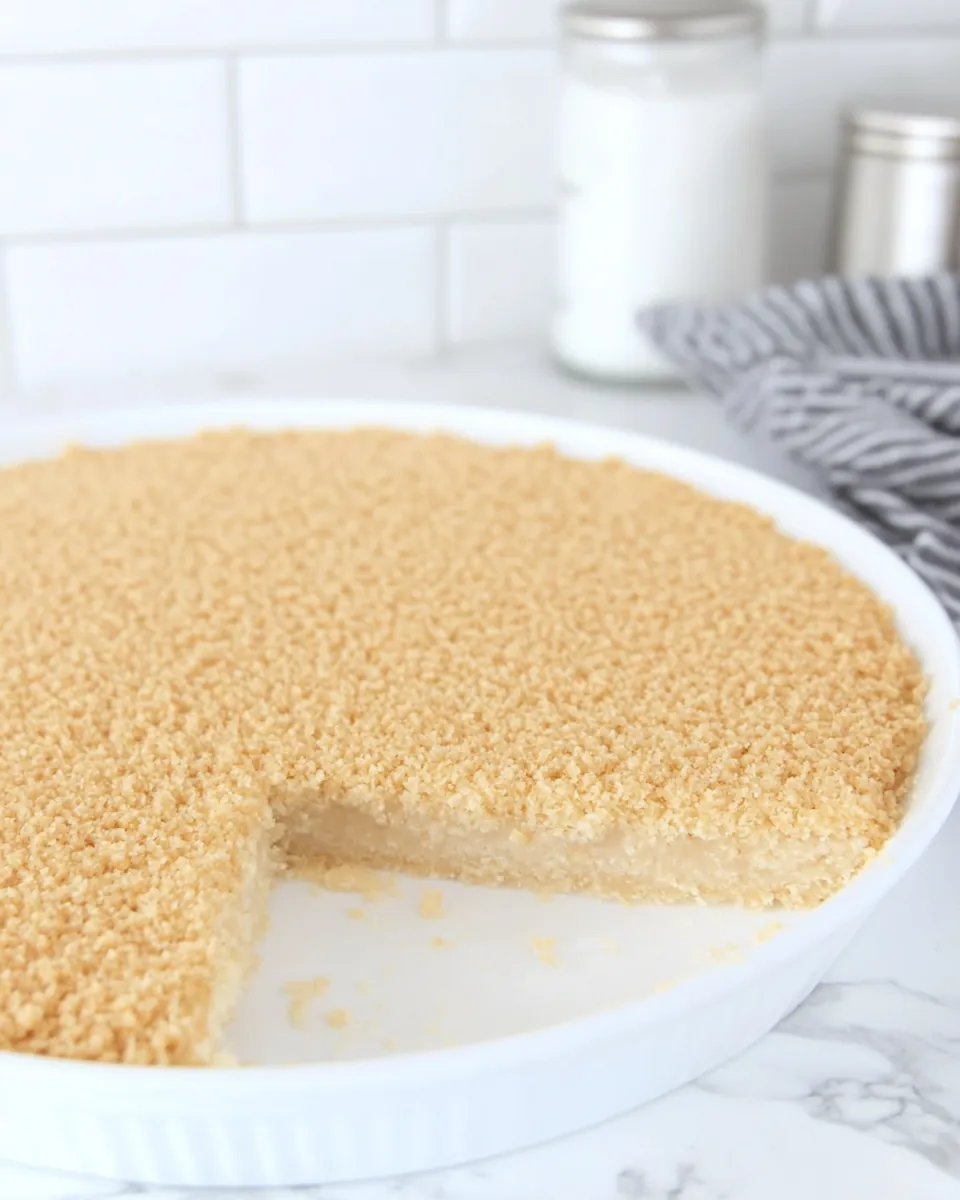
Graham Cracker Crust
There’s something so comforting about a homemade dessert, and the best part often begins with a solid foundation. That’s where the Graham Cracker Crust comes in! Growing up, I remember the excitement of family gatherings, particularly the dessert table that always felt like a treasure trove of sweet delights. My favorite was always the pie with that perfectly crumbly crust, which made each slice feel like a special treat. Creating a Graham Cracker Crust from scratch allows you to connect with those cherished memories while adding a personal touch to your baking. Whether it’s for a holiday feast, a summer BBQ, or just a cozy night in, this crust is an essential base for so many delicious fillings. I love how simple it is to make yet how much it elevates any pie or tart. With just a few ingredients, you can create something that not only tastes fantastic but also feels homemade—because it is!
Recipe Snapshot
20 mins
10 mins
10 mins
Easy
150 kcal
1 g
Keto, Gluten-Free, Low FODMAP
8 g
Baking Sheet, Food Processor, Mixing Bowl, Wooden Spoon
Why This Graham Cracker Crust Works
Perfect for Any Dessert
The Graham Cracker Crust is incredibly versatile. It pairs beautifully with fruit fillings, creamy custards, and even no-bake desserts. You can easily adapt it for various recipes, making it a go-to choice for any occasion.
Quick and Easy to Make
If you’re short on time, this crust is your best friend. With minimal prep and cooking time, you can whip it up in a flash. Just a few quick steps and you’ll be on your way to enjoying a delicious dessert.
Delicious Flavor
The subtle sweetness of the Graham crackers combined with the richness of butter creates a flavor profile that is hard to resist. It adds a lovely crunch and sweetness that enhances whatever filling you choose.
Perfect Texture
When made correctly, the crust strikes the perfect balance between crumbly and sturdy. It holds its shape beautifully while still being soft enough to bite into. This texture is essential for achieving that flawless pie slice.
Customizable Options
Feel free to experiment with your Graham Cracker Crust. You can add spices, sweeteners, or even mix in other types of cookies for a unique twist. This flexibility allows you to tailor it to your taste preferences.
Kid-Friendly Activity
Making this crust can be a fun activity for kids. They can help crush the cookies and mix the ingredients, making it a great way to bond while introducing them to the joys of baking!
Graham Cracker Crust Shopping List
When making a Graham Cracker Crust, the ingredients are simple yet essential for achieving that perfect flavor and texture. The combination of Graham crackers, sugar, and butter work together to create a crust that is both delicious and sturdy. These key players ensure your pie or dessert filling shines, while the crust provides the necessary base.
- 12 full sheets of graham crackers (1 1/2 cups crumbs): The main component of your crust, these provide the sweet and slightly nutty flavor that pairs well with various fillings.
- 1 tablespoon sugar: This adds a touch of sweetness to balance the flavors and enhance the overall taste of the crust.
- 5 tablespoons salted butter: The fat that binds everything together, giving the crust its rich flavor and helping it hold its shape.
The Process for Making Graham Cracker Crust
Creating a Graham Cracker Crust is a delightful experience that can bring back memories of sweet moments spent around the table. Follow these simple steps, and you’ll have a fantastic crust ready for your next dessert!
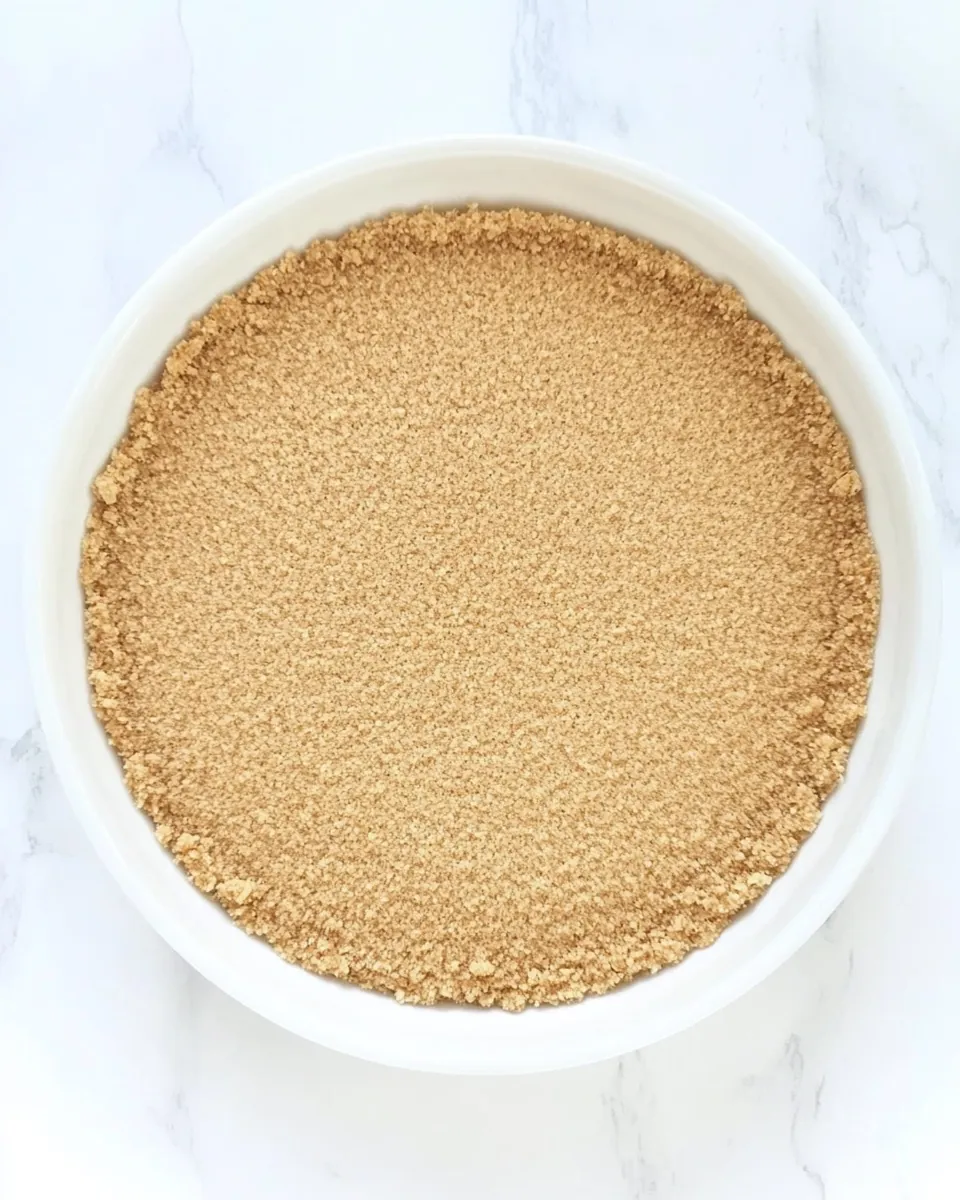
First, gather your materials. In a food processor, add the Graham crackers. Pulse them until they turn into fine crumbs. If you don’t have a food processor, don’t fret! You can place the Graham crackers in a gallon-sized Ziploc bag and crush them with a rolling pin. The goal is to have a fine crumb texture for the best crust.
Next, add the sugar to the crushed Graham crackers. Stir them gently to combine. This step is essential as it evenly distributes the sweetness throughout your crust.
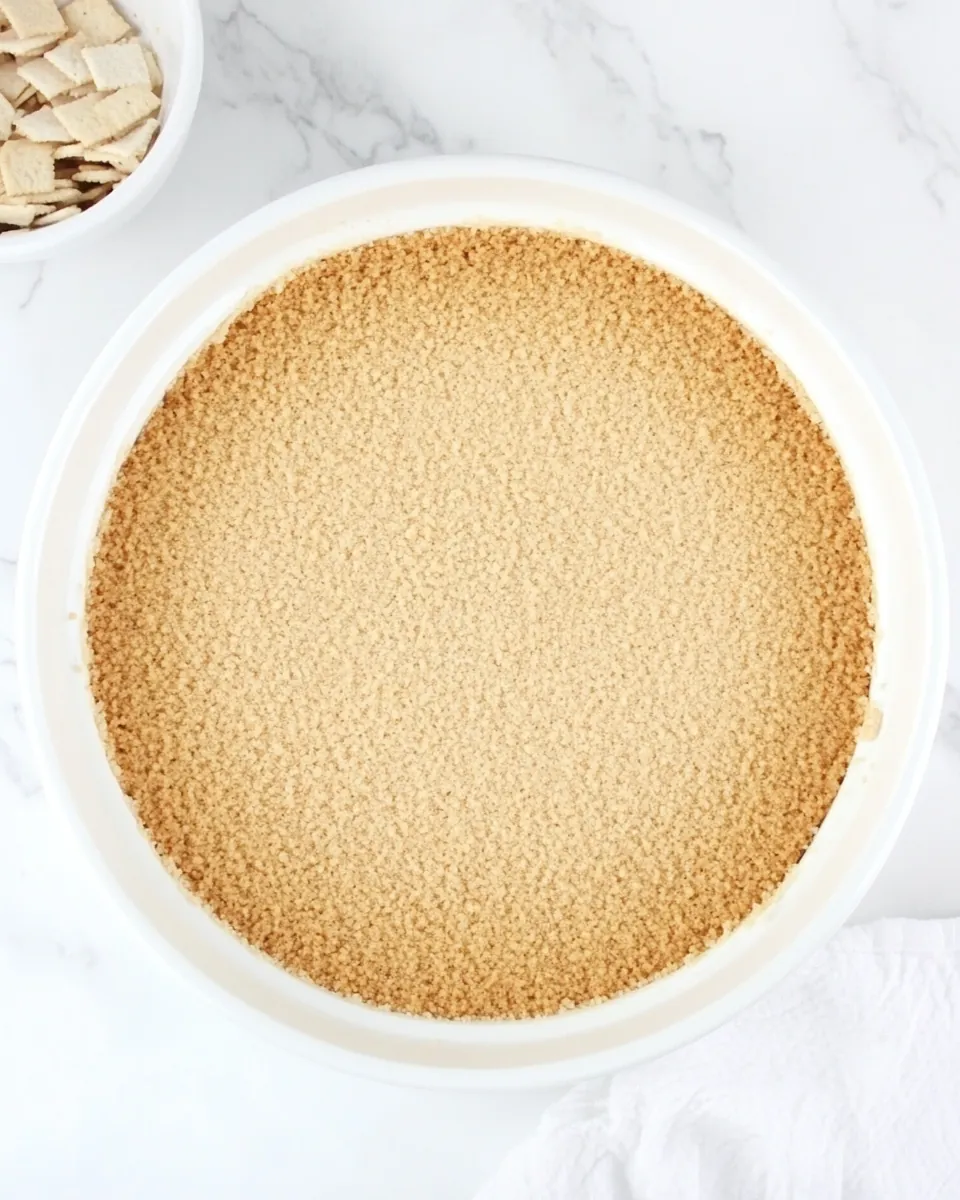
Now, pour in the melted butter. Mix it well until everything is combined. The mixture should be very thick at this stage. You can use your hands to finish combining it, ensuring that all the crumbs are coated with butter.
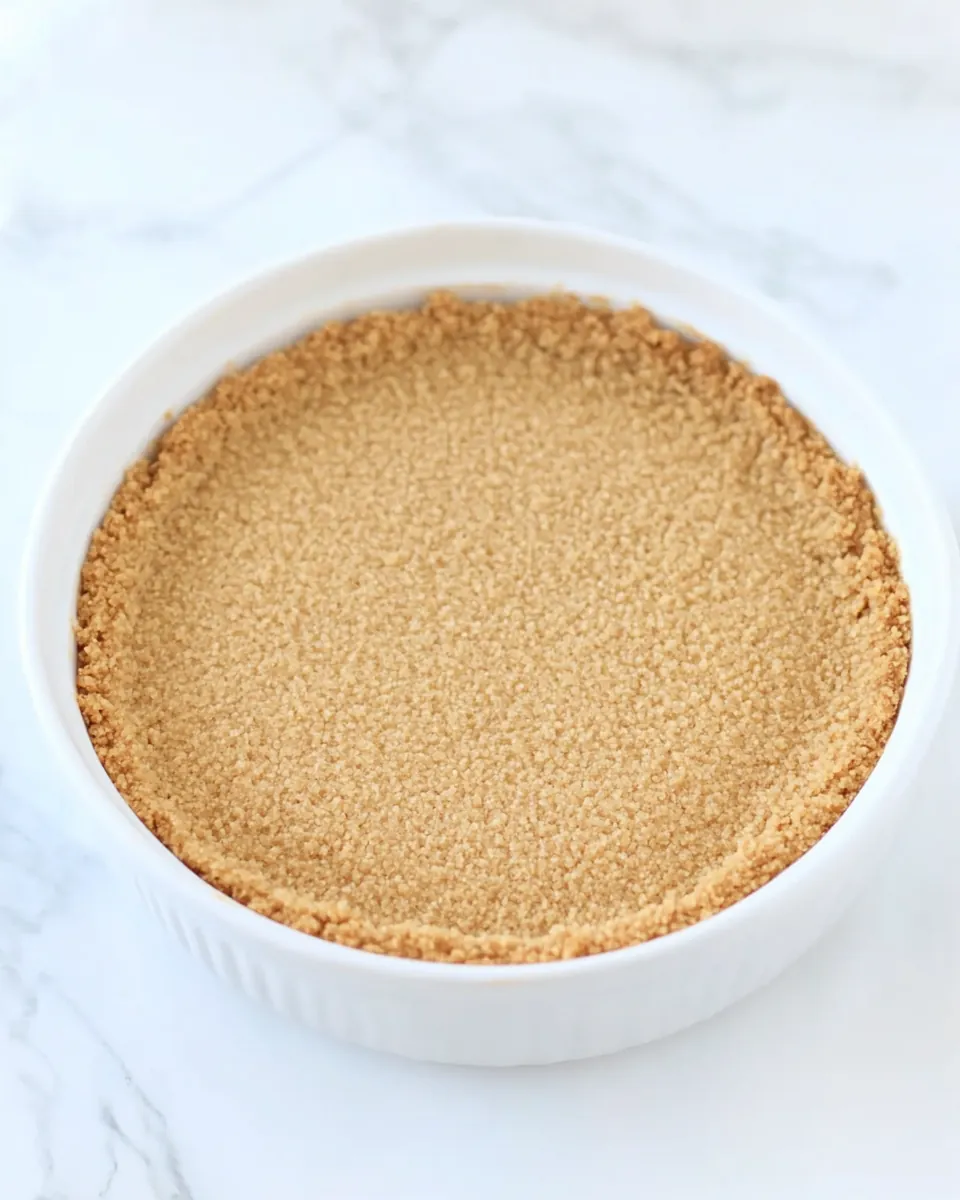
Transfer the mixture into a pie dish. There’s no need to grease the dish beforehand. Using your fingers, gently press the mixture into the bottom and up the sides of the dish. Be careful not to pack it in too tightly, as this will make the crust hard.
Once you’ve shaped the crust, you can either opt to pre-bake it at 350 degrees Fahrenheit for 10 minutes or bake it along with your pie filling based on its requirements. Alternatively, if you’re making a no-bake dessert, you can leave it unbaked. Each method has its benefits, so choose what suits your recipe best!
After baking or shaping, allow it to cool if necessary, then fill with your desired pie filling. Enjoy indulging in your lovely creation with friends and family!
Things Worth Knowing
- Texture Matters: The texture of the Graham Cracker Crust can significantly affect your dessert. Make sure to press it firmly but gently into the pie dish.
- Cooling Time: If you choose to pre-bake your crust, allow it to cool completely before adding any fillings to prevent sogginess.
- Crust Variations: Try mixing in other cookies like chocolate or vanilla wafers for added flavor.
- Sweetness Balance: Adjust the amount of sugar based on your filling. If your pie filling is very sweet, consider reducing the sugar in the crust.
- Storage: Keep any leftovers in an airtight container at room temperature for a few days or in the refrigerator for a longer shelf life.
Helpful Hints
Before diving into your baking adventure, here are some helpful hints to ensure your Graham Cracker Crust turns out perfectly!
- Storage: To keep your crust fresh, store any leftovers in an airtight container. This will help maintain its texture and flavor for a few days.
- Freezing: You can freeze your unbaked or baked crust for future use. Just wrap it tightly in plastic wrap and foil to prevent freezer burn.
- Pairing: This crust pairs wonderfully with a variety of fillings like fruit, cheesecake, or chocolate mousse. Get creative with your dessert choices!
- Baking Tips: If you choose to pre-bake, keep an eye on it to ensure it doesn’t overbake. A slight golden color is perfect!
- Experiment: Don’t hesitate to try different types of cookies for a unique twist on your crust. Each variation offers a new flavor experience!
Best Served With
The Graham Cracker Crust is a delightful base that complements a wide array of delicious fillings and pairings. Here are some ideas on how to serve it:
- Fruit Fillings: Top your crust with fresh fruits like strawberries, blueberries, or peaches for a refreshing summer dessert.
- Cheesecake: This crust is a classic choice for cheesecakes. Its sweetness balances the rich creaminess beautifully.
- No-Bake Desserts: Perfect for no-bake pies, simply fill it with pudding or whipped cream for a quick dessert option.
- Special Occasions: This crust shines at gatherings like birthdays, holidays, or family reunions. It’s sure to be a hit with everyone.
- Storage Tips: If you have leftover crust, keep it in the fridge. You can use it later for a quick dessert fix!
FAQ
Conclusion
The Graham Cracker Crust is a delightful and easy way to elevate any dessert. Its sweet, buttery crunch provides a fantastic base for your favorite fillings and is sure to impress family and friends. Try making it for your next gathering or just a cozy night in at home. You’ll love how simple it is to whip up and the delicious results that follow. Enjoy every bite and the memories that come with it!
Graham Cracker Crust
Ingredients
Equipment
Method
- In a food processor, add graham crackers and pulse until they are fine crumbs. If you don't want to use your food processor, you can put the graham crackers in a gallon ziploc bag and use a rolling pin to crush them into crumbs.
- Add the sugar to the graham cracker crumbs and stir to combine. Then add the melted butter and stir to mix it all together. The mixture will be very thick and you can use your hands to finish combining.
- Pour the mixture into a pie dish (no need to grease it). Use your fingers to gently press the mixture into the bottom and sides of your pie dish. You don't need to pack it in too much because it will make the crust really hard when you are trying to eat it.
- You can either pre-bake the crust at 350 degrees Fahrenheit for 10 minutes, bake it with your pie filling according to the pie directions, or leave it unbaked for a no-bake dessert. Enjoy!
Notes
- Tip 1: To keep your crust fresh, store any leftovers in an airtight container. This will help maintain its texture and flavor for a few days.
- Tip 2: You can freeze your unbaked or baked crust for future use. Just wrap it tightly in plastic wrap and foil to prevent freezer burn.
- Tip 3: This crust pairs wonderfully with a variety of fillings like fruit, cheesecake, or chocolate mousse. Get creative with your dessert choices!
- Tip 4: If you choose to pre-bake, keep an eye on it to ensure it doesn’t overbake. A slight golden color is perfect!
- Tip 5: Don’t hesitate to try different types of cookies for a unique twist on your crust. Each variation offers a new flavor experience!