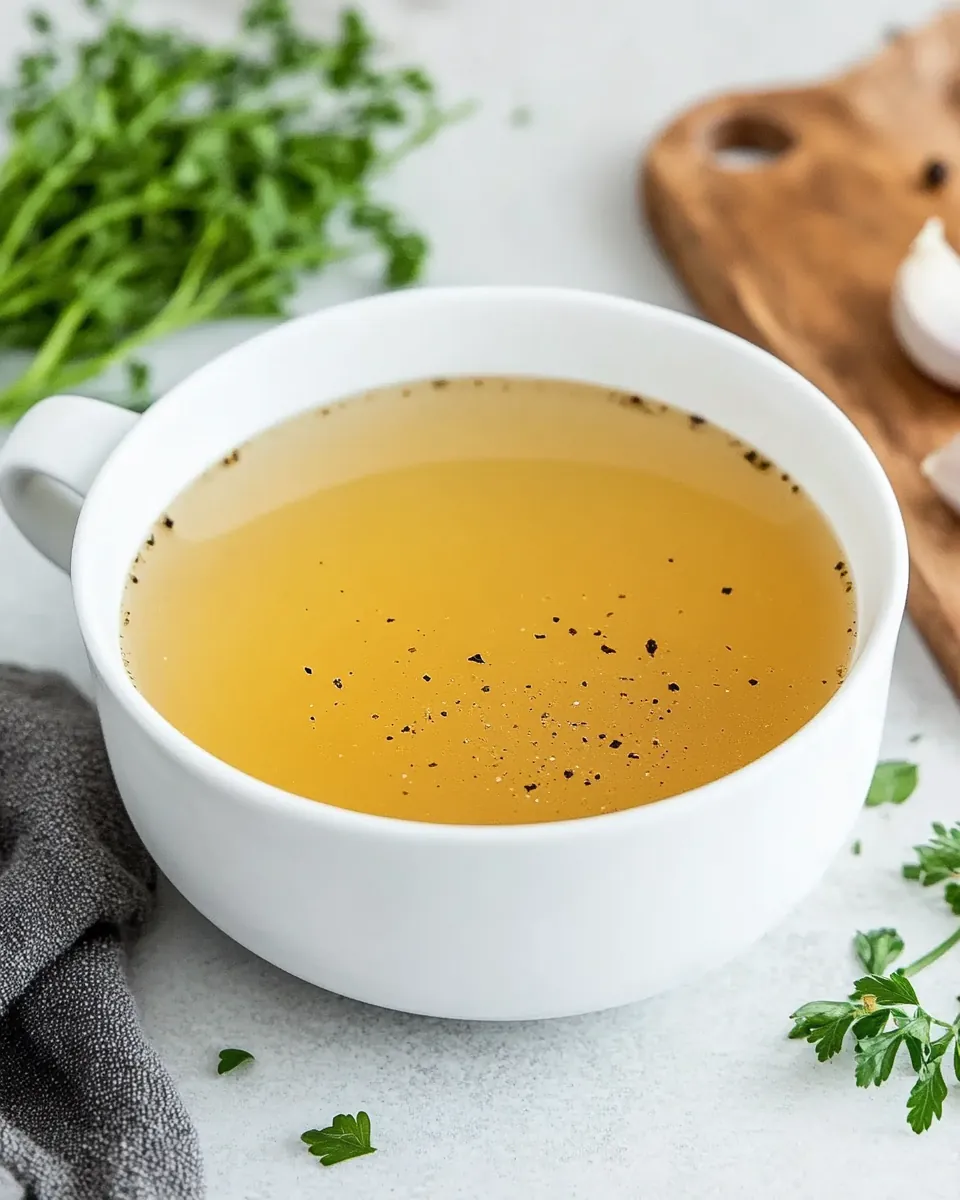
Homemade Chicken Stock
There’s nothing quite like the warmth that a pot of Homemade Chicken Stock brings to your kitchen. I remember the first time I made my own stock; the aroma of simmering vegetables and herbs filled my home, instantly making it feel cozier. It was a chilly winter day, and as I watched the steam rise from the pot, I felt a sense of accomplishment. This stock became the base for countless meals, from soups to risottos, and even a delicious gravy! When I think of comfort food, I think of the rich, flavorful broth that a good stock provides. It’s one of those fundamental recipes that can elevate any dish, and once you make it from scratch, you’ll never want to go back to store-bought. The beauty of Homemade Chicken Stock is not just in its flavor, but also in the memories and warmth it creates around the dinner table.
Recipe Snapshot
3 hr 3 mins
3 mins
180 mins
Hard
50 kcal
5 g
Keto, Paleo, Whole30
2 g
fine mesh strainer
Why Try This Homemade Chicken Stock
Rich Flavor
Making your own Homemade Chicken Stock allows you to control the flavors to your liking. You can play around with different vegetables and herbs, giving you a personalized touch.
Health Benefits
Homemade stock is packed with nutrients. The bones simmer for hours, releasing collagen and minerals that are great for your health.
Economical
Using leftover chicken carcasses and vegetable scraps, you can create a rich stock without breaking the bank. It’s a great way to reduce waste in your kitchen.
Versatility
This stock can be used in countless recipes, from soups and stews to sauces. It acts as a flavor enhancer that can transform a simple dish into something extraordinary.
Easy Freezing
You can easily freeze your stock in portions, making it convenient for quick meals throughout the week. It’s always nice to have some on hand!
Homemade Chicken Stock Ingredients
The ingredients for Homemade Chicken Stock are simple yet impactful. Each component plays a crucial role in creating a rich, flavorful broth. The combination of a chicken carcass with fresh vegetables and herbs imparts depth and complexity to the stock. You’ll find that these ingredients work harmoniously to create a base that elevates your dishes.
- 1 chicken carcass: This is the star ingredient, providing the rich flavor and nutrients for your stock.
- 1 large carrot: Adds a touch of sweetness to balance the savory flavors.
- 2 large onions: Essential for depth, they bring a natural sweetness and aroma.
- 2 stalks celery: This contributes a refreshing, earthy flavor to the mix.
- 1-2 sprigs fresh thyme: An aromatic herb that complements the other ingredients beautifully.
- 1 tablespoon kosher salt: Essential for seasoning; adjust to your taste.
- 2 dried bay leaves: Adds a subtle depth and enhances the overall flavor.
- 1 tablespoon peppercorns: Provides warmth and a hint of spice.
- 16 cups water: The base of your stock, extracting flavors from all the ingredients.
Making This Homemade Chicken Stock
Creating your own Homemade Chicken Stock is a rewarding process that fills your home with wonderful aromas. Let’s dive into the steps that will guide you through this flavorful journey.
Start by gathering your ingredients. Place the chicken carcass, carrot (quartered), onions (quartered), celery (quartered), fresh thyme, kosher salt, bay leaves, and peppercorns into a large stock pot. The combination of these ingredients will create a rich foundation for your stock.
Next, cover everything with water. You’ll want to pour in about 16 cups, ensuring that all the ingredients are submerged. The water helps extract the flavors as it simmers.
Bring the pot to a rolling simmer over medium heat. Keep an eye on the pot and adjust the heat as needed to prevent it from boiling too vigorously. This gentle simmer is key to creating a clear stock.
Once you see gentle bubbles, reduce the heat to low. Allow your stock to simmer for 3 to 4 hours. This long cooking time allows all the flavors to meld beautifully, resulting in a deep and rich broth.
As the stock cooks, you may notice some foam or scum rising to the surface. Use a slotted spoon to skim this off. This step is important for keeping your stock clear and free of impurities.
After 3 to 4 hours, it’s time to strain the stock. Remove the pot from the heat and carefully use a fine-mesh strainer to strain off the solids. Discard the solids, as they have served their purpose in flavoring the stock.
Let the strained broth cool to room temperature. This cooling process helps the flavors to settle and intensify.
Transfer the cooled stock to storage containers or jars. Refrigerate overnight to allow any fat to rise to the top. The next day, you can skim off any fat solids that may have formed.
When storing your stock, keep it in the refrigerator for up to 5 days. Alternatively, you can freeze it in freezer-safe containers, leaving about 1 inch of space for expansion. This way, you can enjoy homemade stock for months!
Things Worth Knowing
- Skimming: Regularly skim the scum from the surface while simmering to keep the stock clear and clean.
- Cooling: Allow the stock to cool before refrigerating it to avoid raising the temperature of your fridge.
- Freezing: Freeze stock in ice cube trays for easy portioning in recipes.
- Flavor Boost: Don’t hesitate to add other herbs or spices to customize your flavor profile!
Helpful Hints
Making Homemade Chicken Stock is straightforward, but these tips will ensure you get the best results.
- Storage: Store leftover stock in airtight containers in the refrigerator for up to 5 days. If you plan to keep it longer, freezing is the best option.
- Freezing: You can freeze your stock in ice cube trays, then transfer the cubes to a freezer bag. This way, you can easily add a flavor boost to dishes!
- Pairing: Use your stock as a base for soups, stews, or sauces. It can elevate even the simplest of dishes.
- Vegetable Scraps: Consider using vegetable scraps if you want to make a more earth-friendly stock. They add flavor and reduce waste.
- Salt Levels: Adjust the salt to your taste. You can always add more seasoning later when using the stock in recipes.
What to Pair With Homemade Chicken Stock
Pairing dishes with your Homemade Chicken Stock opens up a world of culinary possibilities. Here are some ideas:
- Soups: Use your stock as a flavorful base for any soup, from hearty minestrone to classic chicken noodle.
- Risottos: The stock can enhance the creaminess of a risotto, adding depth to the dish.
- Gravy: Use stock as a foundation for a rich, homemade gravy that can accompany roasts.
- Casseroles: Incorporating stock into casseroles adds moisture and richness, enhancing the overall flavor.
- Seasonal Dishes: In winter, use stock for hearty stews. In spring, it can complement lighter fare like vegetable soups.
- Storage Tips: Remember that the fat that rises to the top can be skimmed off for a lighter stock, but it also adds flavor when used.
FAQ
Conclusion
In conclusion, Homemade Chicken Stock is a culinary treasure that adds warmth and flavor to any dish. It’s not just about making a stock; it’s about creating memories and comfort in your kitchen. I encourage you to try this recipe and savor the taste of home-cooked goodness. You won’t regret it; it’s a delightful addition to your cooking repertoire!
Homemade Chicken Stock
Ingredients
Equipment
Method
- Start by gathering your ingredients. Place the chicken carcass, carrot (quartered), onions (quartered), celery (quartered), fresh thyme, kosher salt, bay leaves, and peppercorns into a large stock pot. The combination of these ingredients will create a rich foundation for your stock.
- Next, cover everything with water. You’ll want to pour in about 16 cups, ensuring that all the ingredients are submerged. The water helps extract the flavors as it simmers.
- Bring the pot to a rolling simmer over medium heat. Keep an eye on the pot and adjust the heat as needed to prevent it from boiling too vigorously. This gentle simmer is key to creating a clear stock.
- Once you see gentle bubbles, reduce the heat to low. Allow your stock to simmer for 3 to 4 hours. This long cooking time allows all the flavors to meld beautifully, resulting in a deep and rich broth.
- As the stock cooks, you may notice some foam or scum rising to the surface. Use a slotted spoon to skim this off. This step is important for keeping your stock clear and free of impurities.
- After 3 to 4 hours, it’s time to strain the stock. Remove the pot from the heat and carefully use a fine-mesh strainer to strain off the solids. Discard the solids, as they have served their purpose in flavoring the stock.
- Let the strained broth cool to room temperature. This cooling process helps the flavors to settle and intensify.
- Transfer the cooled stock to storage containers or jars. Refrigerate overnight to allow any fat to rise to the top. The next day, you can skim off any fat solids that may have formed.
- When storing your stock, keep it in the refrigerator for up to 5 days. Alternatively, you can freeze it in freezer-safe containers, leaving about 1 inch of space for expansion. This way, you can enjoy homemade stock for months!
Notes
- Tip 1: In place of the chicken carcass, use bones from 2-3 large chicken breasts, 5-6 chicken thighs, or 10 chicken wings.
- Tip 2: Feel free to use 3 cups of vegetable scraps in place of the carrots, celery, onions, and thyme.
- Tip 3: Reduce the salt to ½ tablespoon or omit for sodium-free chicken stock.
- Tip 4: For slow cooker instructions, combine the ingredients and cook on low for 8-12 hours.