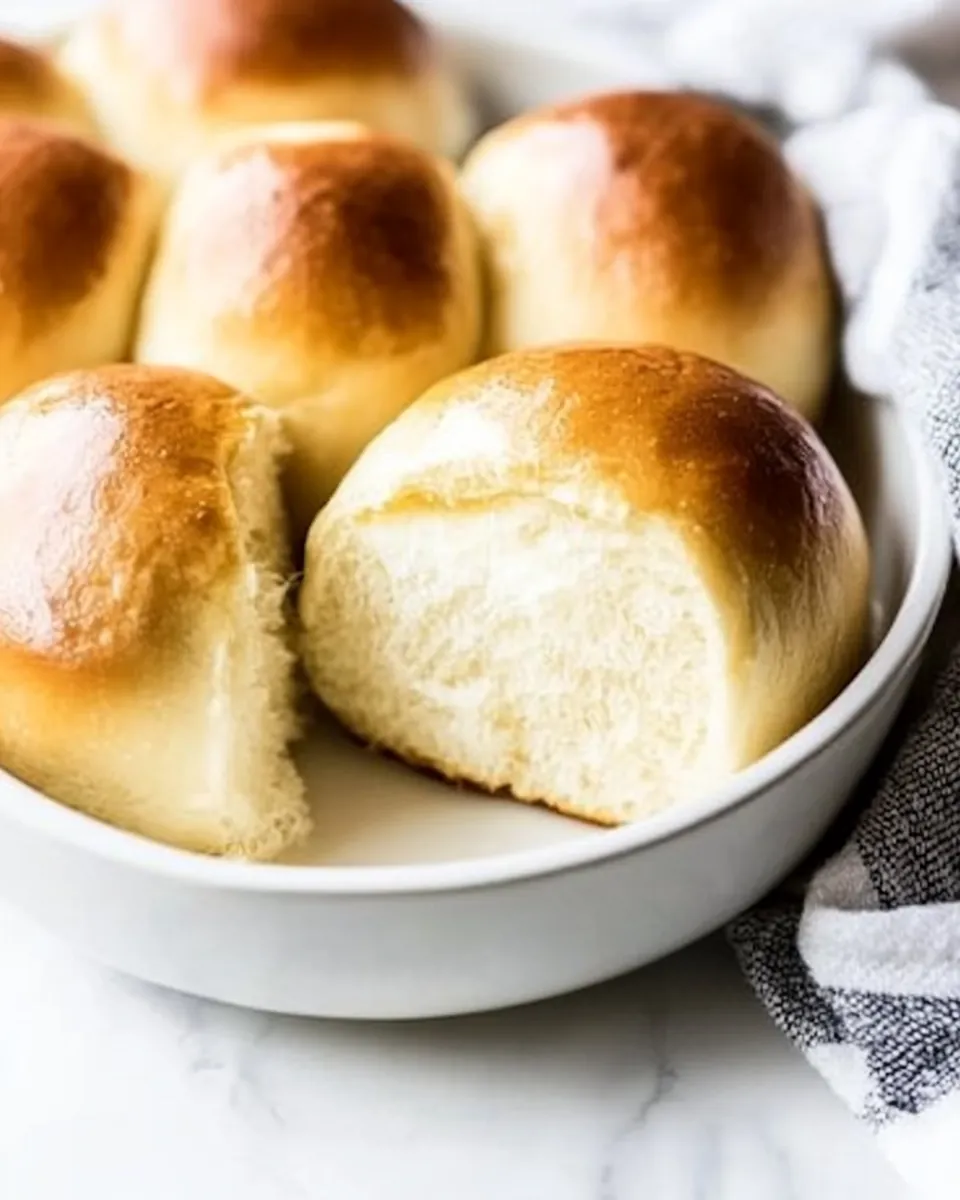
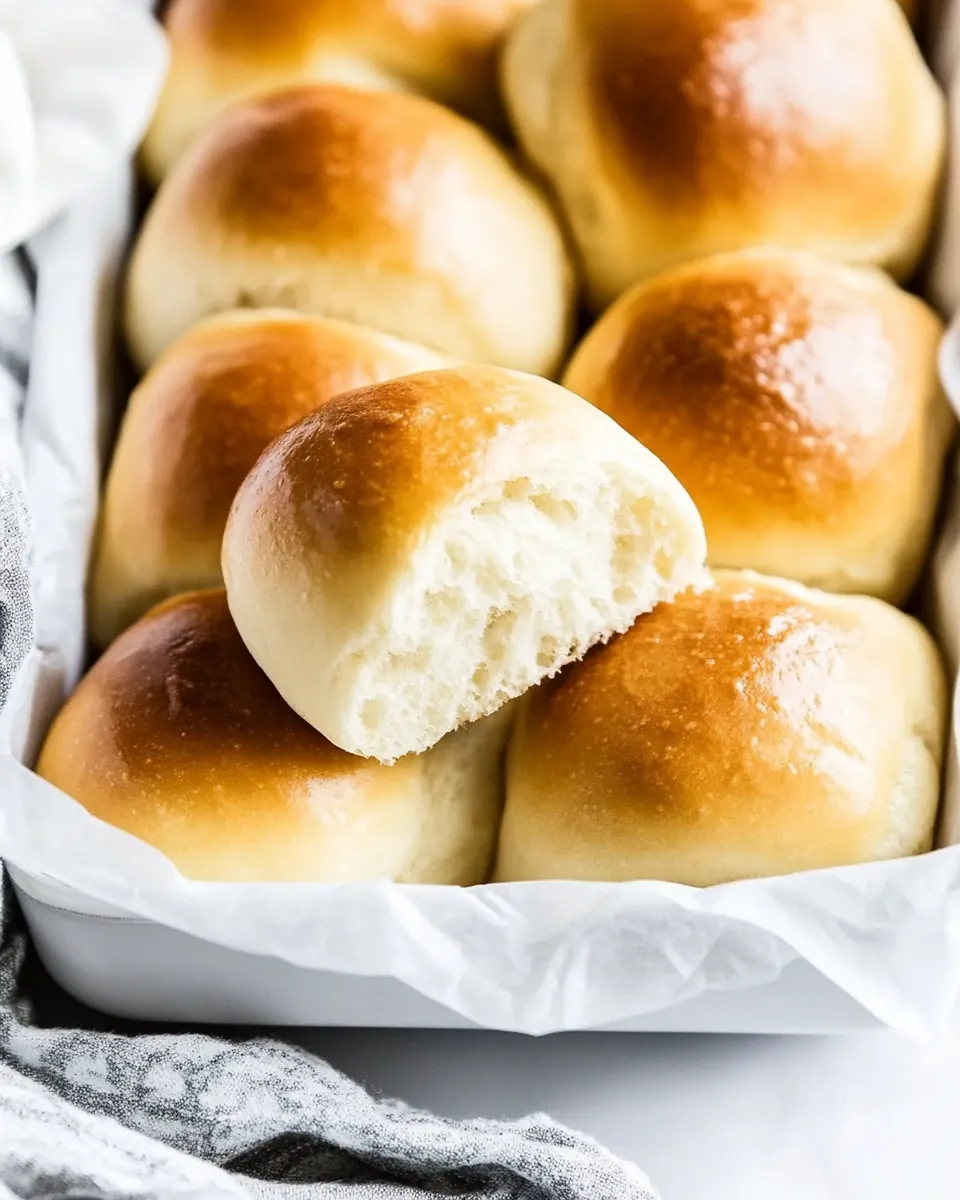
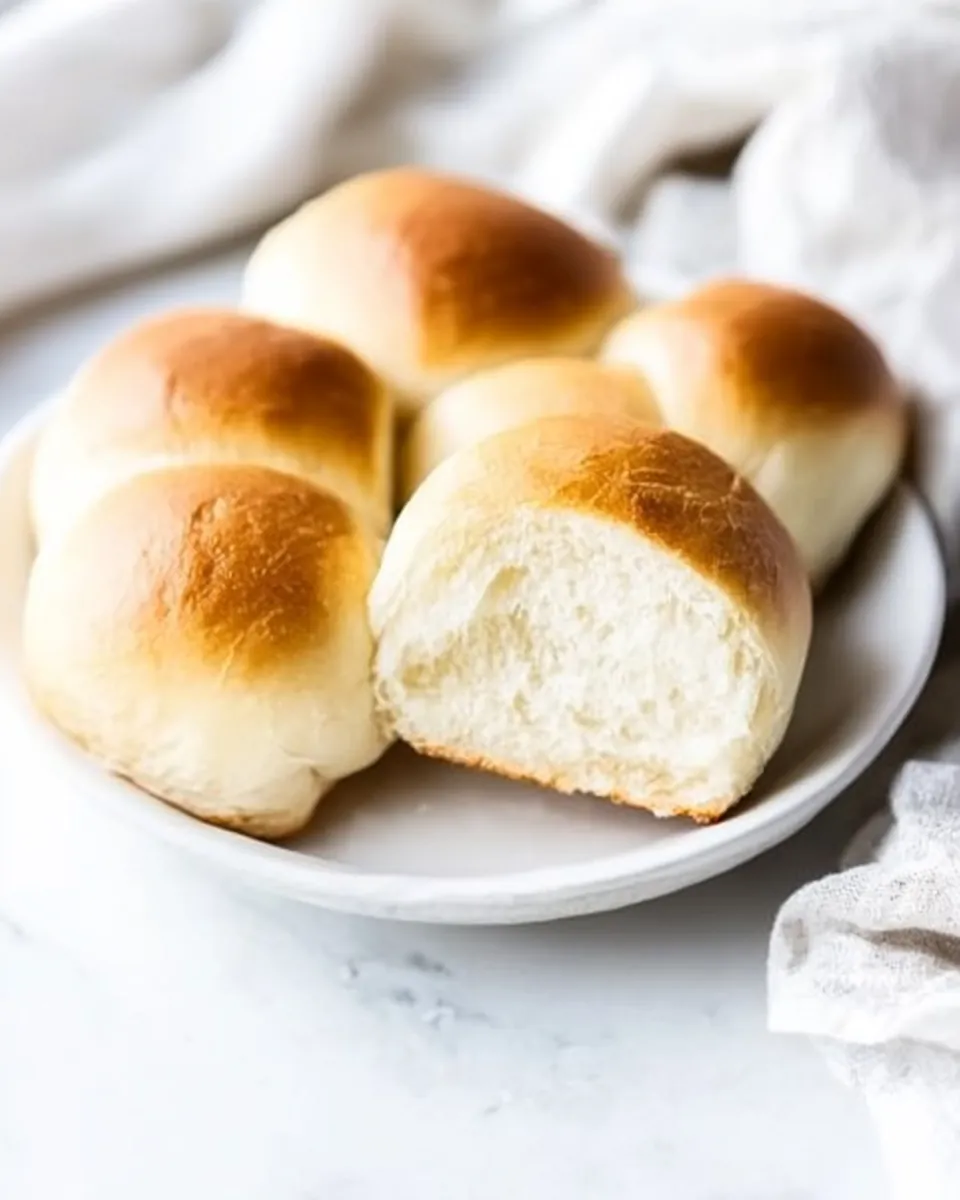
Homemade Dinner Rolls
There’s something truly special about the aroma of freshly baked bread wafting through your home. The smell of warm, fluffy Homemade Dinner Rolls can instantly transport you to a cozy kitchen filled with laughter and love. I remember the first time I made these rolls; it was during a family gathering. Everyone was gathered around the table, sharing stories and enjoying each other’s company. I took the rolls out of the oven, and the moment they hit the table, you could see the anticipation in everyone’s eyes. With a bit of melted butter dripping down the sides, these rolls are always a hit. They are the perfect addition to any meal, and watching loved ones enjoy them is what makes the effort worthwhile.
Recipe Snapshot
40 mins
10 mins
30 mins
Medium
150 kcal
4 g
Gluten-Free, Low FODMAP
5 g
Baking Sheet, Mixing Bowl, Whisk, Frying Pan
The Appeal of This Homemade Dinner Rolls
Perfect for Any Occasion
When it comes to comfort food, nothing tops the versatility of Homemade Dinner Rolls. Whether it’s a holiday feast, a Sunday dinner, or a casual gathering, these rolls always steal the show. They are not just a side dish; they are a warm embrace on a plate, a reminder of home and togetherness.
Easy to Make
Don’t worry if you’re new to baking; these rolls are surprisingly easy to make! With just a few simple ingredients, you can whip up a batch that rivals any bakery. The process of kneading the dough and watching it rise is not only therapeutic but rewarding.
Customizable to Your Taste
One of the greatest things about Homemade Dinner Rolls is their adaptability. You can add herbs, garlic, or cheese to elevate the flavor. Want to make them sweet? A dash of honey or cinnamon can work wonders as well. The possibilities are endless!
Make-Ahead Friendly
Planning a big meal? You can prepare these rolls ahead of time! Just let them rise and then refrigerate them until you’re ready to bake. This way, you can enjoy your time with family and friends without the stress of last-minute cooking.
Ideal for Sharing
There’s something about breaking bread with others that brings people together. When you serve Homemade Dinner Rolls, you’re sharing not just food but an experience. It’s a simple joy that can make any meal feel special.
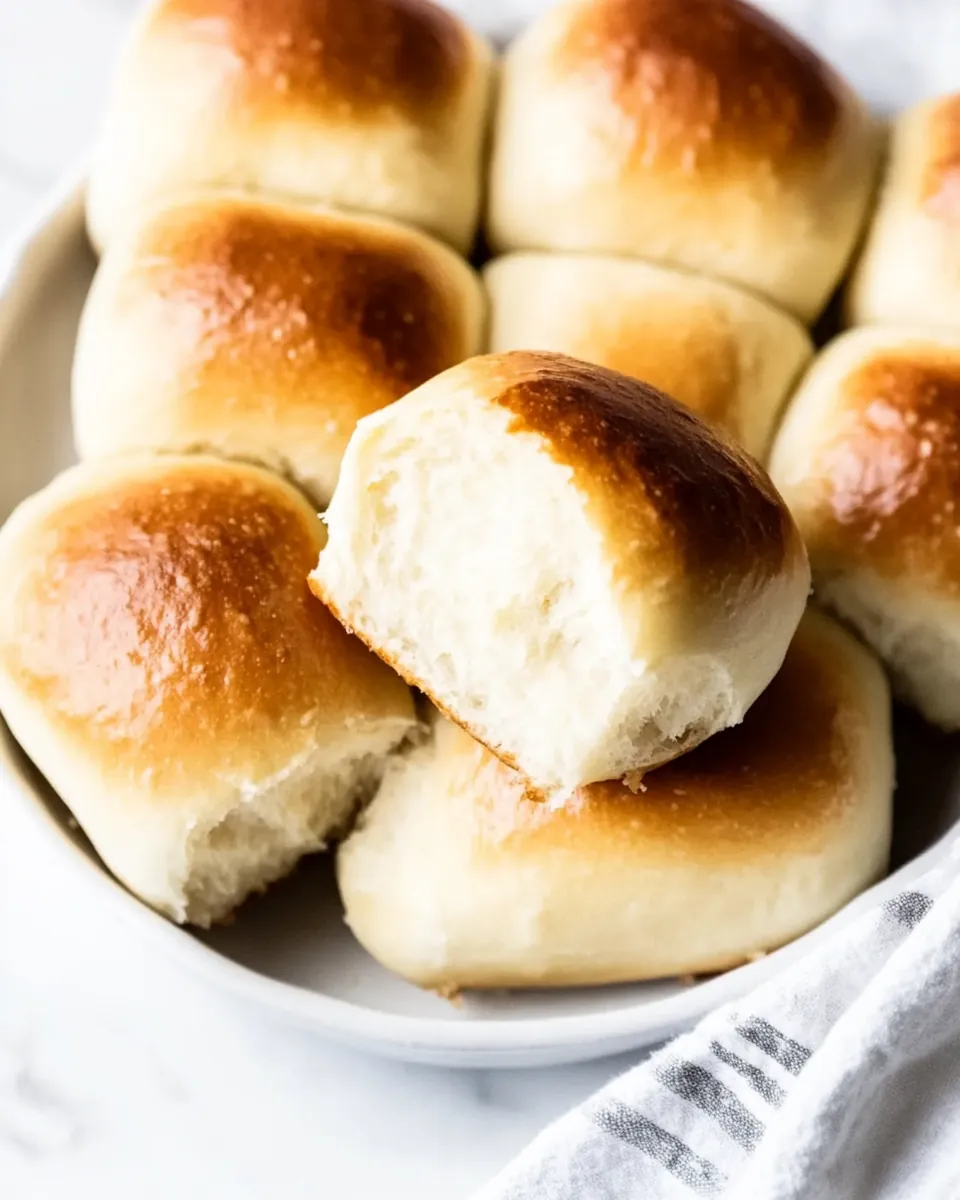
Perfect Texture
What sets these rolls apart is their delightful texture. They are soft and fluffy on the inside, with a golden crust. Each bite is a melt-in-your-mouth experience that pairs beautifully with savory dishes or sweet spreads.
Key Ingredients for Homemade Dinner Rolls
When it comes to making Homemade Dinner Rolls, using quality ingredients is essential. Each component plays a crucial role in creating the perfect texture and flavor. From the warm milk that activates the yeast to the butter that adds richness, these ingredients come together harmoniously.
- 1 ½ cups whole milk at 115°: Serves as the warm liquid to activate the yeast, providing a soft texture.
- ¼ cup sugar: Enhances the sweetness of the rolls and feeds the yeast for a good rise.
- 1 packet active yeast: The key ingredient that makes the dough rise, creating airy rolls.
- 7 tablespoons unsalted butter + more for brushing: Adds flavor and moisture to the rolls, creating a rich taste.
- pinch coarse salt: Balances the sweetness and enhances the overall flavor of the rolls.
- 4 ½ cups All Purpose Flour: Provides structure to the dough, making it easy to handle and shape.
- 3 large eggs: Contributes to the richness and helps bind the ingredients together.
Homemade Dinner Rolls Instructions
Let’s dive into the process of making these delightful Homemade Dinner Rolls. It’s a simple, satisfying journey that will fill your home with warmth and inviting aromas. Follow these steps, and you’ll have soft, fluffy rolls in no time.
- Add the 1 ½ cups of hot milk, 1 tablespoon of sugar, and yeast to a standing mixer with the hook attachment. Whisk until well combined and let it sit for 4 to 6 minutes until a raft forms on top. This is a sign that your yeast is alive and ready to work its magic.
- Next, add the remaining sugar, 7 tablespoons of melted butter, and a pinch of coarse salt to the mixture. Turn the mixer on low and gradually add the flour in about 4 batches. This ensures everything mixes evenly without overworking the dough.
- Once combined, add 2 eggs and mix until fully incorporated. You’ll want to knead the dough for 3 to 5 minutes on medium speed until it becomes smooth and elastic. The dough should be slightly tacky but not overly sticky.
- Cover the bowl with a clean towel and let it rise until it doubles in size, which should take about 60 minutes. You can find a warm spot in your kitchen to speed up the process.
- After the dough has risen, punch it down gently to release the air. Now, form 20 small golf ball-sized dough balls. Place them about 1 inch apart on a greased and parchment paper-lined baking sheet or a 12×18 baking pan.
- Cover the rolls with a towel again and let them rise for an additional 30 minutes. This second rise is crucial for achieving that light and fluffy texture.
- Preheat your oven to 350°F. In a small bowl, whisk together the remaining egg and 2 tablespoons of whole milk until combined. Brush this egg wash over the tops of each roll for that beautiful golden finish.
- Place the rolls in the oven and bake for 25 to 30 minutes, or until they’re golden brown on top and soft in the middle. The aroma will be irresistible!
- Once done, brush the tops with more melted butter and sprinkle with additional salt if desired. Serve them warm for the best experience. Trust me, they won’t last long!
Things Worth Knowing
- Proofing Tips: For a successful rise, ensure your yeast is fresh and the liquid is at the right temperature, around 105° to 110°. If it’s too hot, it can kill the yeast.
- Using a Mixer: A standing mixer with a hook attachment can save you time and effort when kneading the dough. It provides the perfect consistency without tiring your arms.
- Timing is Key: Pay attention to the rising times. If your kitchen is cool, it may take longer for the dough to rise.
- Don’t Skip the Towel: Covering your dough prevents it from drying out during the rising process, ensuring a soft texture.
Tips and Tricks about Homemade Dinner Rolls
If you want your Homemade Dinner Rolls to turn out perfectly, keep these tips in mind. They’ll help you create the best version of this comforting dish.
- Storage: Keep leftover rolls covered at room temperature for up to 3 days, or refrigerate them for up to 5 days. They taste best fresh but can be still delicious after a few days.
- Freezing: These rolls freeze beautifully! Just wrap them tightly and store in the freezer for up to 3 months. Thaw them in the refrigerator before reheating.
- Pairing: These rolls are perfect with soups, stews, or as a side to any main dish. They also make great sliders or sandwiches.
- Herb Butter: For added flavor, try brushing the rolls with herb-infused butter right before serving. It elevates the taste to another level.
- Egg Wash: Applying an egg wash before baking gives the rolls that shiny, beautiful finish. Don’t skip this step!
- Proofing Environment: For the best rise, proof your dough in a warm, draft-free area. You can even use your oven with the light on for a cozy environment.
Serve This Homemade Dinner Rolls With
These Homemade Dinner Rolls are incredibly versatile, making them a fantastic addition to a variety of meals. Here are some delicious ideas for pairing and serving:
- Comforting Soups: Serve alongside hearty soups like Butternut Squash Soup or Chicken Noodle Soup. The rolls can soak up the delicious broth.
- Hearty Main Dishes: These rolls are great with roasted meats or casseroles, providing a perfect balance of flavors.
- Special Occasions: Whether it’s Thanksgiving, Christmas, or a Sunday family dinner, these rolls can be the star of the table.
- Casual Gatherings: Perfect for barbecues or potlucks, where everyone can enjoy a warm roll fresh from the oven.
- Breakfast Treat: Pair them with jam or honey for a delightful breakfast or brunch item.
- Storage Tips: If you have leftovers, store them in an airtight container. They’re best enjoyed fresh but can be reheated in the oven for a few minutes to regain their warmth.
- Seasonal Pairings: In the fall, pair with pumpkin soup, and in the summer, enjoy with fresh salads or grilled vegetables.
FAQ
Conclusion
There’s nothing quite like the experience of biting into a warm, fluffy Homemade Dinner Roll. They are soft, buttery, and perfect for any meal. Whether you’re serving them at a family gathering or enjoying them on a quiet night in, these rolls bring comfort and joy. I encourage you to give this recipe a try and share the warmth with your loved ones. You won’t regret making this delightful addition to your table!
Homemade Dinner Rolls
Ingredients
Equipment
Method
- Add the 1 ½ cups of hot milk, 1 tablespoon of sugar, and yeast to a standing mixer with the hook attachment. Whisk until well combined and let it sit for 4 to 6 minutes until a raft forms on top.
- Next, add the remaining sugar, 7 tablespoons of melted butter, and a pinch of coarse salt to the mixture. Turn the mixer on low and gradually add the flour in about 4 batches.
- Once combined, add 2 eggs and mix until fully incorporated. You’ll want to knead the dough for 3 to 5 minutes on medium speed until it becomes smooth and elastic.
- Cover the bowl with a clean towel and let it rise until it doubles in size, which should take about 60 minutes.
- After the dough has risen, punch it down gently to release the air. Now, form 20 small golf ball-sized dough balls.
- Cover the rolls with a towel again and let them rise for an additional 30 minutes.
- Preheat your oven to 350°F. In a small bowl, whisk together the remaining egg and 2 tablespoons of whole milk until combined. Brush this egg wash over the tops of each roll.
- Place the rolls in the oven and bake for 25 to 30 minutes, or until they’re golden brown on top and soft in the middle.
- Once done, brush the tops with more melted butter and sprinkle with additional salt if desired. Serve them warm for the best experience.
Notes
- Make-Ahead: You can prepare these rolls one day in advance. Once on the baking sheet, refrigerate them until 90 minutes before baking. Allow them to sit at room temperature for 60 minutes before baking.
- How to Store: Keep covered at room temperature for up to 3 days or in the refrigerator for 5 days. They freeze well for up to 3 months.
- How to Reheat: Reheat in a covered casserole dish at 350° for 4 to 6 minutes until hot.
- Proofing Tips: Keep the dough covered to prevent it from drying out while rising.
- Crust Instructions: Aim for a nice brown crust while ensuring the center is cooked thoroughly.