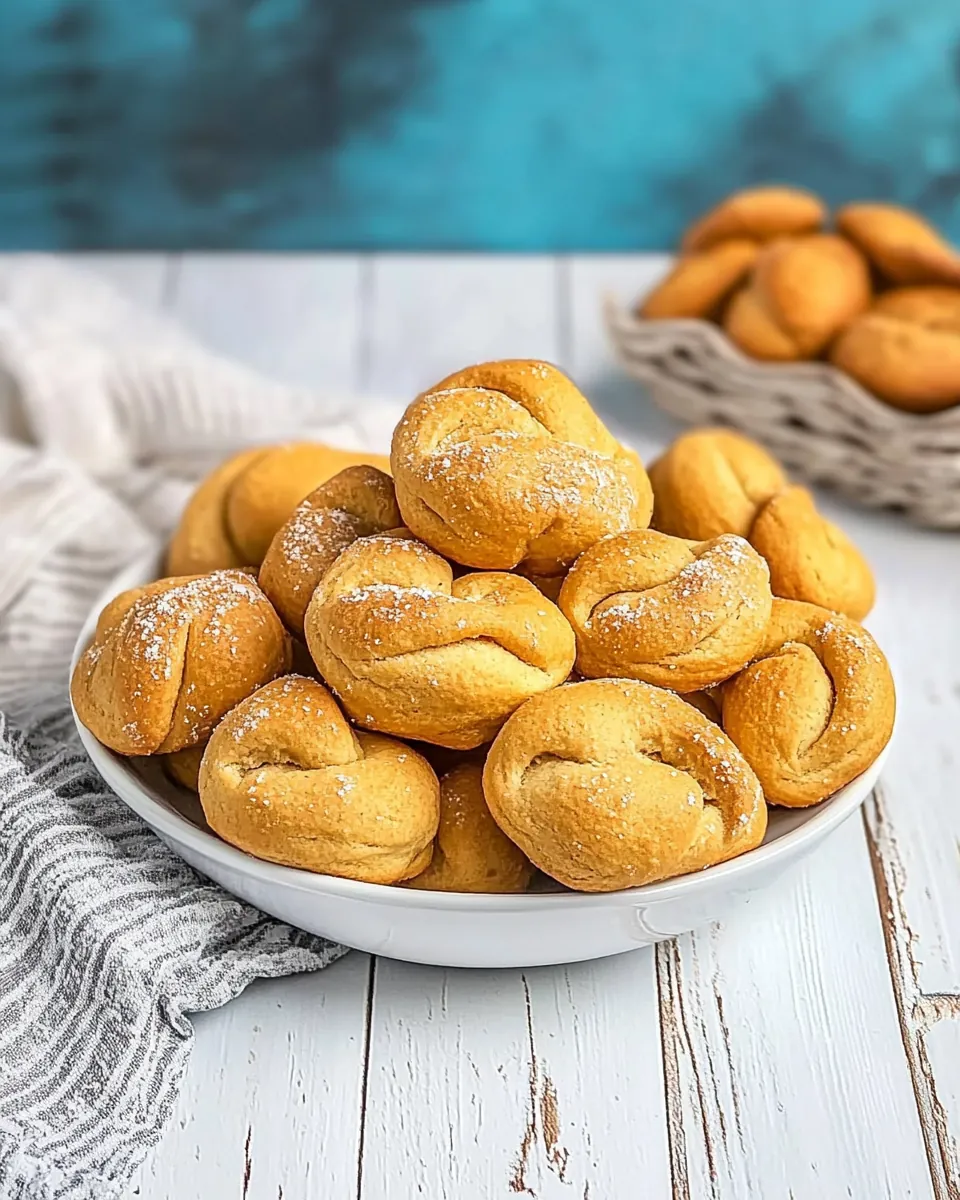
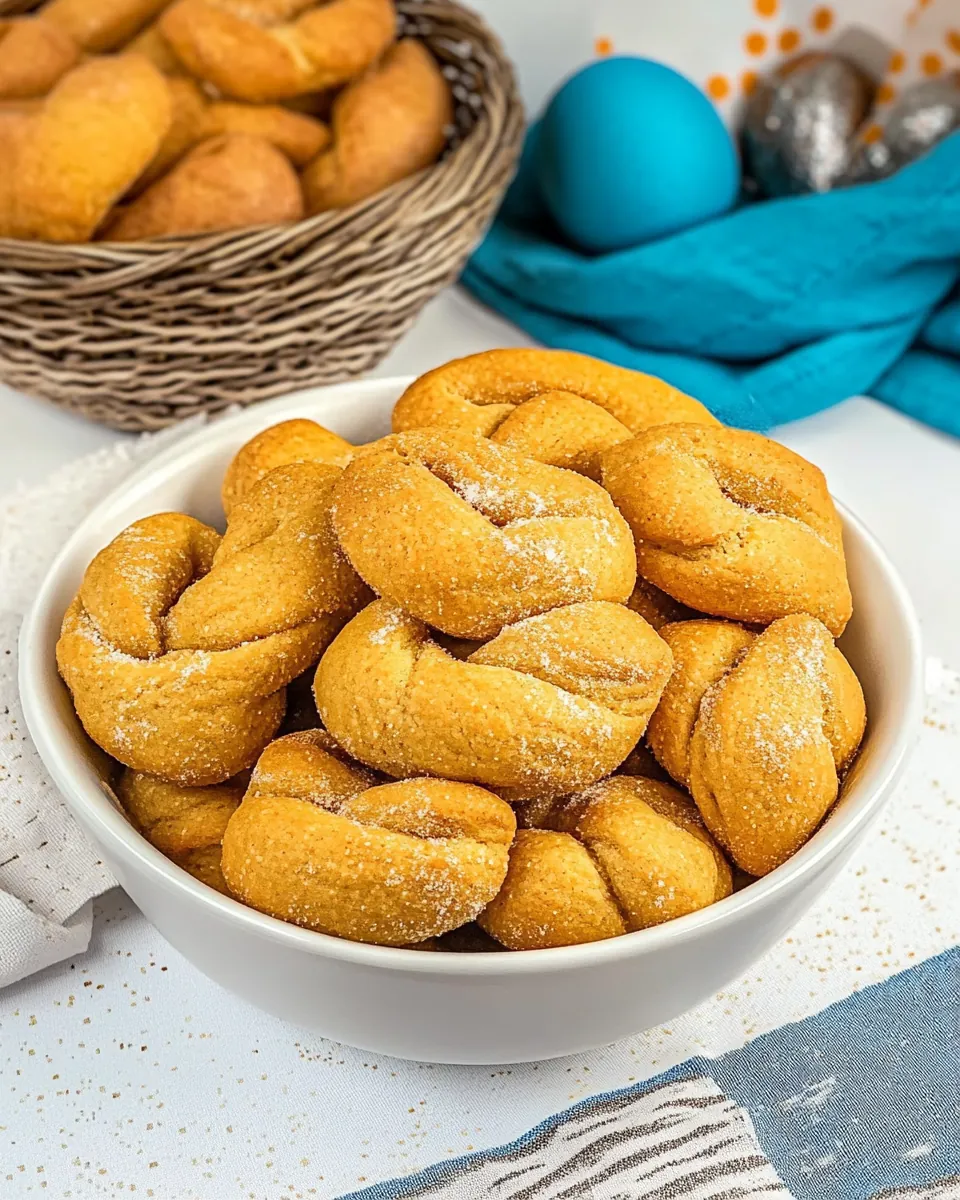
Koulourakia
The first time I made Koulourakia, I was captivated by the sweet, buttery aroma that filled my kitchen. These traditional Greek Easter cookies are not just any treat; they carry a rich history and are often made to celebrate the joyous occasion of Easter. Growing up, I remember my grandmother passing down her recipes, and Koulourakia was always a highlight. With their lovely golden color and unique shapes, these cookies have a way of bringing families together. It’s all about the love and care that goes into the preparation, and I can still hear my grandmother’s laughter as we shaped the dough into perfect twists and braids.
Recipe Snapshot
1 hr 10 mins
30 mins
40 mins
Medium
155 kcal
2 g
Gluten-Free, Low FODMAP
7 g
Oven, Baking Sheet, Mixing Bowl, Wooden Spoon
Why This Koulourakia Works
Perfect for Celebrating Traditions
One of the reasons I adore Koulourakia is their deep-rooted connection to Greek culture. Each bite is like a warm hug, reminding me of my heritage.
Easy to Make
These cookies may look intricate, but I promise they are quite simple to make! The steps are straightforward, and you’ll find the process enjoyable, especially when you share it with someone.
Versatile and Customizable
The beauty of Koulourakia lies in their versatility. While the classic recipe is delicious, you can easily adapt the flavors to suit your taste buds. For example, adding a hint of citrus or a sprinkle of cinnamon can elevate these cookies to the next level.
Perfect for Every Occasion
While they are traditionally made for Easter, I love to whip up a batch of Koulourakia for other celebrations too. Whether it’s a birthday, a family gathering, or simply a cozy evening at home, these cookies are always a hit.
A True Symbol of Love
Making Koulourakia is a labor of love. You can feel the connection to your loved ones while preparing them, like carrying a piece of your family’s history forward.
Ingredients You’ll Need for Koulourakia

When it comes to making Koulourakia, the choice of ingredients plays a vital role in creating their signature flavor and texture. Each component complements the others, creating a harmonious blend that results in cookies that are deliciously soft yet delightfully crunchy. The key players in this recipe are the rich butter, eggs, and flour, which come together to form a dough that is a joy to work with and indulgent to eat.
- 250g Butter at room temperature: This is the star ingredient that provides a rich flavor and a tender texture to the cookies.
- 130g Powdered Sugar: Adds sweetness and helps achieve a smooth, delicate crumb.
- 2 Large Eggs: Contributes to the structure and moisture of the cookies.
- 80ml Whole Milk: Gives the dough the perfect consistency, ensuring it’s not too dry.
- 1 tbsp Honey: Adds a subtle depth of flavor and sweetness.
- Zest of 1 Orange: A burst of citrus that brightens the overall flavor profile.
- 1 tsp Vanilla Extract: Enhances the cookie’s flavor and aroma.
- 500g All-Purpose Flour: The main body of the dough, providing structure.
- 1 tsp Baking Powder: Helps the cookies rise slightly and become fluffy.
- 1 Egg Yolk beaten with a little water, for brushing: Gives the cookies a beautiful golden color when baked.
Preparation Steps for Koulourakia

Now that we have our ingredients ready, it’s time to bring them together and create these delightful cookies. Making Koulourakia is not just about following steps; it’s about enjoying the experience and letting your creativity shine through. Let’s dive into the preparation process!
In a large mixing bowl, combine butter and powdered sugar. Beat them together on high speed using a paddle attachment for about four to five minutes until the mixture becomes light and fluffy. This step is essential as it incorporates air into the dough, giving your cookies a lovely texture.
Next, crack in the eggs, mixing well until they are fully incorporated. Now, pour in the milk and continue to mix. You want to achieve a smooth and creamy mixture that is well blended.
Once your wet ingredients are ready, it’s time to add the honey and orange zest. Stir them in until everything is evenly mixed. The aroma will be delightful, hinting at the deliciousness to come!
In a separate bowl, sift together the flour, baking powder, and vanilla extract. This ensures that your dry ingredients are evenly distributed, which is key for good texture.
Gradually add the flour mixture to the butter mixture. Mix slowly to prevent flour from flying everywhere, gradually bringing the dough together. You’re looking for a soft, slightly sticky dough at this point.
Once combined, turn the dough out onto a lightly floured surface and knead it gently. Form it into a ball, then cover it with plastic wrap. It’s time to let it rest in the refrigerator for at least one to two hours. If you can wait overnight, the flavors will develop even further!
When you’re ready to bake, preheat your oven to 170°C (340°F). If you have convection mode, use it for an even bake.
Take small portions of the chilled dough, about 25 to 30 grams each, and shape them into your desired forms. You can twist them into braids or create simple rings; the choice is yours! Place the shaped cookies on baking trays lined with parchment paper.
Using a brush, lightly coat each cookie with the egg yolk mixture. This will give them that stunning golden color as they bake.
Bake the cookies in your preheated oven for about 20 to 25 minutes, or until they are golden brown. Keep an eye on them towards the end of baking to prevent over-browning.
Once done, remove the cookies from the oven and allow them to cool completely on a wire rack. This step is crucial, as the cookies will firm up as they cool.
Things Worth Knowing
- Chilling is Key: Allowing the dough to chill helps develop the flavors and makes it much easier to handle.
- Don’t Skip the Egg Wash: Brushing with egg yolk not only gives a beautiful finish but also adds a rich flavor.
- Baking Time May Vary: Each oven is different; always check your cookies a few minutes before the suggested baking time to avoid burning.
- Shape Matters: Experiment with different shapes! The traditional twist is lovely, but you can also make rings or even simple rounds.
Helpful Hints
To make your baking experience with Koulourakia as delightful as the cookies themselves, here are some helpful tips. These will ensure that you master this recipe and get the most out of your cooking session.
- Storage: Keep your Koulourakia in an airtight container at room temperature for up to one week to maintain freshness.
- Freezing: You can freeze the baked cookies for up to three months. Just make sure to place parchment paper between layers to avoid sticking.
- Pairing: These cookies pair wonderfully with tea or coffee, making them perfect for a cozy afternoon break.
- Variations: Feel free to add chopped nuts or chocolate chips to the dough for a different twist on the classic recipe.
- Shaping: Don’t hesitate to get creative with the shapes! Experiment with different styles to impress your friends and family.
Perfect Matches for Koulourakia
Serving Koulourakia is just as important as making them. These cookies can be enjoyed in a variety of settings, making them incredibly versatile for any occasion. Here are a few ideas:
- Afternoon Tea: They are perfect for an afternoon gathering, served alongside a steaming cup of tea or coffee. The sweetness complements the bitterness of the drinks beautifully.
- Festive Celebrations: Make Koulourakia a staple during holidays like Easter or any family gathering; they symbolize togetherness and joy.
- Gift Giving: Pack them in a decorative box to gift to friends and family. They make a thoughtful present that showcases your baking skills.
- Breakfast Treat: Enjoy them as a sweet breakfast option with a side of yogurt and fresh fruit!
- Seasonal Pairings: These cookies are delightful year-round, but they shine especially in spring when fresh herbs and citrus are abundant.
FAQ
Conclusion
Koulourakia truly embodies the spirit of Greek tradition and brings joy to any gathering. Their delightful texture and sweet flavors make them irresistible. I encourage you to give this recipe a try and create your own batch of these lovely cookies. It’s not just about baking; it’s about creating memories with every bite!
Koulourakia
Ingredients
Equipment
Method
- In a large mixing bowl, combine butter and powdered sugar. Beat them together on high speed using a paddle attachment for about four to five minutes until the mixture becomes light and fluffy.
- Next, crack in the eggs, mixing well until they are fully incorporated. Now, pour in the milk and continue to mix.
- Once your wet ingredients are ready, it’s time to add the honey and orange zest. Stir them in until everything is evenly mixed.
- In a separate bowl, sift together the flour, baking powder, and vanilla extract. This ensures that your dry ingredients are evenly distributed.
- Gradually add the flour mixture to the butter mixture. Mix slowly to prevent flour from flying everywhere.
- Once combined, turn the dough out onto a lightly floured surface and knead it gently. Form it into a ball, then cover it with plastic wrap.
- When you’re ready to bake, preheat your oven to 170°C (340°F).
- Take small portions of the chilled dough, about 25 to 30 grams each, and shape them into your desired forms.
- Using a brush, lightly coat each cookie with the egg yolk mixture.
- Bake the cookies in your preheated oven for about 20 to 25 minutes, or until they are golden brown.
- Once done, remove the cookies from the oven and allow them to cool completely on a wire rack.
Notes
- Tip 1: Keep your Koulourakia in an airtight container at room temperature for up to one week to maintain freshness.
- Tip 2: You can freeze the baked cookies for up to three months.
- Tip 3: They pair wonderfully with tea or coffee.
- Tip 4: Feel free to add chopped nuts or chocolate chips to the dough.
- Tip 5: Experiment with different shapes!