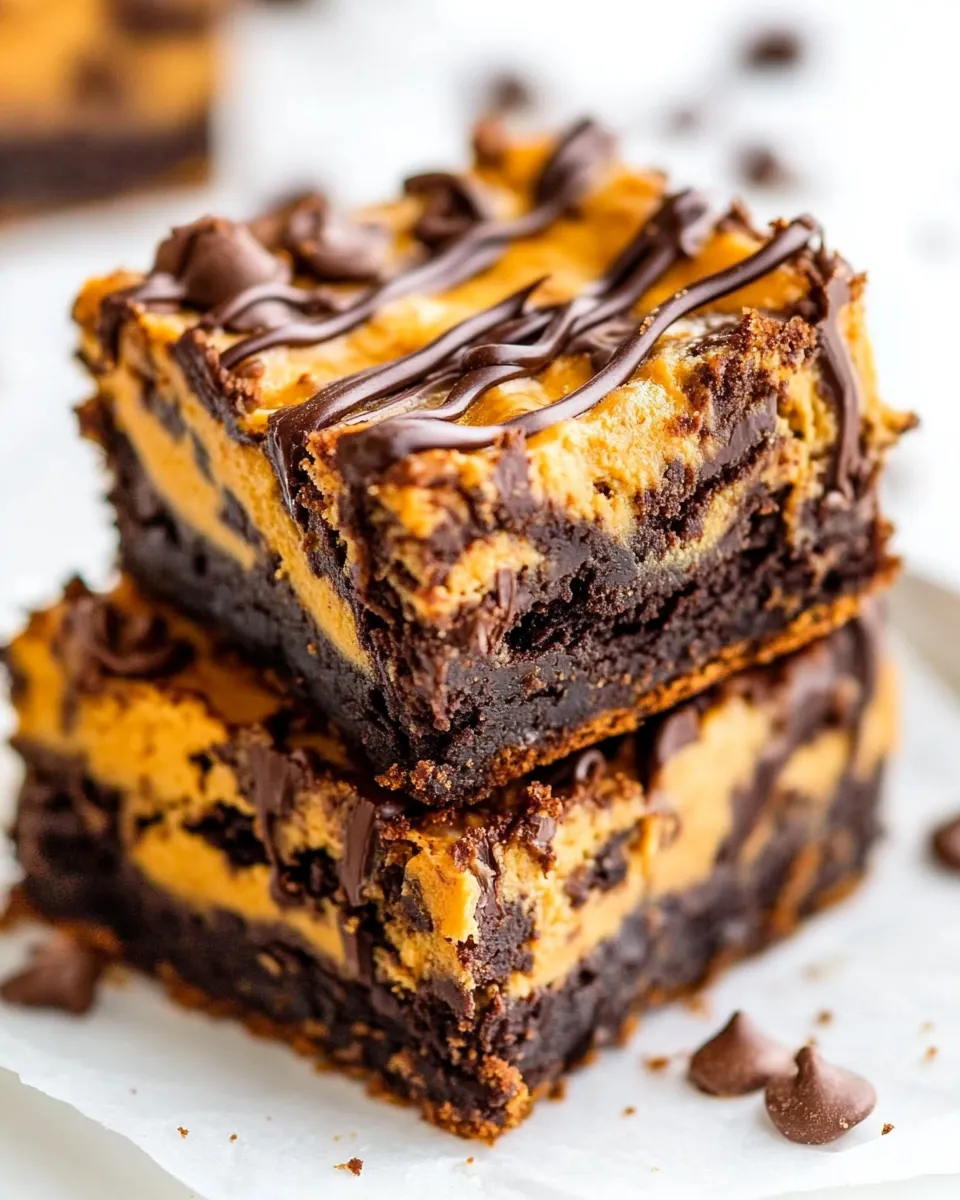
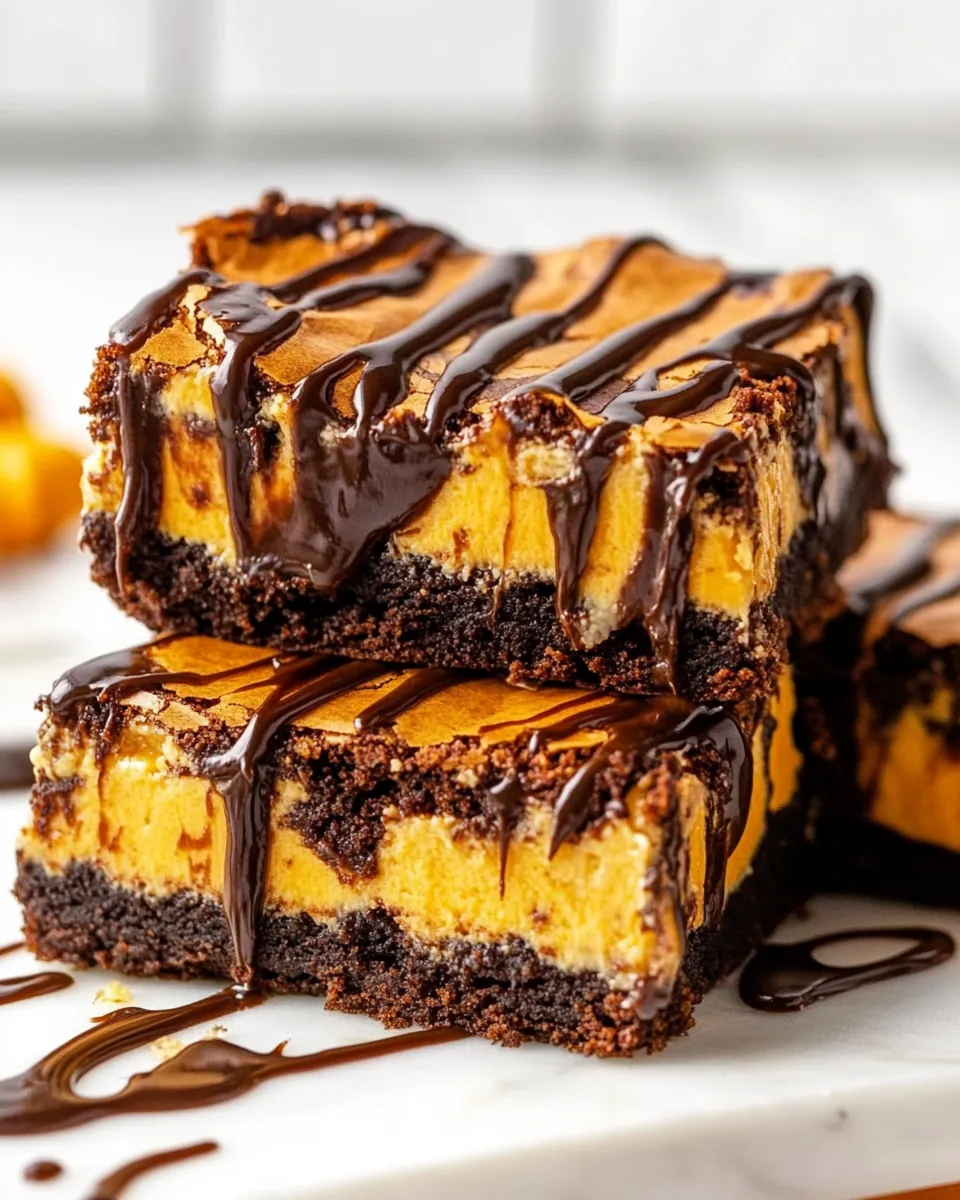
Pumpkin Cheesecake Brownies
Every fall, as the leaves turn golden and the air takes on a crisp chill, I find myself reaching for my favorite dessert: Pumpkin Cheesecake Brownies. This delightful creation combines the richness of a brownie with the creamy indulgence of cheesecake, all infused with the warm spices of autumn. It was during one such fall afternoon, with the aroma of cinnamon wafting through my kitchen, that I decided to experiment with this classic pairing. I remember the first time I served them at a family gathering; the look of sheer happiness on everyone’s faces as they took their first bite was unforgettable. This dish has become a staple, as it seamlessly blends the comforting flavors of pumpkin pie with the decadence of brownies. Every bite feels like a warm hug, and I can’t help but think this is the perfect way to celebrate the season.
Recipe Snapshot
1 hr 5 mins
15 mins
50 mins
Medium
250 kcal
3 g
Gluten-Free, Low FODMAP
12 g
8-inch Square Cake Pan, Parchment Paper, Glass Mixing Bowl Set (3 piece), Keep Calm And Bake On Spatula, KitchenAid Hand Mixer, Black Cooling Rack
Why This Pumpkin Cheesecake Brownies Works
Rich Flavor Fusion
The combination of chocolate and pumpkin is a match made in dessert heaven. The Pumpkin Cheesecake Brownies feature a chocolatey brownie base that is not overly sweet, which perfectly balances the rich, creamy cheesecake filled with pumpkin. It’s this dynamic that makes each bite an experience, where the flavors dance together harmoniously.
Perfect for Gatherings
These brownies are a crowd-pleaser. When you bring a tray of Pumpkin Cheesecake Brownies to a holiday gathering or a cozy family dinner, you’ll find that they disappear quickly. People are always drawn to the unique layers and the delicious taste, making them a fantastic dessert to share.
Seasonal Ingredients
The star ingredients in these brownies are not just delicious but also seasonal. Using canned pumpkin and warm spices like cinnamon and pumpkin spice invokes that cozy fall vibe. It’s delightful to incorporate these flavors when the season calls for it!
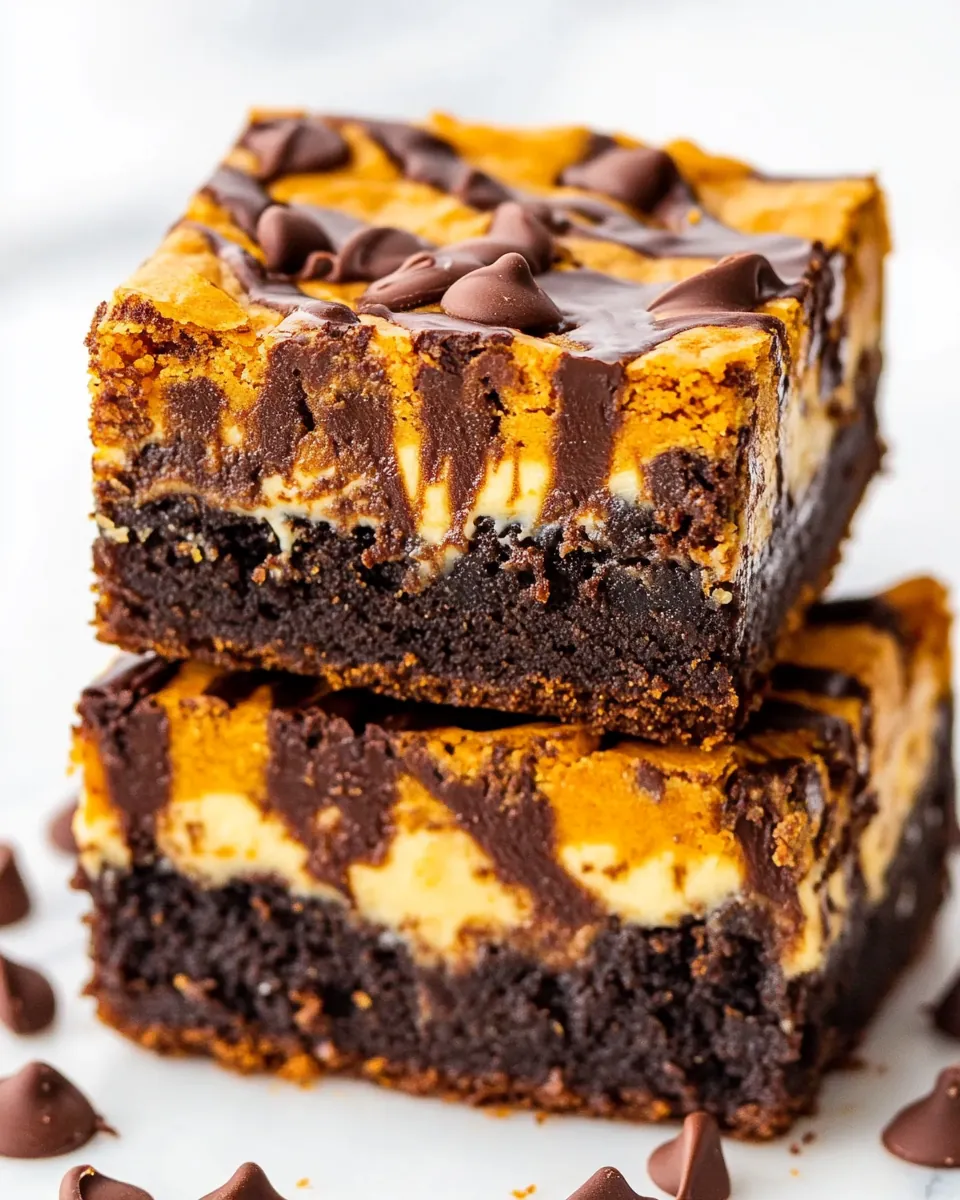
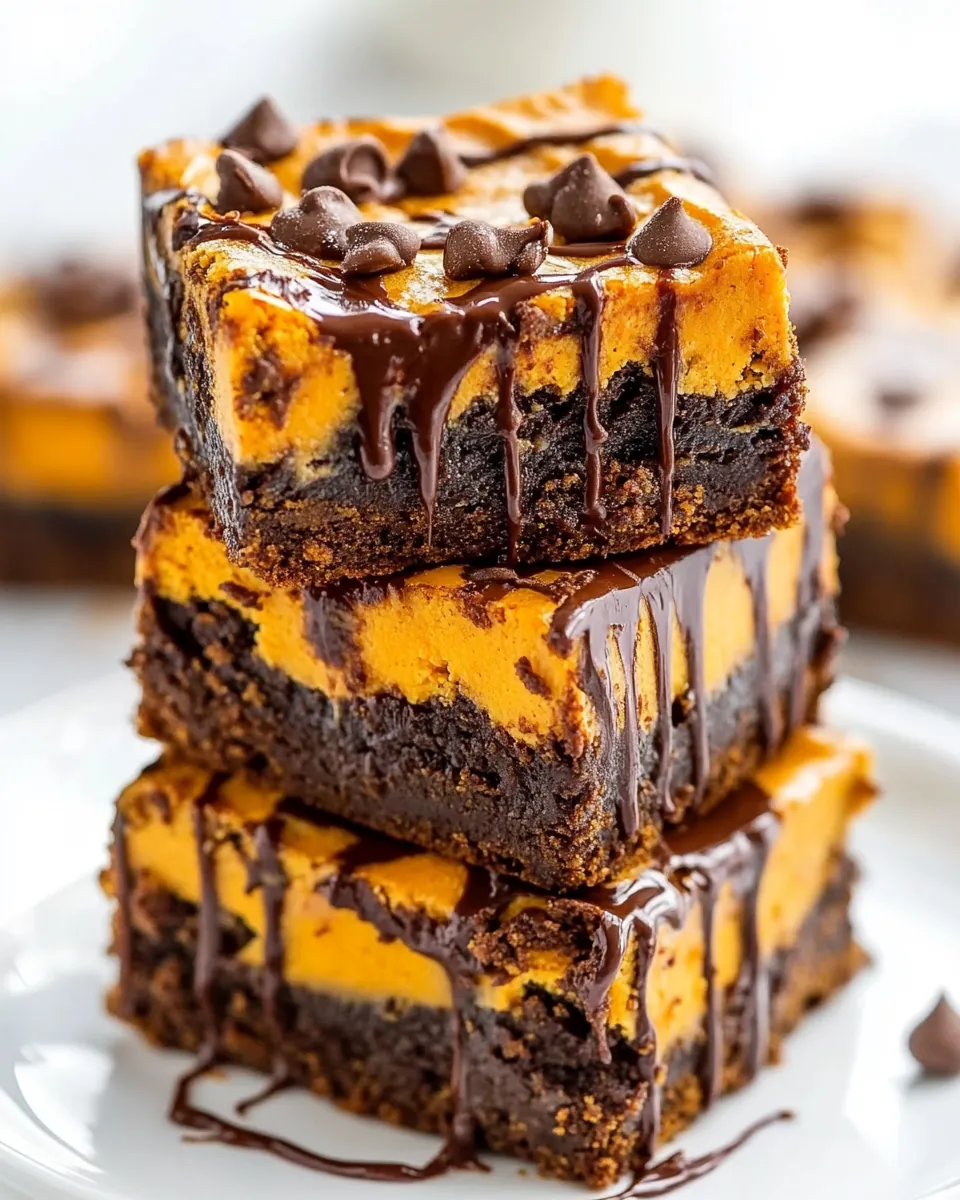
Visual Appeal
Not only do they taste incredible, but Pumpkin Cheesecake Brownies are also visually stunning. With their marbled top and rich layers, they’re sure to impress. You might even find yourself snapping a picture before they are devoured—though it’s tough to resist digging in!
Easy to Make
Despite their impressive appearance, these brownies are surprisingly easy to make. With straightforward steps and common ingredients, you can whip up a batch in no time. It’s a great recipe for both novice bakers and seasoned pros alike.
Versatile Dessert
These brownies are versatile enough to adapt for various occasions. Whether it’s a cozy fall evening at home, Thanksgiving celebrations, or even a potluck, the Pumpkin Cheesecake Brownies fit right in. You can serve them plain or with a dollop of whipped cream for an added touch of indulgence.
Essential Ingredients for Pumpkin Cheesecake Brownies
The ingredients in Pumpkin Cheesecake Brownies are simple yet essential for achieving that perfect blend of flavors. Each component plays a vital role, from the creamy texture of the cream cheese to the warm notes of cinnamon. Together, they create a delicious harmony that defines this beloved dessert.
- ¾ cup butter (unsalted, melted): The base of the brownies, giving them richness and moisture.
- 1 cup sugar: Sweetens the brownies and adds to the overall balance of flavors.
- 1 teaspoon vanilla extract: Enhances the sweetness and adds fragrance.
- 2 eggs: Provides structure and helps bind the ingredients together.
- ½ cup all-purpose flour: The backbone of the brownies, giving them the right texture.
- ½ cup cocoa powder (unsweetened): Adds the chocolate flavor to the base, making it rich and decadent.
- ¼ teaspoon salt: Balances the sweetness and enhances the overall flavor.
- 2 teaspoons cinnamon: Imparts a warm, spicy flavor that complements the pumpkin.
- 8 ounces cream cheese (softened): The star ingredient in the cheesecake layer, providing creaminess and tang.
- 1 egg (for cheesecake): Adds richness to the cheesecake layer, making it smooth and creamy.
- ⅓ cup sugar (for cheesecake): Sweetens the cheesecake layer.
- ¼ cup all-purpose flour (for cheesecake): Helps set the cheesecake layer.
- ½ cup canned pumpkin: Adds moisture, flavor, and a beautiful color to the cheesecake layer.
- 1 teaspoon vanilla extract (for cheesecake): Adds depth of flavor to the cheesecake.
- ½ teaspoon cinnamon (for cheesecake): Enhances the flavor profile of the pumpkin layer.
- 1 teaspoon pumpkin spice: Amplifies the autumn flavors in the cheesecake.
Recipe Steps for Pumpkin Cheesecake Brownies
Making Pumpkin Cheesecake Brownies is an enjoyable process, and you’ll find yourself eager to dig in by the time they are ready! Let’s walk through the steps together, ensuring you capture that perfect texture and flavor with each layer.
Begin by preheating your oven to 350℉. This temperature is crucial for baking the brownies evenly. While your oven warms up, prepare an 8×8 inch baking pan by spraying it with cooking oil and lining it with parchment paper. This step ensures easy removal later on.
In a mixing bowl, add the melted butter, sugar, and vanilla extract. Mix these ingredients together until they are well combined. You want a smooth mixture that looks glossy.
Next, add the eggs to the butter mixture. Beat them in until the mixture becomes light and fluffy. This process adds air into your batter, which helps create a nice texture.
In another bowl, combine the dry ingredients for the brownie batter: flour, cocoa powder, salt, and cinnamon. Whisk them together to ensure they are evenly distributed. Gradually add this dry mixture into the butter mixture, mixing until well combined and smooth.
In a separate large bowl, add the softened cream cheese and beat it until smooth. This will be the base of your cheesecake layer. Once smooth, add the remaining cheesecake ingredients: egg, sugar, flour, canned pumpkin, vanilla extract, cinnamon, and pumpkin spice. Mix until everything is well combined and creamy.
Spread about two-thirds of the brownie batter into your prepared pan, smoothing it out evenly with a spatula. The brownie layer is your foundation, so ensure it’s spread evenly.
Next, carefully spread the cheesecake batter over the brownie layer. Use a spatula to smooth it out, ensuring it covers the brownie layer completely.
Now, take the remaining brownie batter and drop spoonfuls over the cheesecake layer. This layering creates a beautiful marbled effect.
Finally, take a butter knife or skewer and gently swirl the batters together. Be cautious not to disturb the bottom brownie layer too much if you want to keep distinct layers. It creates a visually appealing marbled top!
Place the baking pan in the preheated oven and bake for 40 to 50 minutes. The Pumpkin Cheesecake Brownies are done when the center is set and a toothpick inserted comes out with a few moist crumbs.
Once baked, remove them from the oven and let them cool completely on a wire rack. After they cool, place them in the fridge for a bit to chill before cutting into squares.
Things Worth Knowing
- Swirling Technique: When swirling the batters, focus mainly on the top two layers. This helps to create distinct layers without mixing into the bottom brownie layer.
- Cooling Time: Allow the brownies to cool completely before cutting them. This ensures cleaner cuts and better presentation.
- Storage: Keep any leftovers in an airtight container. They can be stored on the counter for up to 3 days or in the fridge for up to 5 days.
- Freezing: These brownies freeze well. Once cooled, place them uncovered in the freezer to freeze entirely. Then wrap them in plastic wrap and aluminum foil. They can last for up to 3 months.
Change It Up
While the Pumpkin Cheesecake Brownies are delightful as they are, here are some tips to customize or enhance your baking experience.
- Switch the Spices: If you love a bit of a kick, consider adding some nutmeg or allspice to the cheesecake layer for an extra depth of flavor.
- Nutty Addition: For a crunch factor, incorporate chopped nuts, like walnuts or pecans, into the brownie layer. They add a delightful texture.
- Cheesecake Swirl: Try to create more pronounced swirls by using a skewer to create a more dramatic marbling effect.
- Caramel Drizzle: Drizzle caramel sauce over the brownies before serving for an extra touch of sweetness and flair.
- Serving Suggestions: Serve the brownies warm with a scoop of vanilla ice cream on the side for a decadent dessert experience.
- Flavor Variations: Experiment with flavored cream cheese, like pumpkin spice or maple, to enhance the cheesecake layer.
What to Serve With Pumpkin Cheesecake Brownies
When it comes to serving Pumpkin Cheesecake Brownies, there are countless options depending on the occasion and mood. Here are some suggestions:
- Fall Gatherings: Pair these brownies with a warm spiced apple cider. The combination is perfect for enjoying on a chilly evening.
- Thanksgiving Dessert Table: These brownies are a festive addition alongside traditional pumpkin pie and pecan pie, bringing variety to your dessert spread.
- Cozy Evenings: Enjoy these brownies with a cup of hot chocolate or coffee as a sweet treat during movie nights or book clubs.
- Picnics or Potlucks: Slice them into smaller squares for easy sharing at outdoor gatherings. They travel well, making them a great picnic dessert.
- Ice Cream Pairing: Serve warm brownies with a scoop of vanilla ice cream for an indulgent dessert. The melting ice cream creates a delightful contrast with the brownies.
- Storage Tips: If you have leftovers, store them in an airtight container. They keep well on the counter for a few days and can be refrigerated for longer freshness.
FAQ
Conclusion
The Pumpkin Cheesecake Brownies are truly a delightful combination of rich flavors and textures. The moist brownie base, paired with the creamy cheesecake infused with pumpkin, makes for a treat that is hard to resist. I encourage you to try making these brownies, whether for a special occasion or simply to enjoy a cozy dessert at home. Bring a taste of fall into your kitchen; you won’t be disappointed!
Pumpkin Cheesecake Brownies
Ingredients
Equipment
Method
- Preheat your oven to 350℉. Spray an 8×8 inch baking pan with cooking oil and line it with parchment paper.
- In a bowl, add melted butter, sugar, and vanilla extract. Mix until well combined.
- Add in eggs and continue beating until light and fluffy.
- In another bowl, combine the dry ingredients: flour, cocoa powder, salt, and cinnamon. Gradually add to the butter mixture.
- In a large bowl, beat cream cheese until smooth. Add the rest of the cheesecake ingredients and mix until smooth.
- Spread about two-thirds of the brownie batter into the prepared pan, smoothing it out with a spatula.
- Spread the cheesecake batter over the brownie batter.
- Add remaining brownie batter over cheesecake by spoonfuls.
- Swirl the batters together with a butter knife or skewer.
- Bake for 40 to 50 minutes or until the center is set. Cool completely on a wire rack.
Notes
- Swirling Layers: For perfect layers, focus your swirling on the top two layers without touching the bottom brownie layer.
- Storage: Store leftovers in an airtight container on the counter for up to 3 days or in the fridge for up to 5 days.
- Freezing: Freeze the brownies fully cooled and uncovered on a pan, then wrap in plastic wrap and aluminum foil. They can last for up to 3 months.