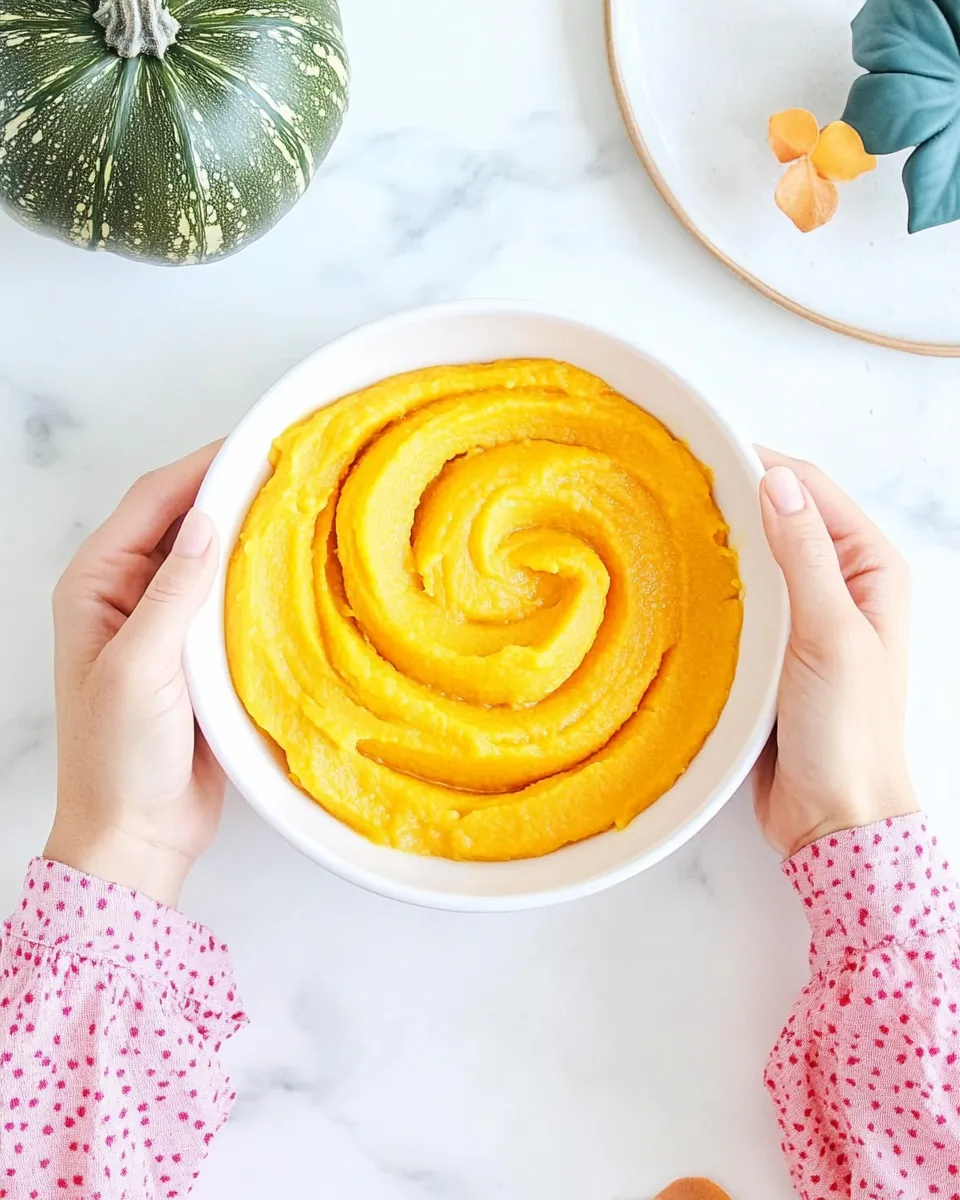
Pumpkin Puree
The first time I made Pumpkin Puree, I was struck by how simple it was, yet how transformative it felt. Every autumn, the air turns crisp, and the vibrant hues of orange and gold remind me of the cozy days ahead. I remember visiting a local farm, where the pumpkins were piled high, waiting to be harvested. The sweet, earthy scent filled the air, and I couldn’t resist picking out a perfect sugar pie pumpkin. Little did I know, this innocent-looking gourd would become the star of my kitchen, turning into creamy, luscious Pumpkin Puree that would enhance my favorite recipes.
As the days grew shorter, the evenings spent in the kitchen became my favorite ritual. I would roast that pumpkin, and as it filled the house with warmth, the magic began. Making Pumpkin Puree is not just about the process; it’s about the memories created and the flavors unlocked. This humble ingredient can elevate everything from soups to pastries. With each spoonful, I’m reminded of those joyful moments, and it makes every bite even more special.
In this recipe, I’ll share with you how to make Pumpkin Puree that is not only easy but also delicious. You’ll find that with just a few steps, you can create something that will enrich your seasonal dishes and leave your friends and family asking for seconds. Let’s delve into the art of making Pumpkin Puree, a delightful addition to your fall cooking repertoire.
Recipe Snapshot
50 mins
10 mins
40 mins
Medium
45 kcal
1 g
Vegan, Gluten-Free, AIP
0 g
Food Processor, Oven, Baking Sheet, Peeler, Chef’s Knife
Why You Need This Pumpkin Puree
Reasons to Love This Recipe
When it comes to fall cooking, Pumpkin Puree is a staple, and here’s why I adore it:
It’s Incredibly Versatile
This Pumpkin Puree can be used in countless recipes, from sweet to savory. Think of creamy soups, flavorful pies, and even breakfast pancakes. You’ll find it enhances almost anything!
Health Benefits
Besides its delicious taste, Pumpkin Puree is packed with nutrients. It’s rich in vitamins A and C, which are great for your health, especially during the colder months when our immune systems need a boost.
Easy to Make
The process of making Pumpkin Puree is straightforward and doesn’t require fancy equipment. With just a simple oven and a food processor, you can whip up a batch in no time.
Seasonal Delight
There’s something magical about cooking with seasonal ingredients. The act of making Pumpkin Puree in the fall connects you to the harvest and the essence of the season.
Cost-Effective
If you buy pumpkins during the fall, they’re often inexpensive. Making your own puree can save you money compared to store-bought options, especially when preparing for gatherings.
Freshness Guaranteed
When you make Pumpkin Puree at home, you know exactly what’s going into it. No preservatives, just pure, delicious pumpkin that you can feel good about sharing with loved ones.
What to Buy for Pumpkin Puree
When we talk about ingredients for Pumpkin Puree, we are looking at a few simple yet impactful components. The focus here is on the pumpkin itself, the heart of this recipe. Choosing the right pumpkin can make all the difference in the flavor and texture of your puree. I always recommend using sugar pie pumpkins or similar varieties like butternut or kabocha squash for their sweetness and creaminess.
- Pumpkin – 1 large pumpkin or squash (sugar pie pumpkin, butternut, buttercup, or kabocha squash). Avoid large Halloween carving pumpkins, as their flesh is too fibrous for a soft puree.
The Method for Pumpkin Puree
Now that we’ve gathered our ingredients, let’s dive into the method of creating that silky-smooth Pumpkin Puree. It’s a simple, rewarding process that brings the taste of fall right into your kitchen.
- Preheat your oven to 400°F (200°C). This step is crucial as a hot oven will help roast the pumpkin evenly, bringing out its natural sweetness. Line a baking sheet with parchment paper to prevent sticking.
- Slice the pumpkin in half. Be careful, as it can be tough to cut through. Use a sharp knife and steady pressure to cut through the flesh. Once halved, scoop out the seeds with a spoon, ensuring you get all the stringy bits out.
- Place the pumpkin halves cut side down on the baking sheet. This allows the steam to escape while roasting, making the flesh tender and easy to scoop out later.
- Roast the pumpkin in the preheated oven for 40 to 60 minutes. You’ll know it’s done when a fork easily pierces the flesh. Keep an eye on it, as roasting time can vary depending on the size of the pumpkin.
- Once roasted, remove the pumpkin from the oven and let it cool for about 1 hour. This cooling period helps handle the pumpkin without burning your fingers!
- Use your hands to peel the flesh from the skin. It should come off easily if the pumpkin is properly roasted. Place the flesh into a food processor.
- Puree the flesh until smooth. Let your food processor run for about a minute, stopping occasionally to scrape down the sides. This ensures everything gets blended evenly.
- If your puree turns out more watery than expected, don’t worry! You can strain the excess liquid by letting it sit in a fine mesh strainer (or cheesecloth) over a bowl for about 30 minutes.
- Finally, chill your Pumpkin Puree until ready to use. It’s now perfect for your favorite recipes!
Things Worth Knowing
- Roasting Tip: Ensure the pumpkin is evenly roasted for the best texture. Check for softness with a fork.
- Texture Check: The puree should be smooth and creamy. If it’s too watery, straining is key.
- Storage: Keep your Pumpkin Puree in an airtight container in the fridge for up to one week.
- Freezing: You can freeze this puree for up to three months. Just thaw before using.
- Choosing the Right Pumpkin: Sugar pie pumpkins are ideal for this recipe. Others like butternut squash also work well.
Customization Ideas
Customization is key when it comes to Pumpkin Puree. Here are some fun and creative ways to tailor this recipe to your taste:
- Add spices: Consider adding cinnamon, nutmeg, or ginger to the puree for a warm flavor boost.
- Sweeten it up: If you prefer a sweeter puree, a drizzle of maple syrup or honey can enhance the flavor.
- Use it in baking: Try substituting Pumpkin Puree in your favorite bread or muffin recipes for a seasonal twist.
- Create a soup: Blend your puree with vegetable broth, sautéed onions, and cream for a comforting soup.
- Make a dip: Mix Pumpkin Puree with cream cheese and spices for a delightful dip for crackers or veggies.
Accompaniments for Pumpkin Puree
Serving Pumpkin Puree opens up a world of possibilities, and here are some delightful ways to enjoy it:
- With Pancakes: Add a dollop of Pumpkin Puree to your pancake batter for a seasonal twist to breakfast.
- In Soups: Stir it into cream-based soups for a rich, velvety texture.
- In Desserts: Use it as a filling in pies or as a base for cheesecakes to impress your guests.
- As a Side: Serve it alongside roasted meats for a delicious contrast.
- Seasonal Gatherings: Perfect for Thanksgiving, this puree can be the star of your dinner table.
- Storage Tips: Keep leftover puree refrigerated or freeze in portions for later use.
FAQ
Conclusion
In conclusion, making Pumpkin Puree is a delightful way to embrace the flavors of the fall season. The process is simple, rewarding, and results in a delicious ingredient that can elevate countless dishes. I encourage you to try making it yourself and experience that fresh, homemade taste. Whether it’s in a pie, soup, or simply as a side, Pumpkin Puree can truly transform your meals into something exceptional.
Pumpkin Puree
Ingredients
Equipment
Method
- Preheat your oven to 400°F (200°C). This step is crucial as a hot oven will help roast the pumpkin evenly, bringing out its natural sweetness. Line a baking sheet with parchment paper to prevent sticking.
- Slice the pumpkin in half. Be careful, as it can be tough to cut through. Use a sharp knife and steady pressure to cut through the flesh. Once halved, scoop out the seeds with a spoon, ensuring you get all the stringy bits out.
- Place the pumpkin halves cut side down on the baking sheet. This allows the steam to escape while roasting, making the flesh tender and easy to scoop out later.
- Roast the pumpkin in the preheated oven for 40 to 60 minutes. You’ll know it’s done when a fork easily pierces the flesh. Keep an eye on it, as roasting time can vary depending on the size of the pumpkin.
- Once roasted, remove the pumpkin from the oven and let it cool for about 1 hour. This cooling period helps handle the pumpkin without burning your fingers!
- Use your hands to peel the flesh from the skin. It should come off easily if the pumpkin is properly roasted. Place the flesh into a food processor.
- Puree the flesh until smooth. Let your food processor run for about a minute, stopping occasionally to scrape down the sides. This ensures everything gets blended evenly.
- If your puree turns out more watery than expected, don't worry! You can strain the excess liquid by letting it sit in a fine mesh strainer (or cheesecloth) over a bowl for about 30 minutes.
- Finally, chill your Pumpkin Puree until ready to use. It’s now perfect for your favorite recipes!
Notes
- Storage: Keep your Pumpkin Puree in an airtight container in the fridge for up to one week.
- Freezing: You can freeze this puree for up to three months. Just thaw before using.
- Choosing the Right Pumpkin: Sugar pie pumpkins are ideal for this recipe. Others like butternut squash also work well.