Strawberry Cheesecake Cake
Every time I think about dessert, my mind jumps to the rich, creamy delight of a Strawberry Cheesecake Cake. This cake has a special place in my heart, reminding me of family gatherings where sweet treats brought everyone together. The rich layers of cheesecake and soft cake intertwine to create a symphony of flavors that’s simply irresistible. I remember the first time I made this dessert; the kitchen was filled with the sweet aroma of strawberries and cream, and my family couldn’t wait to dig in! With every bite, I could see the smiles on their faces, and that moment made the effort all worth it. When you serve this cake, you’re not just serving dessert; you’re sharing a piece of love and joy.
Recipe Snapshot
2 hr 15 mins
60 mins
75 mins
Hard
500 kcal
8 g
Gluten-Free, Low FODMAP
30 g
Large Pot, Oven, Baking Sheet, Blender, Frying Pan, Wooden Spoon, Whisk, Mixing Bowl
Why This Strawberry Cheesecake Cake Hits Different
What makes the Strawberry Cheesecake Cake so special? Let me share why this dessert deserves a spot on your table.
Layered Perfection
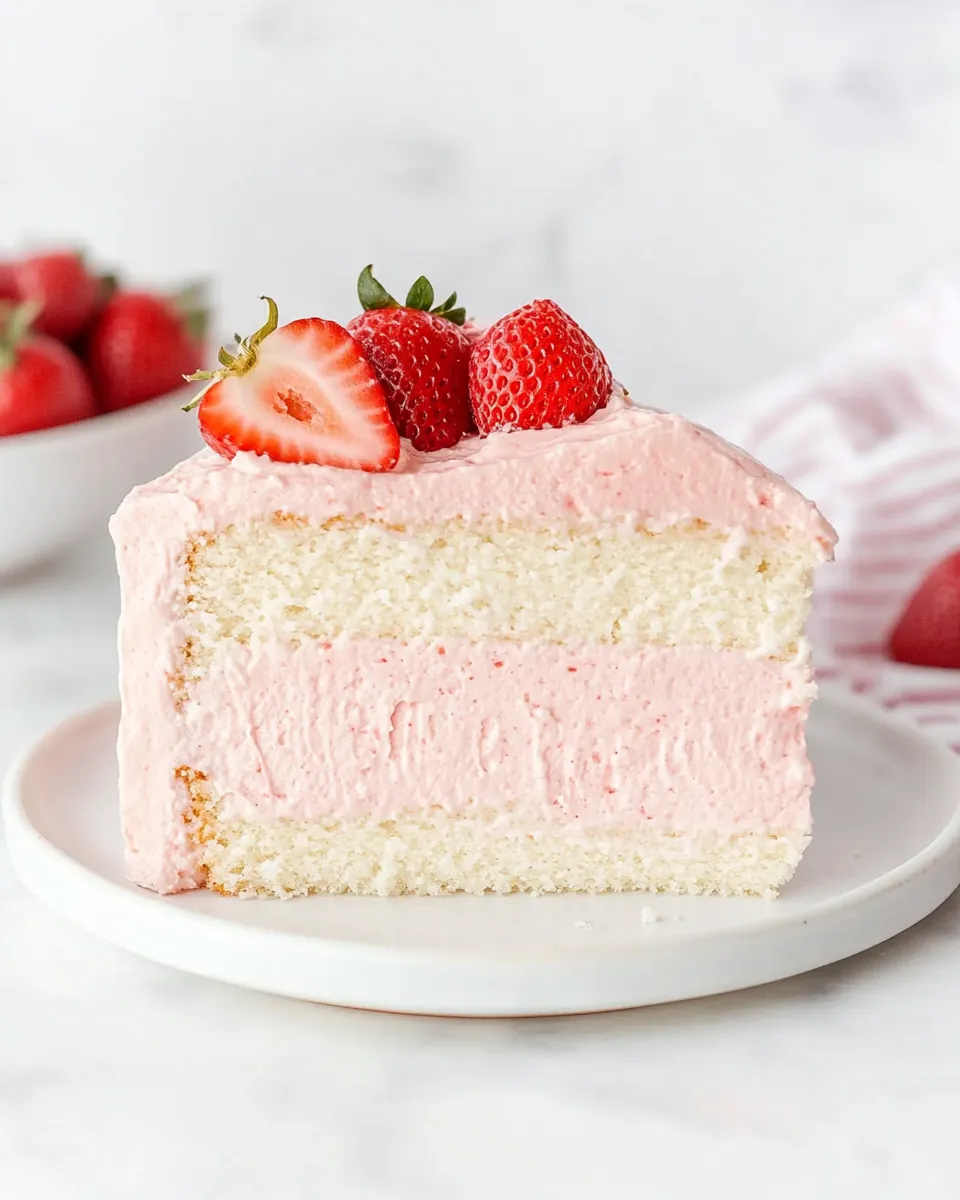
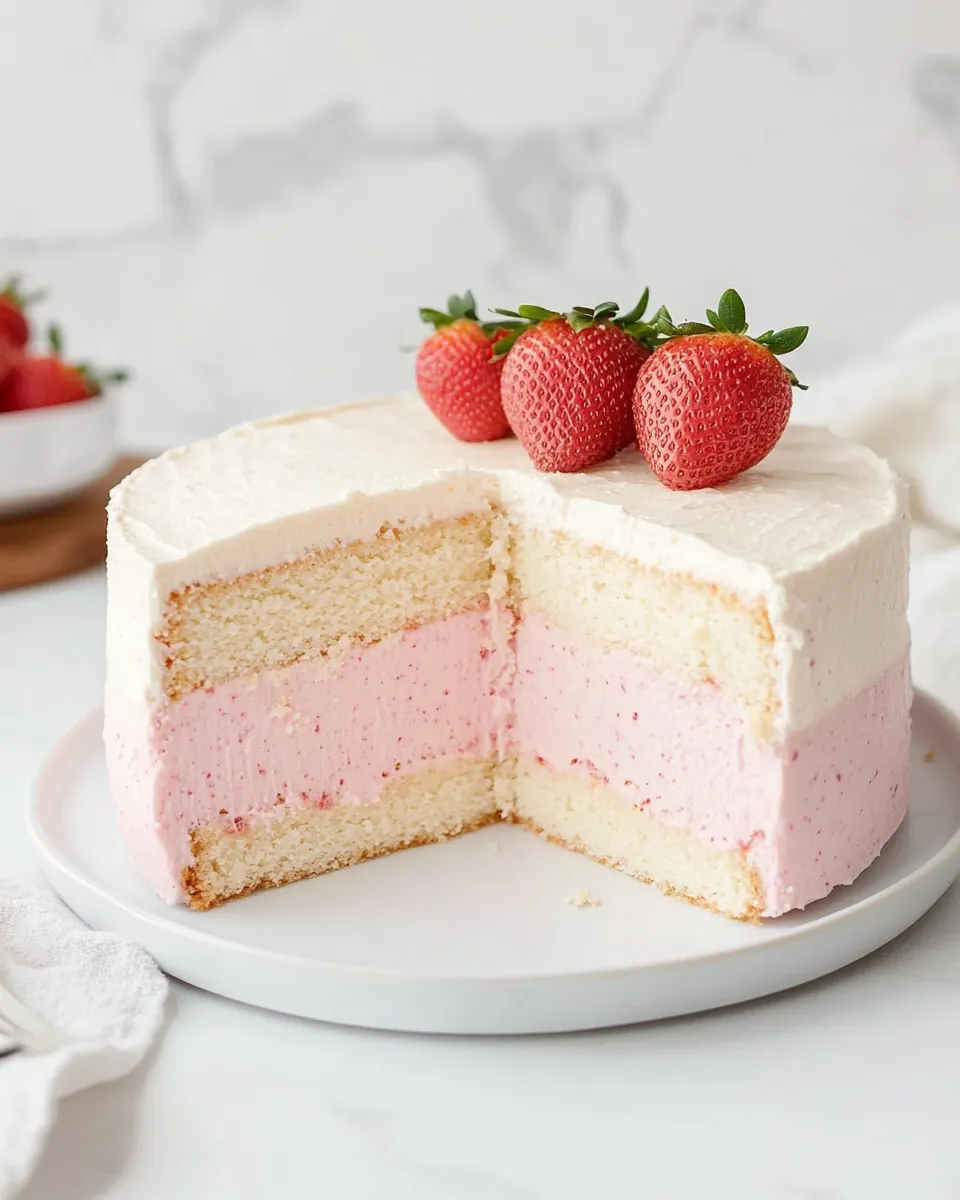
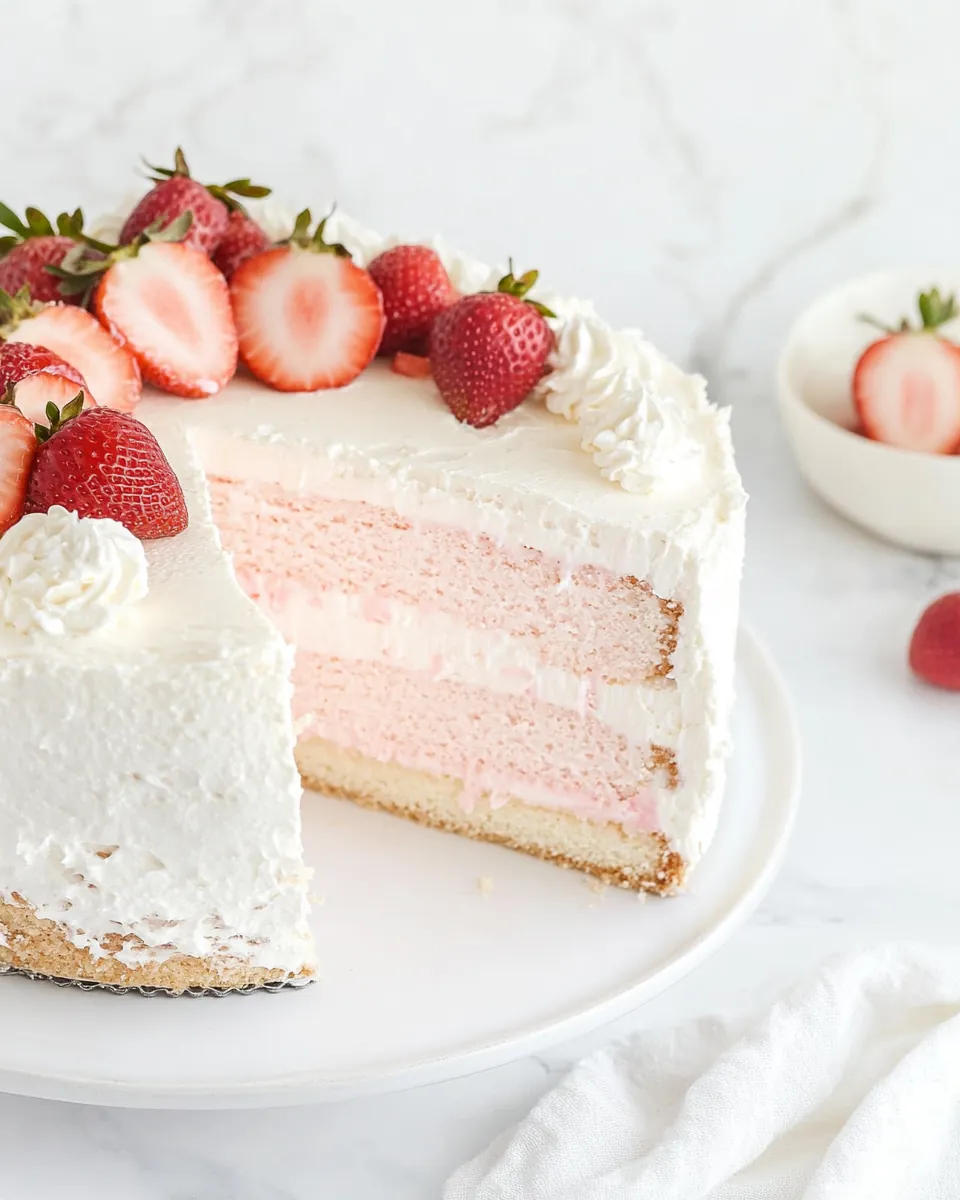
One of the standout features of the Strawberry Cheesecake Cake is its layered structure. The combination of a rich cheesecake layer topped with a light and fluffy cake creates an experience that tantalizes the taste buds. Each forkful offers a delightful contrast in textures, from the smoothness of the cheesecake to the airy cake layers. It’s truly a dessert that showcases the beauty of baking!
Fresh Flavors
Using fresh strawberries in this recipe elevates it to another level. The natural sweetness of the strawberries complements the creaminess of the cheesecake beautifully, creating a harmonious flavor profile. It’s like tasting a slice of summer in every bite! Plus, the vibrant color of fresh strawberries makes the cake visually stunning, perfect for any occasion.
Impressive Yet Simple
Don’t be intimidated by the layered look of the Strawberry Cheesecake Cake. While it may seem complex, the steps are simple and achievable for bakers of all levels. With a little patience and dedication, you can create a dessert that looks like it came from a bakery, impressing friends and family alike!
Versatility
This cake is perfect for any occasion, whether it’s a birthday, family gathering, or just a sweet treat for yourself. You can decorate it with whipped cream, fresh fruit, or even a drizzle of chocolate sauce. The possibilities are endless, and that’s what makes this dessert so much fun to serve.
Leftover Love
If you have any leftovers (which is rare!), the Strawberry Cheesecake Cake stores beautifully. You can keep it in the refrigerator and enjoy it for days. Each bite tastes just as good as the first, making it a perfect dessert to prepare ahead of time for gatherings.
What to Buy for Strawberry Cheesecake Cake
When it comes to making a Strawberry Cheesecake Cake, choosing the right ingredients is essential for achieving the perfect flavor and texture. We’ll be working with a range of ingredients that complement each other beautifully, from the creamy cream cheese to the sweet strawberries. Each component has a role to play in creating a harmonious dessert that will leave everyone asking for seconds.
- Two 8-ounce packages of cream cheese: Ensure this is at room temperature to achieve a smooth, creamy filling.
- ⅔ cup granulated white sugar: This adds the necessary sweetness to balance the tang of the cream cheese.
- Pinch of salt: Enhances the flavors and balances the sweetness.
- 2 large eggs: Provides structure and helps bind the cheesecake mixture.
- ⅓ cup sour cream: Adds a subtle tang and creaminess to the filling.
- ⅓ cup heavy whipping cream: Ensures a rich and velvety texture in the cheesecake layer.
- 1 teaspoon vanilla extract: Adds a warm, sweet aroma to the flavors.
- 10 ounces frozen whole strawberries: These are perfect for the cake and add a natural sweetness.
- ¾ cup whole milk: Keeps the batter moist and tender.
- 6 large egg whites: Contributes to a light and fluffy cake texture.
- 2 teaspoons vanilla extract: Adds flavor to the cake layers.
- 2¼ cups cake flour: A lighter flour that helps create a delicate cake.
- 1¾ cups granulated white sugar: Sweetens the cake beautifully.
- 4 teaspoons baking powder: Provides lift to the cake.
- 1 teaspoon salt: Balances the flavors in the cake.
- 12 tablespoons unsalted butter: Softened to room temperature, it’s essential for a rich flavor.
- A few drops of red food coloring (optional): To enhance the pink hue of the cake.
- 12 ounces cream cheese: For the frosting, creamy and luscious.
- ½ cup unsalted butter: Again, at room temperature for a smooth frosting.
- 2 teaspoons vanilla extract: A must for frosting flavor.
- ¼ cup strawberry puree: Adds fresh flavor and color to the frosting.
- 1 tablespoon heavy whipping cream: For a silkier frosting texture.
- 2 to 3 cups powdered sugar: Needed to achieve the perfect frosting consistency.
- Fresh strawberries and/or slivers of white chocolate: Optional, but they make beautiful decorations.
The Process for Making Strawberry Cheesecake Cake
Making a Strawberry Cheesecake Cake is a rewarding experience that fills your kitchen with delightful aromas. Follow these steps closely, and you’ll create a dessert that’s sure to impress! Let’s get started with the layers.
Preheat your oven to 325°F (160°C) and prepare a 9-inch springform pan by spraying it with nonstick spray. This ensures your cheesecake will release easily after baking.
In a large mixing bowl, use an electric mixer to blend the cream cheese until smooth and creamy, about 1 to 2 minutes. You want it to be free of lumps for a silky filling. Add the granulated sugar and salt, mixing for an additional 2 minutes. Make sure to scrape down the sides of the bowl to incorporate everything well.
Slowly add the eggs one at a time, blending after each addition. This step is crucial; it helps to create a stable cheesecake mixture. Finally, fold in the sour cream, heavy whipping cream, and vanilla extract until everything is combined and smooth. Pour this luscious batter into the prepared springform pan.
Bake your cheesecake for about 45 minutes. It should be set around the edges but still slightly jiggly in the center. Remember, don’t worry if it cracks on top; this is normal. Let it cool on a wire rack for at least an hour, then place it in the freezer to chill completely for 4 to 5 hours or overnight if possible.
Once your cheesecake is set, preheat your oven to 350°F (180°C). Now, prepare two 9-inch round cake pans by spraying them with nonstick spray, and line them with parchment paper for easy release. This step is vital to ensure your cake comes out perfectly.
For the cake layers, microwave the frozen strawberries in a covered bowl for about 5 minutes until they are soft and juicy. Strain the strawberries using a fine-mesh strainer placed over a small saucepan, pressing with a rubber spatula to extract as much juice as possible. This juice will be used in the cake batter.
Boil the strained strawberry juice over medium-high heat, stirring occasionally until it thickens and measures about ¼ cup, approximately 6 to 8 minutes. Off the heat, whisk in the whole milk. Transfer this mixture into a clean bowl and whip in the egg whites and another dose of vanilla extract until combined.
In a large bowl, whisk together the cake flour, granulated sugar, baking powder, and salt. Then, add the softened unsalted butter a bit at a time, mixing until the texture resembles small peas. This method helps create a fluffy cake texture.
Gradually add half of the milk mixture, increase the mixer speed to medium-high, and beat for about 1 minute until light and fluffy. Lower the speed and add the remaining milk mixture, mixing until just incorporated, which should take about 30 seconds. If you want an extra pop of color, add a few drops of red food coloring at this point.
Divide the cake batter evenly between the prepared pans, smoothing the tops with a rubber spatula. Gently tap the pans on your countertop to release any air bubbles. Bake for about 20 to 25 minutes, or until a toothpick inserted into the center comes out clean.
Let the cakes cool in their pans on a wire rack for about 10 minutes. Carefully remove the cakes by inverting them on the rack, discarding the parchment paper, and allowing them to cool completely.
While the cakes cool, prepare the frosting by combining the remaining cream cheese and softened unsalted butter in a large bowl. Beat until the mixture is smooth and creamy. Stir in the vanilla extract, strawberry puree, and heavy whipping cream. Gradually mix in the powdered sugar until you reach your desired frosting consistency.
To assemble, place one cake layer on a serving plate. Carefully remove the chilled cheesecake from the freezer and release it from the springform pan. If necessary, trim the cheesecake edges to match the cake layers. Spread a layer of frosting on top of the first cake layer, place the cheesecake on top, and add more frosting before topping it with the second cake layer.
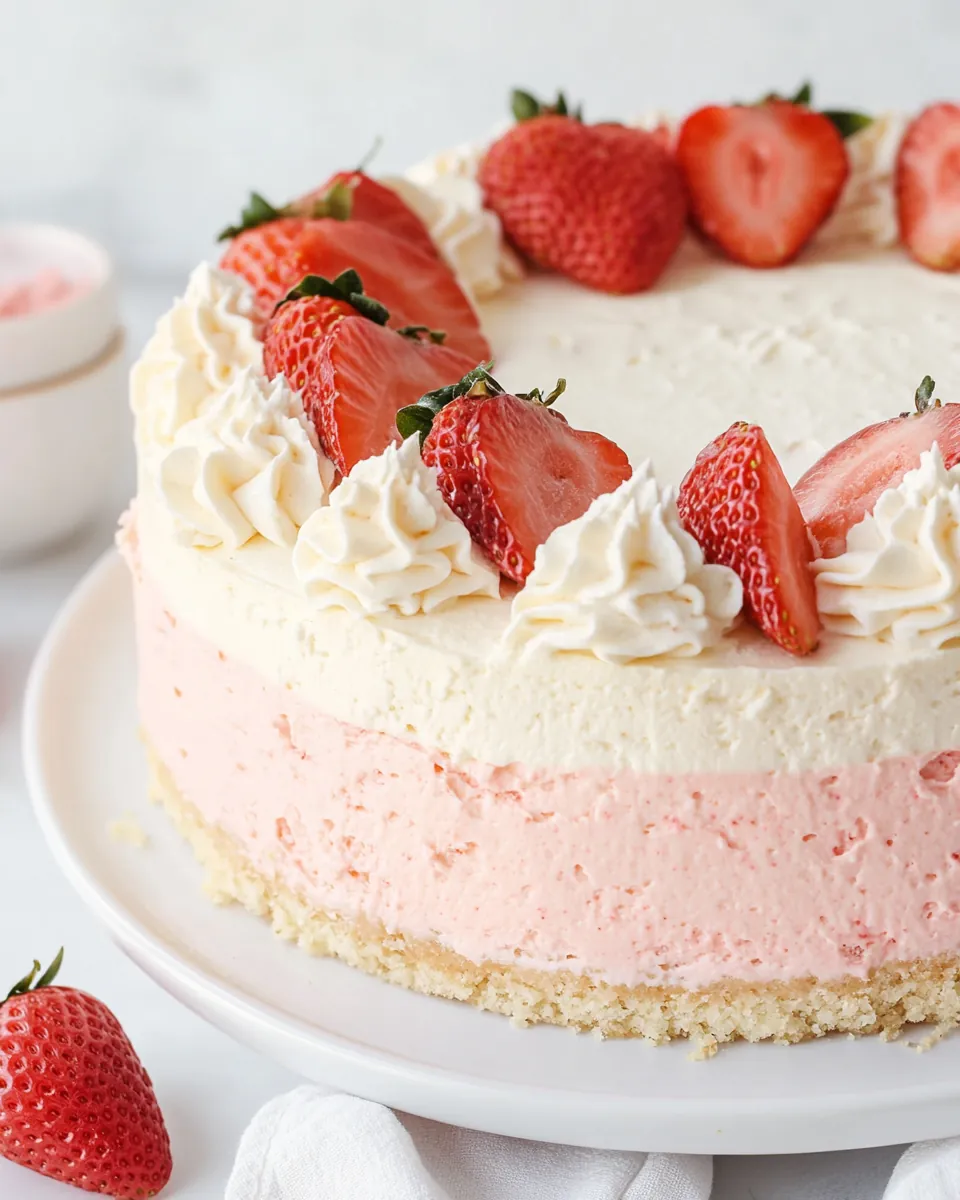
Apply a crumb coat of frosting around the entire cake to trap any crumbs. Chill the cake in the refrigerator for about 30 minutes until the frosting is set. If desired, apply a second layer of frosting for a smoother finish and decorate as you wish. Chill until ready to serve.
Things Worth Knowing
- Temperature Matters: Ensure your ingredients are at room temperature for the best results, especially the cream cheese and butter.
- Don’t Overmix: When combining ingredients, mix just until incorporated to avoid dense cakes or cheesecakes.
- Cooling Time: Allowing the cheesecake to cool completely in the freezer helps it hold its shape when layered.
- Use Fresh Ingredients: Fresh strawberries and cream make a significant difference in flavor and texture.
- Don’t Skip the Crumb Coat: This step helps prevent crumbs from showing through the frosting and gives a polished look.
Recipe Tips about Strawberry Cheesecake Cake
To ensure your Strawberry Cheesecake Cake turns out perfectly, here are some essential tips to keep in mind.
- Storage: Store any leftovers in an airtight container in the refrigerator. It’s best enjoyed within a few days but can last up to a week.
- Freezing: You can freeze the assembled cake. Wrap it well in plastic wrap and aluminum foil to prevent freezer burn. It can last for up to three months.
- Pairing: Serve with a dollop of freshly whipped cream or a scoop of vanilla ice cream to enhance the flavors.
- Variations: Feel free to experiment with other fruits like blueberries or raspberries for different flavor combinations.
- Serving Temperature: Allow the cake to sit at room temperature for about 30 minutes before serving for the best texture.
Serve This Strawberry Cheesecake Cake With
When it comes to serving your Strawberry Cheesecake Cake, there are several delightful ways to enjoy this special dessert!
- Whipped Cream: A generous dollop of whipped cream on top adds creaminess and complements the cake beautifully.
- Fresh Strawberries: Garnish with additional fresh strawberries for a pop of color and freshness.
- Chocolate Sauce: Drizzle some chocolate sauce over the top for an indulgent twist.
- Seasonal Occasions: This cake is perfect for spring celebrations, picnics, and birthdays. It’s a crowd-pleaser!
- Coffee or Tea: Pair your slice with a warm cup of coffee or tea; the flavors complement each other wonderfully.
- Storage Tips: If not serving immediately, keep the cake refrigerated, especially in warm weather.
FAQ
Conclusion
The Strawberry Cheesecake Cake is more than just a dessert; it’s a celebration of flavors and textures that brings joy to any occasion. I encourage you to give this recipe a try and share the happiness it brings with your loved ones. Baking is a way to spread love and warmth, so indulge in this delicious cake and create sweet memories together!
Strawberry Cheesecake Cake
Ingredients
Equipment
Method
- Preheat your oven to 325°F (160°C) and prepare a 9-inch springform pan by spraying it with nonstick spray.
- In a large mixing bowl, use an electric mixer to blend the cream cheese until smooth and creamy, about 1 to 2 minutes. Add the granulated sugar and salt, mixing for an additional 2 minutes.
- Slowly add the eggs one at a time, blending after each addition. Finally, fold in the sour cream, heavy whipping cream, and vanilla extract until everything is combined and smooth.
- Pour this luscious batter into the prepared springform pan.
- Bake your cheesecake for about 45 minutes. It should be set around the edges but still slightly jiggly in the center.
- Let it cool on a wire rack for at least an hour, then place it in the freezer to chill completely for 4 to 5 hours or overnight if possible.
- Once your cheesecake is set, preheat your oven to 350°F (180°C).
- Prepare two 9-inch round cake pans by spraying them with nonstick spray, and line them with parchment paper for easy release.
- For the cake layers, microwave the frozen strawberries in a covered bowl for about 5 minutes until they are soft and juicy.
- Strain the strawberries using a fine-mesh strainer placed over a small saucepan, pressing with a rubber spatula to extract as much juice as possible.
- Boil the strained strawberry juice over medium-high heat, stirring occasionally until it thickens and measures about ¼ cup, approximately 6 to 8 minutes.
- Off the heat, whisk in the whole milk and set aside.
- In a large bowl, whisk together the cake flour, granulated sugar, baking powder, and salt.
- Add the softened unsalted butter a bit at a time, mixing until the texture resembles small peas.
- Gradually add half of the milk mixture, increase the mixer speed to medium-high, and beat for about 1 minute until light and fluffy.
- Lower the speed and add the remaining milk mixture, mixing until just incorporated.
- Divide the cake batter evenly between the prepared pans, smoothing the tops with a rubber spatula.
- Bake for about 20 to 25 minutes, or until a toothpick inserted into the center comes out clean.
- Let the cakes cool in their pans on a wire rack for about 10 minutes.
- Carefully remove the cakes by inverting them on the rack, discarding the parchment paper, and allowing them to cool completely.
- While the cakes cool, prepare the frosting by combining the remaining cream cheese and softened unsalted butter in a large bowl. Beat until smooth.
- Stir in the vanilla extract, strawberry puree, and heavy whipping cream. Gradually mix in the powdered sugar until you reach your desired frosting consistency.
- To assemble, place one cake layer on a serving plate.
- Carefully remove the chilled cheesecake from the freezer and release it from the springform pan. Trim the cheesecake edges if necessary.
- Spread a layer of frosting on top of the first cake layer, place the cheesecake on top, and add more frosting before topping it with the second cake layer.
- Apply a crumb coat of frosting around the entire cake to trap any crumbs. Chill the cake in the refrigerator until set.
Notes
- Tip 1: If you prefer to use a boxed mix, it will work just fine (just make two layers in two 9-inch pans).
- Tip 2: Measure your cheesecake layer against the cake layers. If it's slightly larger, use a knife to shave off some of the exterior.
- Tip 3: To apply a crumb coat layer of frosting, use a long, thin spatula to cover the cake completely with a thin layer of frosting. Refrigerate until set.
- Tip 4: If you’re serving this cake at a party, it’s okay to leave it at room temperature for a couple of hours.
- Tip 5: Otherwise, keep it stored in the refrigerator; it also freezes perfectly.