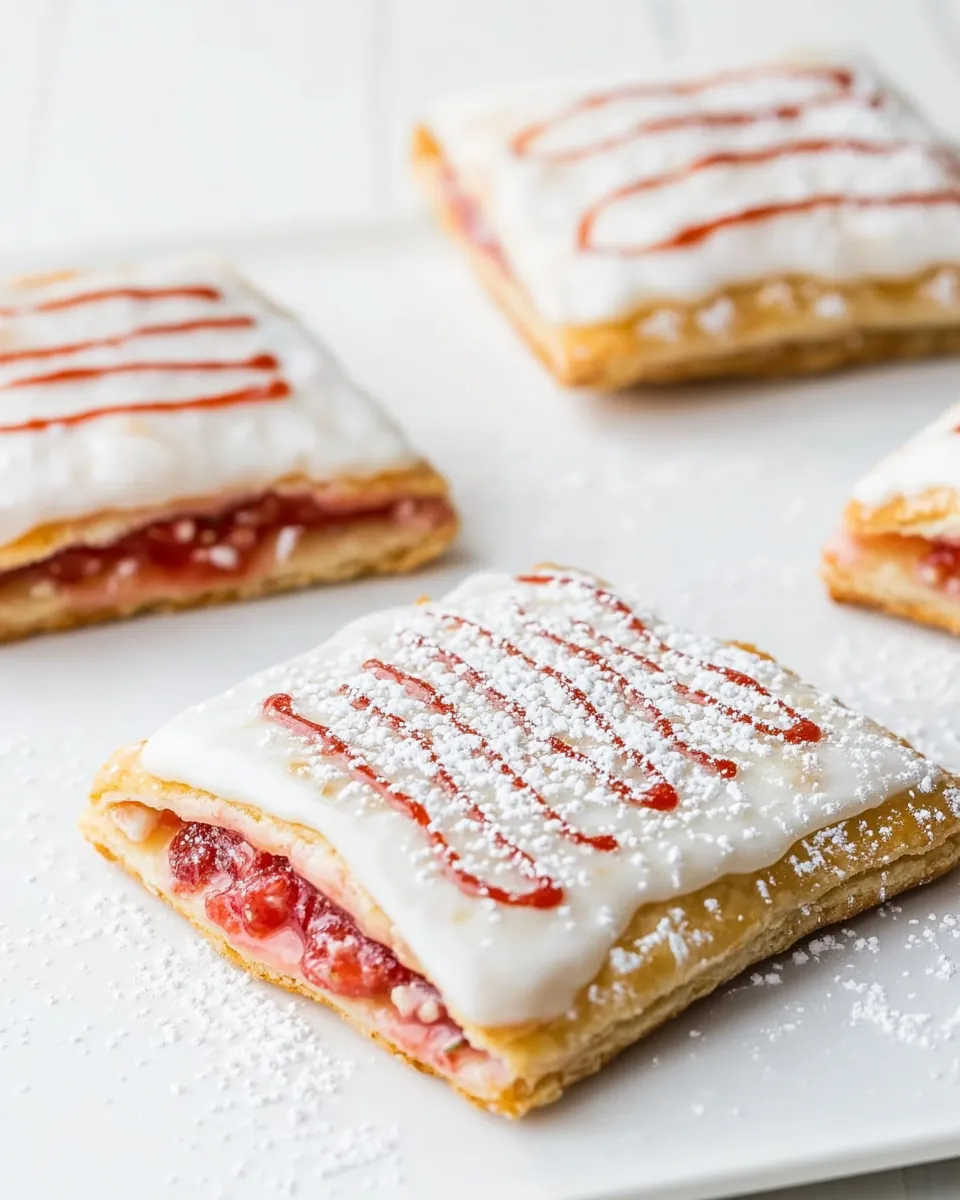
Strawberry Toaster Pastries
There’s something magical about the combination of crispy pastry and sweet strawberry filling that takes me back to my childhood. I remember lazy weekend mornings, the aroma of fresh pastries filling the kitchen as I eagerly awaited my breakfast treat. The moment I bit into a warm Strawberry Toaster Pastries, it was an explosion of flavor that brought pure joy. This recipe brings that nostalgia right back, allowing you to create your very own delicious pastries at home. Whether you’re looking for a quick snack or a delightful dessert, these pastries are bound to impress.
Recipe Snapshot
1 hr 15 mins
45 mins
30 mins
Medium
220 kcal
2 g
Gluten-Free, Low FODMAP
10 g
Large Pot, Food Processor, Oven, Baking Sheet, Frying Pan, Wooden Spoon, Whisk, Mixing Bowl
Why Try This Strawberry Toaster Pastries
Personalize Your Pastries
One of the reasons I adore this Strawberry Toaster Pastries recipe is that you can personalize it to your heart’s content. Feel free to experiment with different fillings, from raspberry to blueberry, or even a mix of your favorites. The flexibility allows you to create a unique twist on the classic recipe.
Simple Ingredients You Can Trust
This recipe uses simple pantry staples, which means you won’t have to hunt for exotic ingredients. With items like all-purpose flour, butter, and strawberry fruit spread, you can whip these up anytime you crave something sweet and homemade.
Perfect for Any Occasion
These pastries are not just for breakfast; they make a delightful snack or even a dessert for gatherings. Whether you’re hosting a brunch or having friends over for tea, serving homemade Strawberry Toaster Pastries will surely impress your guests.
Fun for the Whole Family
Cooking together is a great way to bond, and making these pastries is a fun activity for the whole family. Kids love to help with the rolling and filling process, and they’ll be thrilled to enjoy the fruits of their labor afterwards!
A Sweet Way to Celebrate Spring
With spring in the air, what better way to celebrate than with these fruity pastries? The bright, sweet flavors of the strawberries perfectly complement the season and can make any gathering feel festive and special.
Main Ingredients for Strawberry Toaster Pastries
Creating these delicious pastries starts with simple, wholesome ingredients that blend beautifully together. The key players are the all-purpose flour, which forms the base of the pastry, and the strawberry fruit spread that adds a burst of flavor. Each ingredient plays a crucial role in building the pastry’s flaky texture and delightful sweetness.
- 2½ cups all-purpose flour: This is the foundation of your pastry, providing structure and flakiness.
- 1½ tablespoons granulated sugar: A touch of sweetness to enhance the flavor of the pastry.
- 1 teaspoon kosher salt: Balances the sweetness and adds depth to the dough.
- 1 cup cold unsalted butter: Essential for creating a flaky texture; remember to keep it cold!
- 2 tablespoons ice water: Helps bind the dough together without overworking it.
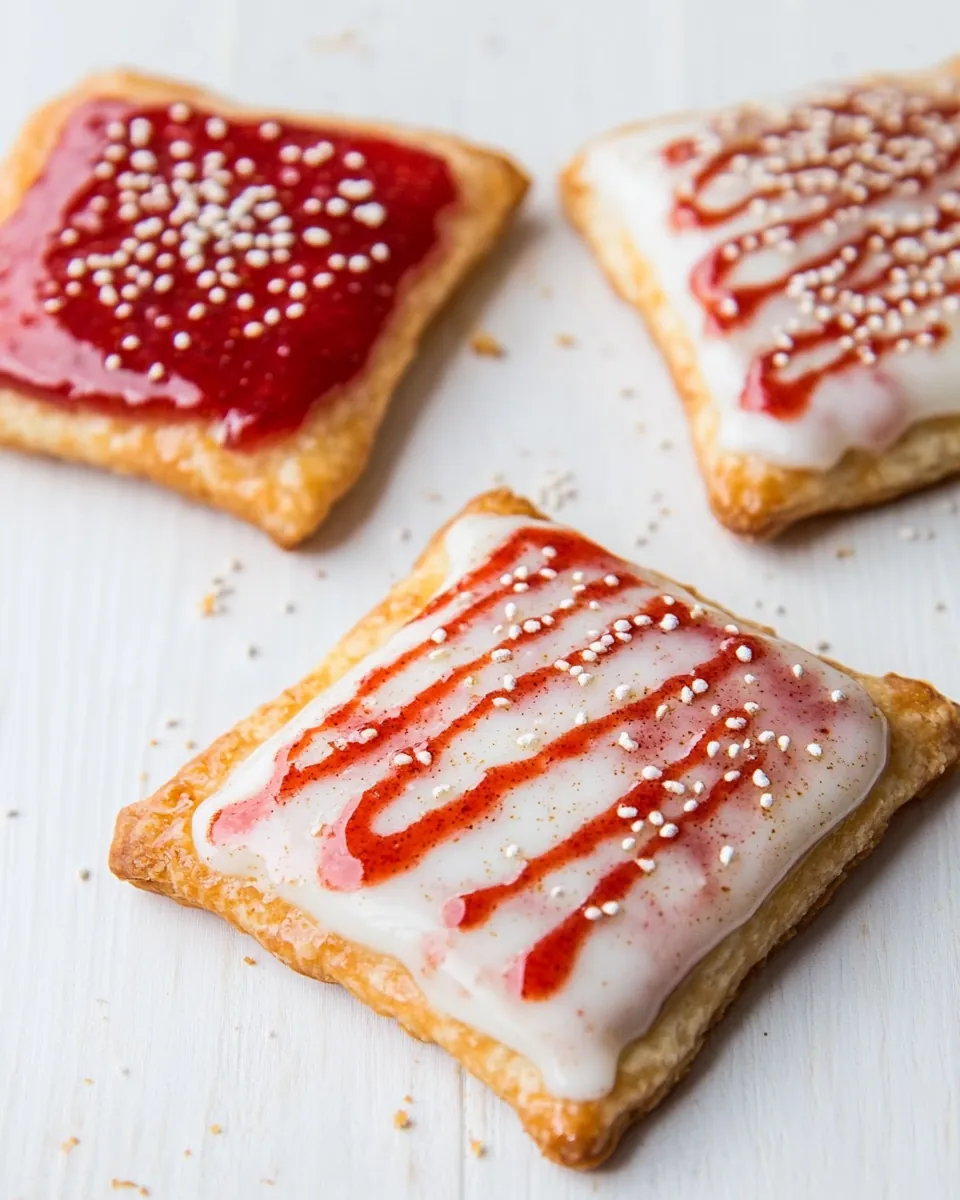
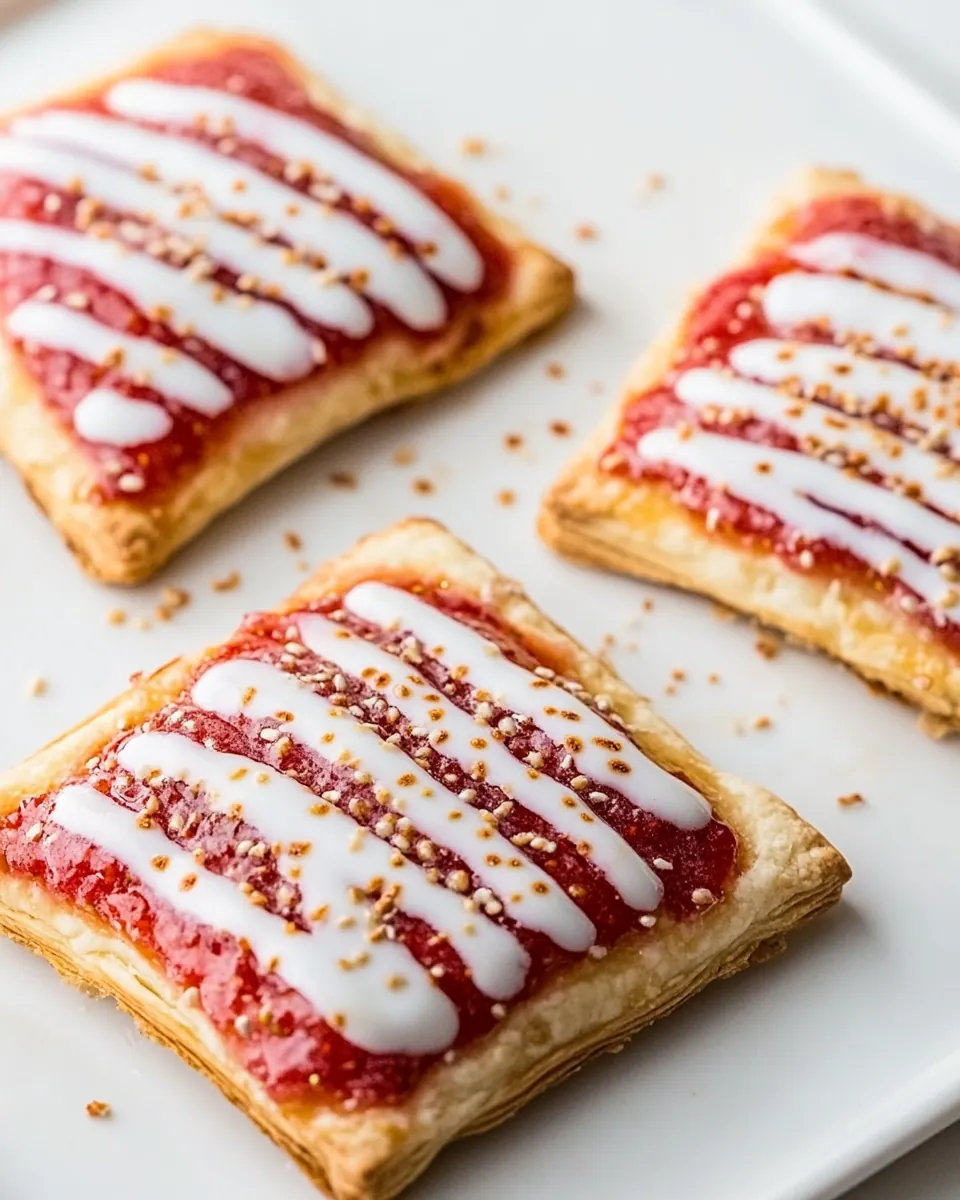
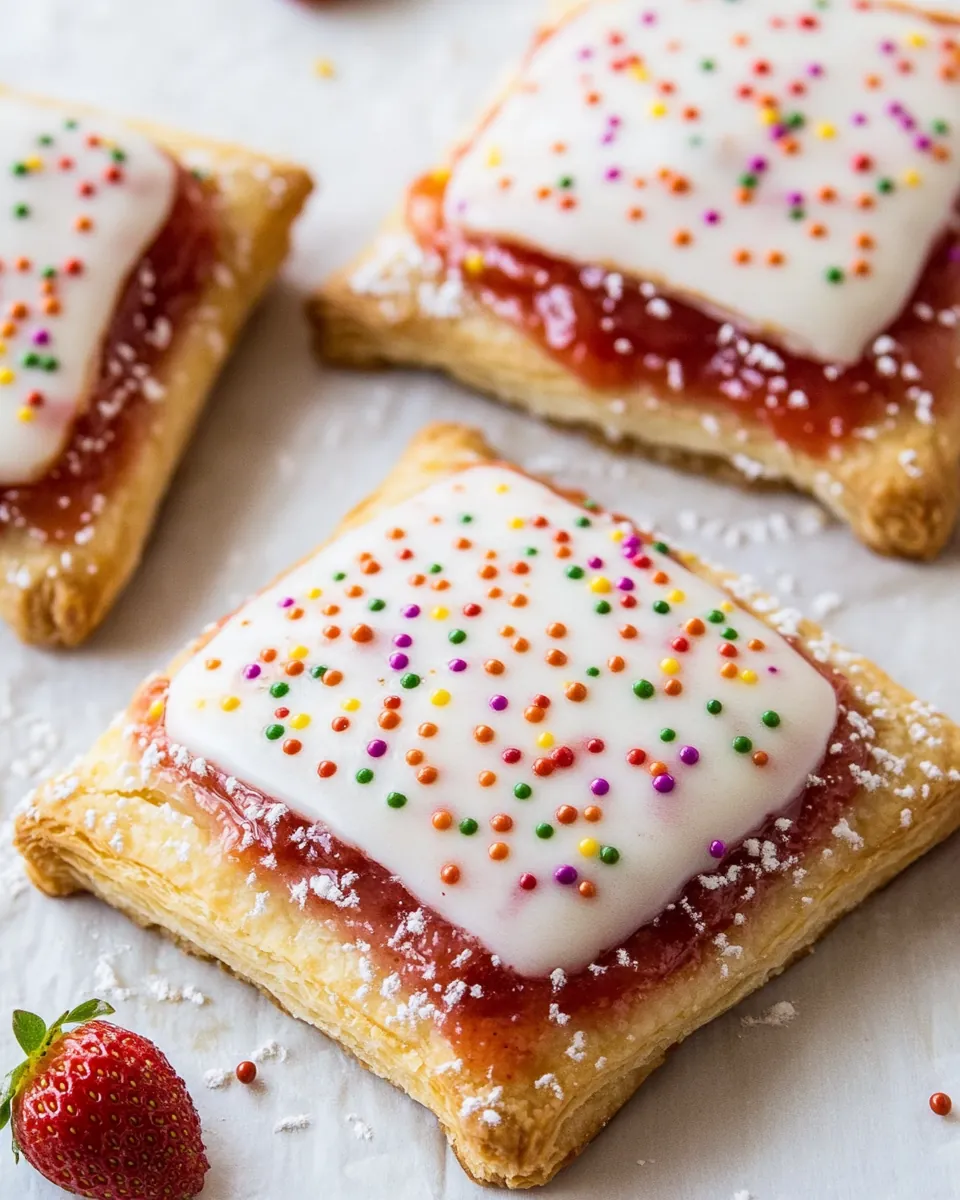
- 1 cup strawberry fruit spread: The star of the show, providing that luscious, fruity filling.
- 1 tablespoon cornstarch: Helps thicken the filling for a perfect texture.
- 4½ tablespoons water: Used to create the cornstarch mixture and desired consistency for the filling.
- 1 large egg: Brushed on the pastry for a beautiful golden finish.
- 2 cups confectioners’ sugar: For a sweet, smooth glaze on top.
- Garnish: Assorted sparkling sugars to add a touch of festive flair!
Step by Step Guide for Strawberry Toaster Pastries
Making Strawberry Toaster Pastries is a delightful experience that allows you to connect with the process. Follow these steps carefully, and soon you’ll have these delectable pastries to enjoy. Let’s dive into the baking!
- In the work bowl of a food processor, place 2½ cups of all-purpose flour, 1½ tablespoons of granulated sugar, and ¾ teaspoon of kosher salt (set aside the remaining salt); pulse until the mixture is well combined. This will create a beautiful base for your dough that is just the right balance of sweet and salty.
- Next, add 1 cup of cold unsalted butter, cubed. Pulse until the mixture resembles coarse crumbs, with bits of butter about the size of peas. This will ensure you achieve that desired flaky texture when baked.
- Continue the process by slowly adding 2 tablespoons of ice water while the processor is running, just until the dough comes together. It may look crumbly but, when pinched, it should hold together nicely. Don’t overwork it to keep it tender!
- Turn the dough out onto a lightly floured surface, dividing it into two halves (each about 287 grams). Shape each half into a square about 5 inches wide. Wrap them in plastic wrap and refrigerate for approximately 30 minutes, allowing the dough to chill and set.
- Meanwhile, in a small bowl, combine 1 tablespoon of cornstarch with 1 tablespoon of water until smooth. This mixture will enhance the filling’s texture.
- In a small saucepan, bring 1 cup of strawberry fruit spread to a gentle boil over medium heat. Stir in the cornstarch mixture, cooking until the filling thickens and reduces slightly, about 10 to 12 minutes. Once done, transfer it to a heatproof bowl and let it cool before refrigerating for at least 30 minutes.
- Preheat your oven to 300°F (150°C) and line two baking sheets with parchment paper. It’s essential to have everything ready for when those beautiful pastries come out of the oven!
- On a lightly floured surface, roll out one half of the chilled dough into a rectangle about 14 by 10 inches, aiming for a thickness of about 1/16 inch. Using a bench knife, trim the edges to create a perfect rectangle, measuring 13½ by 9¾ inches. Cut this into 9 rectangles, each measuring 4½ by 3¼ inches.
- Gently transfer these rectangles to the prepared baking sheets using a small offset spatula. Spoon about a heaping tablespoon of the chilled strawberry mixture onto each rectangle, spreading it evenly and leaving a ¾-inch border around the edges. Refrigerate these for about 10 minutes to firm them up.
- Roll the remaining dough into another 14 by 10-inch rectangle, trimming as before. Cut this into another set of 9 rectangles. Use a fork to dock the tops in ¼-inch intervals, which will help steam escape during baking.
- In a small bowl, whisk together 1 large egg and 1 tablespoon of water. Brush this egg wash along the edges of the rectangles with the strawberry filling. Carefully place the docked rectangles on top, sealing the edges by pressing firmly.
- Trim any excess dough from the edges to create a tight seal. Refrigerate again for about 1 hour, or you can freeze them for about 15 minutes if you’re in a hurry.
- Once ready, bake the pastries in the preheated oven for 30 to 35 minutes until they are slightly puffed, with dry tops and golden brown bottoms. Let them cool on the pans for about 10 minutes before transferring to wire racks to cool completely.
- To finish, whisk together 2 cups of confectioners’ sugar and the remaining 2½ tablespoons of water until smooth—a perfect drizzle consistency. Spoon this glaze into a small pastry bag fitted with a round piping tip. Pipe a decorative border and fill the center of each pastry with icing, making sure to remove any air bubbles with a wooden pick. For that extra touch, you can garnish with assorted sparkling sugars if desired.
Things Worth Knowing
- Chilling the Dough: This step is vital for achieving a flaky texture. It allows the butter to firm up, which prevents it from melting into the dough during baking.
- Don’t Skip the Docking: Docking the top dough prevents steam buildup, ensuring the pastries don’t puff up too much and helps maintain their shape.
- Cooling Time: Allowing the pastries to cool completely on wire racks is essential for the glaze to set properly and for the flavors to meld.
- Experimentation is Key: Don’t hesitate to customize your fillings! Try different fruits or even savory fillings for a unique twist.
Tips and Tricks about Strawberry Toaster Pastries
To elevate your Strawberry Toaster Pastries, consider these helpful tips. Whether you’re a seasoned baker or a novice, these suggestions can enhance your baking experience.
- Storage: Keep any leftover pastries in an airtight container at room temperature for up to three days to maintain freshness.
- Freezing: These pastries can be frozen before baking! Just prepare them up to the point of baking, then freeze until solid. Bake from frozen, adding a few extra minutes to the cook time.
- Pairing: These pastries pair wonderfully with a hot cup of tea or coffee for breakfast or an afternoon snack.
- Variations: Feel free to experiment with different fruit spreads or even chocolate ganache for a rich filling.
- Glazing: For a more decadent touch, add a splash of milk or cream to your glaze for a creamier consistency.
Serve This Strawberry Toaster Pastries With
When it comes to serving Strawberry Toaster Pastries, the possibilities are endless! Here are some ideas to consider:
- Fresh Fruit: Serve alongside fresh strawberries or a fruit salad for a colorful, healthy touch.
- Whipped Cream: A dollop of freshly whipped cream on the side adds an indulgent element to each bite.
- Ice Cream: Consider serving these pastries warm with a scoop of vanilla ice cream for a delightful dessert.
- Tea or Coffee: Pair your pastries with a hot cup of your favorite tea or coffee for a cozy breakfast experience.
- Brunch Buffet: These pastries are perfect for a brunch spread, alongside other pastries, quiches, and fresh juices.
- Storage Tips: If you have leftovers, store them in an airtight container to keep them fresh for longer!
FAQ
Conclusion
The Strawberry Toaster Pastries are a delightful treat that combines a crispy crust with a sweet, fruity filling. They bring a touch of nostalgia to your kitchen while being incredibly easy to make. I encourage you to try this recipe as it not only satisfies your sweet tooth but also adds a wonderful homemade touch to your breakfasts or snacks. You’ll impress your family and friends with these delightful pastries, so why wait? Bake some today!
Strawberry Toaster Pastries
Ingredients
Equipment
Method
- In the work bowl of a food processor, place 2½ cups of all-purpose flour, 1½ tablespoons of granulated sugar, and ¾ teaspoon of kosher salt; pulse until combined. Add 1 cup of cold unsalted butter and pulse until the mixture is crumbly and butter is pea-sized. With the processor running, add 2 tablespoons of ice water slowly just until the dough comes together.
- Turn out the dough and divide it in half, shaping each half into a 5-inch square. Wrap in plastic wrap and refrigerate until chilled, about 30 minutes.
- In a small bowl, stir together 1 tablespoon of cornstarch and 1 tablespoon of water until well combined.
- In a small saucepan, bring 1 cup of strawberry fruit spread to a boil over medium heat. Add the cornstarch mixture and cook until boiling and thickened slightly, about 10 to 12 minutes. Transfer to a bowl and refrigerate for at least 30 minutes.
- Line 2 baking sheets with parchment paper. Roll half of the dough into a rectangle about 14 by 10 inches thick. Trim edges for a perfect rectangle and cut into 9 rectangles.
- Transfer rectangles onto prepared pans, spoon a heaping tablespoon of chilled fruit spread mixture onto each, spreading it into a thin layer, leaving a ¾-inch border. Refrigerate until firm, about 10 minutes.
- Roll out remaining dough and cut into another 9 rectangles. Dock them using a fork in ¼-inch intervals all over.
- Whisk together 1 large egg and 1 tablespoon of water. Brush egg wash onto edges of chilled rectangles. Top with docked dough, pressing edges together firmly to seal.
- Trim edges for a tight seal. Refrigerate until firm again, about 1 hour, or freeze for 15 minutes.
- Preheat oven to 300°F (150°C). Bake until slightly puffed and golden brown, about 30 to 35 minutes. Cool on pans for 10 minutes before transferring to wire racks to cool completely.
- In a medium bowl, whisk together 2 cups of confectioners’ sugar and 2½ tablespoons of water until smooth. Pipe a rectangle around edges of tarts, filling in the center. Garnish with sparkling sugar, if desired.
Notes
- Tip 1: Keep any leftover pastries in an airtight container at room temperature for up to three days.
- Tip 2: These pastries can be frozen before baking for future enjoyment. Bake from frozen, adjusting time as needed.
- Tip 3: Pair with fresh strawberries or whipped cream for a delightful treat.
- Tip 4: Don't hesitate to try different fruit spreads for a unique flavor twist.
- Tip 5: You can enhance the glaze with a splash of milk for a creamier finish.