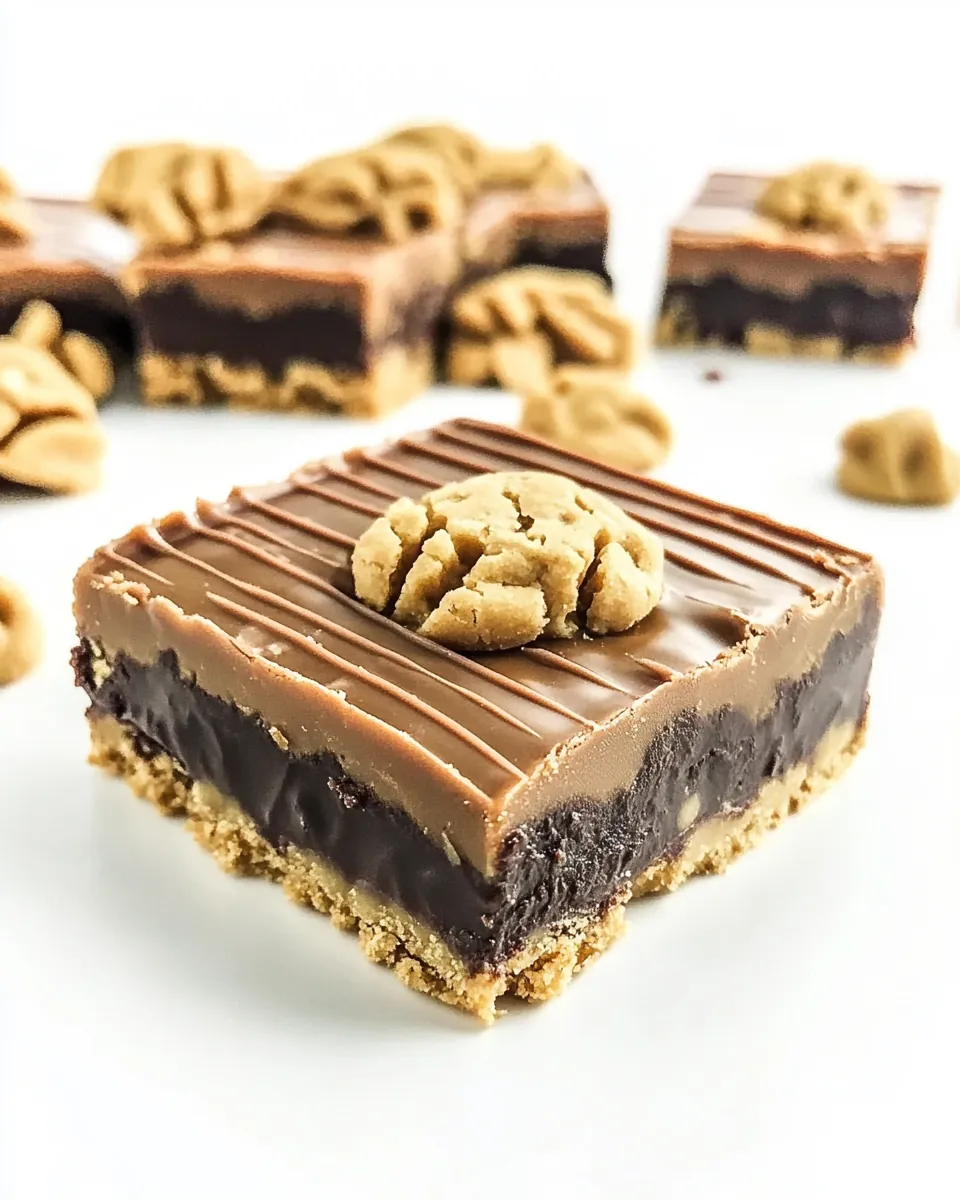
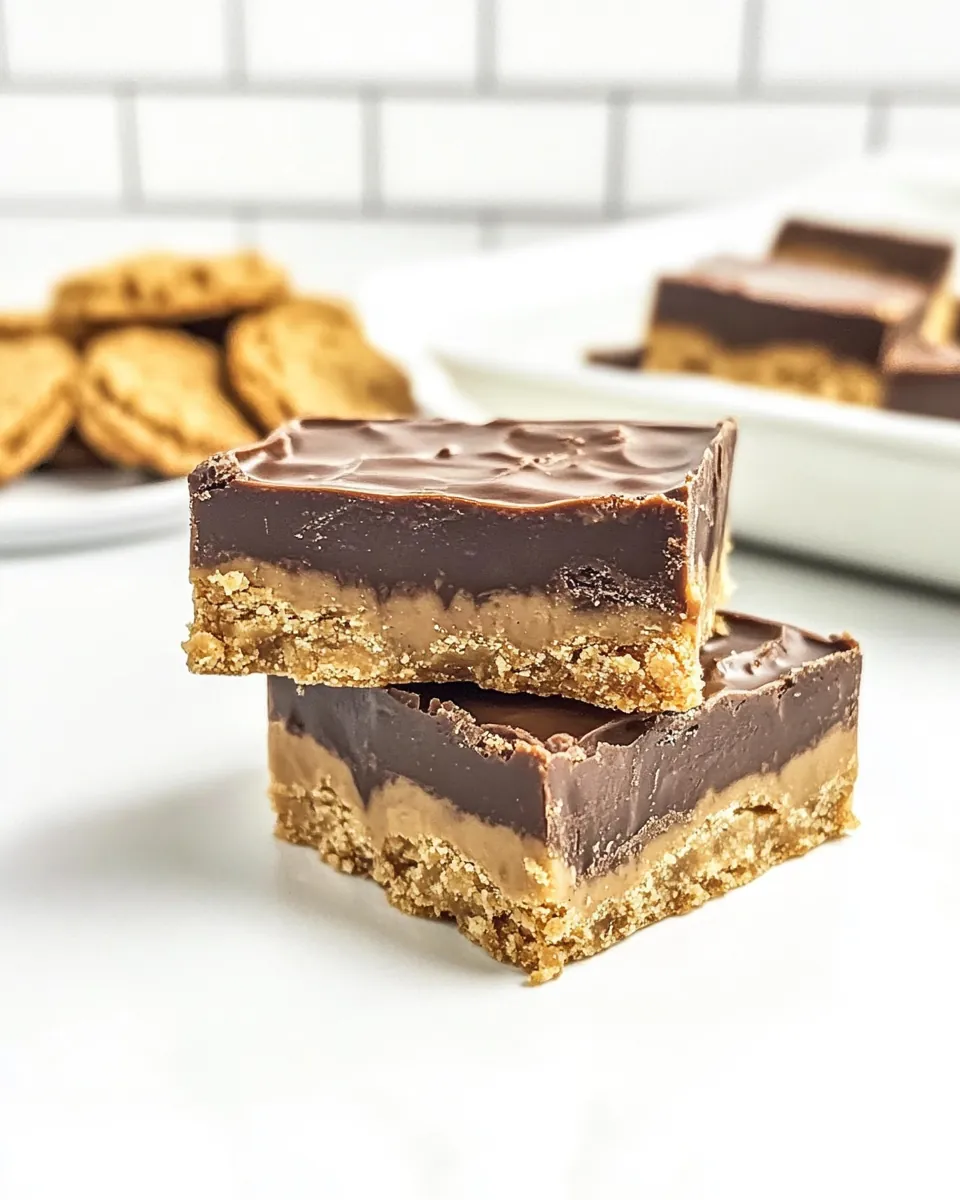
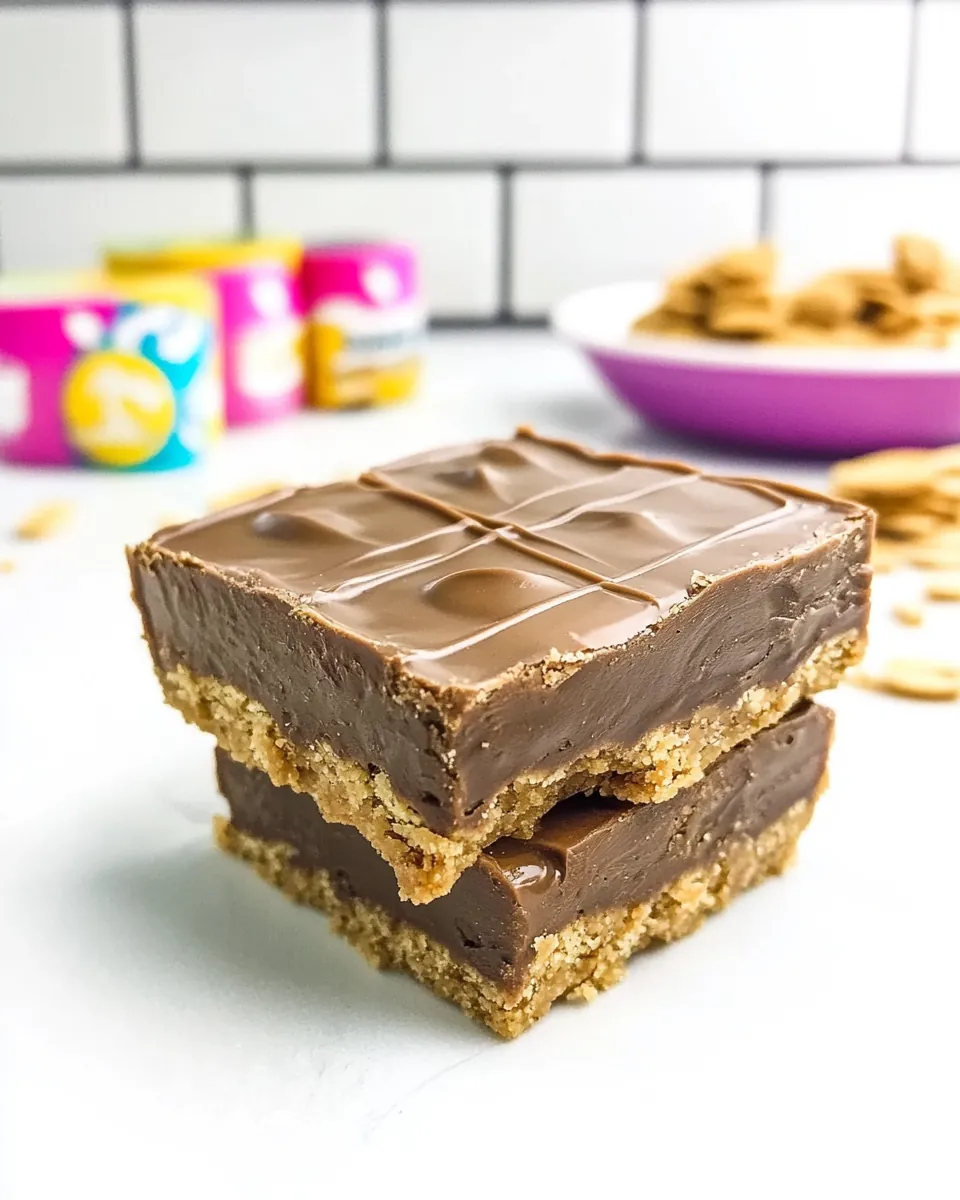
Peanut Butter Cookie Fudge Bars
There’s something incredibly comforting about the combination of peanut butter and chocolate, and that’s exactly what you get with these Peanut Butter Cookie Fudge Bars. I remember the first time I made these; it was a chilly afternoon, and the smell of baking cookies wafting through the house brought a sense of warmth and nostalgia. I had friends coming over, and I wanted to impress them with something sweet and indulgent. Little did I know, I was about to create a new favorite treat! The fudge layer on top adds a rich and creamy texture that pairs perfectly with the chewy cookie base. It’s a delightful contrast that leaves everyone wanting more. Whether you’re hosting a gathering or just craving something sweet for yourself, these bars are the ultimate go-to. Trust me, once you take a bite, you’ll understand why they disappeared so quickly. So, let’s dive into making these delicious Peanut Butter Cookie Fudge Bars together!
Recipe Snapshot
1 hr 15 mins
45 mins
30 mins
Medium
230 kcal
3 g
Gluten-Free, Low FODMAP
10 g
Oven, Baking Sheet, Frying Pan, Wooden Spoon, Chef’s Knife, Mixing Bowl
Why We Love This Peanut Butter Cookie Fudge Bars
Irresistible Combination
One of the standout features of these Peanut Butter Cookie Fudge Bars is the harmonious blend of flavors. You have the nutty, creamy profile of peanut butter that gives the cookie base its rich character. Coupled with the smooth, velvety layers of chocolate fudge, it’s simply heavenly. Every bite is a perfect balance of sweet and salty, and the texture is so satisfying!
Easy to Make
These bars are a breeze to prepare. With only a handful of ingredients, you can whip up a batch in no time. I love how straightforward the steps are—mix, bake, and top with fudge. You don’t need to be a master baker to create something amazing. Plus, the cleanup is minimal, making it a stress-free experience.
Perfect for Any Occasion
What I adore about Peanut Butter Cookie Fudge Bars is how versatile they are. Whether it’s a birthday party, a cozy family gathering, or simply a Saturday movie night, these bars are a hit every time. They’re also a great treat for school lunches or as an afternoon snack. Trust me, they’ll brighten anyone’s day!
Make Ahead and Store
If you’re like me, you’ll want to make these ahead of time. They store beautifully in an airtight container, and the flavors only get better after a day or two. You can even freeze them for longer storage. Just be sure to wrap them tightly; they’ll be ready to enjoy whenever you have a craving!
Customizable
One of the best parts about these bars is their adaptability. You can sprinkle in your favorite mix-ins, like nuts or dried fruits, to give them a personal touch. Want to make them more special? Add some sea salt on top for that sweet-salty contrast. The possibilities are endless!
Kid-Friendly Fun
These bars are also a fantastic way to involve kids in the kitchen. They can help mix the ingredients or press the dough into the pan. Plus, who wouldn’t love to lick the bowl after making the fudge? It’s a fun and delicious way to spend time together.
Ingredients to Make Peanut Butter Cookie Fudge Bars
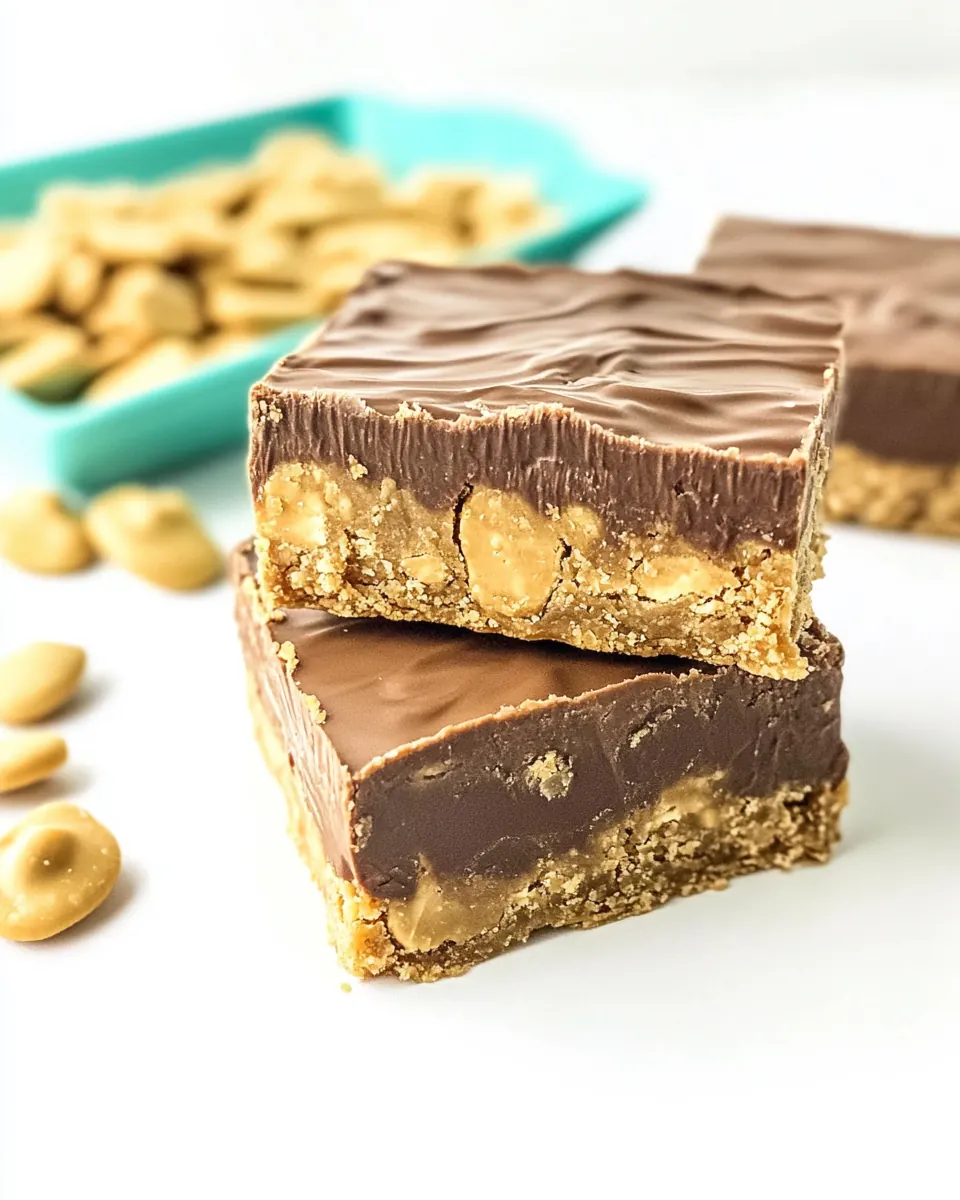
Creating the perfect Peanut Butter Cookie Fudge Bars starts with quality ingredients. Each component plays a crucial role in achieving that delightful balance of flavors and textures. The star ingredients here are the peanut butter and chocolate chips, which combine to create a rich and satisfying treat. The butter adds moisture, while the baking soda ensures the bars rise just enough to be soft and chewy. Let’s take a look at what you’ll need to make this delightful dessert.
- ½ cup (113g) unsalted butter: Softened to ensure a creamy texture in the dough.
- ¾ cup (200g) peanut butter: The heart of the recipe, providing that rich, nutty flavor.
- ¾ cup (150g) packed brown sugar: Adds moisture and a hint of caramel sweetness.
- ¼ cup (50g) granulated sugar: Balances the richness of the brown sugar.
- 1 large egg: Binds the ingredients together.
- 1 tablespoon vanilla: For added depth of flavor.
- 1 tablespoon milk: Helps to achieve the perfect dough consistency.
- ¼ teaspoon salt: Enhances all the flavors.
- 1 teaspoon baking soda: Leavening agent for a light texture.
- 1 ½ cups (186g) all-purpose flour: The base of the cookie dough, providing structure.
- 3 cups (510g) chocolate chips: The indulgent fudge layer that tops the bars.
- 14 ounce can sweetened condensed milk: Creates the smooth fudge topping.
Step by Step Guide for Peanut Butter Cookie Fudge Bars
Making these bars is a fun and rewarding experience. The aroma of peanut butter and chocolate filling your kitchen is irresistible. Follow these steps carefully to create your own batch of Peanut Butter Cookie Fudge Bars that will have everyone asking for seconds!
- Preheat your oven to 350°F (175°C). Grease a 9×13 inch pan with cooking spray and line it with foil for easy removal later. This ensures your bars come out easily without sticking.
- In a large mixing bowl, combine the softened butter, peanut butter, and both the brown sugar and granulated sugar. Using an electric mixer fitted with a paddle attachment, cream the ingredients together for about 2 to 3 minutes until they are light and fluffy.
- Next, add the egg, vanilla, milk, baking soda, and salt to the mixture. Beat on medium speed until everything is well combined and smooth.
- Gradually add the flour to the mixing bowl and mix on low speed until the dough just comes together. Avoid over-mixing, as this can lead to tough bars.
- Transfer the cookie dough into the prepared pan. Using your hands or a spatula, press the dough evenly into the bottom of the pan, ensuring it’s packed tightly.
- Place the pan in the preheated oven and bake for 18 to 24 minutes. You want the top to turn a lovely golden color; check for doneness by inserting a toothpick into the center—it should come out clean.
- Once baked, remove the pan from the oven and allow it to cool completely. This step is crucial to ensure the fudge layer adheres well.
- While the bars are cooling, prepare the fudge topping. In a saucepan over low heat, combine the chocolate chips and the sweetened condensed milk. Stir frequently until the mixture is melted and smooth.
- Remove the melted fudge mixture from the heat and immediately pour it over the cooled cookie base. Use a spatula to spread it evenly across the surface.
- For an optional finishing touch, sprinkle some colorful sprinkles or chopped nuts on top. Allow the bars to cool completely again, which will set the fudge.
- Once set, lift the bars from the pan using the foil and cut them into squares. Store any leftovers in an airtight container for up to three days.
Things Worth Knowing
- Don’t skip the cooling: Let the cookie base cool completely before adding the fudge. This helps the fudge layer to stay intact.
- Mix slowly: When adding flour, mix on low speed. This prevents the dough from becoming tough and ensures a tender texture.
- Quality ingredients matter: Using high-quality chocolate chips and peanut butter will greatly enhance the flavor of your bars.
- Experiment with toppings: Don’t hesitate to add your favorite toppings to the fudge for a personal touch.
Substitutions and Tips
These Peanut Butter Cookie Fudge Bars are delightful as they are, but here are some tips and substitutions to consider for enhancing your baking experience:
- Storage: Store leftover bars in an airtight container at room temperature for up to three days. They can also be refrigerated for longer freshness.
- Freezing: You can freeze the bars for up to two months. Wrap them tightly in plastic wrap and then in aluminum foil for best results.
- Pairing: Serve these bars with a side of fresh fruit or your favorite ice cream for a delightful treat.
- Variations: Try adding chopped nuts or different flavored chocolate chips for a twist. You can also mix in some mini marshmallows for added texture.
- Serving Temperature: These bars are delicious served cold, but letting them sit at room temperature for a bit enhances their flavor.
- Perfect for Parties: These are great for sharing at gatherings. Slice them into smaller squares for easy serving!
What Complements This Peanut Butter Cookie Fudge Bars
These Peanut Butter Cookie Fudge Bars are incredibly versatile and can be enjoyed in various ways. Here’s how to serve them:
- Coffee Time: Pair a square of these bars with a cup of coffee or tea for a delightful afternoon snack.
- Picnic Favourites: They make a perfect treat to take along on picnics—easy to transport and share!
- Birthday Parties: These bars are a hit at birthday parties, especially when decorated with colorful sprinkles.
- Family Gatherings: Make these for family get-togethers; everyone will love the rich chocolate and peanut butter combination.
- Movie Nights: Enjoy them while watching your favorite films; they’re the perfect sweet treat for cozy nights in.
- Seasonal Treat: These bars can be enjoyed all year round, making them a staple for any dessert lover.
FAQ
Conclusion
The Peanut Butter Cookie Fudge Bars are a delightful treat that combines rich flavors with a chewy texture, making them a favorite for any occasion. They’re easy to make, perfect for sharing, and can be adapted to suit your tastes. I encourage you to try making these bars and experience the joy they bring. Whether for yourself or to share with loved ones, they’re sure to be a hit. Happy baking!
Peanut Butter Cookie Fudge Bars
Ingredients
Equipment
Method
- Preheat oven to 350°F. Line a 9×13” pan with foil and spray with cooking spray.
- Cream butter, peanut butter, and both brown sugar and granulated sugar in the bowl of an electric mixer fitted with the paddle attachment, about 2-3 minutes.
- Add egg, vanilla, milk, baking soda, and salt and mix until combined.
- Slowly add flour and mix until dough just comes together.
- Press the cookie dough into the prepared pan.
- Bake for 18-24 minutes, until it gets golden on top. Let cool completely before making fudge for the top.
- Melt chocolate chips with sweetened condensed milk slowly over low heat, stirring often in a saucepan.
- Once it’s smooth, remove from heat and immediately pour and spread over cooled bars.
- Sprinkle with sprinkles or chopped nuts, if desired. Cool completely before cutting into bars.
- Store in an airtight container for up to 3 days.
- You can make the fudge portion in the microwave using a microwave-safe bowl and stirring every minute until melted and smooth.
Notes
- Storage: Store leftover bars in an airtight container at room temperature for up to three days. They can also be refrigerated for longer freshness.
- Freezing: You can freeze the bars for up to two months. Wrap them tightly in plastic wrap and then in aluminum foil for best results.
- Pairing: Serve these bars with a side of fresh fruit or your favorite ice cream for a delightful treat.
- Variations: Try adding chopped nuts or different flavored chocolate chips for a twist. You can also mix in some mini marshmallows for added texture.
- Serving Temperature: These bars are delicious served cold, but letting them sit at room temperature for a bit enhances their flavor.
- Perfect for Parties: These are great for sharing at gatherings. Slice them into smaller squares for easy serving!