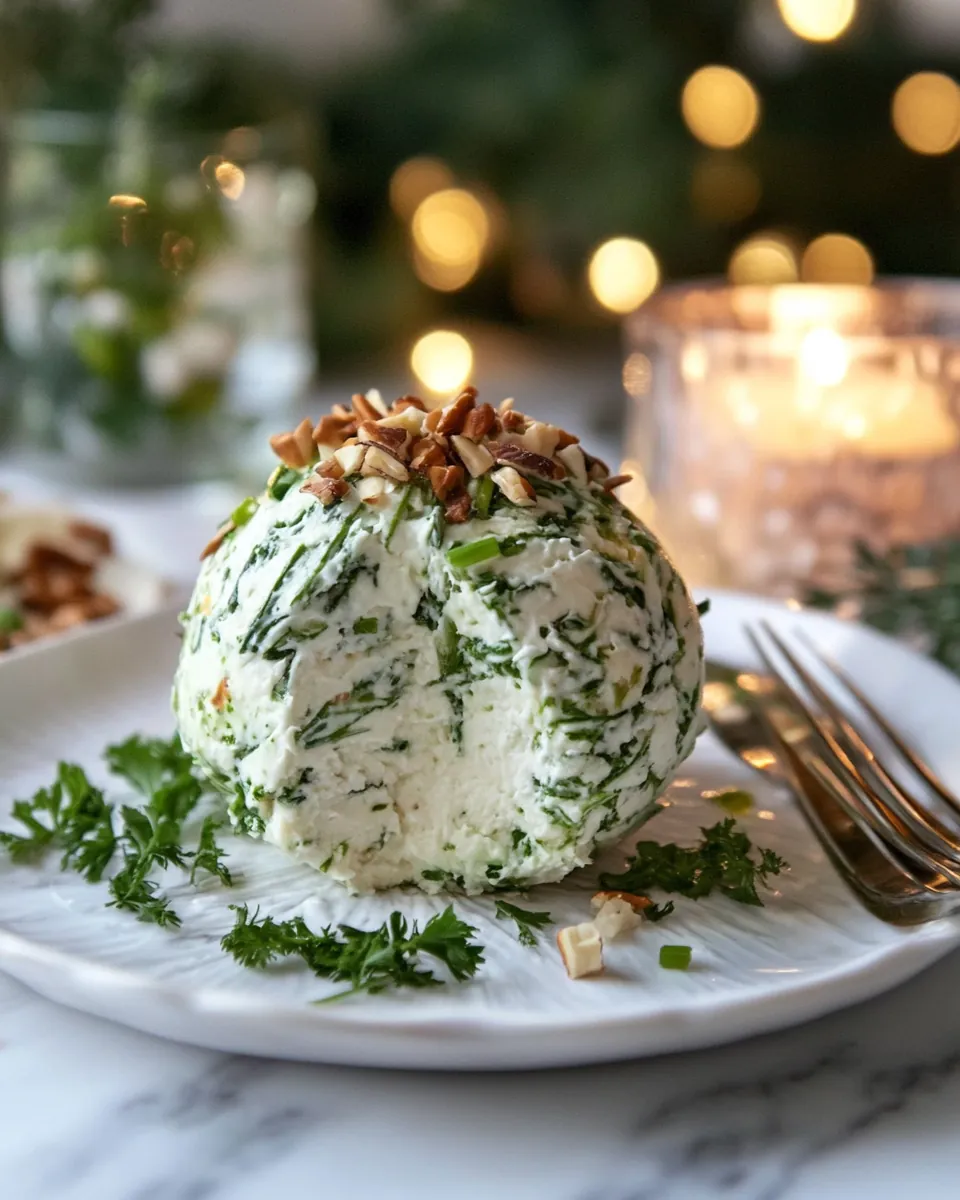
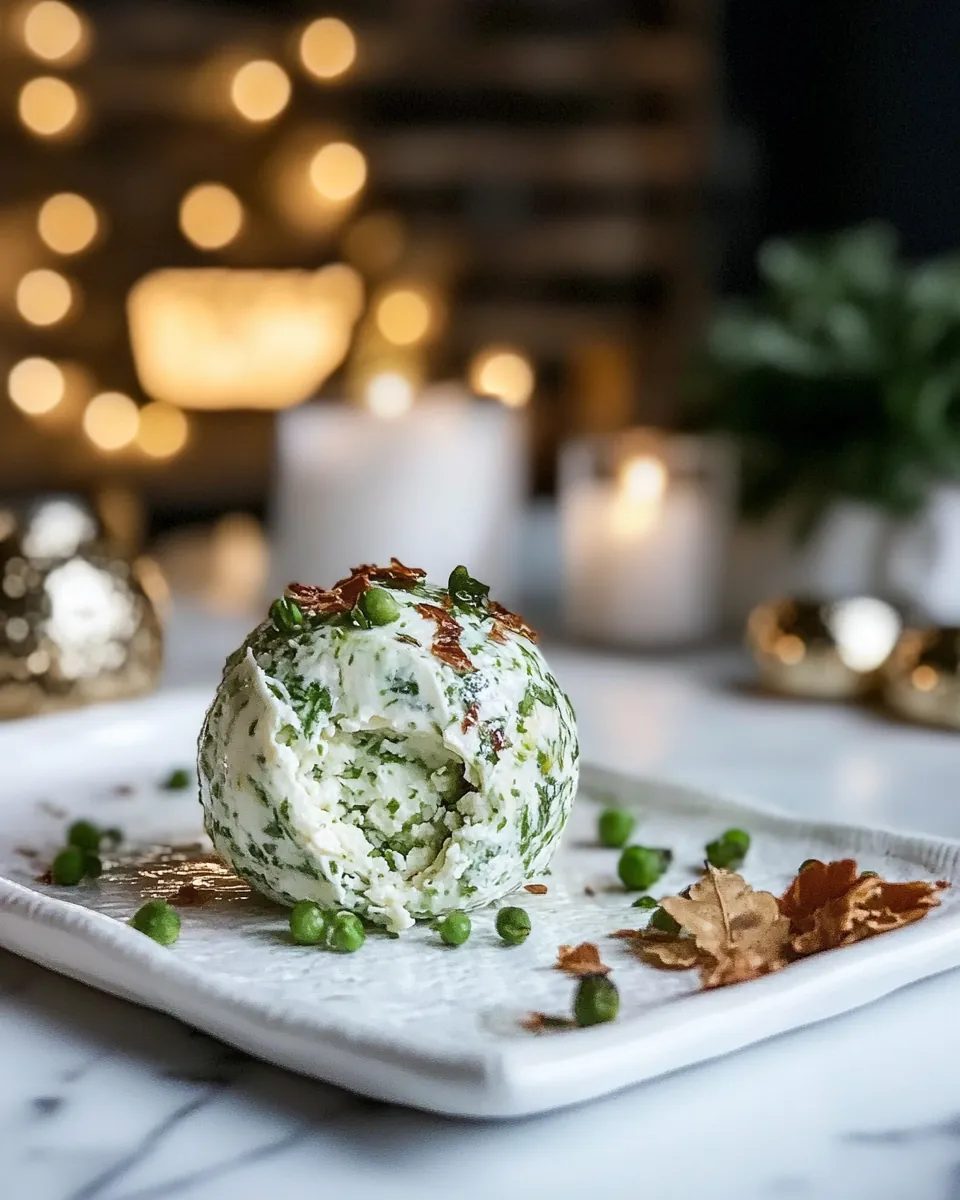
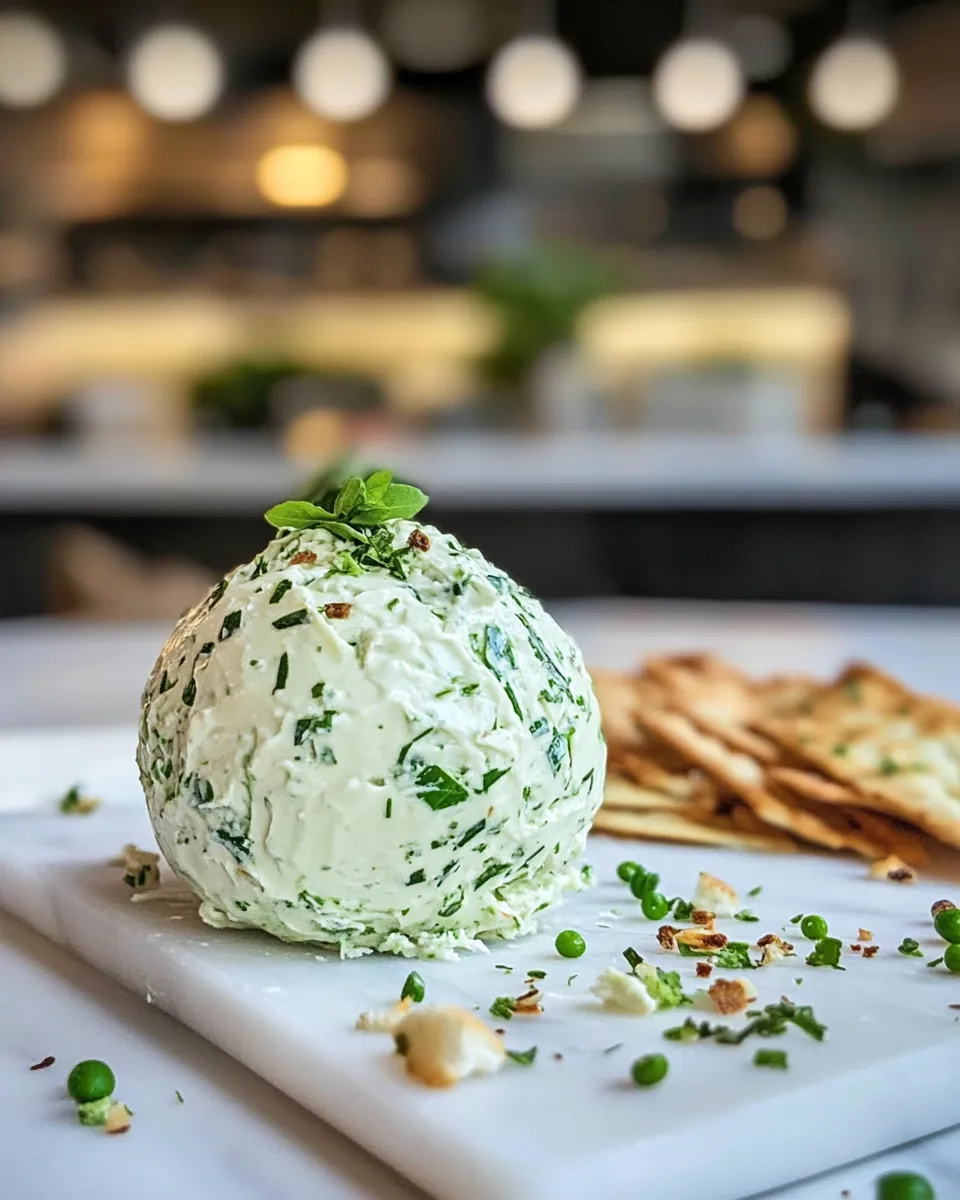
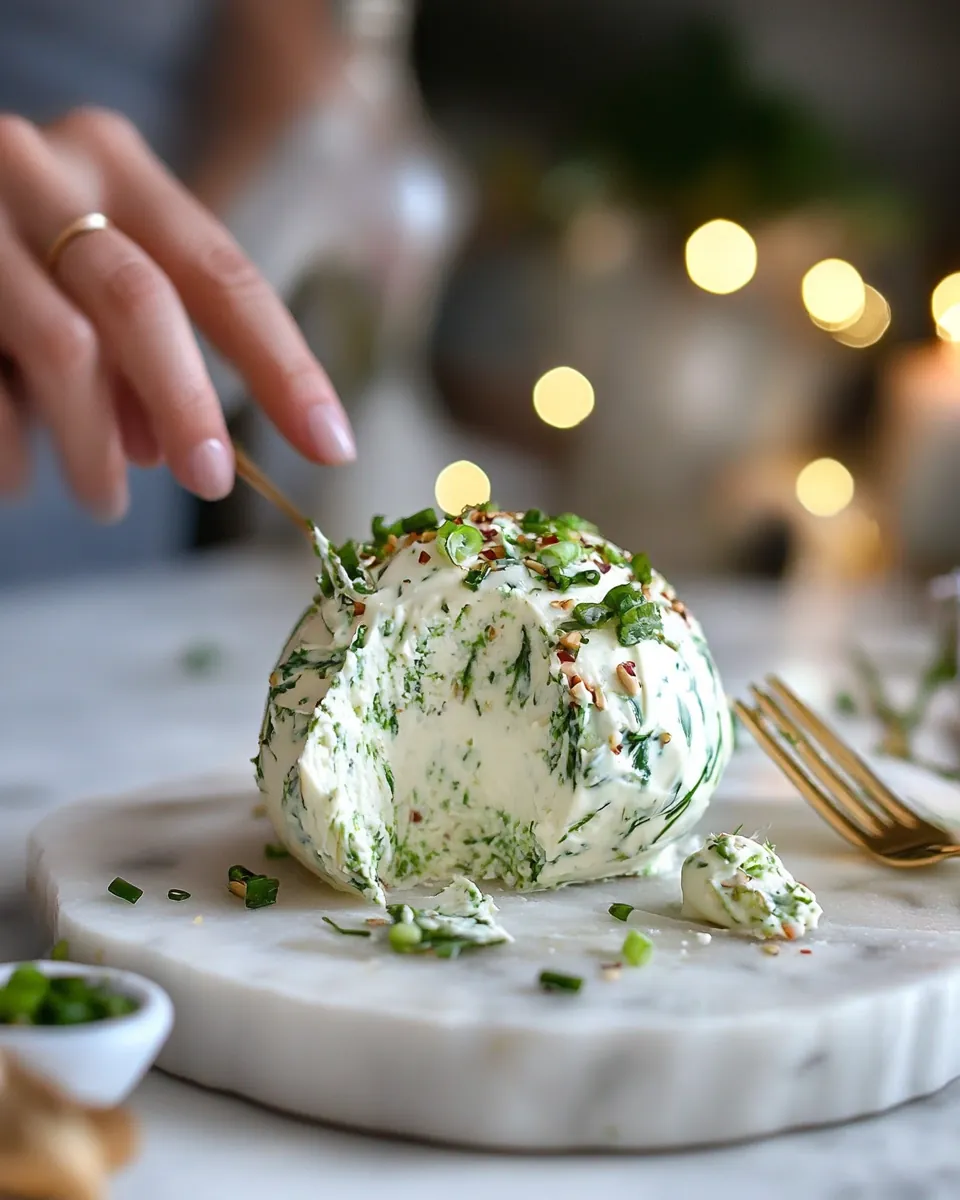
Green Goddess Cheese Ball
There’s something so delightful about a party spread that features a Green Goddess Cheese Ball. It all started during one of those cozy get-togethers with friends, where the laughter was as plentiful as the snacks. As I was brainstorming what to make, I remembered a recipe I had seen floating around. It promised to be a show-stopper, and boy, did it deliver! The first time I served this dish, it disappeared within minutes, with folks raving about its creamy texture and vibrant herb flavors. I love how it can fit into any occasion – from festive celebrations to simple weeknight dinners, it’s always a hit. If you’re looking for something that’s both easy to prepare and impressive to present, then look no further. This Green Goddess Cheese Ball is the answer to your culinary prayers.
Recipe Snapshot
15 mins
15 mins
0 mins
Medium
120 kcal
4 g
Keto, Gluten-Free, Low FODMAP
10 g
Food Processor, Grater, Blender, Chef’s Knife, Mixing Bowl
Why We Love This Green Goddess Cheese Ball
It’s a Showstopper
Whenever I bring out the Green Goddess Cheese Ball, the buzz in the room instantly shifts. It’s one of those recipes that can steal the spotlight at any gathering. The vibrant greens and creamy texture make it visually appealing, and the wonderful aroma of fresh herbs draws everyone in. People can’t help but be curious, and that curiosity turns into delight when they take their first bite.
Perfect for Any Occasion
This cheese ball is incredibly versatile. Whether it’s a holiday celebration or a casual backyard barbecue, it fits right in. It can be served as a delightful appetizer or paired with a refreshing salad as a light meal. I’ve made it for everything from Christmas parties to cozy movie nights, and it never fails to impress. The Green Goddess Cheese Ball can easily adapt to the vibe of your gathering.
Easy to Prepare
One of the best features of this recipe is its simplicity. I love whipping it up in just a few minutes using my food processor. You toss in the ingredients, blend, and voila! In less than an hour, you have a beautiful cheese ball ready to serve. It allows me to spend more time with my guests instead of stuck in the kitchen.
Customizable for Your Taste
Don’t be afraid to make the Green Goddess Cheese Ball your own! You can experiment with different herbs or add in some spices for a kick. I’ve tried it with dill, cilantro, and even added a bit of lemon zest for extra brightness. The beauty is in the flexibility of the recipe, allowing you to cater to your palate. If you love a particular herb, throw it in!
Great for Leftovers
If there happens to be any leftover (which is rare!), the cheese ball keeps well in the fridge for a couple of days. You can enjoy it in various ways, whether on a sandwich, atop a salad, or simply with some crackers. It’s like having a gourmet snack ready to go. That’s part of what makes the Green Goddess Cheese Ball so fantastic.
Healthy and Delicious
With fresh herbs and the creaminess of cheese, this dish feels like an indulgence without the guilt. The combination of herbs provides a boost of flavor and can add nutritional benefits, too. Every bite is packed with taste, making it a healthy choice for entertaining.
What Goes Into Green Goddess Cheese Ball
The ingredients for the Green Goddess Cheese Ball are not only fresh but also create a balance of creamy and herbaceous flavors. Each ingredient plays a vital role, working together to create a dish that’s both delicious and visually appealing.
- Cream Cheese: This is the base of the cheese ball, providing a creamy texture that holds everything together.
- White Cheddar Cheese: Adds a rich flavor that complements the cream cheese beautifully.
- Parmesan Cheese: Delivers a nutty, salty kick that enhances the overall taste.
- Fresh Parsley: Brightens up the flavor with its fresh, herbal notes.
- Fresh Basil: Contributes an aromatic, sweet taste that works perfectly with the other herbs.
- Fresh Oregano: Adds a warm, earthy flavor that rounds out the dish.
- Garlic Powder: Gives a subtle zing without overpowering the fresh ingredients.
- Salt and Pepper: Essential for enhancing the flavors of the cheese and herbs.
- Pecans: Adds a delightful crunch and nutty flavor that contrasts beautifully with the creaminess.
- Chives: Brings an onion-like flavor that makes every bite pop.
Step by Step Instructions for Green Goddess Cheese Ball
Making the Green Goddess Cheese Ball is an enjoyable process that allows you to create something special with minimal effort. Let’s dive into the detailed steps to make this crowd-pleaser.
Start by placing the cream cheese in the bowl of your food processor. Blend it until creamy, ensuring there are no lumps. This will be the base of your Green Goddess Cheese Ball, so take your time to get it nice and smooth.
Next, add in the white cheddar cheese and parmesan cheese. Pulse them together until they are fully incorporated. You want to see a beautiful, creamy blend that combines all those cheesy flavors.
Now, toss together the chopped parsley, basil, and oregano with the chives. Set aside about 2 tablespoons of this mixture to coat the cheese ball later.
Add the majority of the herb mixture into the food processor. Along with that, include the garlic powder, salt, and pepper. Blend until everything is combined and you can see the herbs throughout the cheese mixture. The color should be a lovely green hue.
Using a spatula, scoop out the mixture from the food processor. You can place it onto a piece of plastic wrap for easier shaping. Wrap it up tightly, forming it into a ball or a tree shape, depending on your preference.
Chill the wrapped cheese ball in the refrigerator for 30 minutes. This helps it firm up, making it easier to handle and shape.
After the chilling time, unwrap the cheese ball. Roll it in the reserved herb and pecans mixture to coat the outside. This adds flavor and a bit of crunch.
If you’ve made the cheese ball a few days in advance, you can place it back in the wrap depending on how long you plan to keep it. Otherwise, transfer it to a serving plate.
Before serving, place a whole pecan on top for decoration. It makes the cheese ball look even more inviting!
Finally, serve the Green Goddess Cheese Ball with an assortment of crackers, pretzels, pita chips, or fresh veggies. Enjoy the compliments!
Things Worth Knowing
- Keep It Cold: Make sure your cheese ball stays refrigerated until serving. This helps maintain its shape and flavor.
- Herb Freshness: For the best flavor, always use fresh herbs. Dried herbs won’t provide the same vibrant taste.
- Prep Ahead: Prepare the cheese ball a day or two in advance to enhance the flavors. Just keep it wrapped in the fridge.
- Serving Variation: Try serving with different dippers like fresh vegetables, chips, or even breadsticks for variety.
Pro Tips and Tweaks
Crafting the perfect Green Goddess Cheese Ball can be even easier with these expert tips. Whether you’re a seasoned chef or a novice, these insights can help elevate your dish.
- Storage: Store leftovers in an airtight container in the fridge for up to three days. This keeps it fresh and ready to enjoy anytime.
- Freezing: You can freeze the cheese ball for up to a month. Just wrap it tightly to prevent freezer burn and thaw in the fridge before serving.
- Pairing: This cheese ball pairs beautifully with a variety of accompaniments. Try it with fresh baguette slices, vegetable sticks, or even apple slices for a refreshing twist.
- Variations: Feel free to experiment with different cheeses or herbs to make it your own. Add a hint of spice with chili flakes or mix in some roasted garlic for a unique flavor.
- Presentation: For a stunning display, serve on a wooden board with assorted crackers, nuts, and fruits surrounding the cheese ball.
Serving Ideas for Green Goddess Cheese Ball
When it comes to serving the Green Goddess Cheese Ball, the possibilities are endless. Here are some fun ideas to make your presentation stand out:
- Ideal Appetizer: Serve as a starter at your next party. It’s a great conversation piece that will have guests lining up for seconds.
- Perfect for Gatherings: This cheese ball is a fantastic addition to potlucks, BBQs, or holiday celebrations. Everyone loves a communal dish!
- Lunch Pairing: It works beautifully as a sandwich spread. Use it in wraps or on bagels for a delicious twist on lunch.
- Snack Time: Enjoy as a midday snack with some crunchy veggies or whole grain crackers. It’s satisfying and delicious!
- Seasonal Serving: In spring, pair it with fresh produce like asparagus or cherry tomatoes. In the summer, serve alongside sweet corn chips.
- Storage Tips: Keep any leftovers well-wrapped in the fridge. It’s perfect for snacking later on.
FAQ
Conclusion
The Green Goddess Cheese Ball is a delightful blend of creamy cheeses and fresh herbs that makes it an outstanding choice for any gathering. Its vibrant flavors and easy preparation will surely impress your guests. I encourage you to try making it for your next event; it’s bound to be a hit!
Green Goddess Cheese Ball
Ingredients
Equipment
Method
- Start by placing the cream cheese in the bowl of your food processor. Blend it until creamy, ensuring there are no lumps. This will be the base of your Green Goddess Cheese Ball, so take your time to get it nice and smooth.
- Next, add in the white cheddar cheese and parmesan cheese. Pulse them together until they are fully incorporated. You want to see a beautiful, creamy blend that combines all those cheesy flavors.
- Now, toss together the chopped parsley, basil, and oregano with the chives. Set aside about 2 tablespoons of this mixture to coat the cheese ball later.
- Add the majority of the herb mixture into the food processor. Along with that, include the garlic powder, salt, and pepper. Blend until everything is combined and you can see the herbs throughout the cheese mixture. The color should be a lovely green hue.
- Using a spatula, scoop out the mixture from the food processor. You can place it onto a piece of plastic wrap for easier shaping. Wrap it up tightly, forming it into a ball or a tree shape, depending on your preference.
- Chill the wrapped cheese ball in the refrigerator for 30 minutes. This helps it firm up, making it easier to handle and shape.
- After the chilling time, unwrap the cheese ball. Roll it in the reserved herb and pecans mixture to coat the outside. This adds flavor and a bit of crunch.
- If you’ve made the cheese ball a few days in advance, you can place it back in the wrap depending on how long you plan to keep it. Otherwise, transfer it to a serving plate.
- Before serving, place a whole pecan on top for decoration. It makes the cheese ball look even more inviting!
- Finally, serve the Green Goddess Cheese Ball with an assortment of crackers, pretzels, pita chips, or fresh veggies. Enjoy the compliments!
Notes
- Storage: Store leftovers in an airtight container in the fridge for up to three days. This keeps it fresh and ready to enjoy anytime.
- Freezing: You can freeze the cheese ball for up to a month. Just wrap it tightly to prevent freezer burn and thaw in the fridge before serving.
- Pairing: This cheese ball pairs beautifully with a variety of accompaniments. Try it with fresh baguette slices, vegetable sticks, or even apple slices for a refreshing twist.
- Variations: Feel free to experiment with different cheeses or herbs to make it your own. Add a hint of spice with chili flakes or mix in some roasted garlic for a unique flavor.
- Presentation: For a stunning display, serve on a wooden board with assorted crackers, nuts, and fruits surrounding the cheese ball.